

Certman (Cloud Security)
Certman, a central subsystem in Kubit, manages all users' security and protection needs in a centralized manner. In simple terms, Certman is the hub for issuing and managing security certificates to access Kubit's services and infrastructure. This system also supports Single Sign-On (SSO).

Options provided by Certman to users include:
Certificates Section: Users and administrators can issue new certificates for themselves and view their current certificates.
Guest Certificates Section: (For administrators only) Allows the issuance of temporary, time-limited certificates for others.
Logs: (For administrators only) Displays a detailed history of each user's operations; information about other users is visible only to administrators.
Certman Overview
Three types of certificates can be created in this system:
- Client Certificate: For authentication across all services and subsystems.
- OpenVPN Certificate: For connecting to the organization's private network.
- kubeconfig Certificate: For connecting to Kubernetes clusters.
Additional features of Certman include:
- Recording and displaying the history of certificate issuance.
- Viewing and reviewing user operation logs.
Access Levels
This system has two access levels:
- Users: Access only to their personal certificates.
- Administrators: Ability to view the history and logs of all users, manage user certificates, and issue guest certificates.
Certman also plays a key role in completing the registration of LDAP users. Users defined by the admin in OpenLDAP must activate their accounts through Certman. Password management and recovery are also handled through this system.
Single Sign-On (SSO) Management
For secure access to Kubit's services and subsystems, Single Sign-On (SSO) authentication is used, meaning users can access all sections with a single username and password. This process is also managed by Certman.
Steps for Initial Account Activation:
- The organization admin registers the user's email and username in the system.
- The user logs into Certman and selects the Password Recovery option.
- After entering the username, a verification code is sent to their email.
- By entering this code in Certman, the user can set their password and complete the registration.
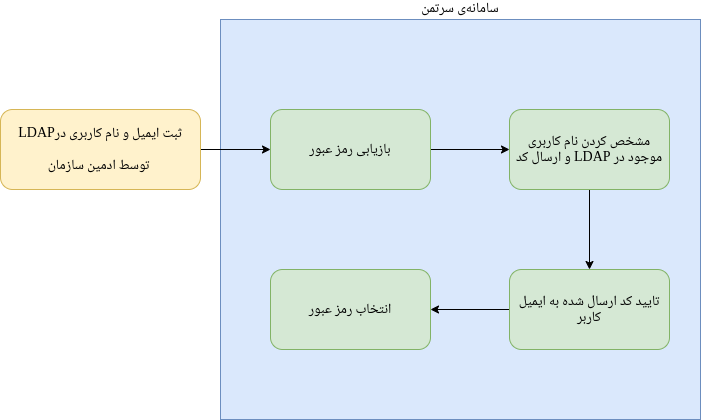
After setting the password, access to all Kubit services is granted using the same username and password. In case of forgetting or needing to change the password, the same process is followed again through Certman.