

Install your first ready-to-use pack
To install your first application, select a ready-to-install pack from a repository and complete its form. Kubchi builds the pack configuration from the form values and installs the application in the selected namespace. You do not need to write YAML or understand the internal structure of the Helm chart for this workflow.
Prerequisites
You need the following before installing a pack:
- The Kubit project is connected to a cluster.
- Your role can view charts and install packs.
- A namespace is bound to the project, or your role can create one.
- The cluster has enough capacity for the application resources.
If the project is not connected to a cluster or the installation option is disabled, ask an organization administrator to check the project connection and your role permissions.
Select a ready-to-install pack
- Select the organization and project in the panel.
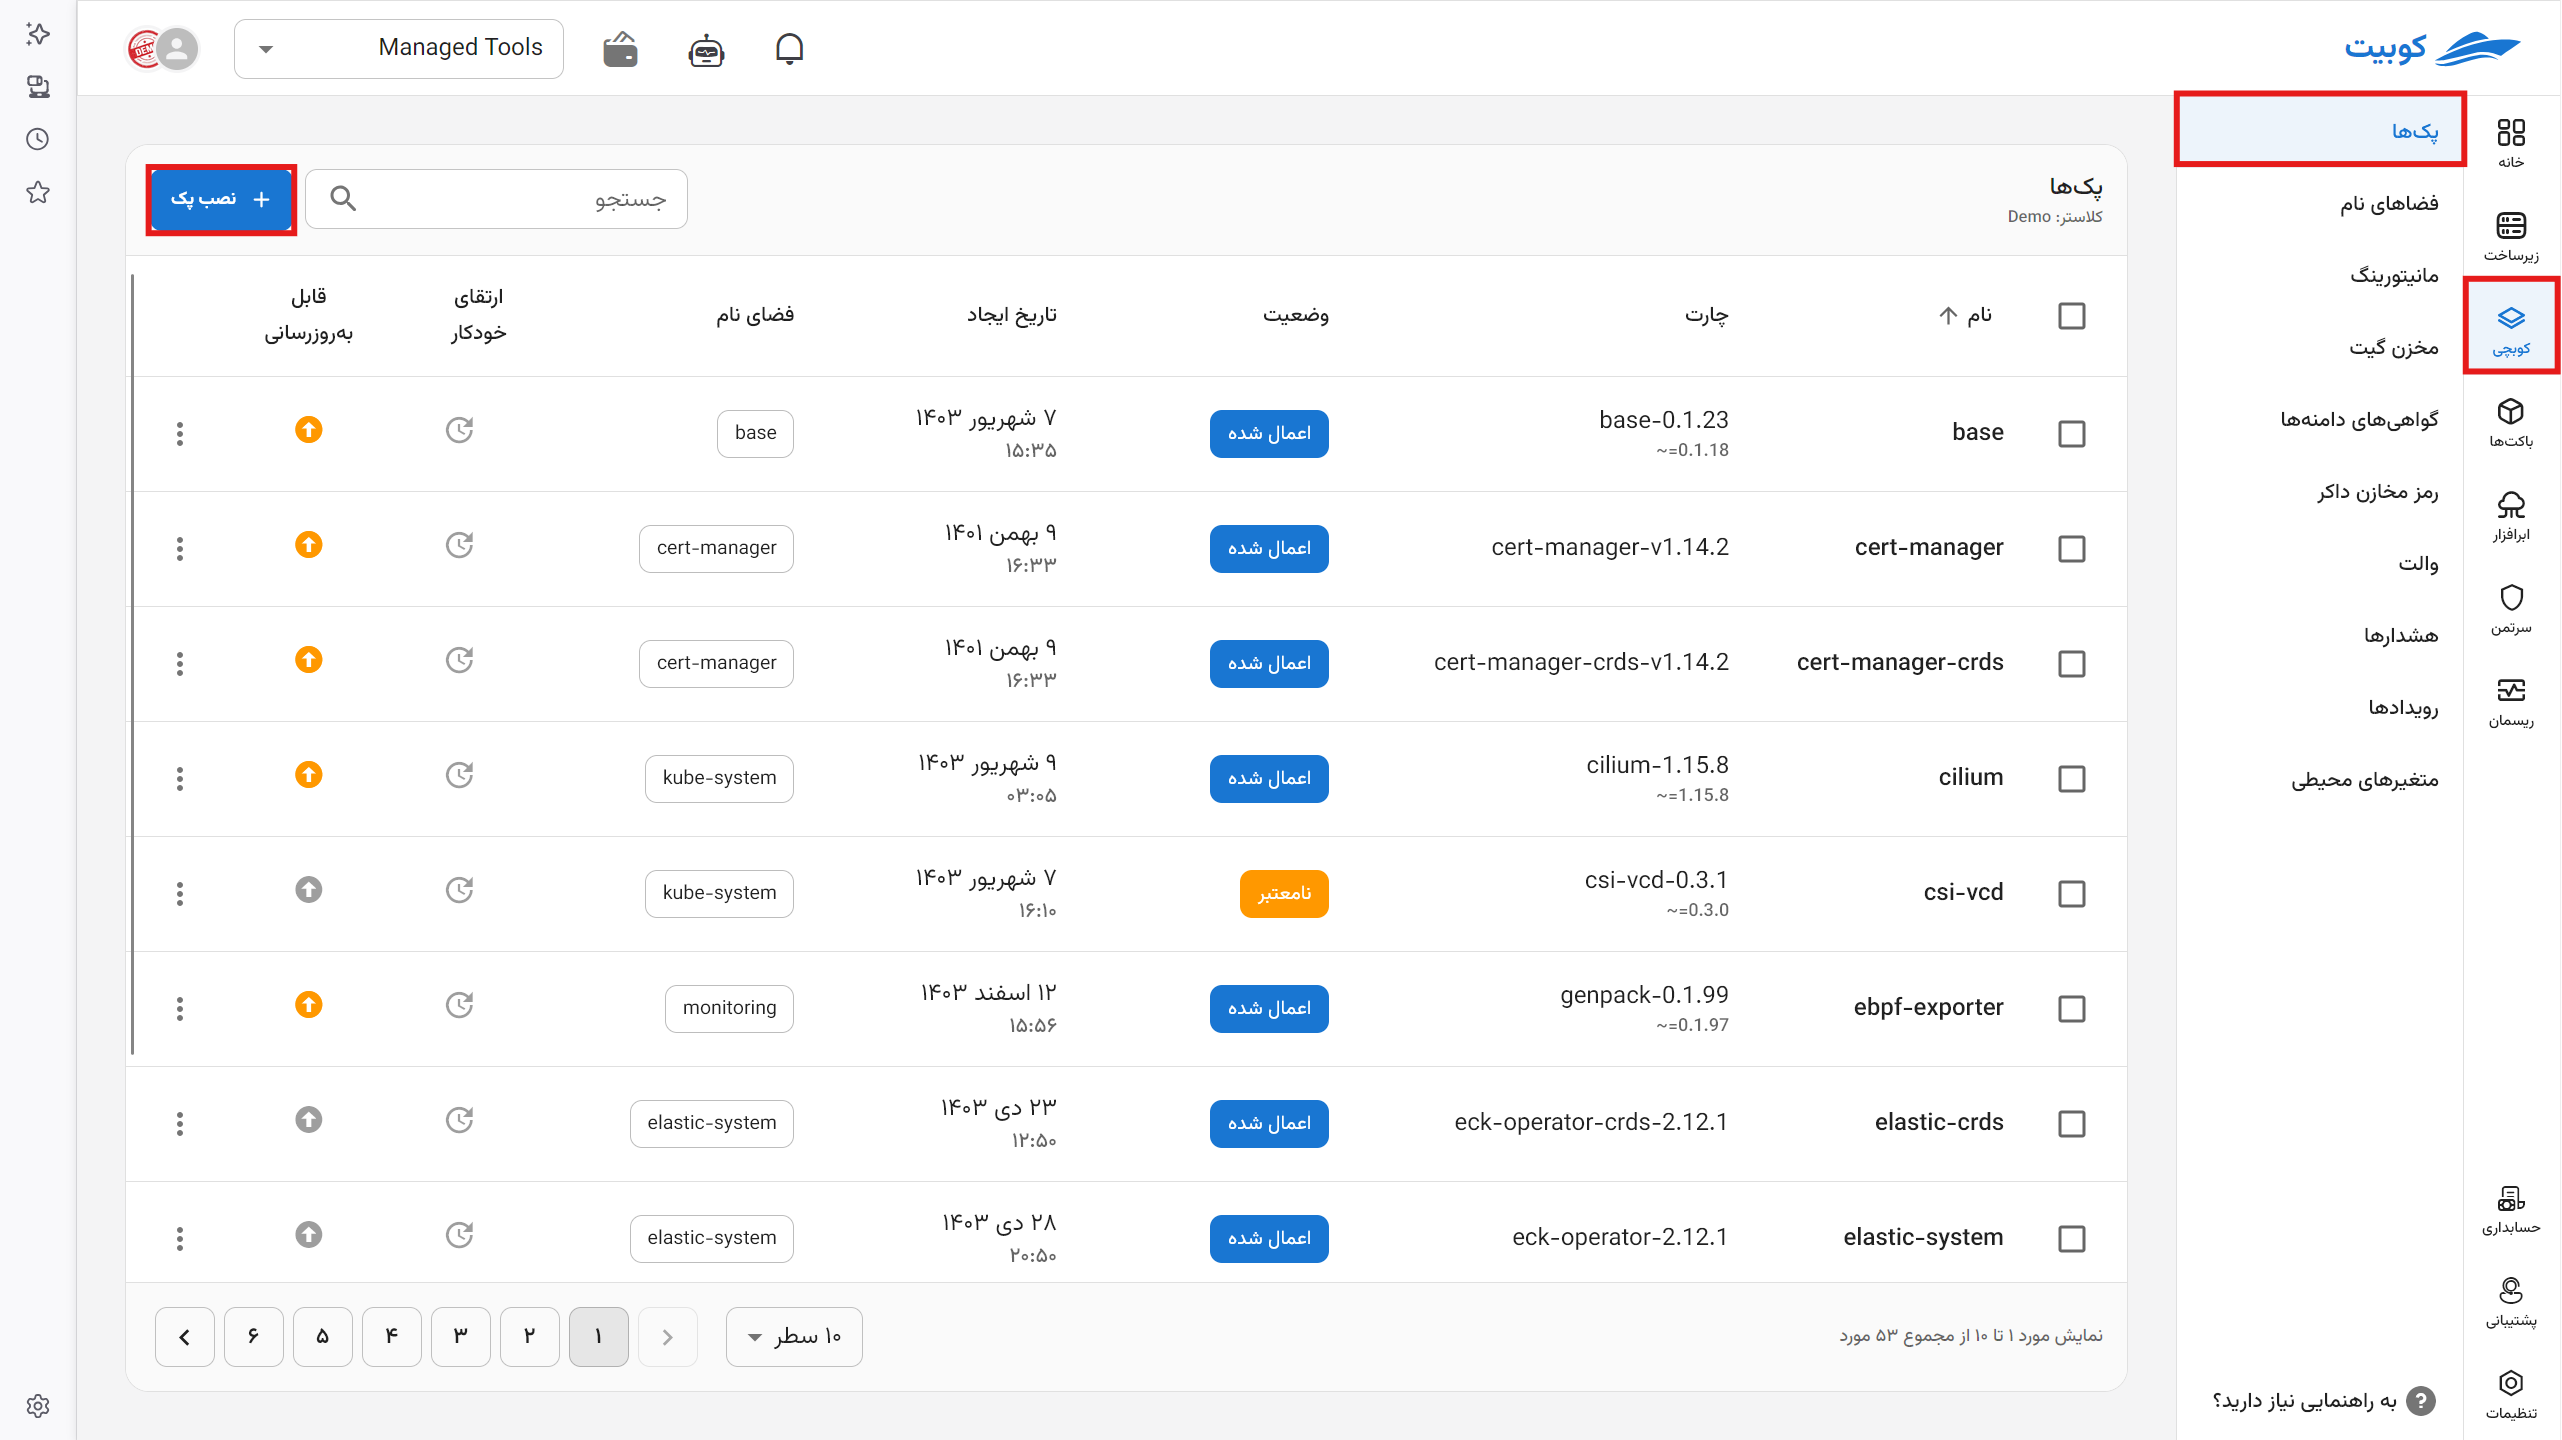
- Open Kubchi. The project pack list appears.
- Select Install Pack.
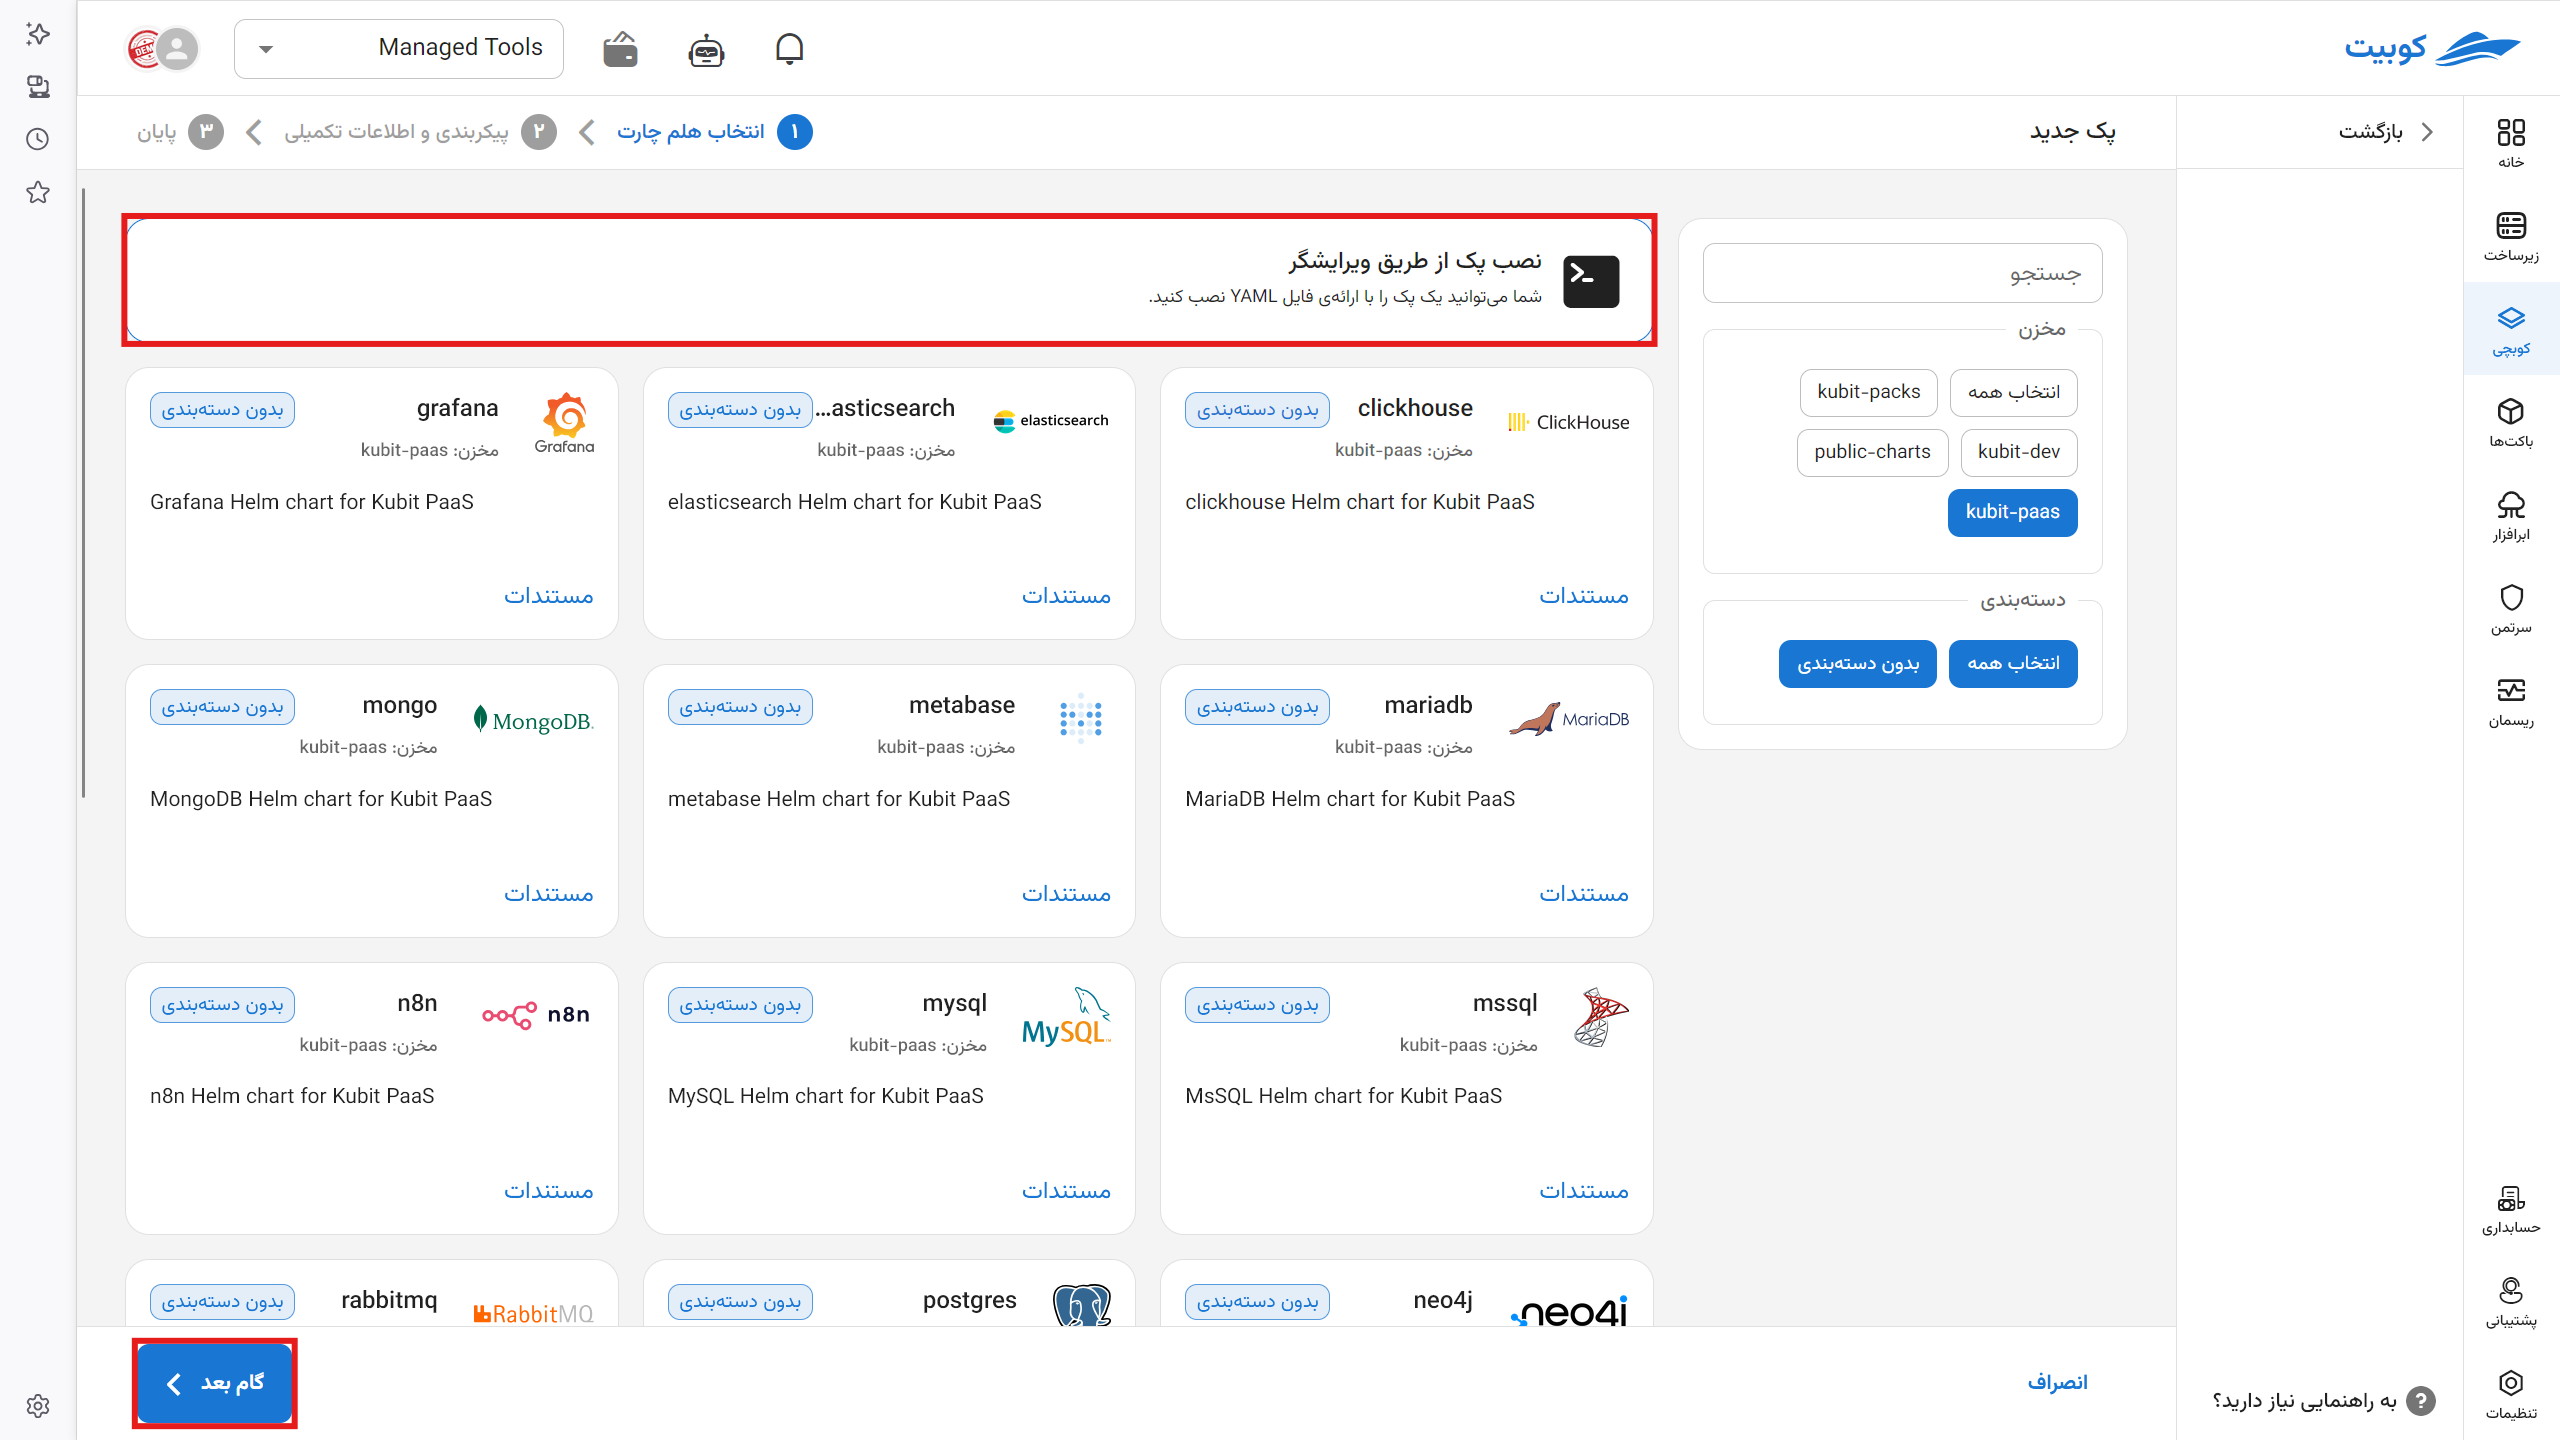
- Select a pack from the repository list. Search by application name or use the Repository filter to narrow the results.
- Select Next step after choosing the pack card.
Each card represents a prepared application or database. The list comes from the repositories available to the cluster and may differ between clusters. If you cannot find the pack, set Repository to Select all.
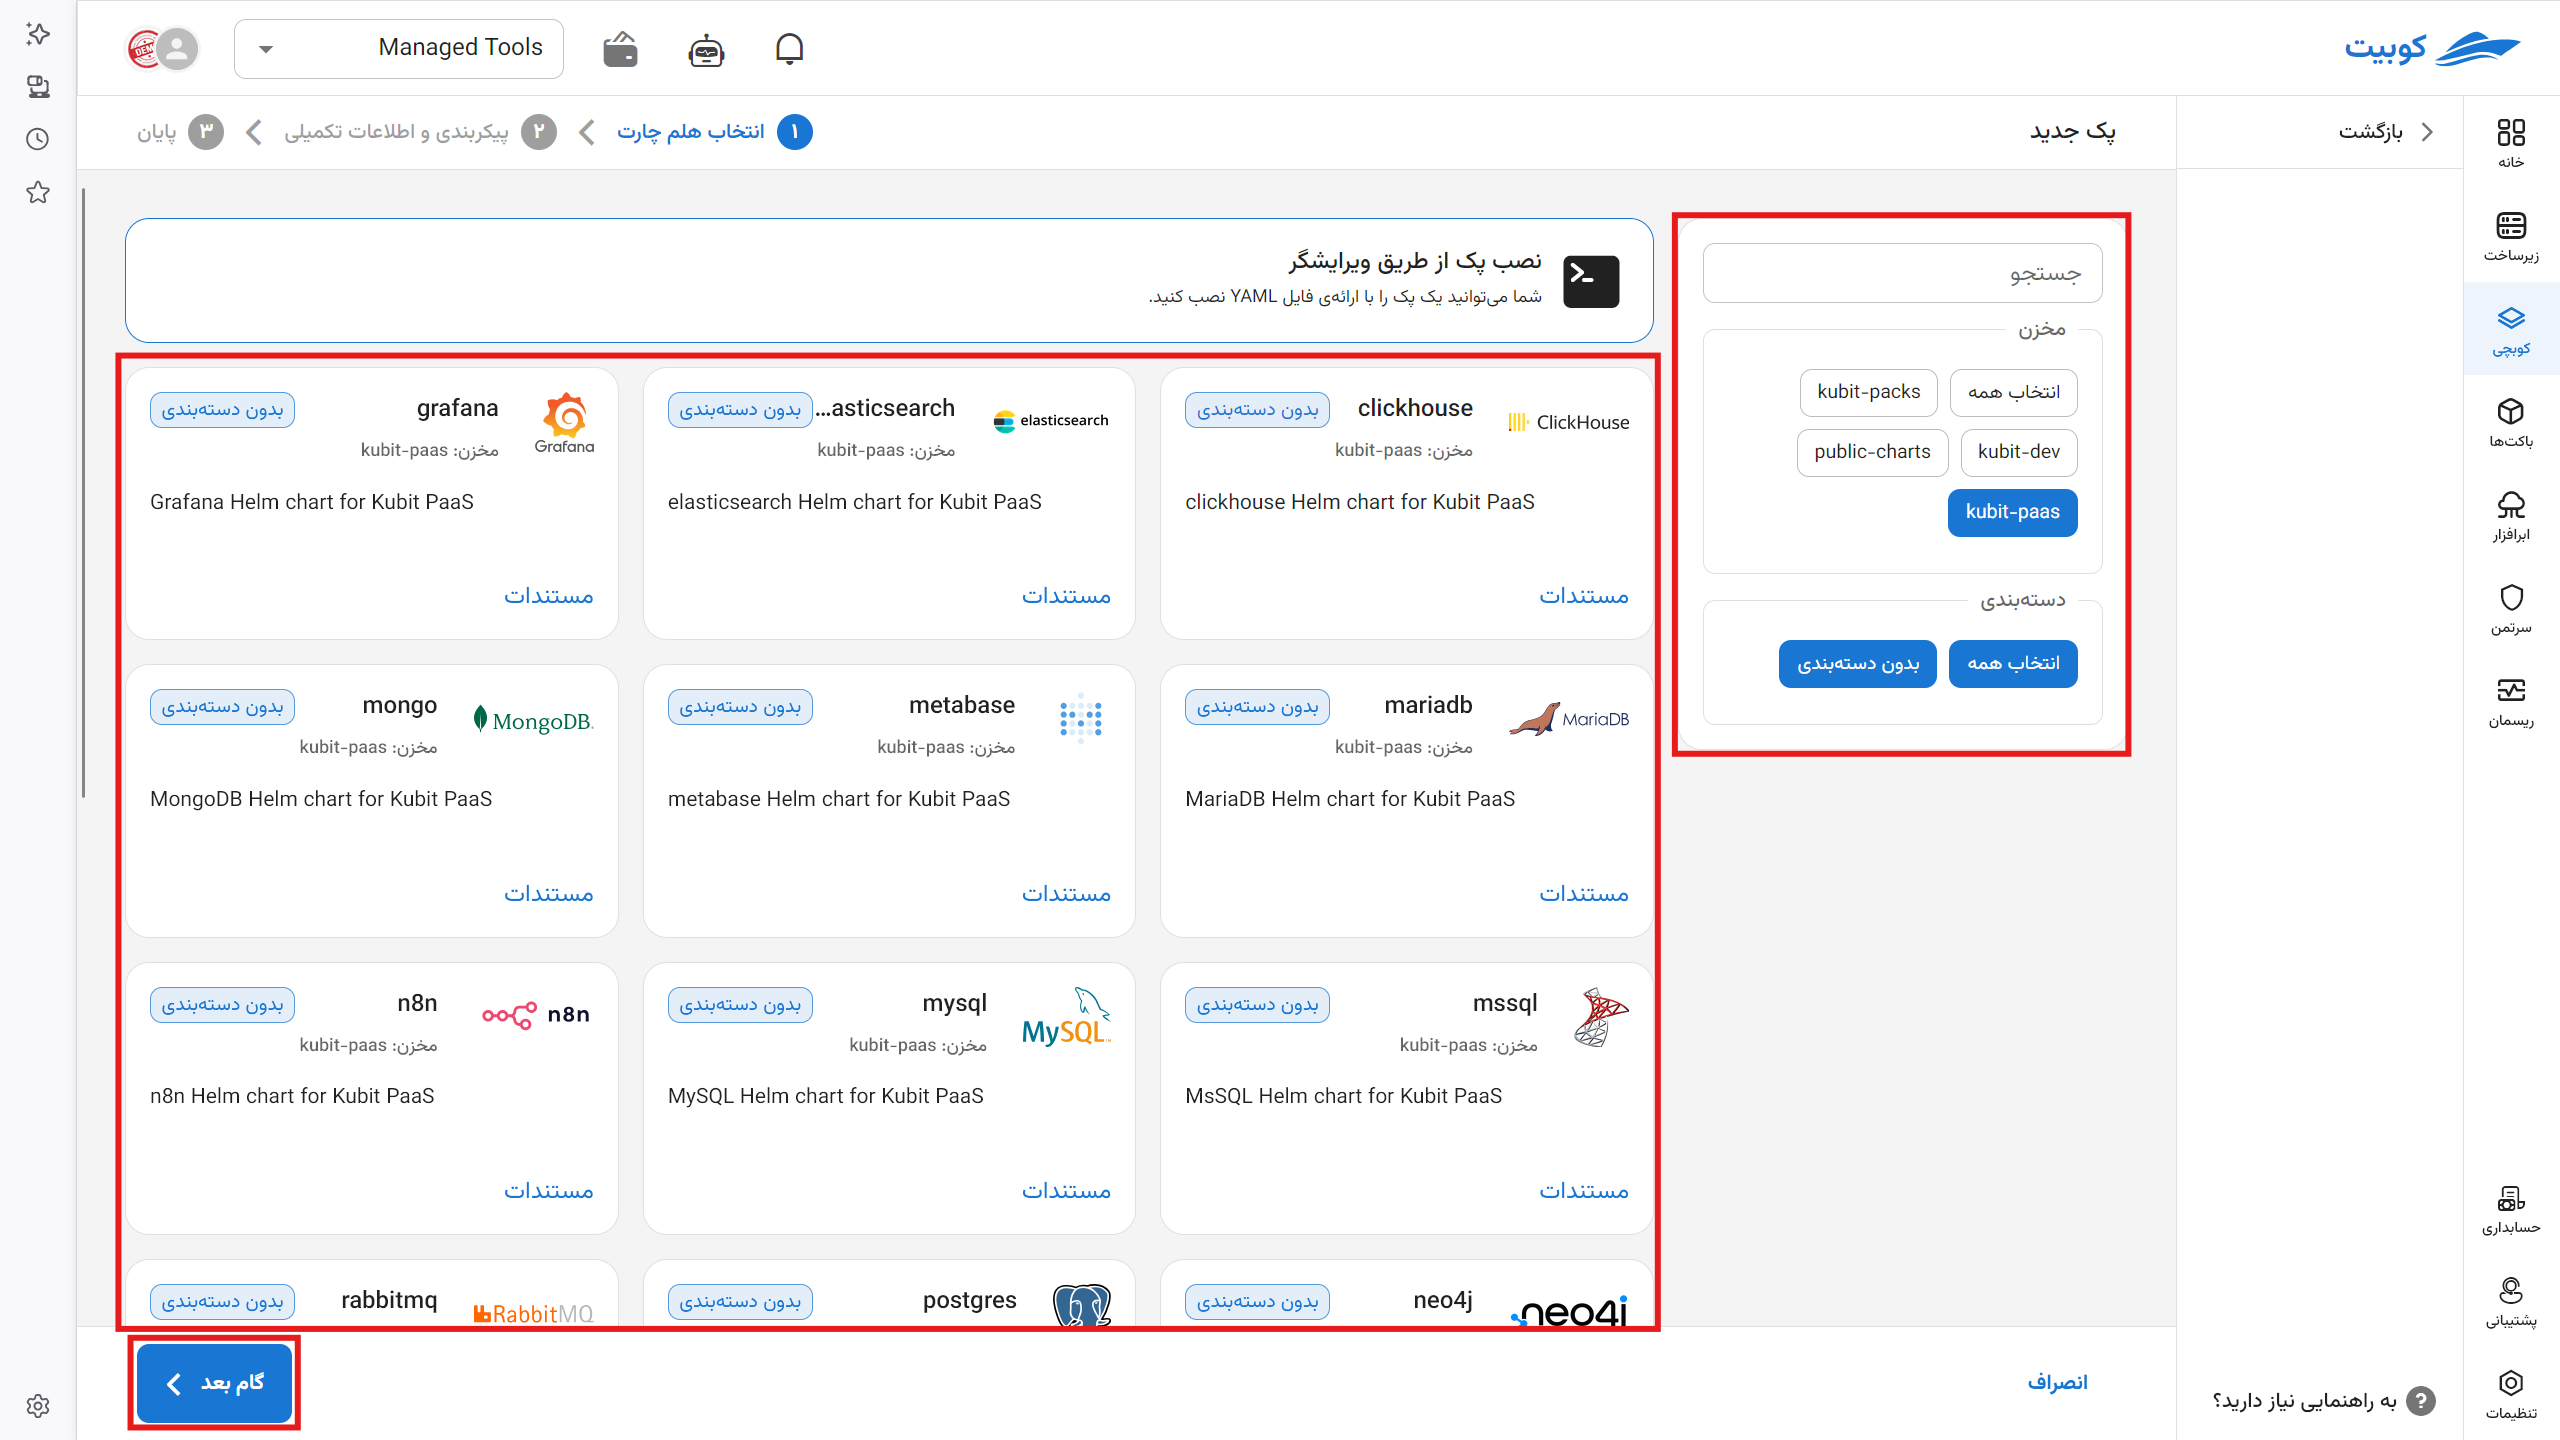
The Install pack via editor card is for entering a Pack manifest. Select the application card when installing a ready-to-use pack.
Configure the pack through its form
Selecting a pack opens its installation page. The general part of the form includes:
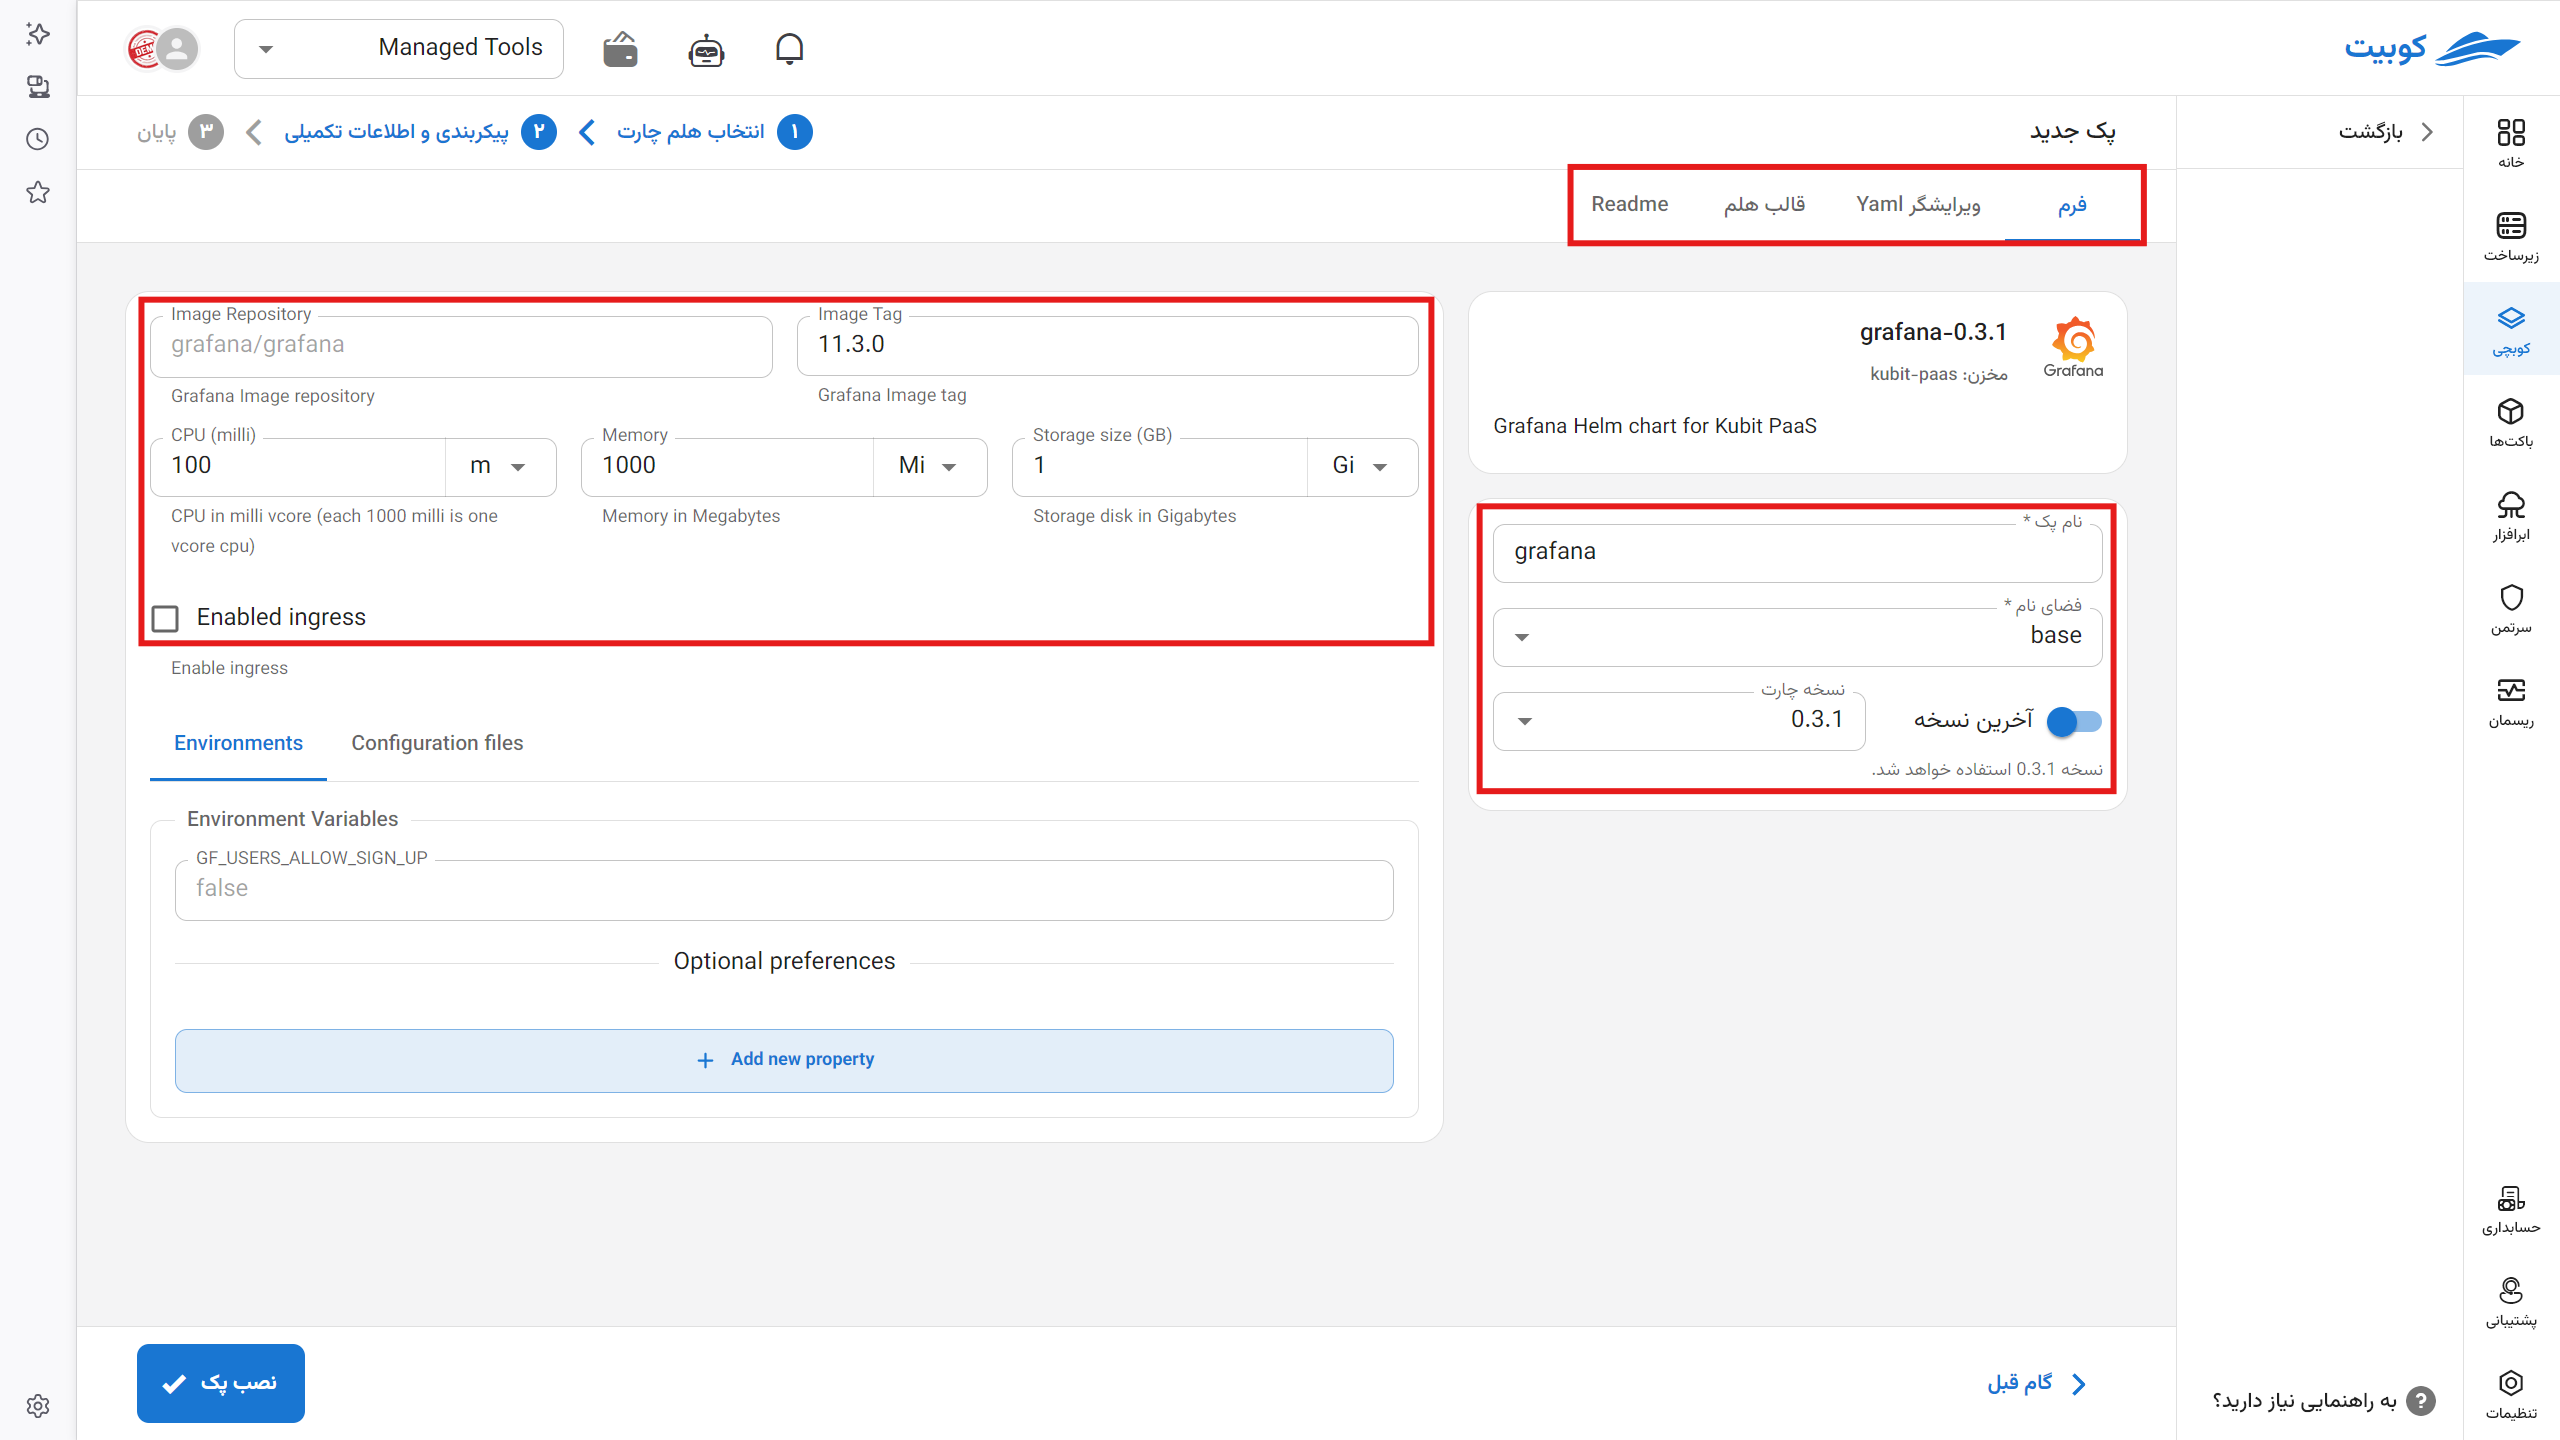
- Pack name: Identifies this installation in the project.
- Namespace: The Kubernetes namespace where the application resources are created. If your role permits it, you can create a namespace from this field.
- Chart version: The version to install. The panel shows the selected version below this field.
- Last Revision: When enabled, the version constraint follows compatible revisions. See chart version selection for details.
The remaining fields depend on the chart. A database form, for example, may request storage size, CPU and memory resources, a username, or network settings. The form and chart documentation identify required fields and default values.
Choose the pack name and namespace carefully. Before installation, the panel warns that these two values cannot be changed later.
Review the configuration
Review the pack in one of these tabs before installation:
- Form: The usual way to configure a ready-to-install pack.
- Yaml Editor: The configuration generated from the form. You normally do not need to edit it.
- Helm Template: The Kubernetes resources rendered by the chart.
- Readme: The chart documentation, prerequisites, and option descriptions.
Resolve form validation errors before installing. Helm Template is useful when you need to inspect the rendered resources, but opening it is not required for a normal installation.
Install the pack
- Complete the form and select Install Pack.
- Check the pack name and namespace again in the confirmation dialog.
- To store the Pack configuration in Git from the start, select Activation GitOps and choose the GitOps repository. This is optional.
- Review Path. The panel suggests it from the Pack name and namespace, and you can change it when needed.
- If a file already exists at that path, select Commit if file already exists only after reviewing its contents.
- Confirm the installation.
Each GitOps path can be connected to only one Pack. If another Pack already uses the selected path, choose a different path. The repository and path must also be set together; leaving either one empty prevents installation.
If the file does not exist, Kubchi creates it when connecting the Pack. An existing file is an error by default because it may contain unrelated configuration. Use Commit if file already exists only when you intentionally want to connect that file to the Pack. Before continuing, compare the Pack name, namespace, and file contents with the installation form.
If no Git repository is connected to the project, install the Pack without GitOps. You can connect it later by following Connect a Pack to GitOps.
Verify the installation
After confirmation, the panel opens the new pack page. Creating the resources and making the application ready may take several minutes. Overview shows the namespace, chart version, workload state, and outputs defined by the chart.
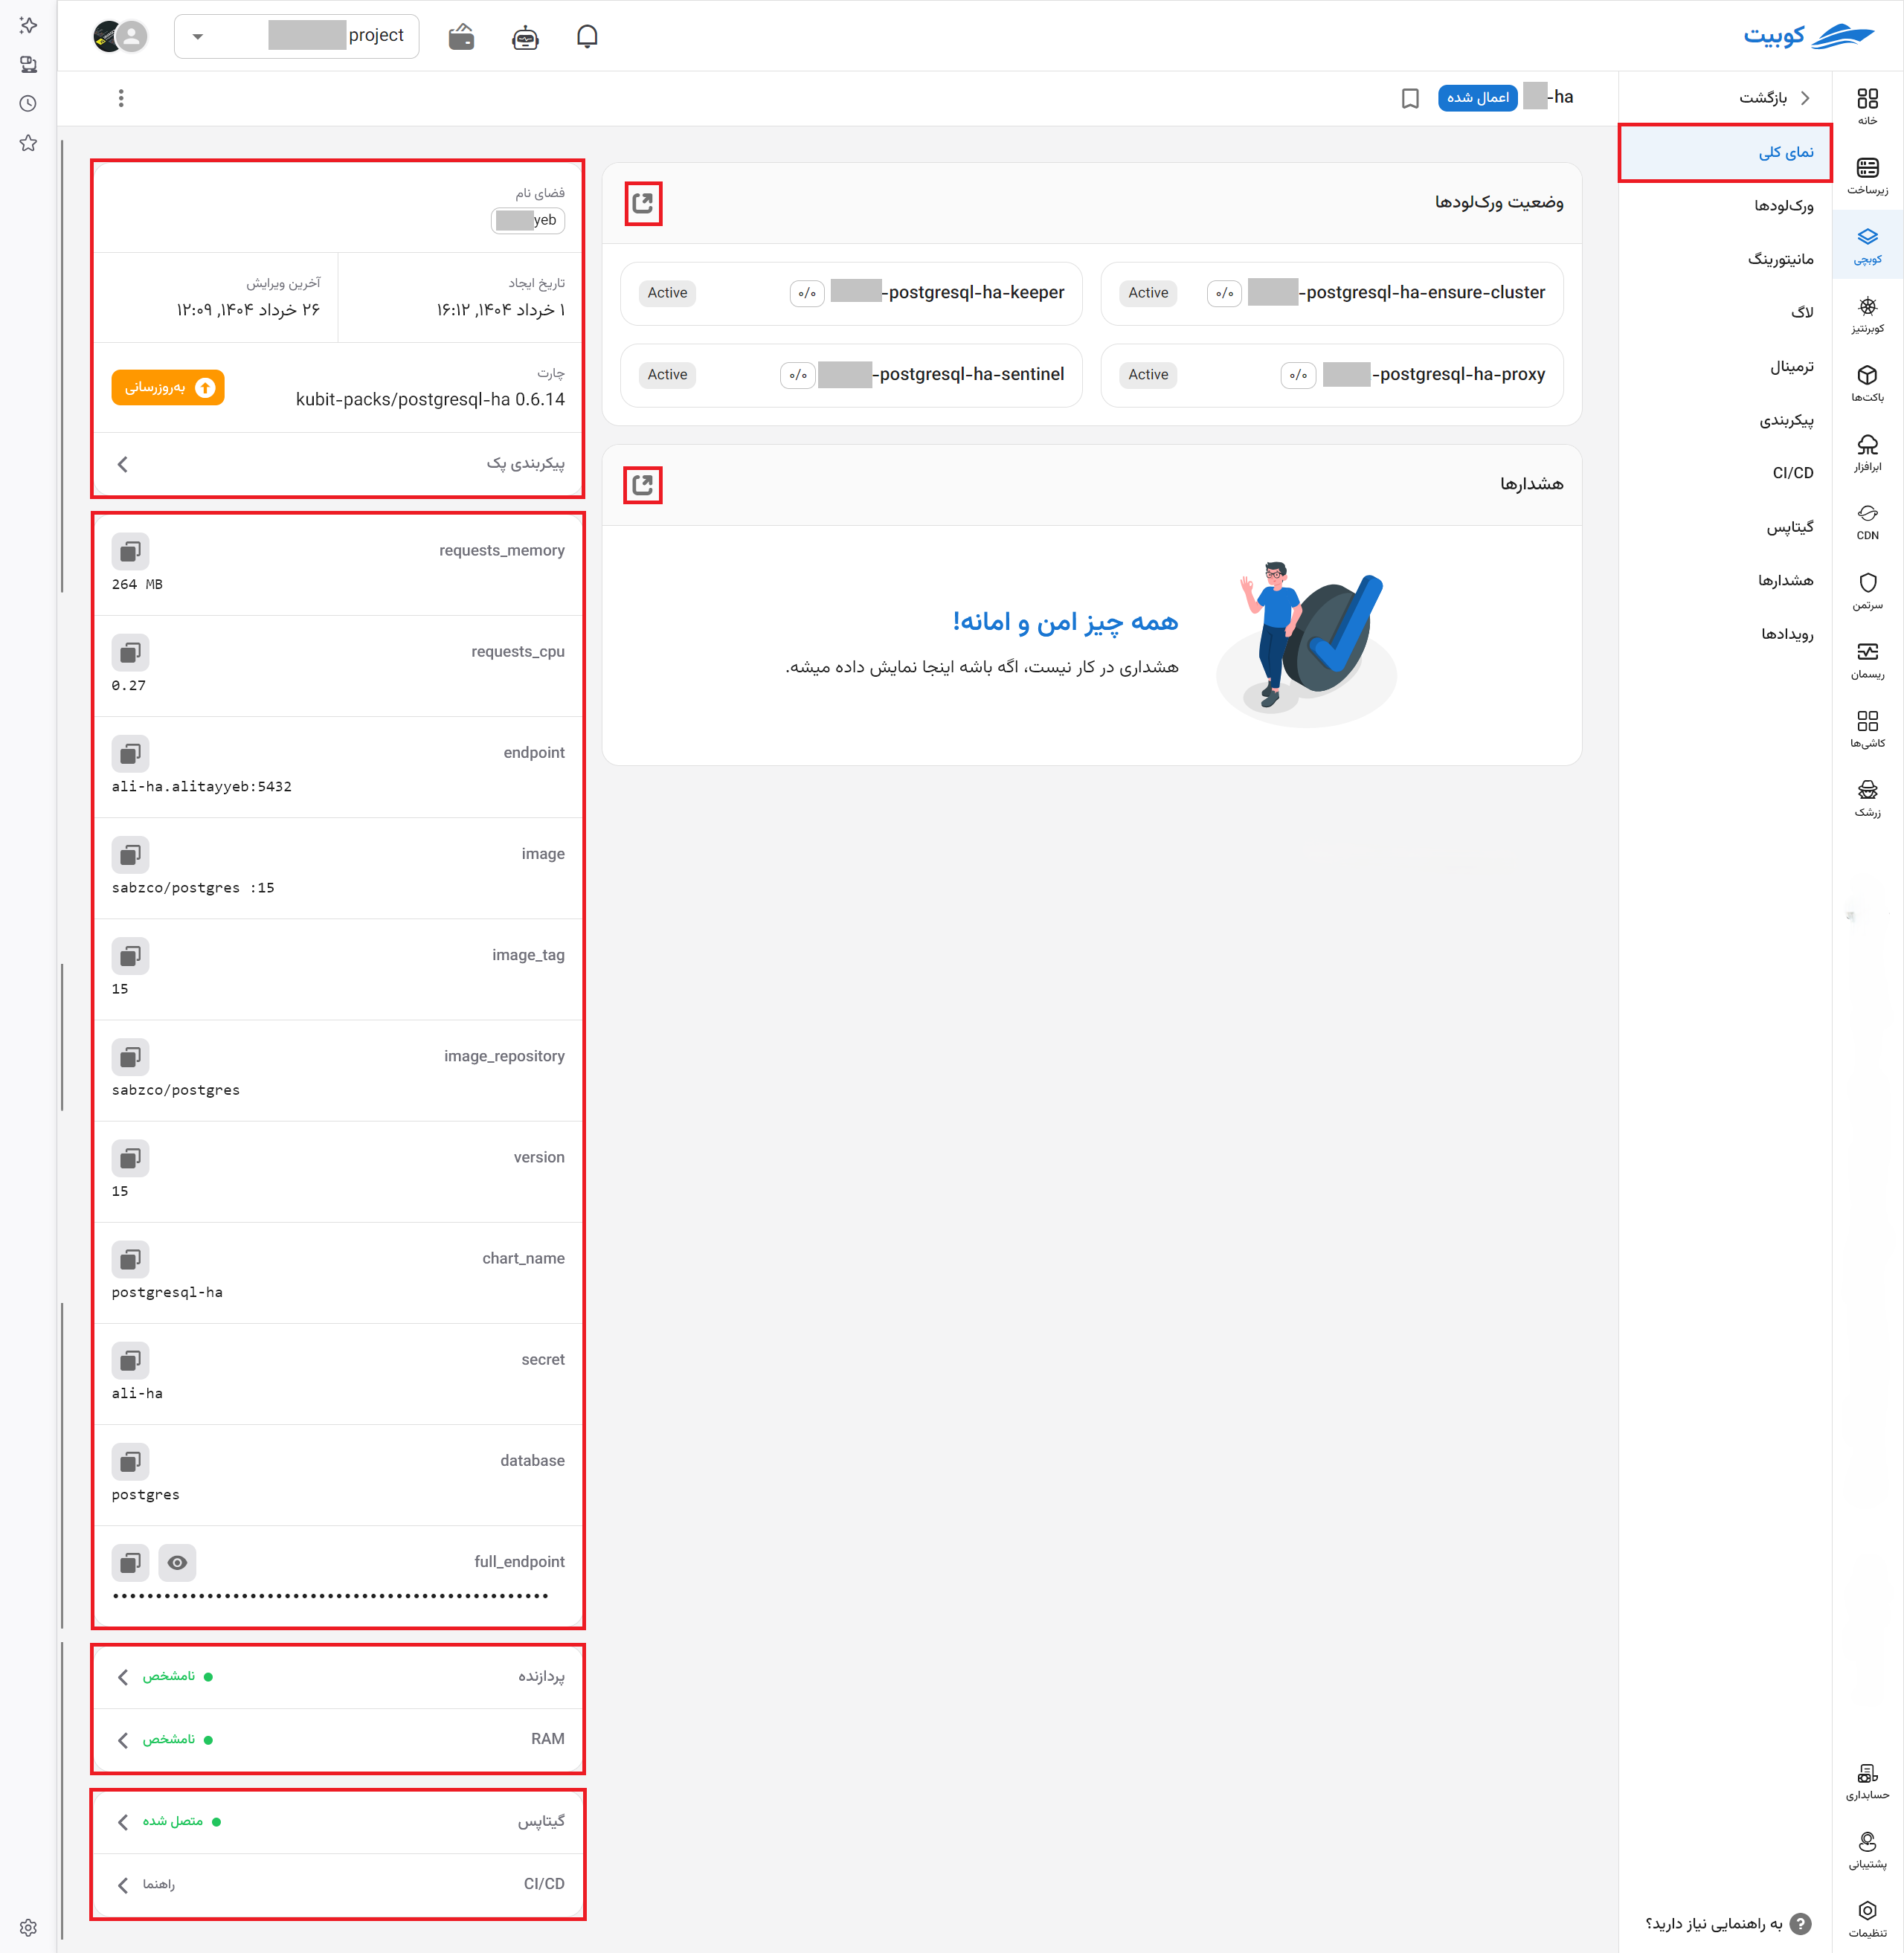
Check the installation using these signals:
- The ready replica count on Overview or Workloads matches the expected count.
- Events has no new warning that explains an installation failure.
- If the chart publishes an address or connection information, the expected output appears on the pack page.
- After the application starts, CPU and memory usage appears under Monitoring.
If the Pack resource exists but its workloads are not ready, check pack events first. Then use pod logs to find why the application did not start.
Common installation problems
The pack is not listed
Check the Repository filter and select Select all if needed. Availability depends on the repositories configured for the cluster. If the pack is still missing, ask the cluster administrator or Kubit support to check the repositories.
The installation form is not available
Some charts do not provide a form. In that case, the panel opens Yaml Editor directly. If you do not want to work with the technical configuration, review the chart documentation or contact support before installing it.
Install Pack is disabled
Your role must be allowed to view charts and install packs. An organization administrator can check the permissions assigned to your role.
The GitOps path is rejected
Select both the repository and file path. If the file already exists, review its contents and enable Commit if file already exists only when you are certain it belongs to this Pack. A path already connected to another Pack cannot be reused; choose a new path for this Pack.
The installation does not become ready
Resources may take several minutes to become ready. If the state does not change, check pack events, pod logs, cluster capacity, image registry access, and required form values.
When to install with YAML
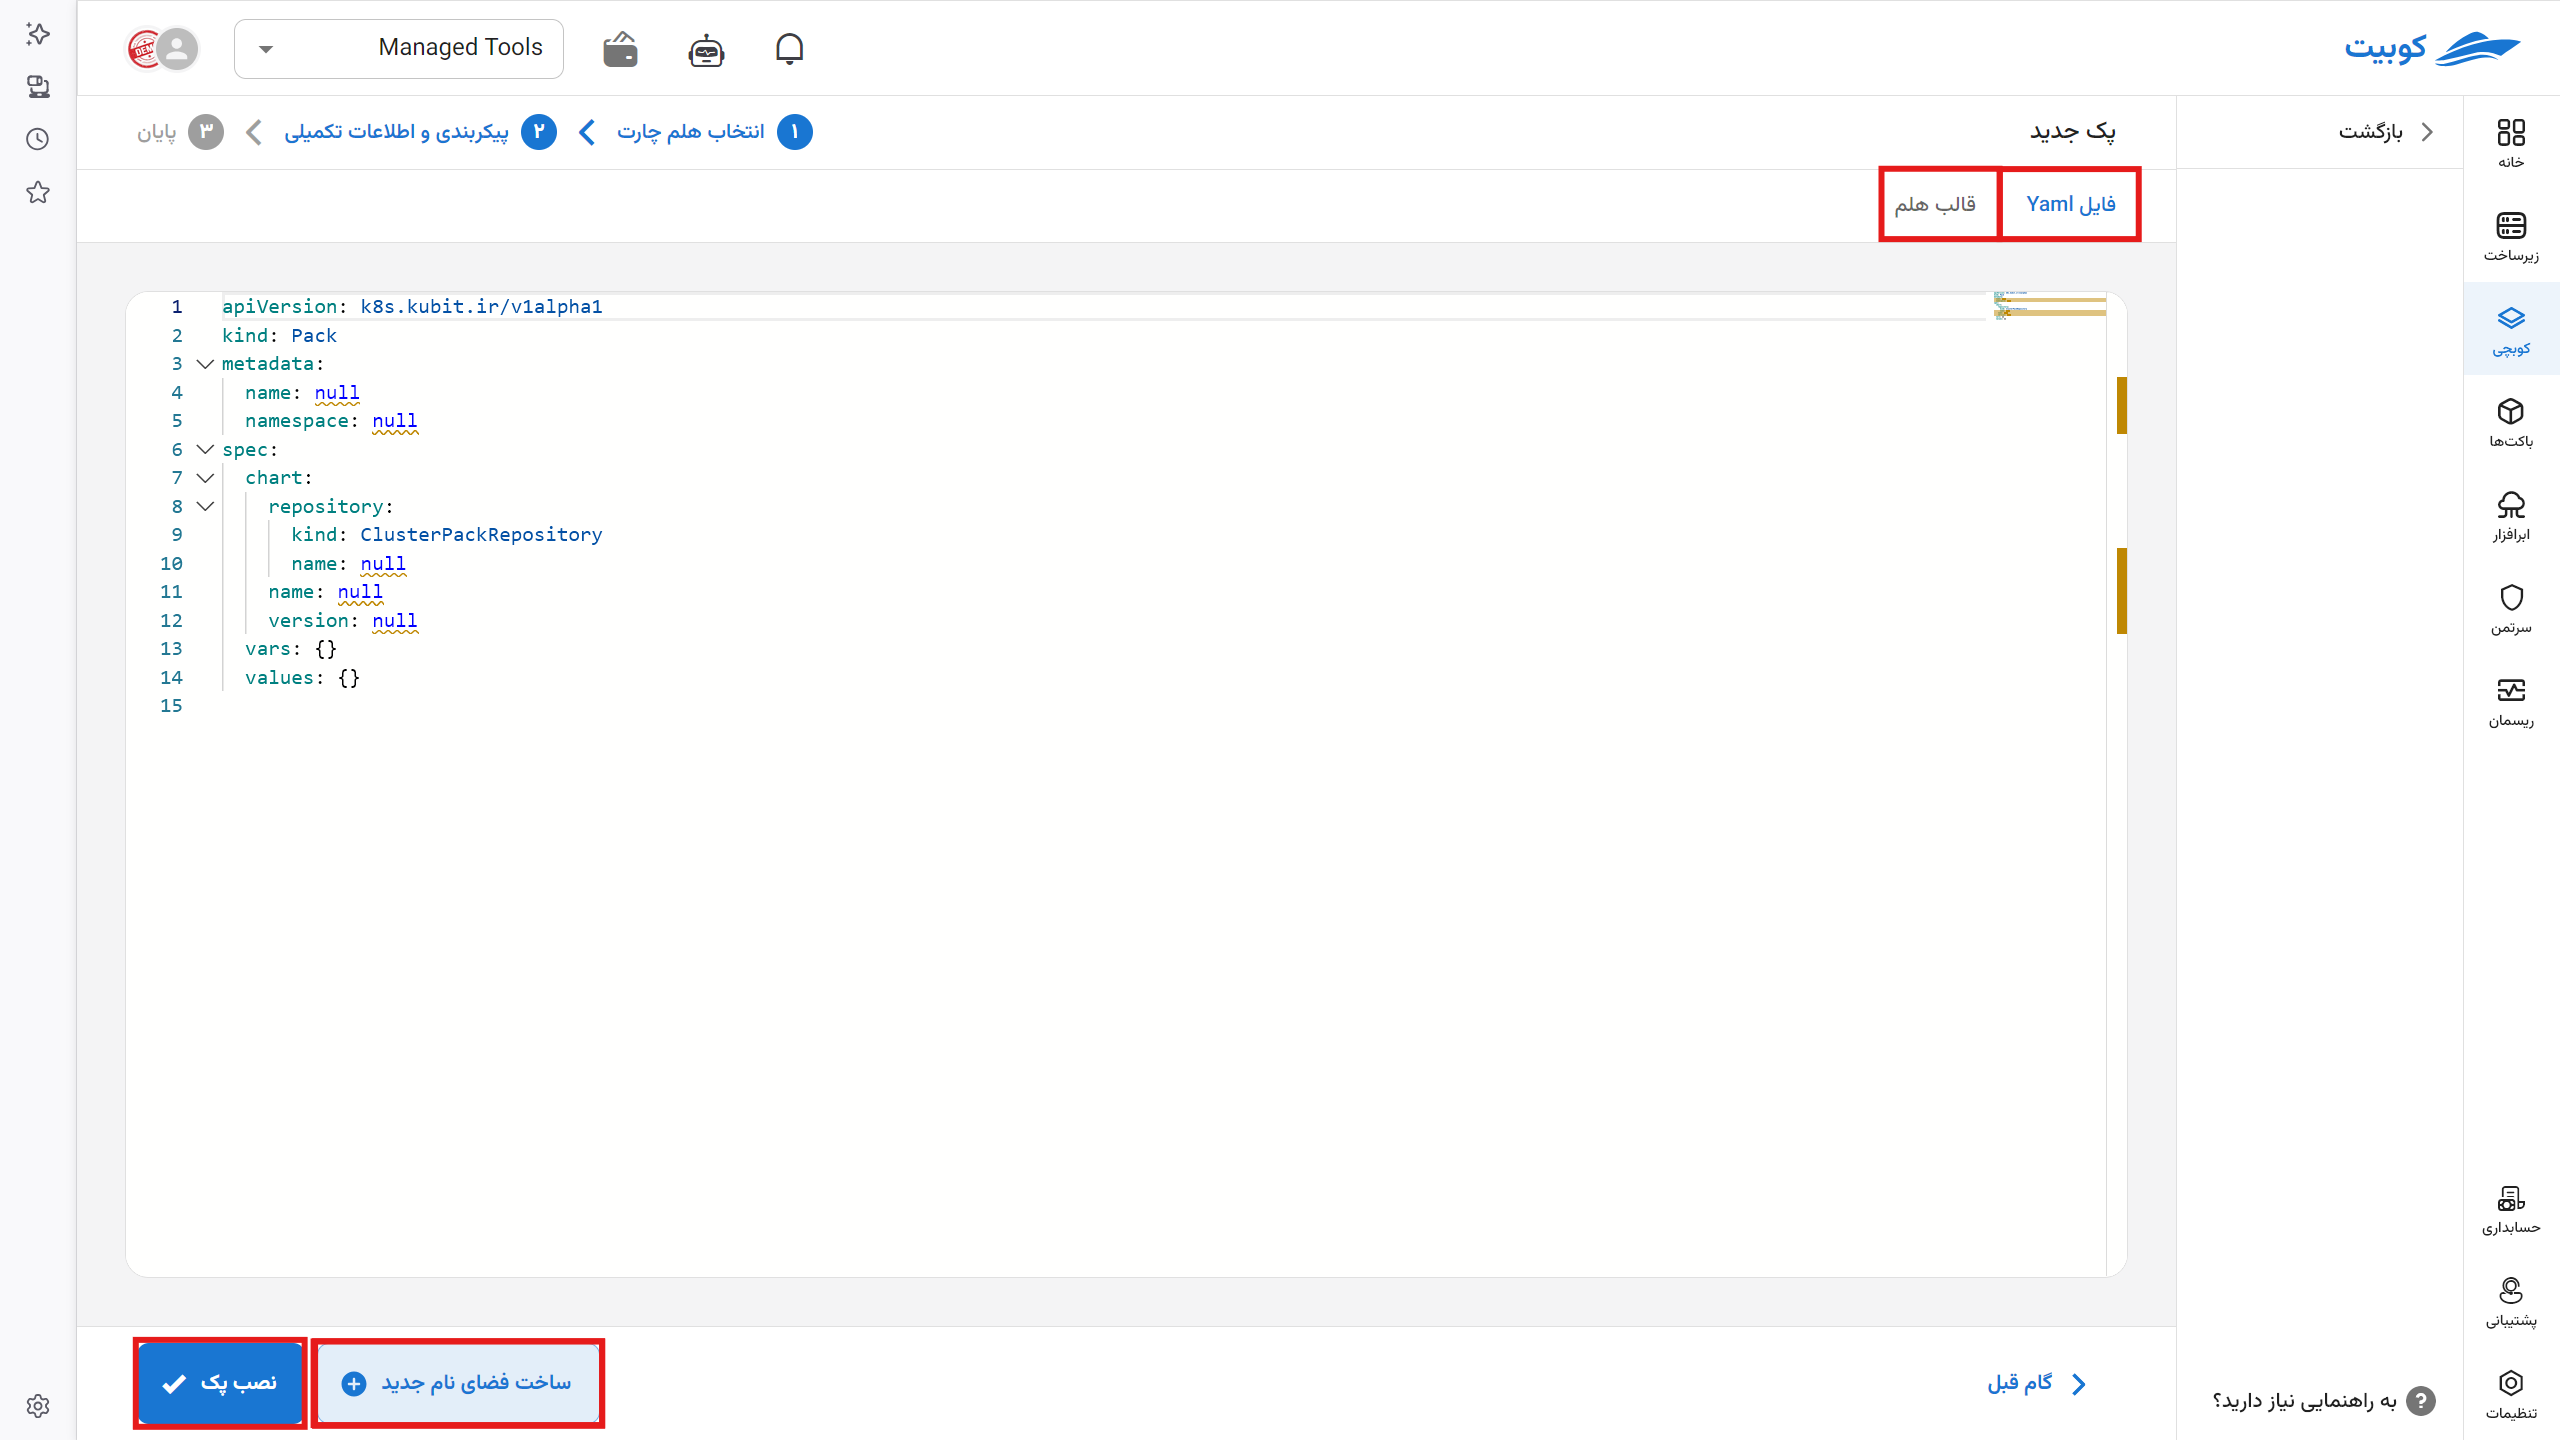
Most users do not need YAML to install a ready-to-use pack. Use Install pack via editor when you already have a Pack manifest, the chart has no form, or you need to control settings that the form does not expose.
In this workflow, the manifest must define the name, namespace, repository, chart, version, and values. Read creating a Pack manifest before using the editor. If the application provides a form, use that form for the usual installation flow.
Manage the pack after installation
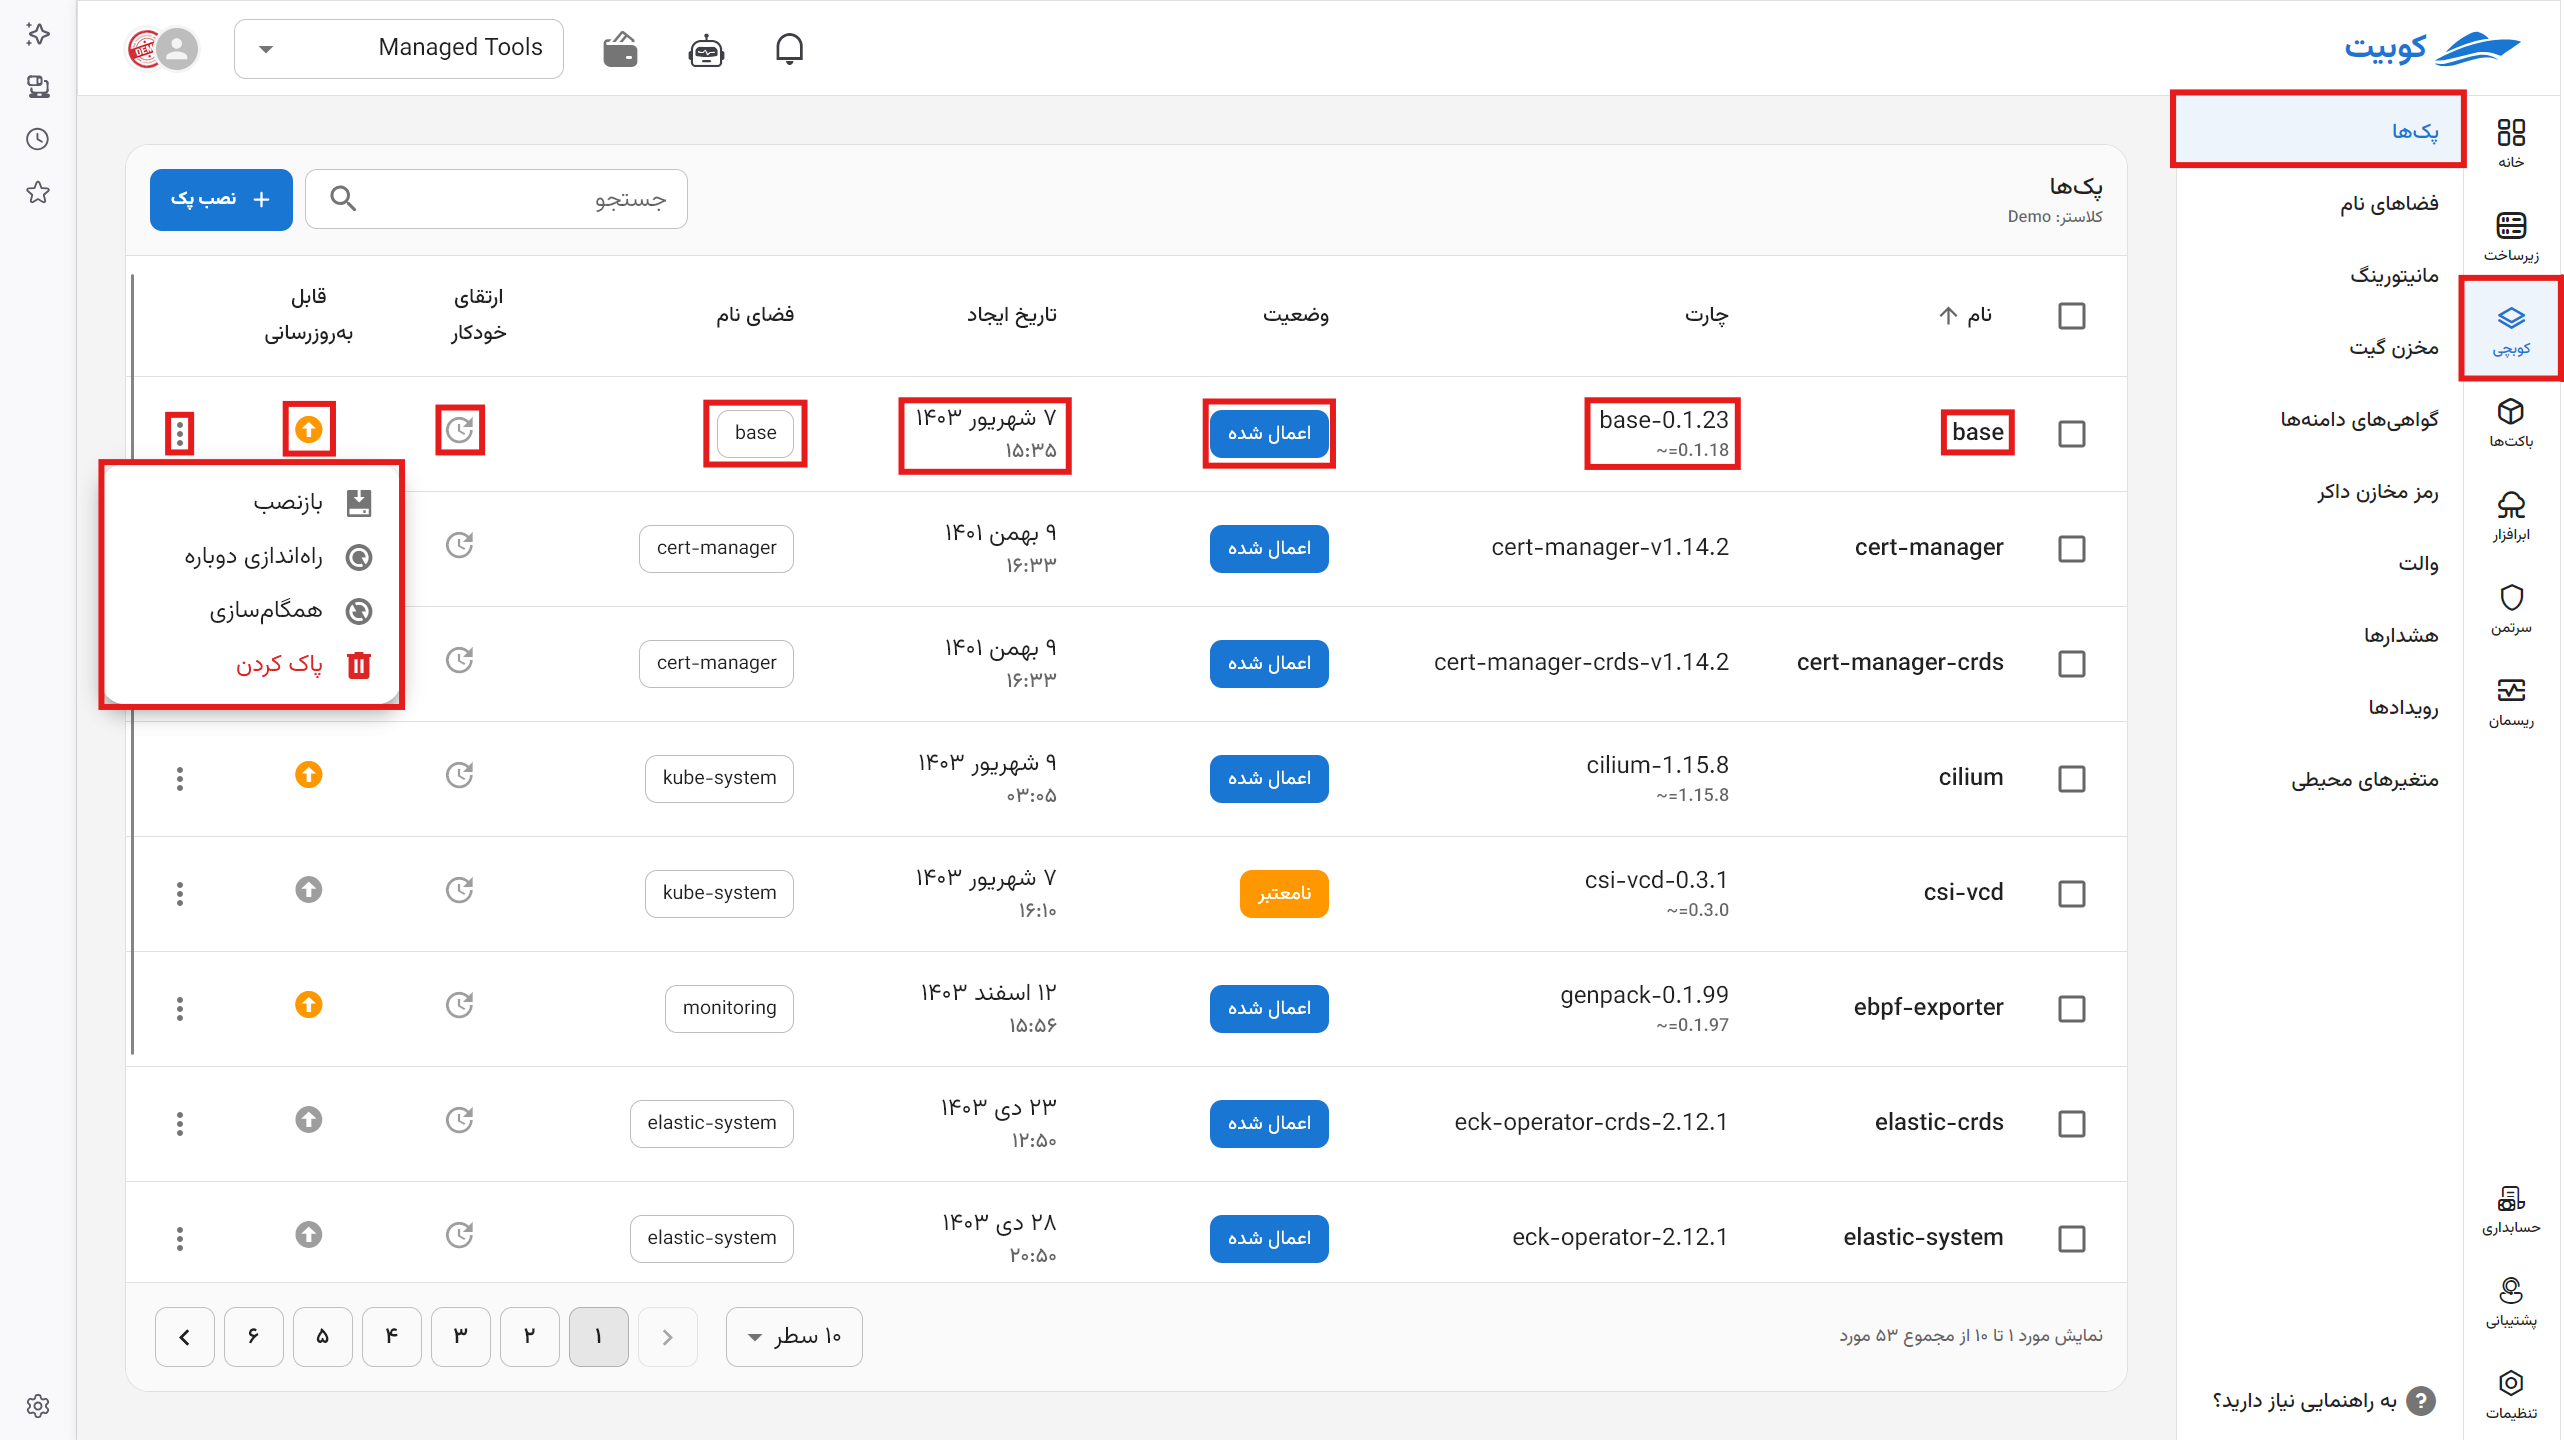
The Kubchi home page lists the project packs and their current state. Each pack has a menu with management operations such as synchronize, restart, or reinstall. These operations can change running workloads.
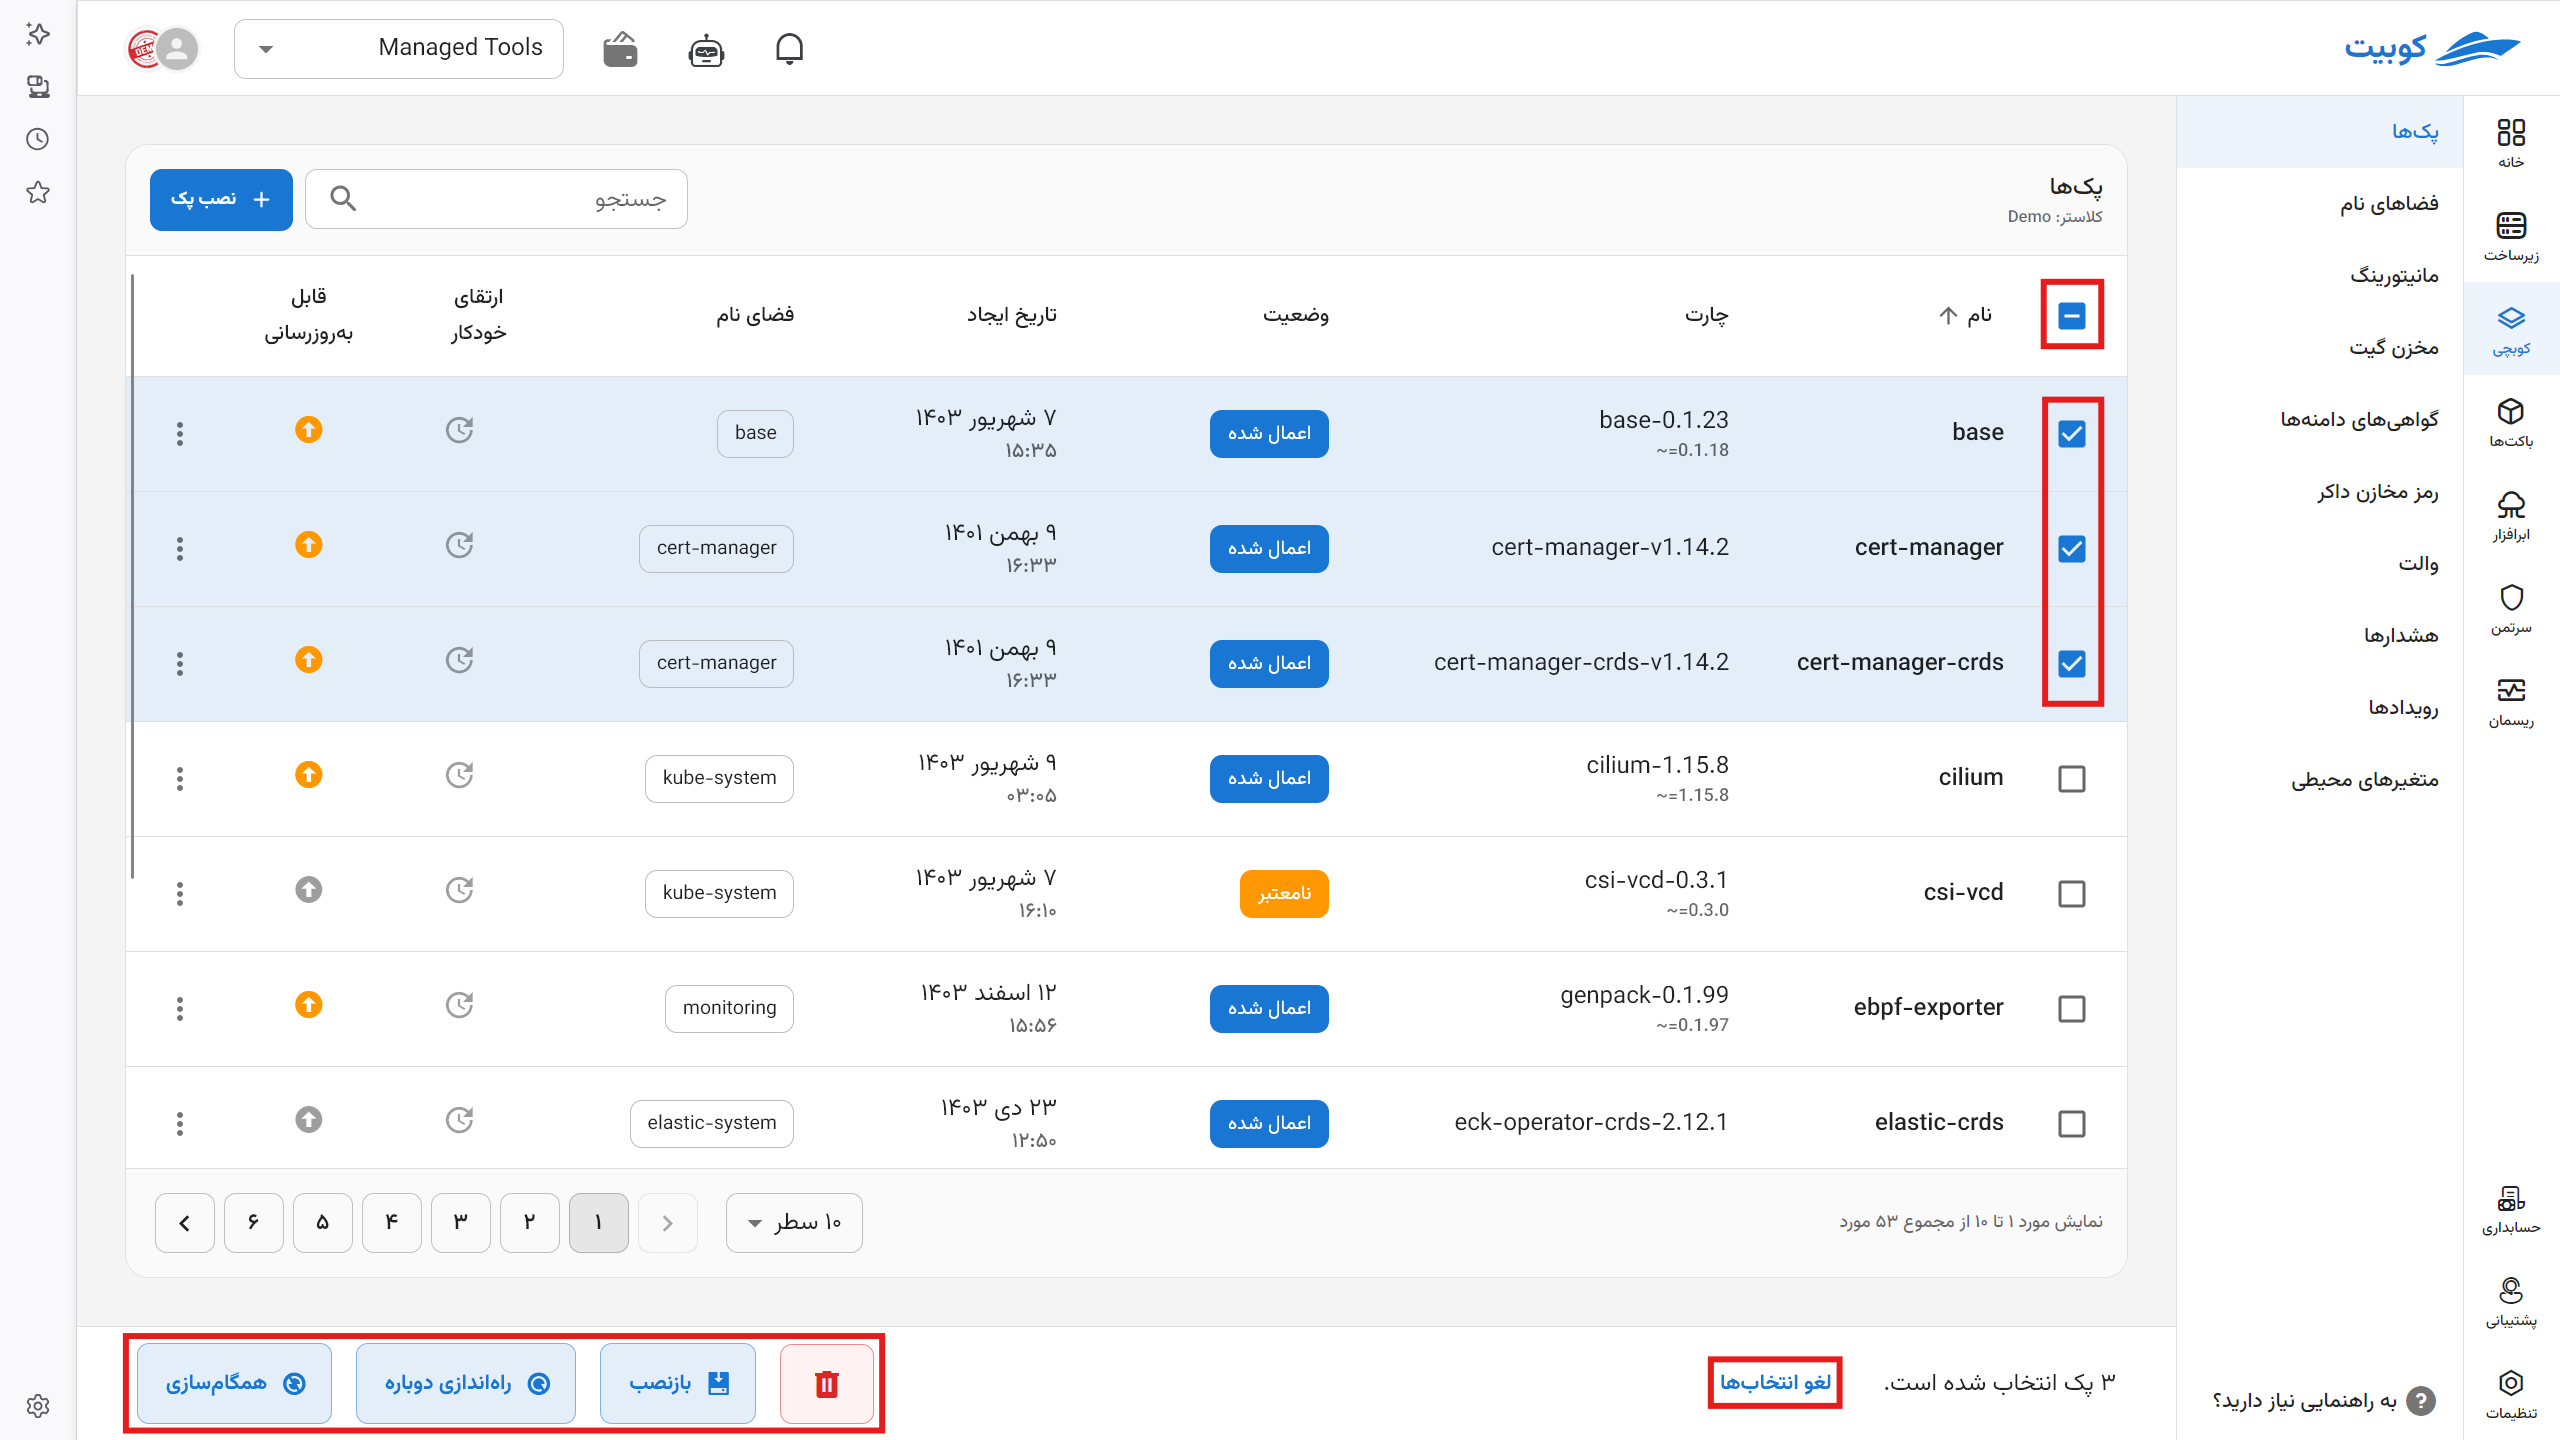
To run an operation on several packs, select their rows and then choose a bulk action. Restarting or reinstalling packs can interrupt a service. Run these operations with the appropriate permission and during a planned maintenance window.
Next steps
- To change settings or upgrade a version, see Pack configuration.
- To connect a domain, see Domains and certificates.
- For a private image, first add Docker Registry Credentials.
- For sensitive data, use Vault in Kubchi.