

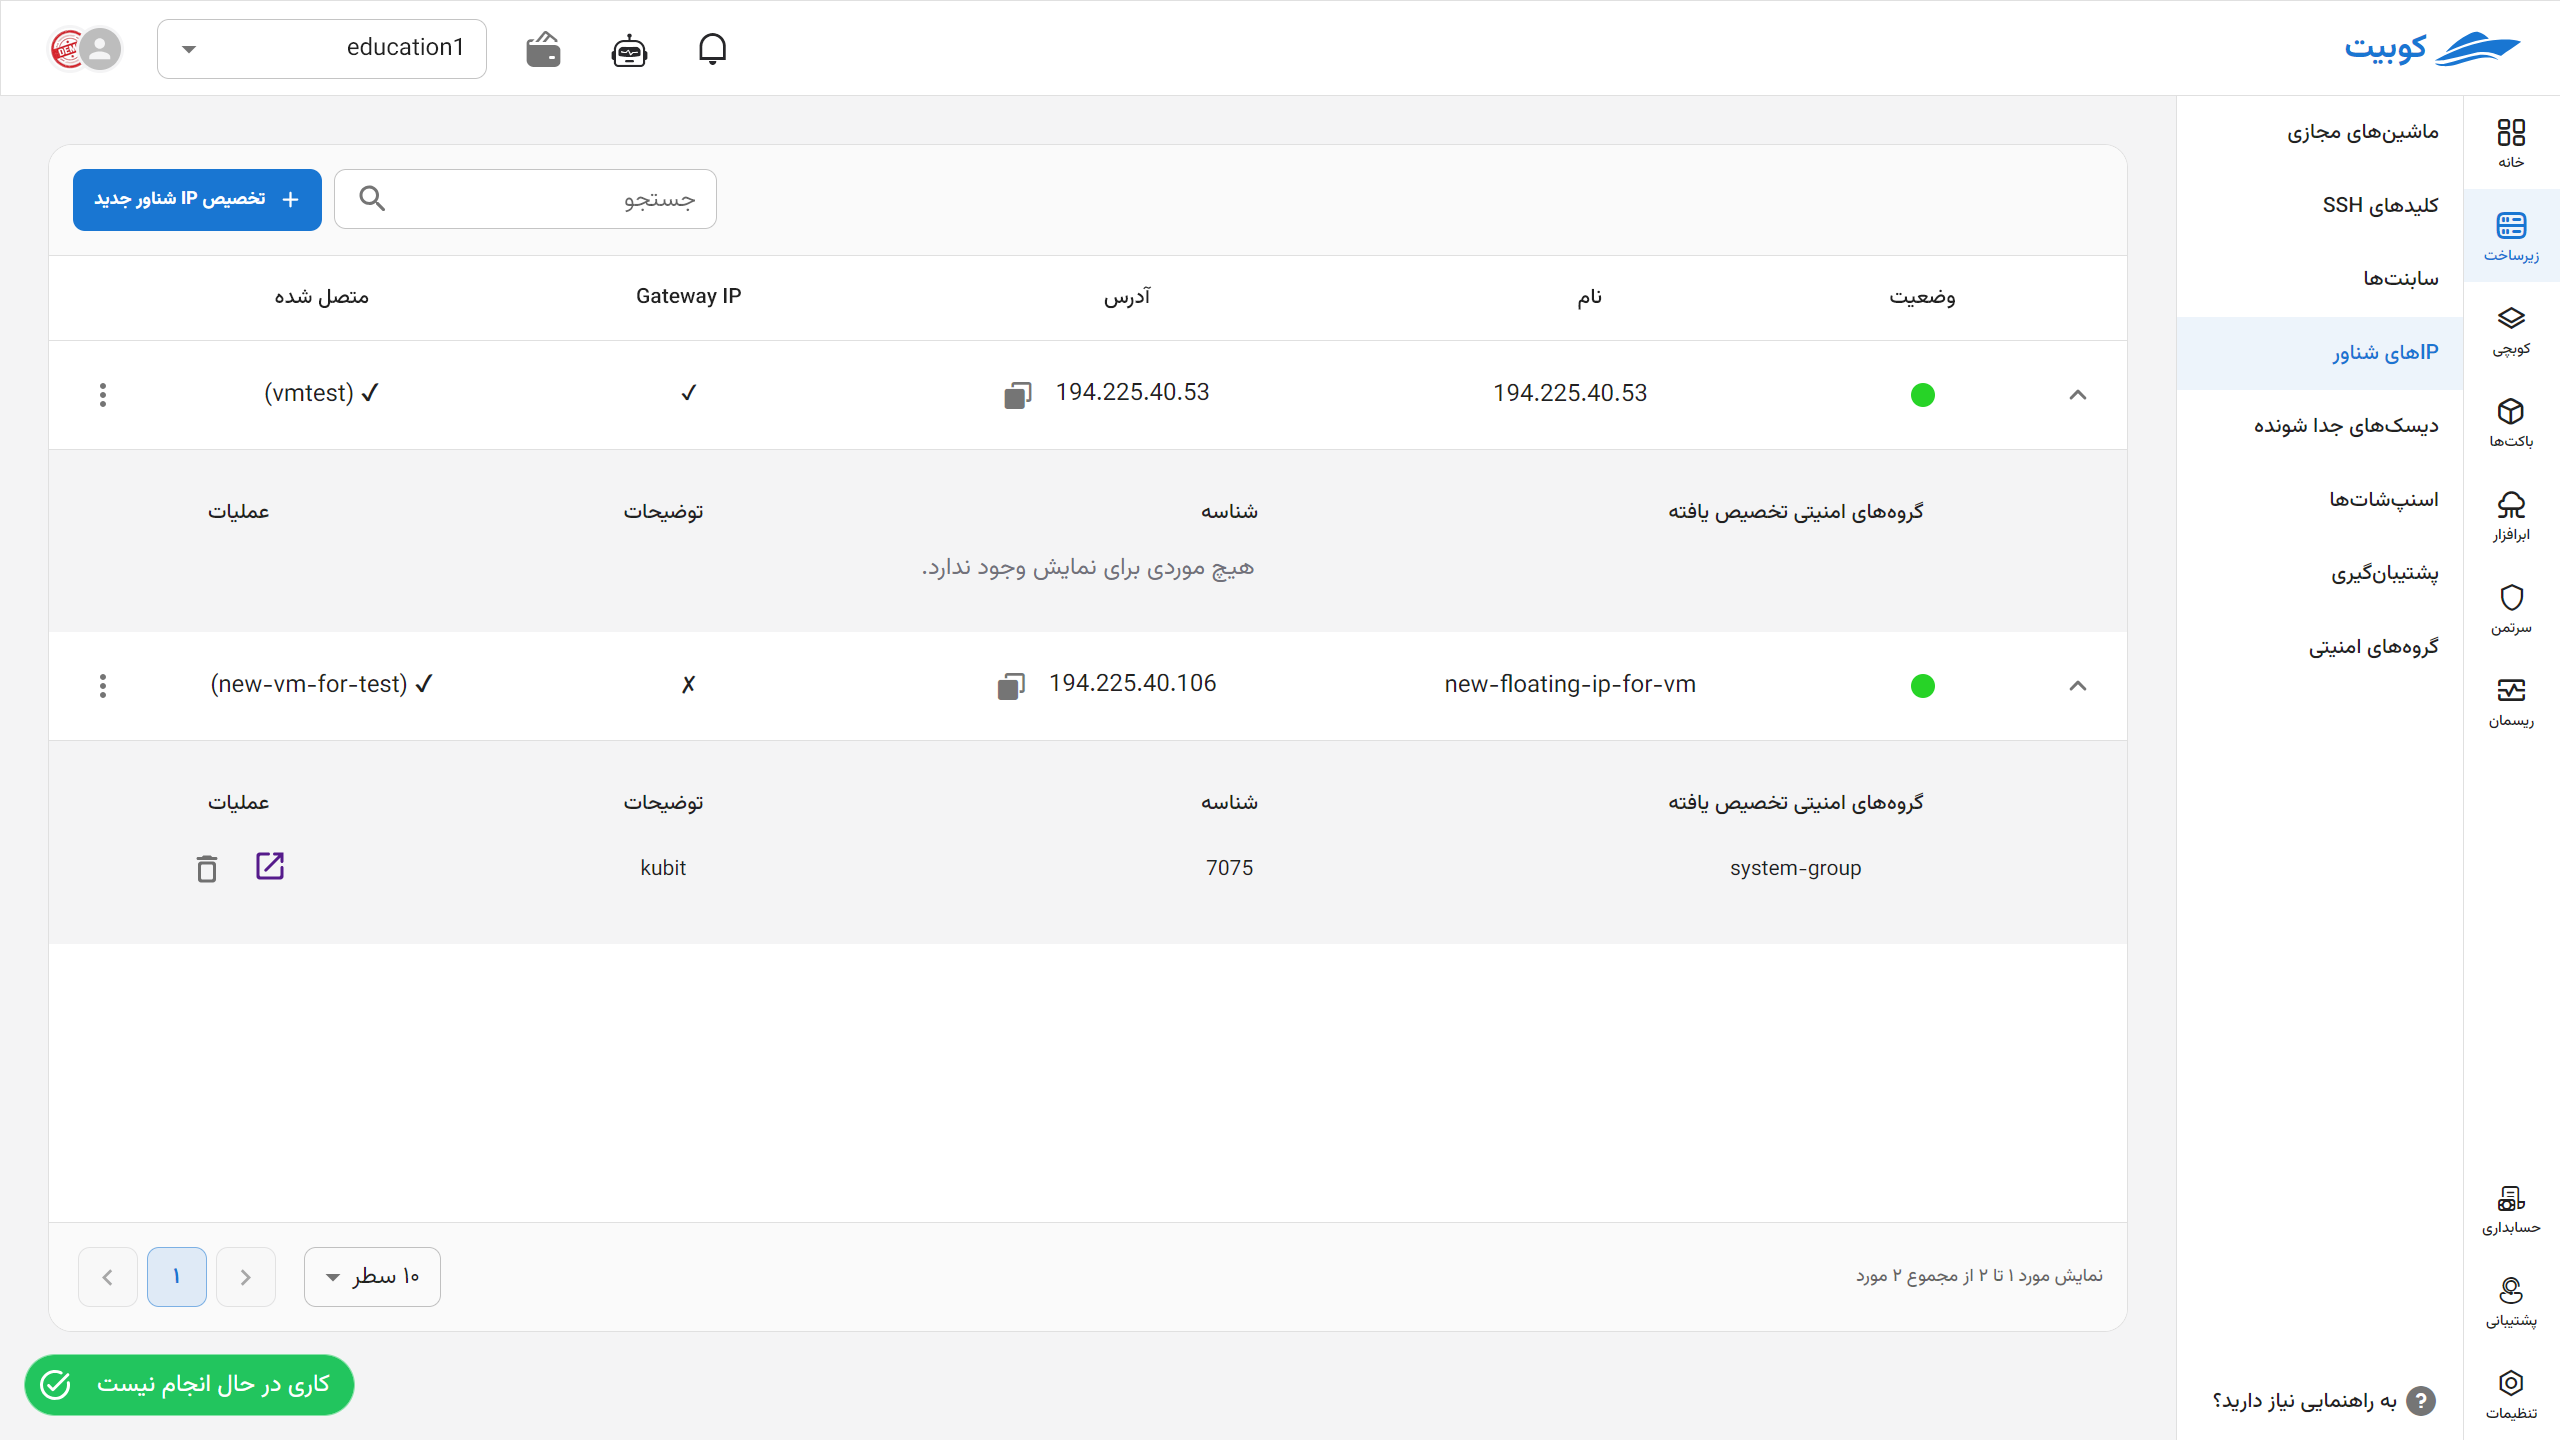
Floating IPs
In this section, you can access the list of floating IPs available in the project and manage them, including assignment, deletion, and disconnection.
Assigning a Floating IP
-
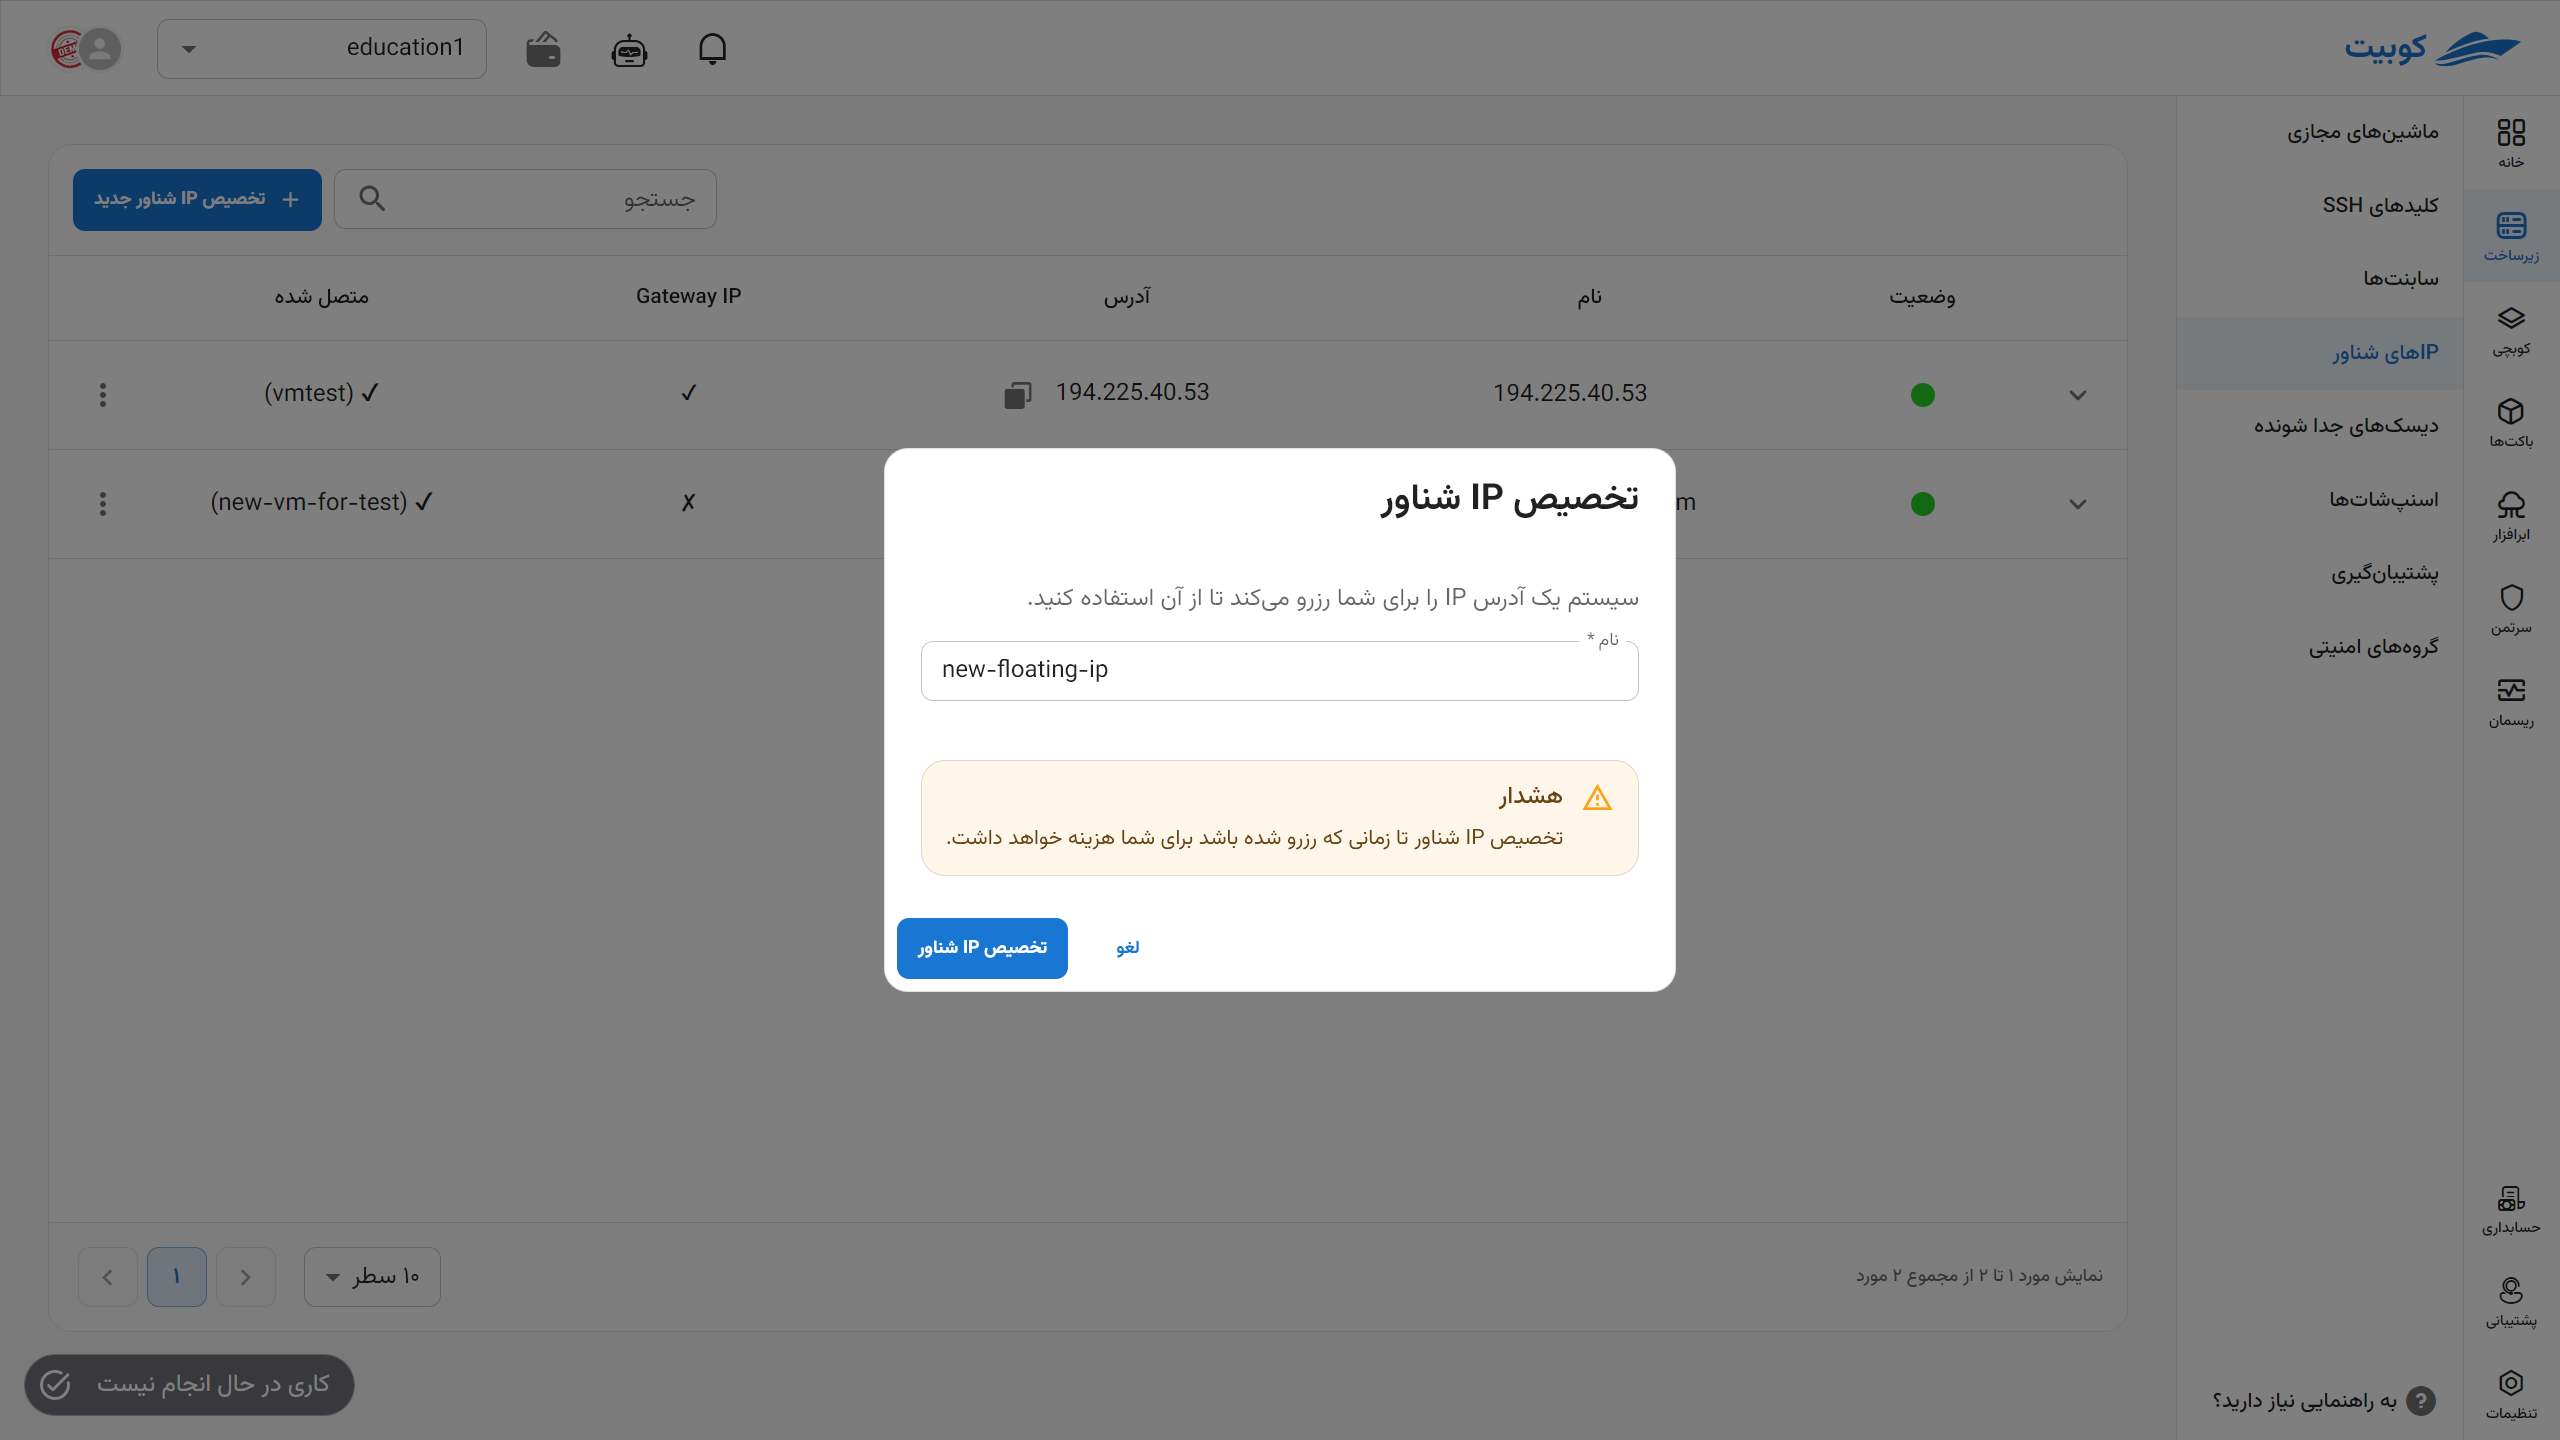
Click on the Assign New Floating IP option.
-
In the opened dialog, enter a valid and unique name.
-
Then, click on Assign Floating IP. A job related to the floating IP assignment will also be created, showing the status of this request.
-
Upon successful completion of the created job, you can use your new floating IP.
⚠️
Note!Note that assigning a floating IP will incur costs as long as it remains reserved.
Floating IP Operations
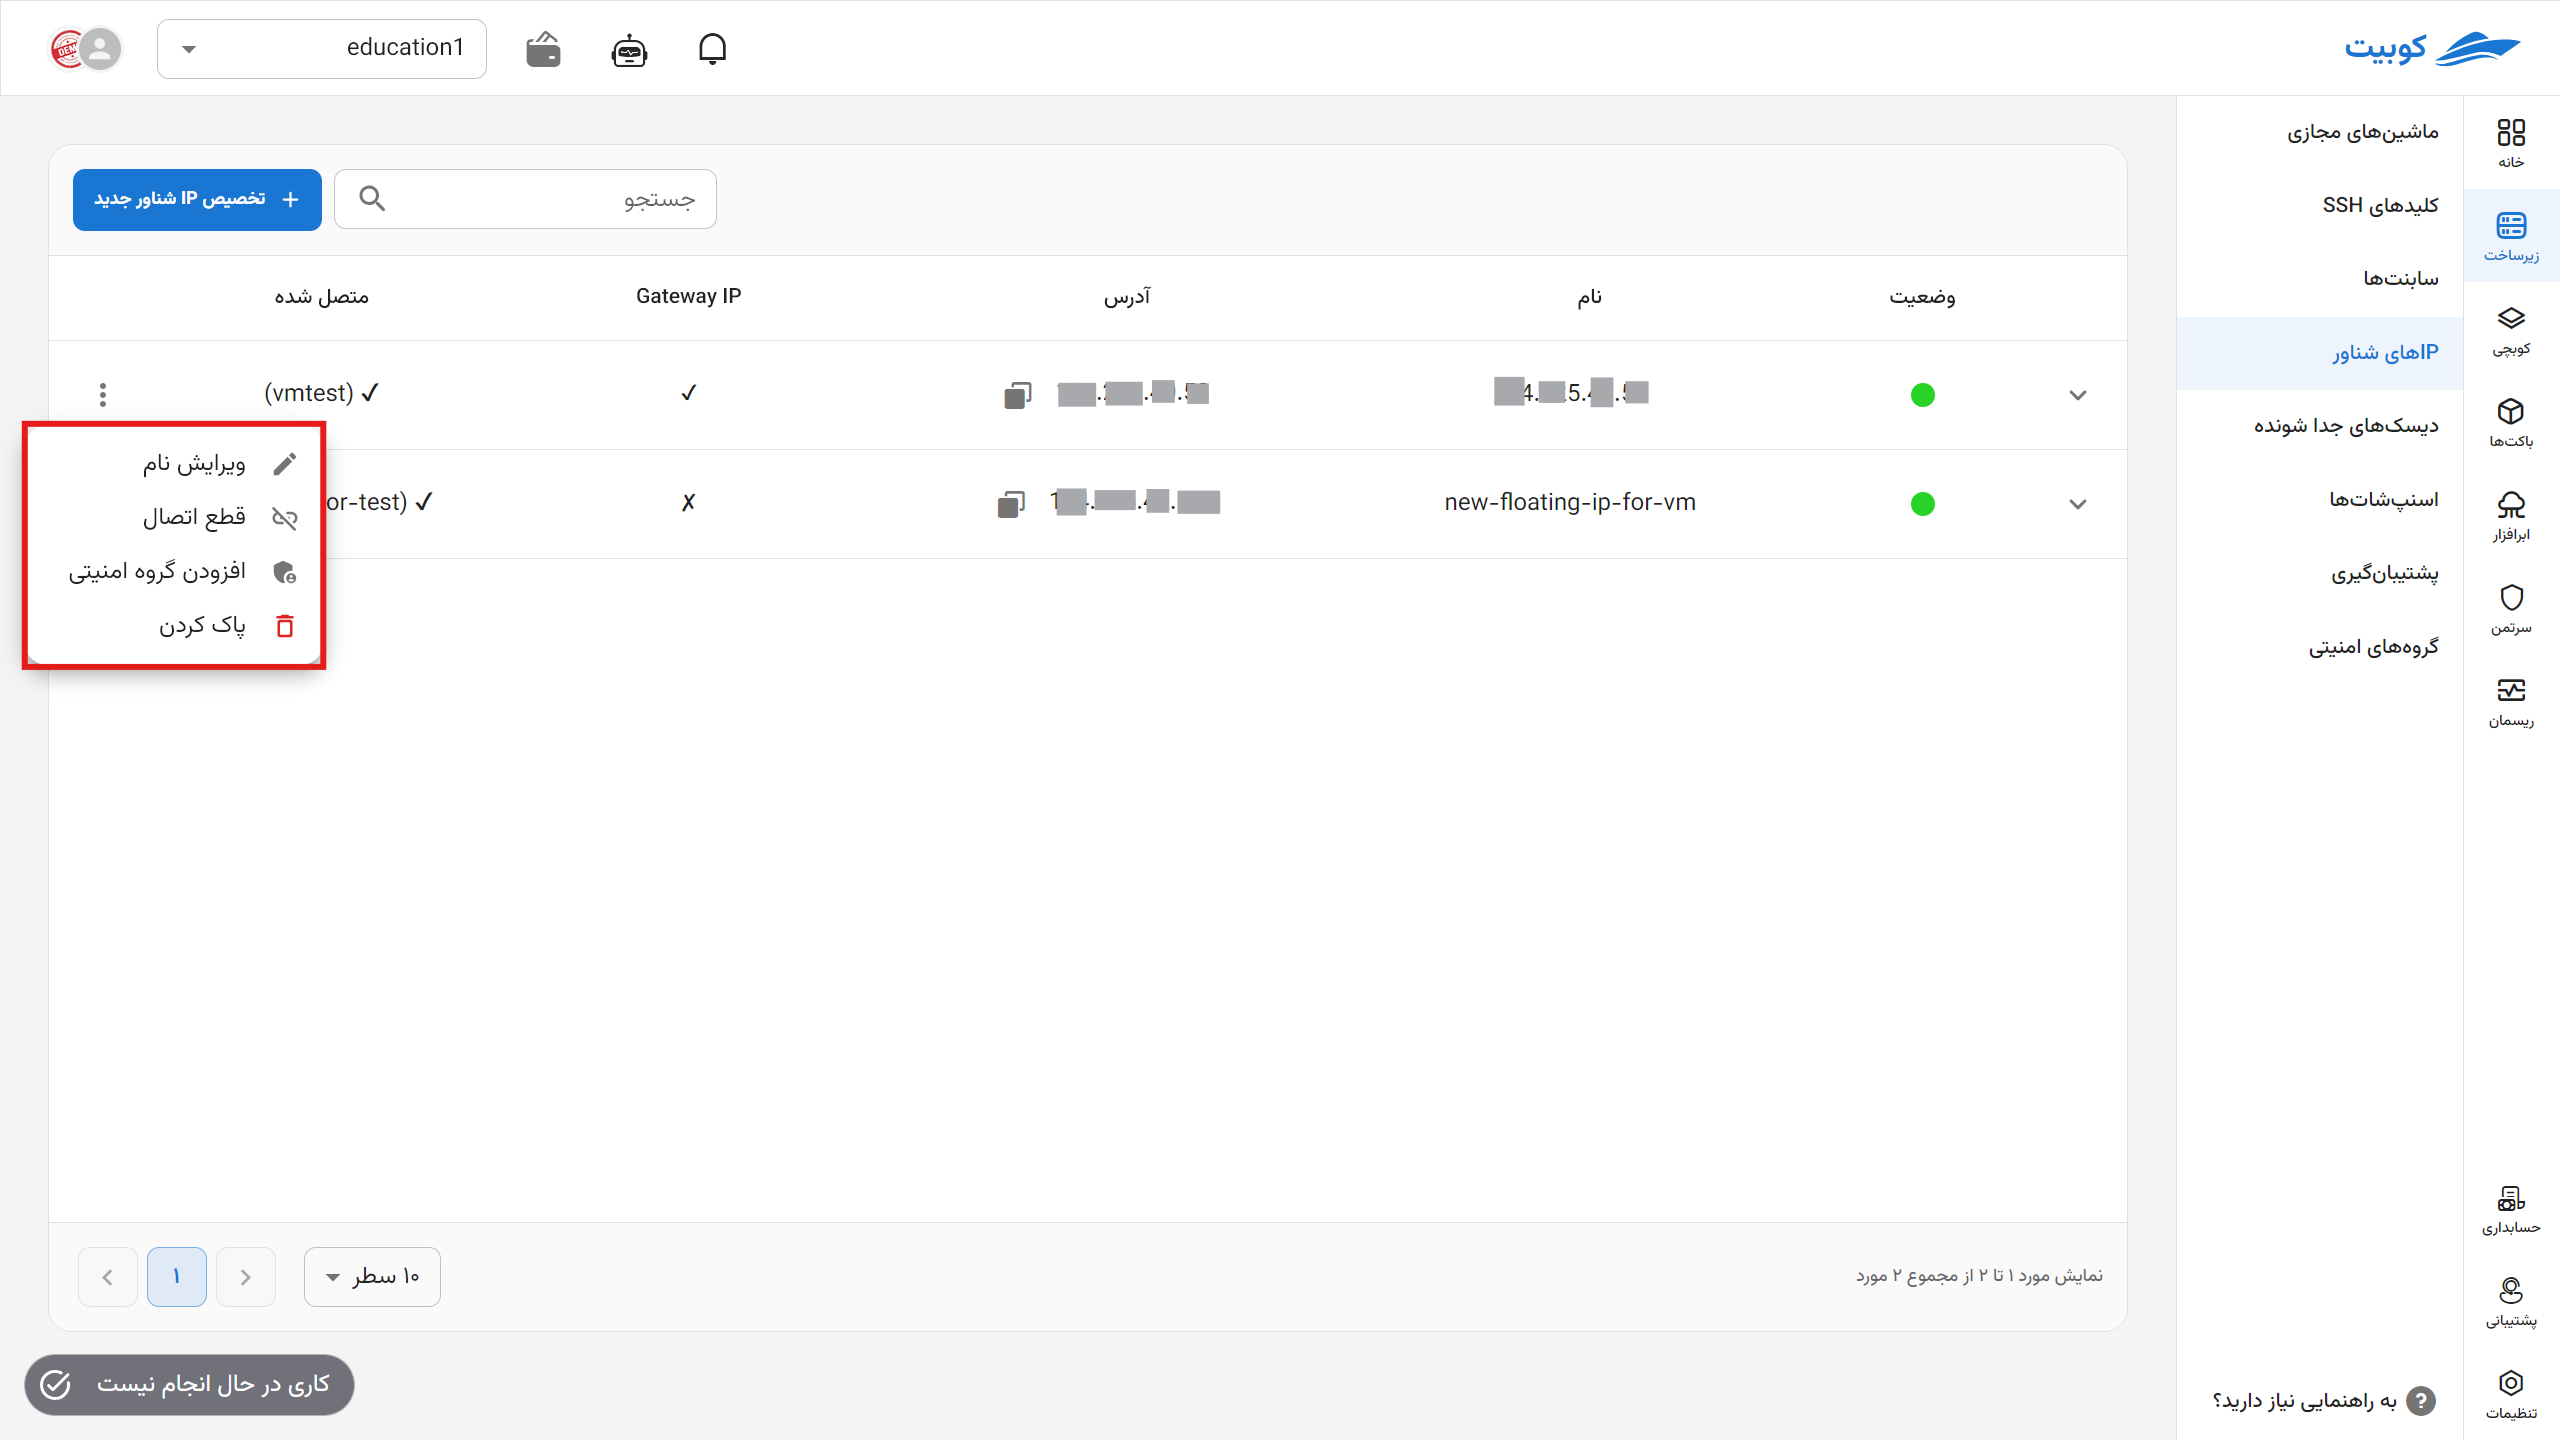
To view possible operations for a floating IP, click on the three-dot button in the Operations column to display a list of operations:
Editing the Name
- To edit the name, click on the three-dot button in the Operations column and select the Edit Name option.
- In the opened dialog, choose the new name and click the Edit Name button.

Disconnecting
- To disconnect from all resources, click on the three-dot button in the Operations column and select the Delete option.
- Then, if you are sure about the deletion, click the Confirm button in the opened dialog.
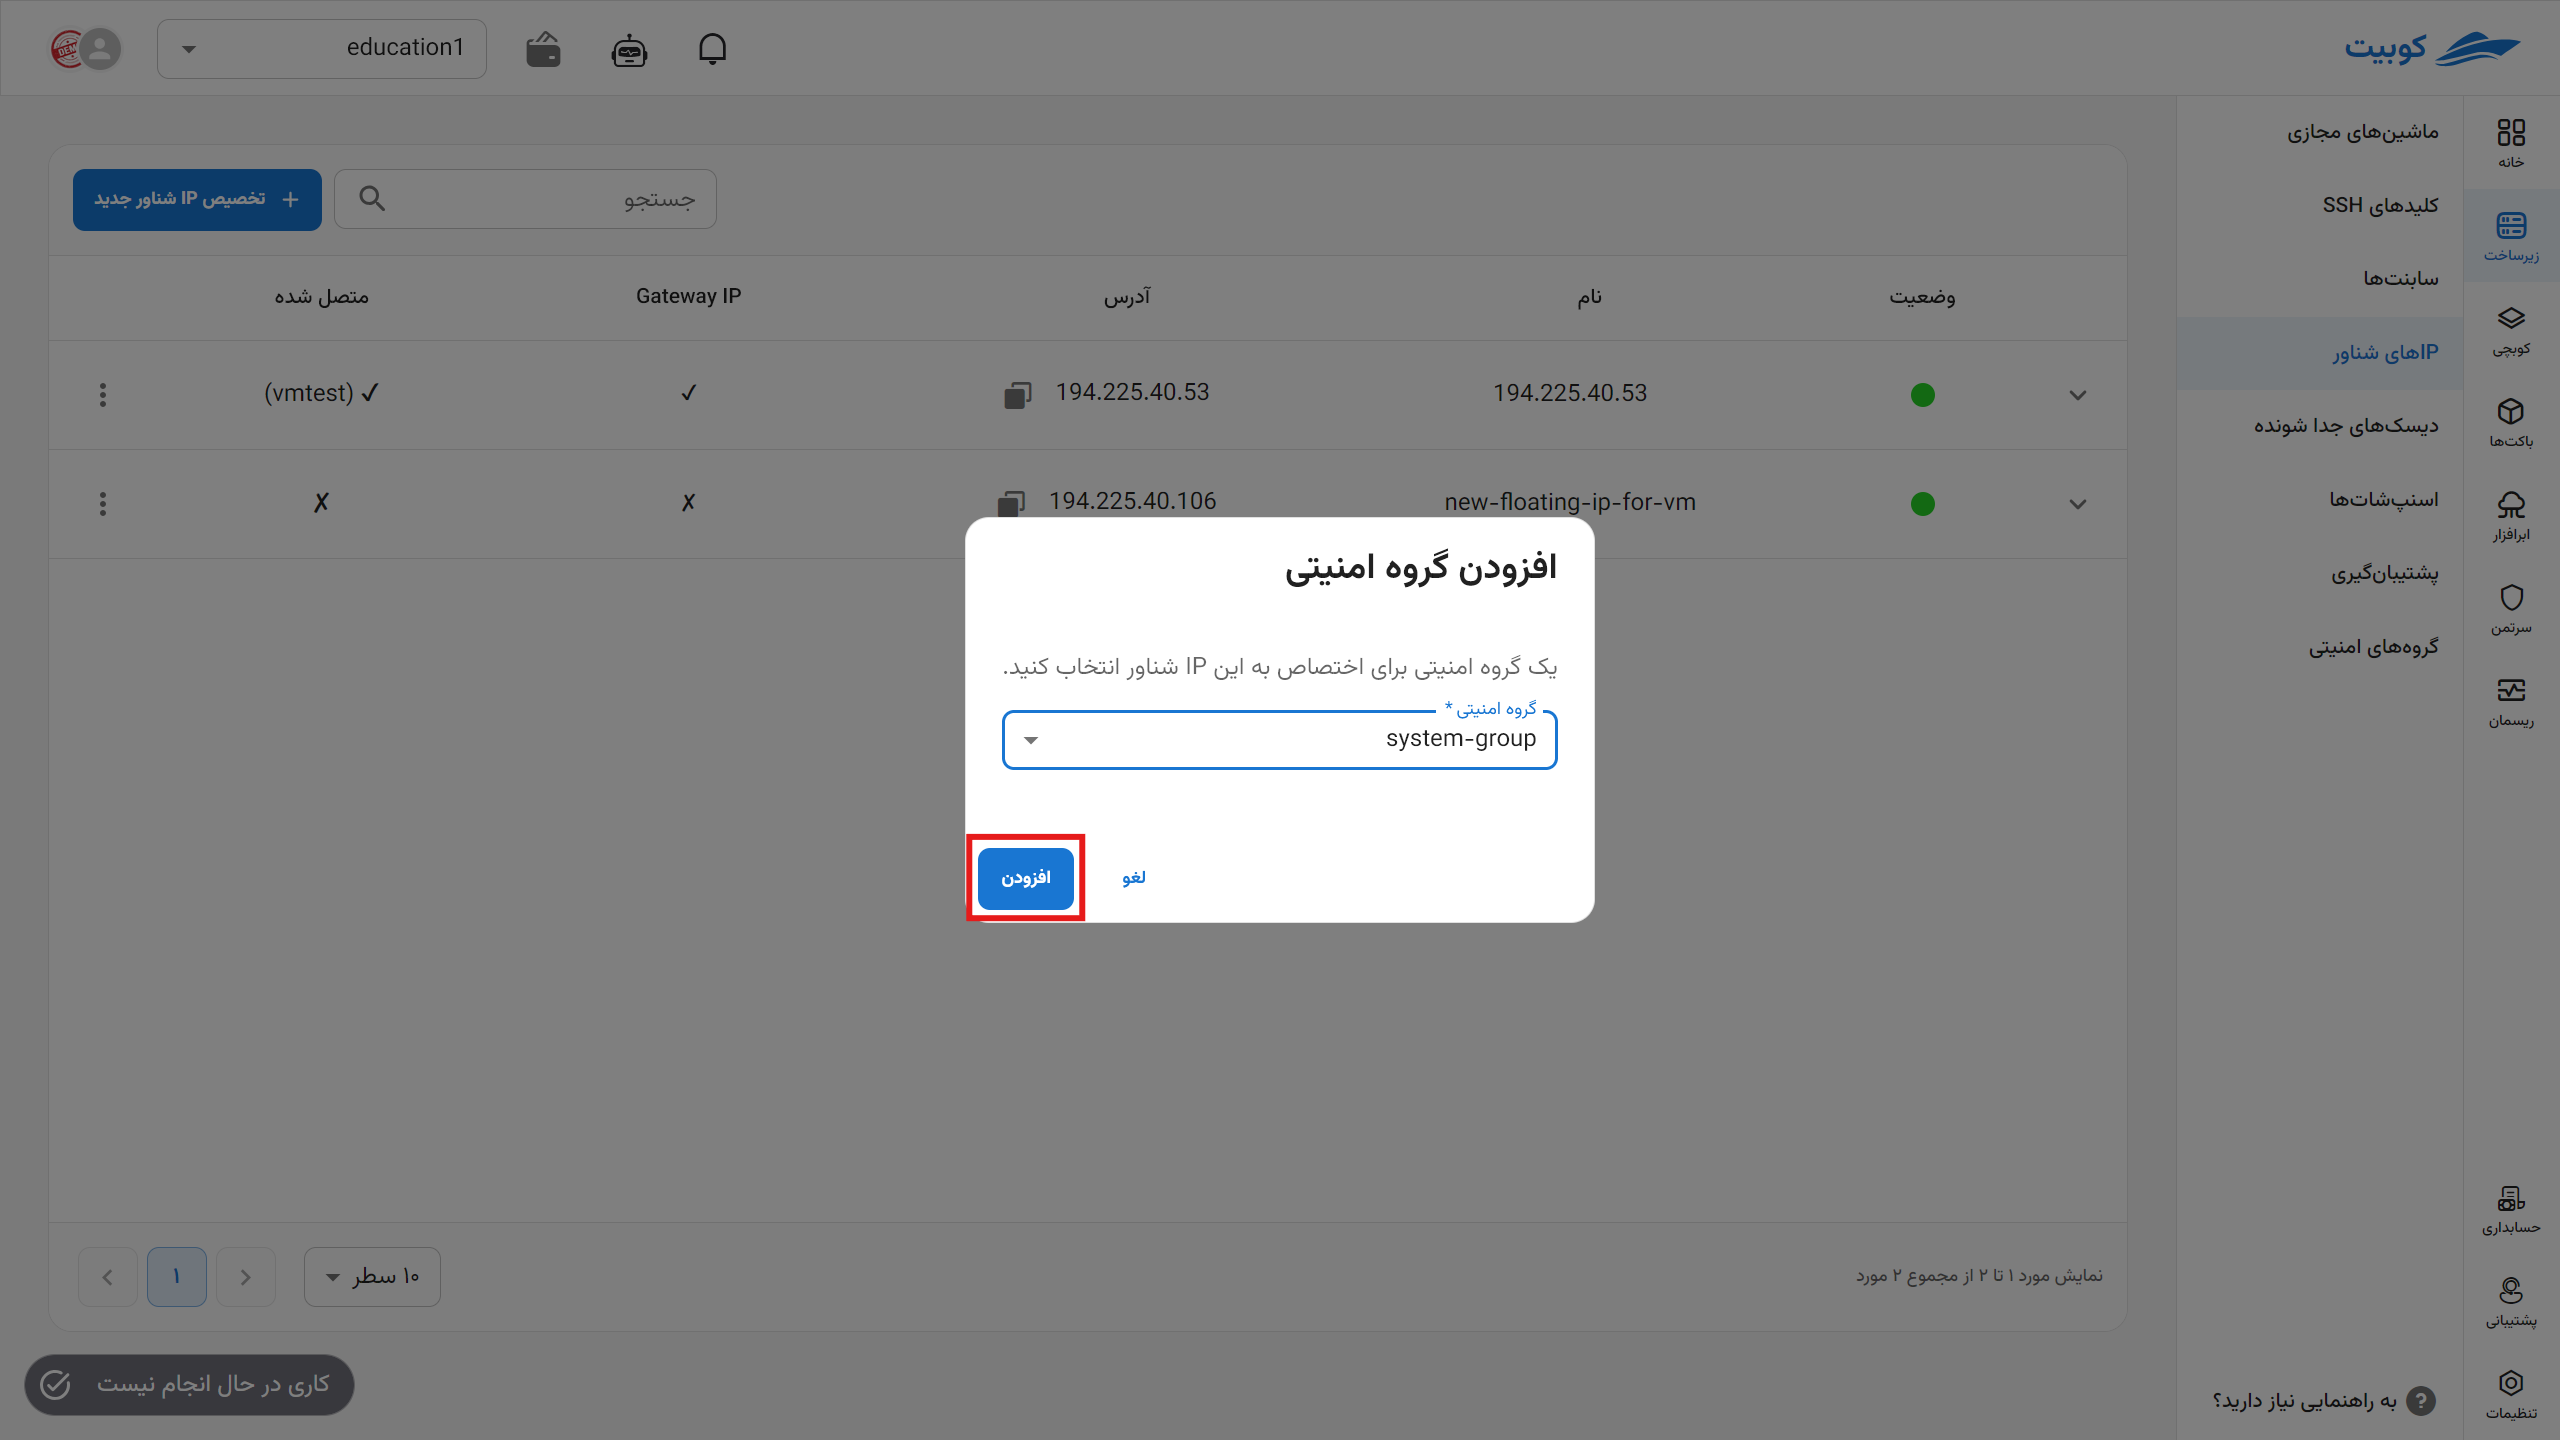
Connecting to a Security Group
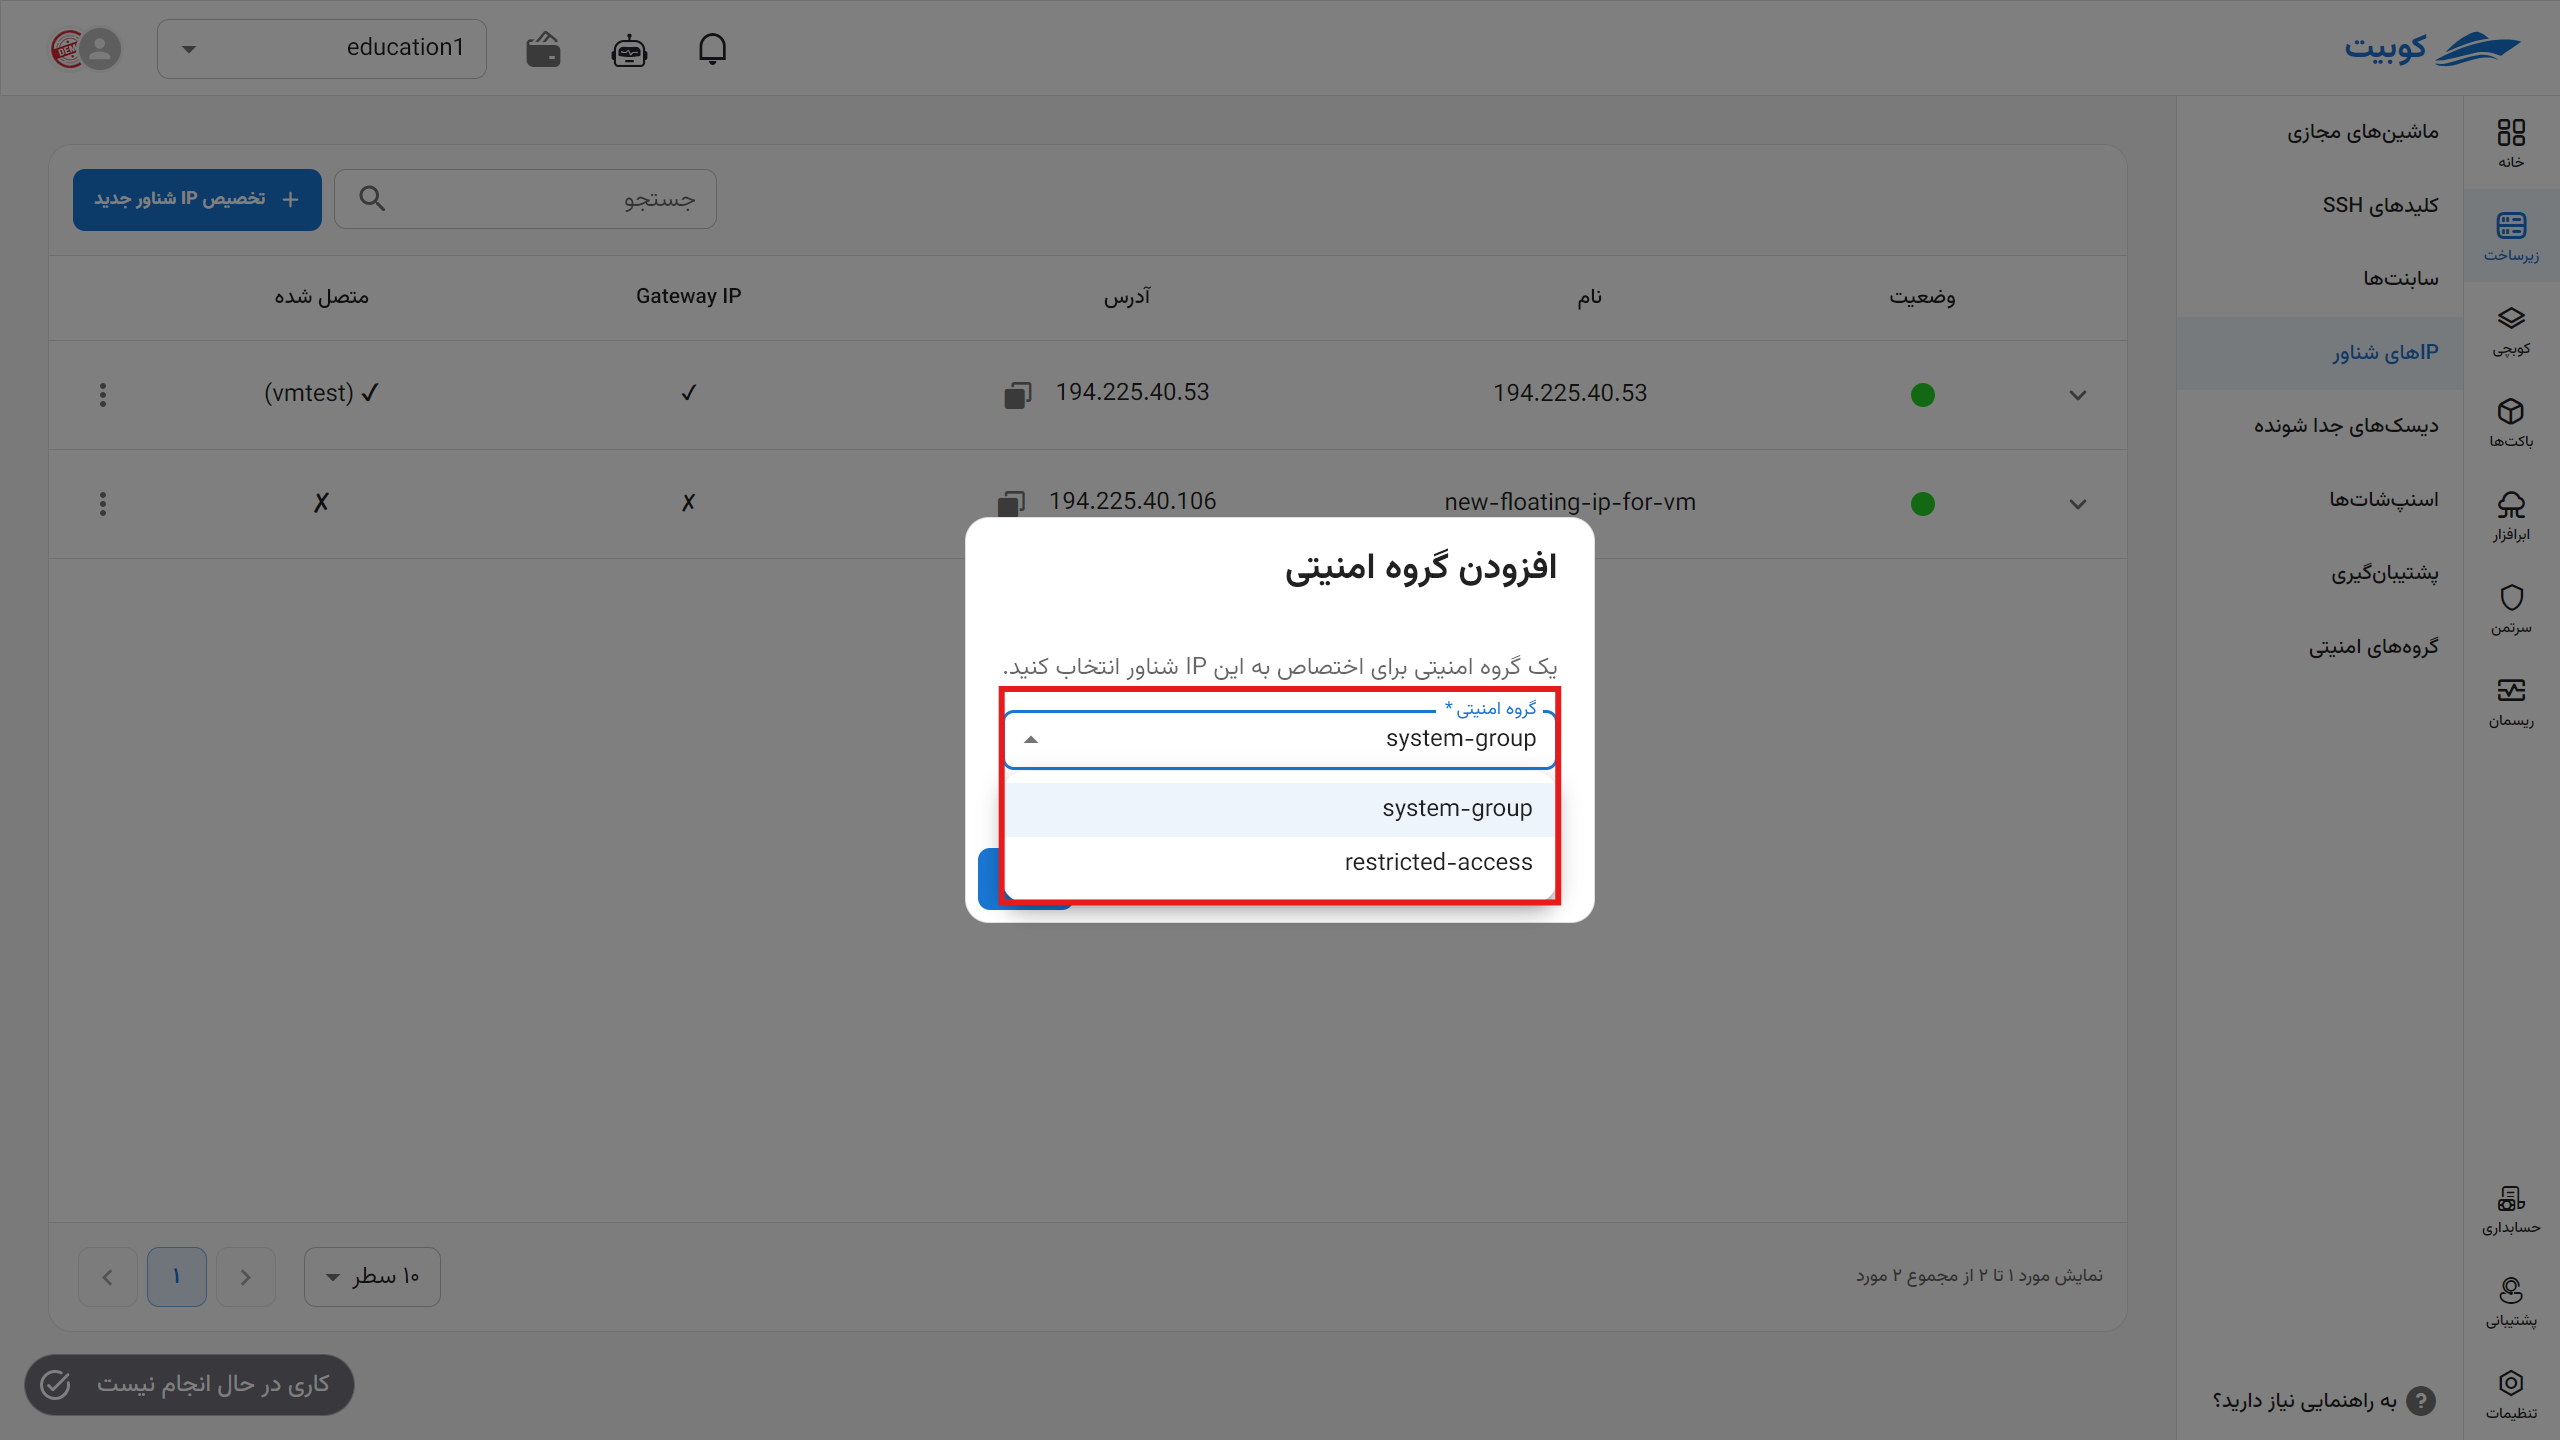
- To add a security group to this IP address, first click on the three-dot button in the Operations column and select the Add to Security Group option.
- Choose the appropriate security group from the list of available security groups.
Deleting a Floating IP
- To delete, click on the three-dot button in the Operations column and select the Delete option.
- Then, if you are sure about the deletion, click the Delete button in the opened dialog.