Subnets
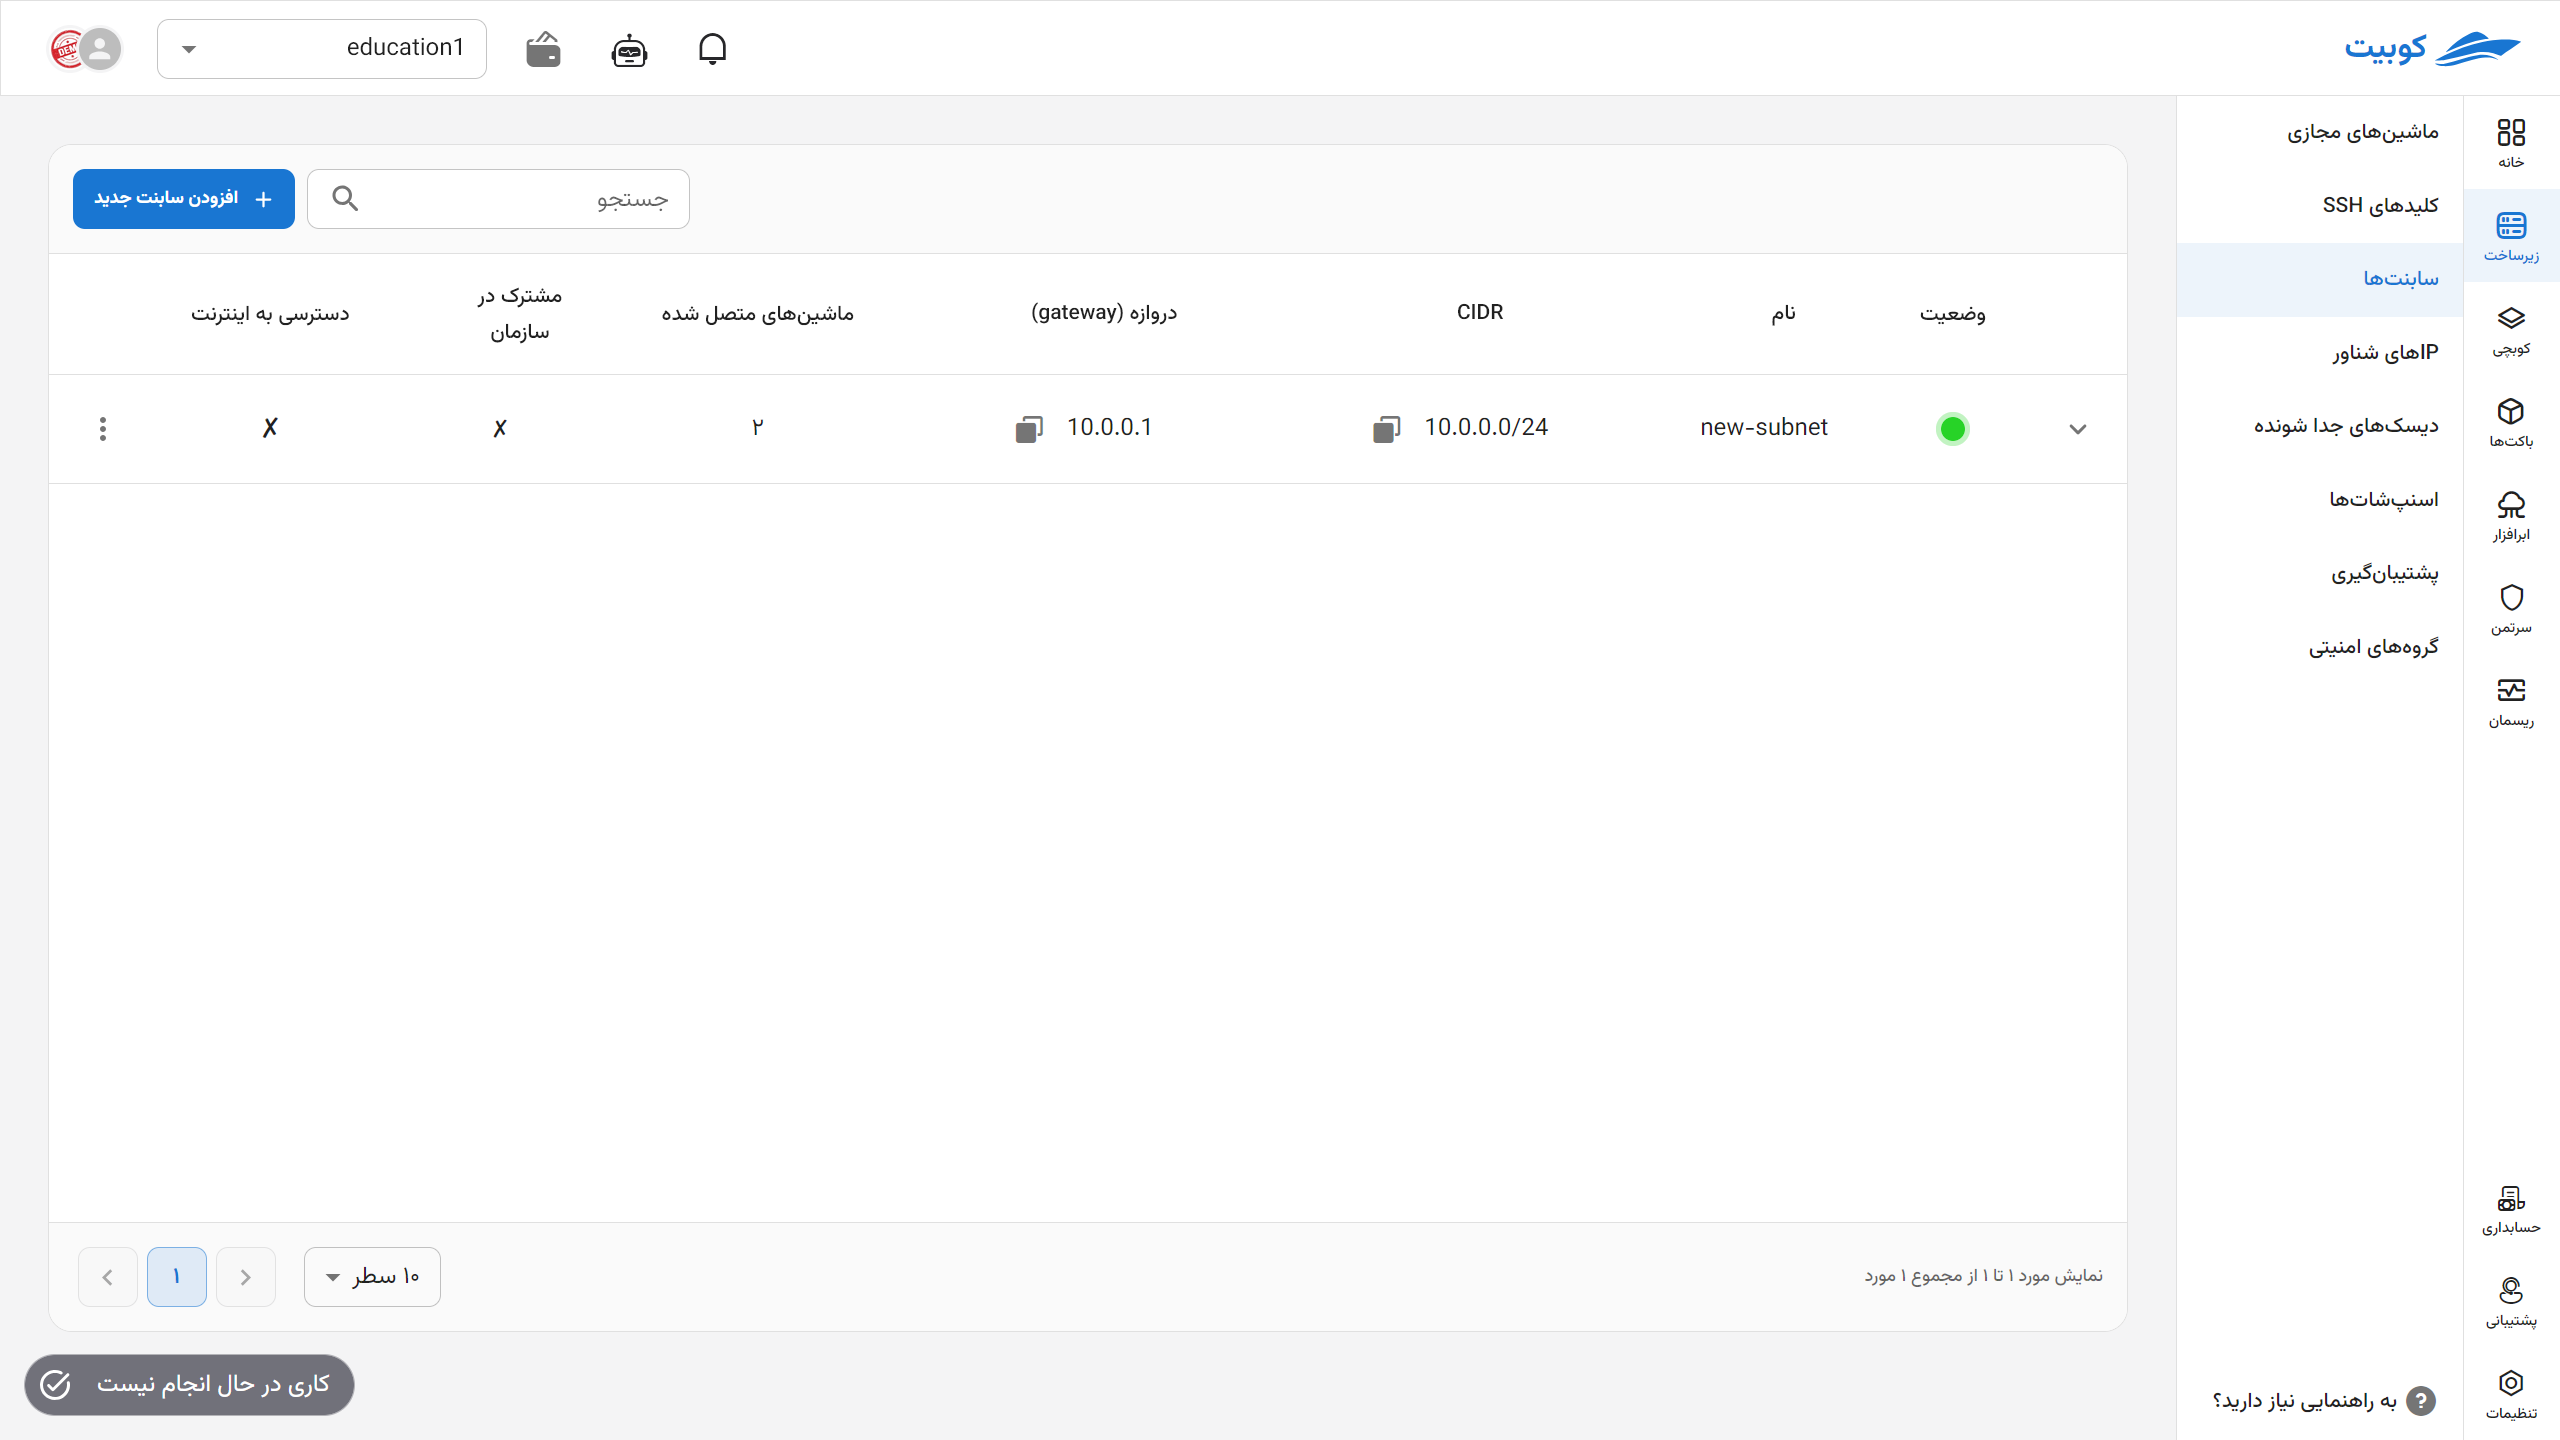
In the Subnets page, a list of project-specific and organization-shared subnets is displayed, along with options to add a new subnet and perform operations such as edit, connect to the internet, add a security group, and delete.
Adding a New Subnet
-
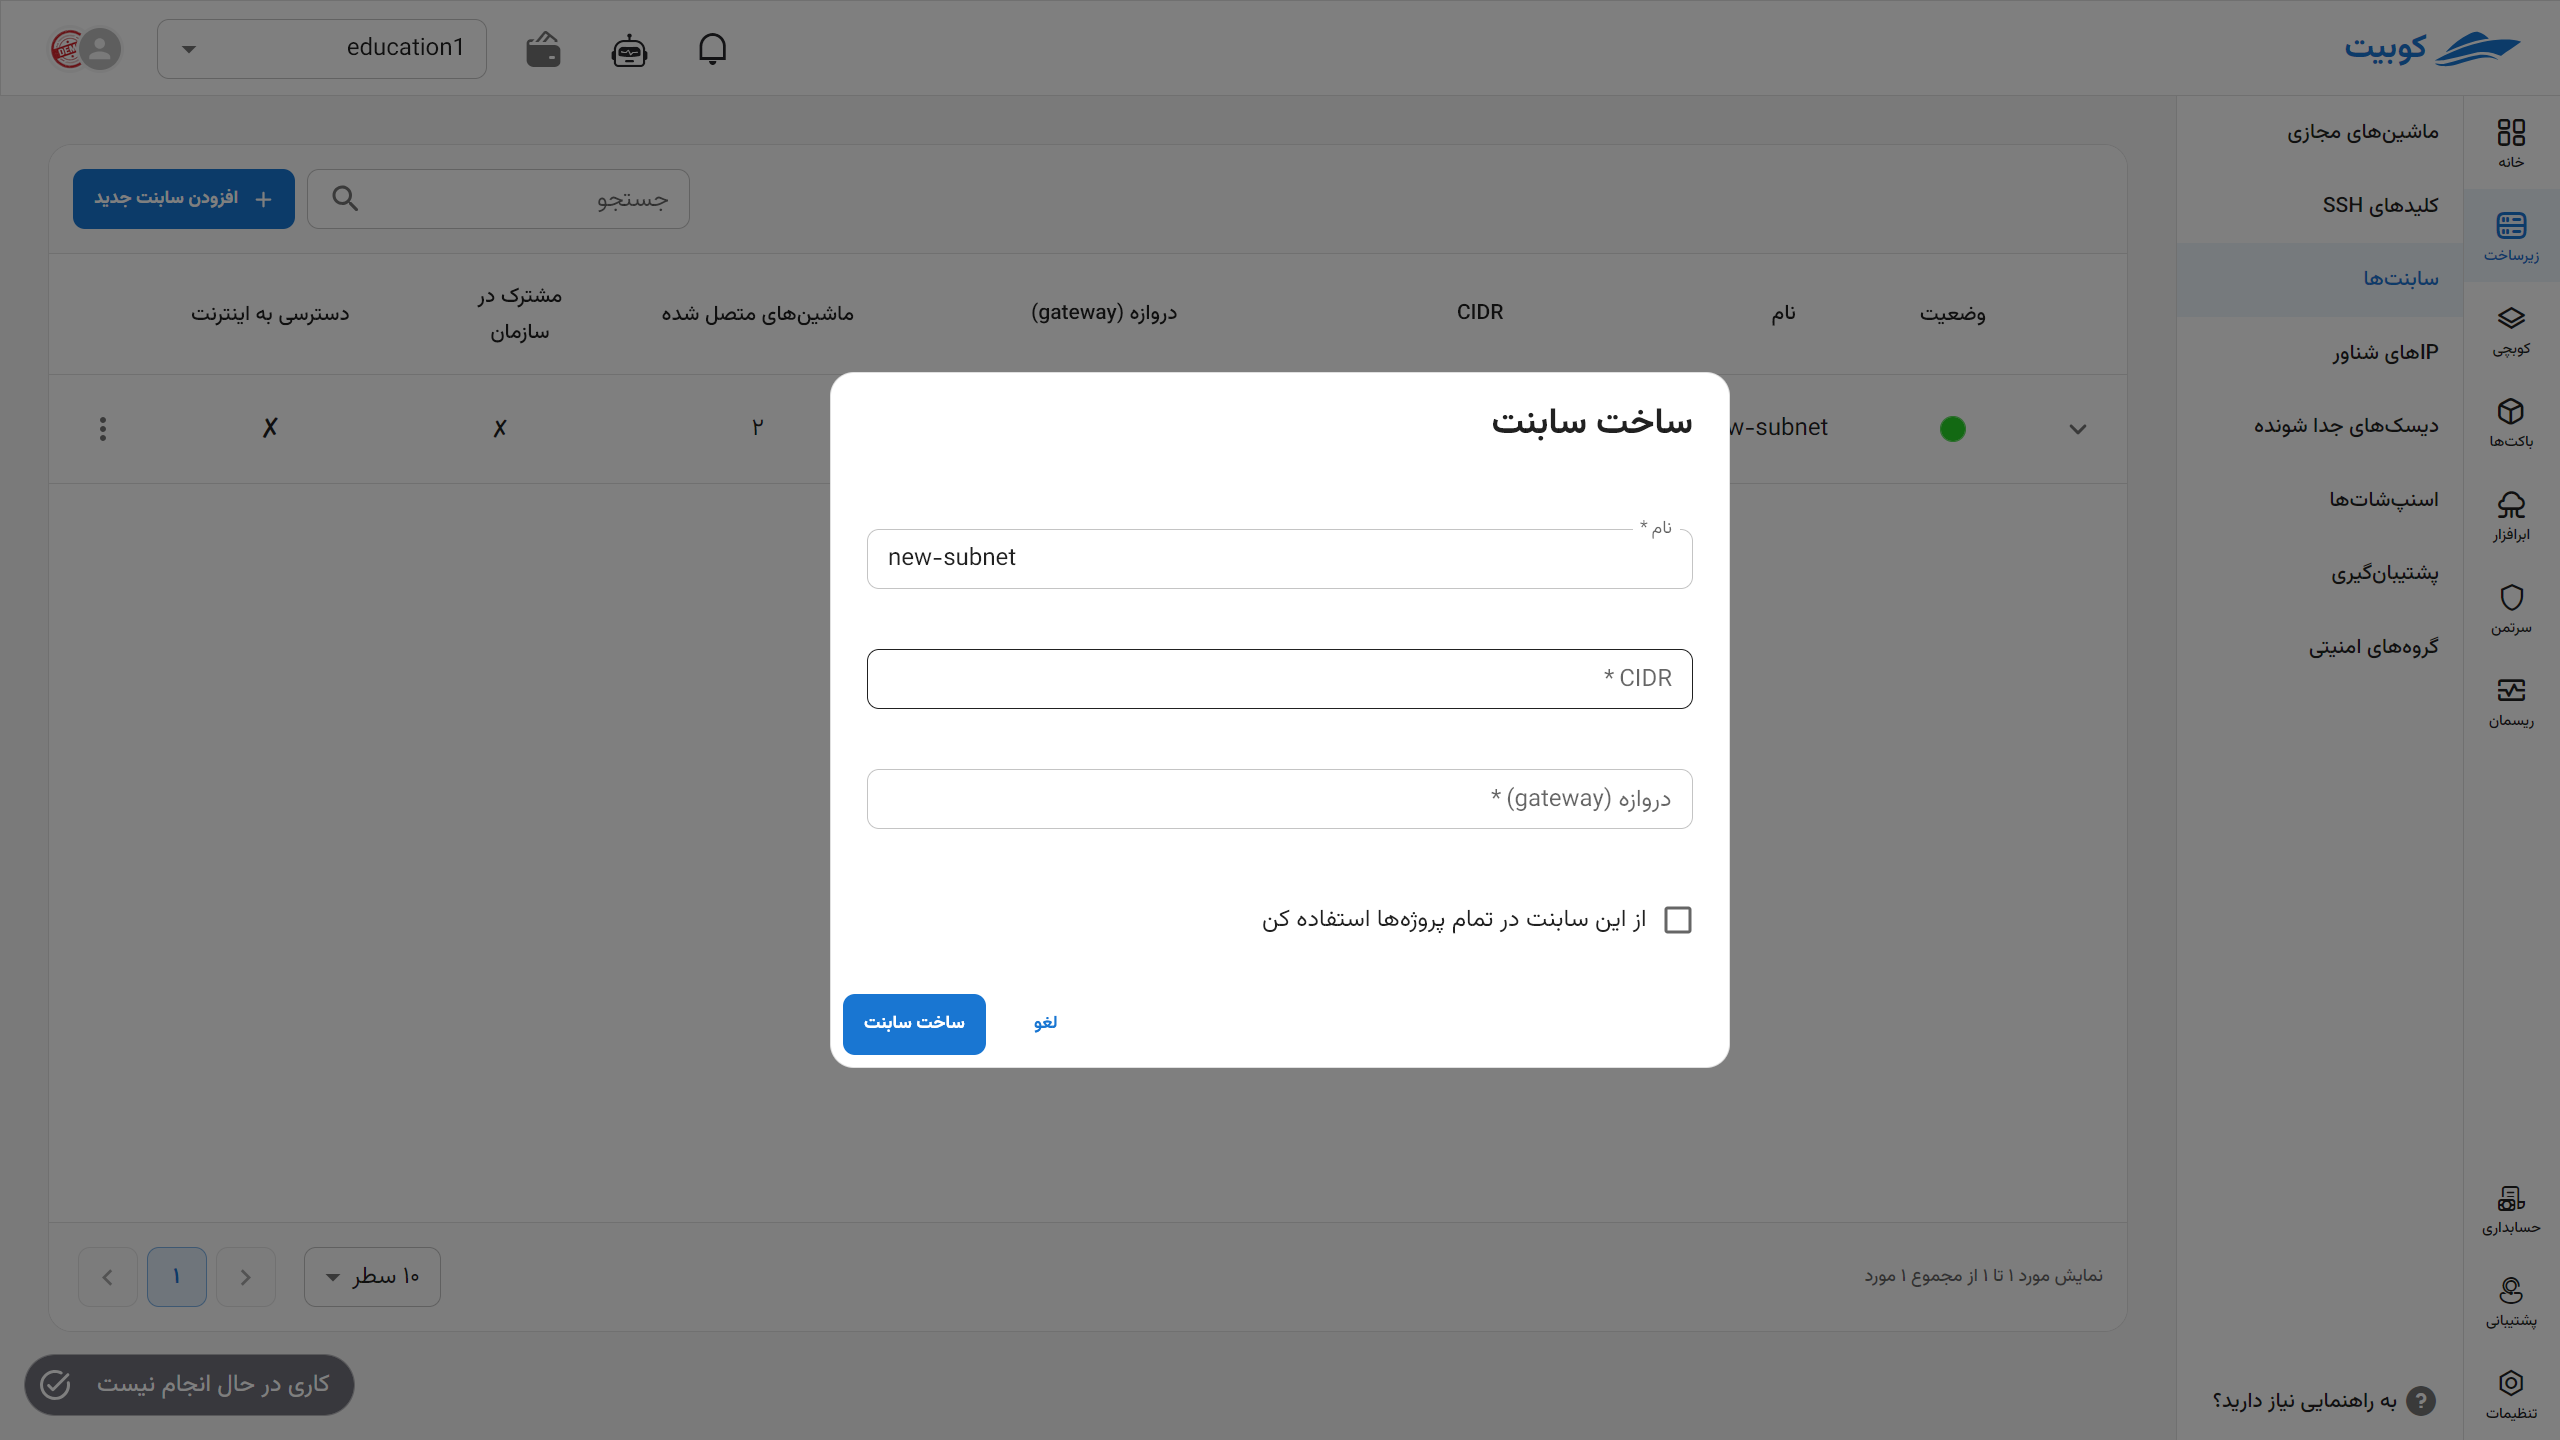
To add a subnet, click on the Add New Subnet button.
-
Then, enter the requested information such as Name, CIDR, and Gateway.
-
Finally, if you wish to share this subnet across the organization, select the Use this subnet in all projects option and click on Create Subnet.
Viewing Details and Status
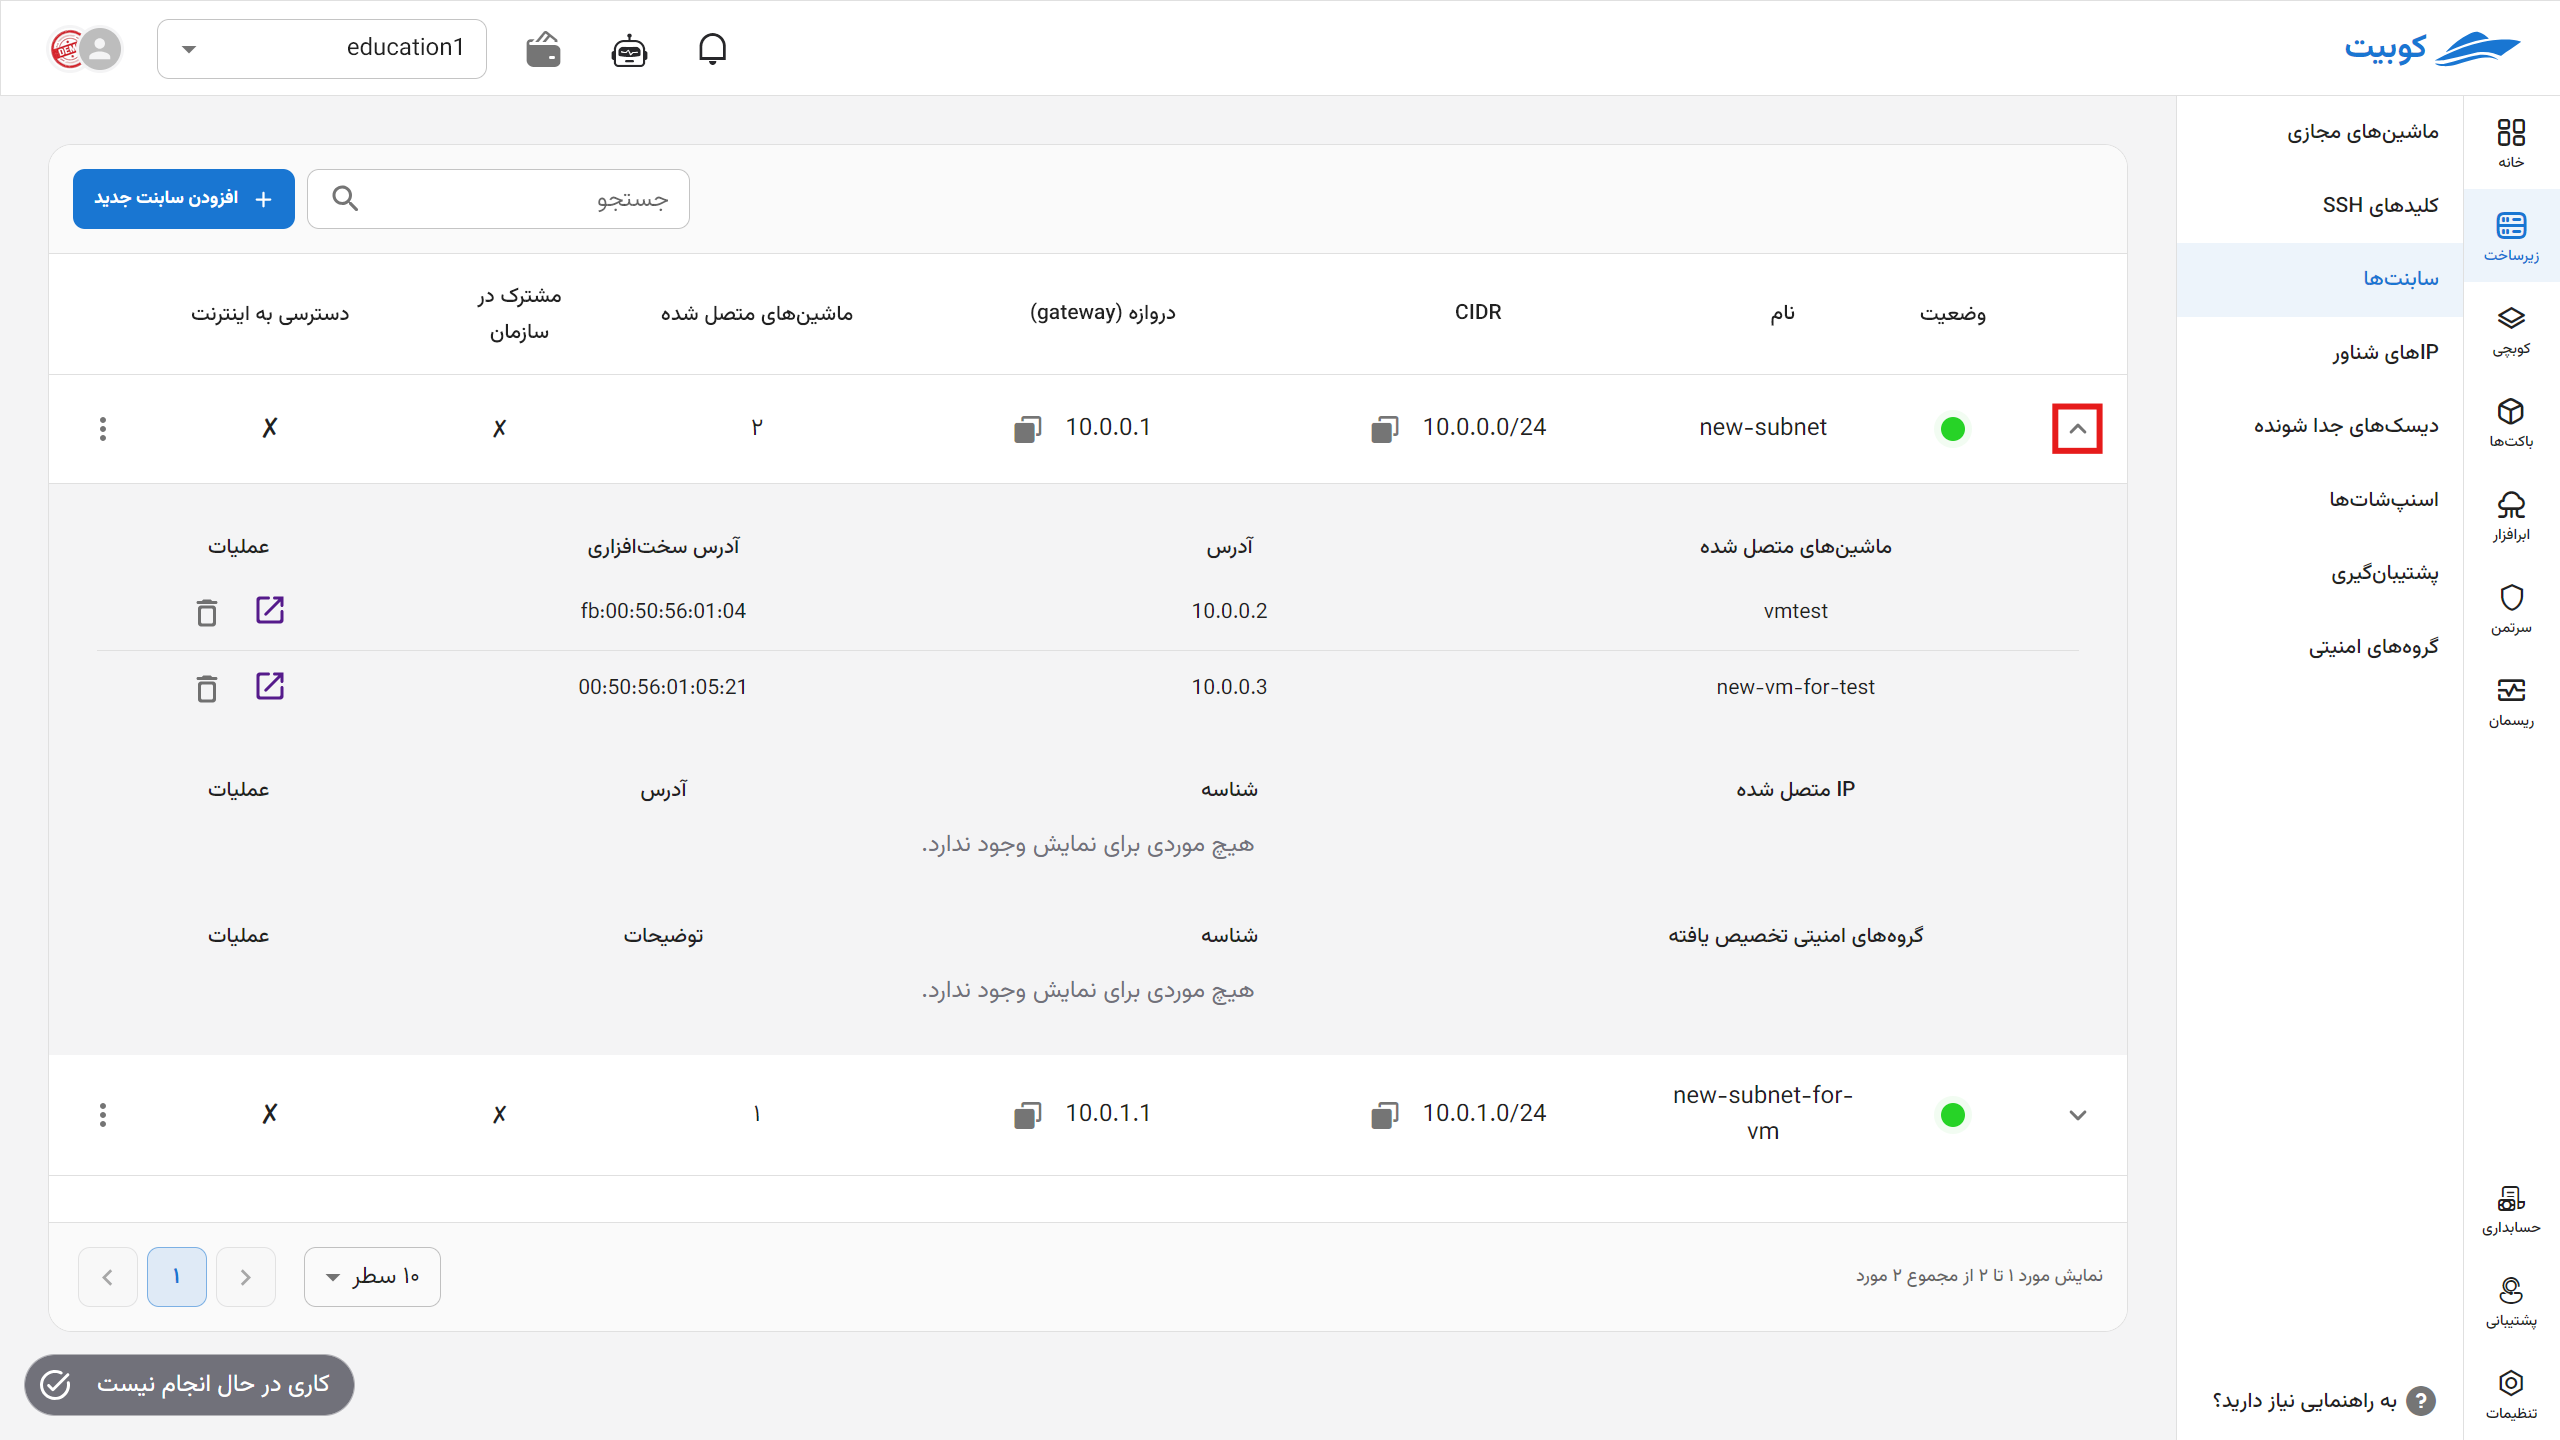
To view details such as connected machines, allocated addresses for each machine, and perform operations on them, click on the (▼) icon. A list of the mentioned information will be displayed for the selected subnet:
Deleting a Network Interface
- To delete the network interface assigned to a virtual machine, click on the trash can icon for the relevant machine.
- Then, if you are sure about the deletion, click the Delete button in the opened dialog.

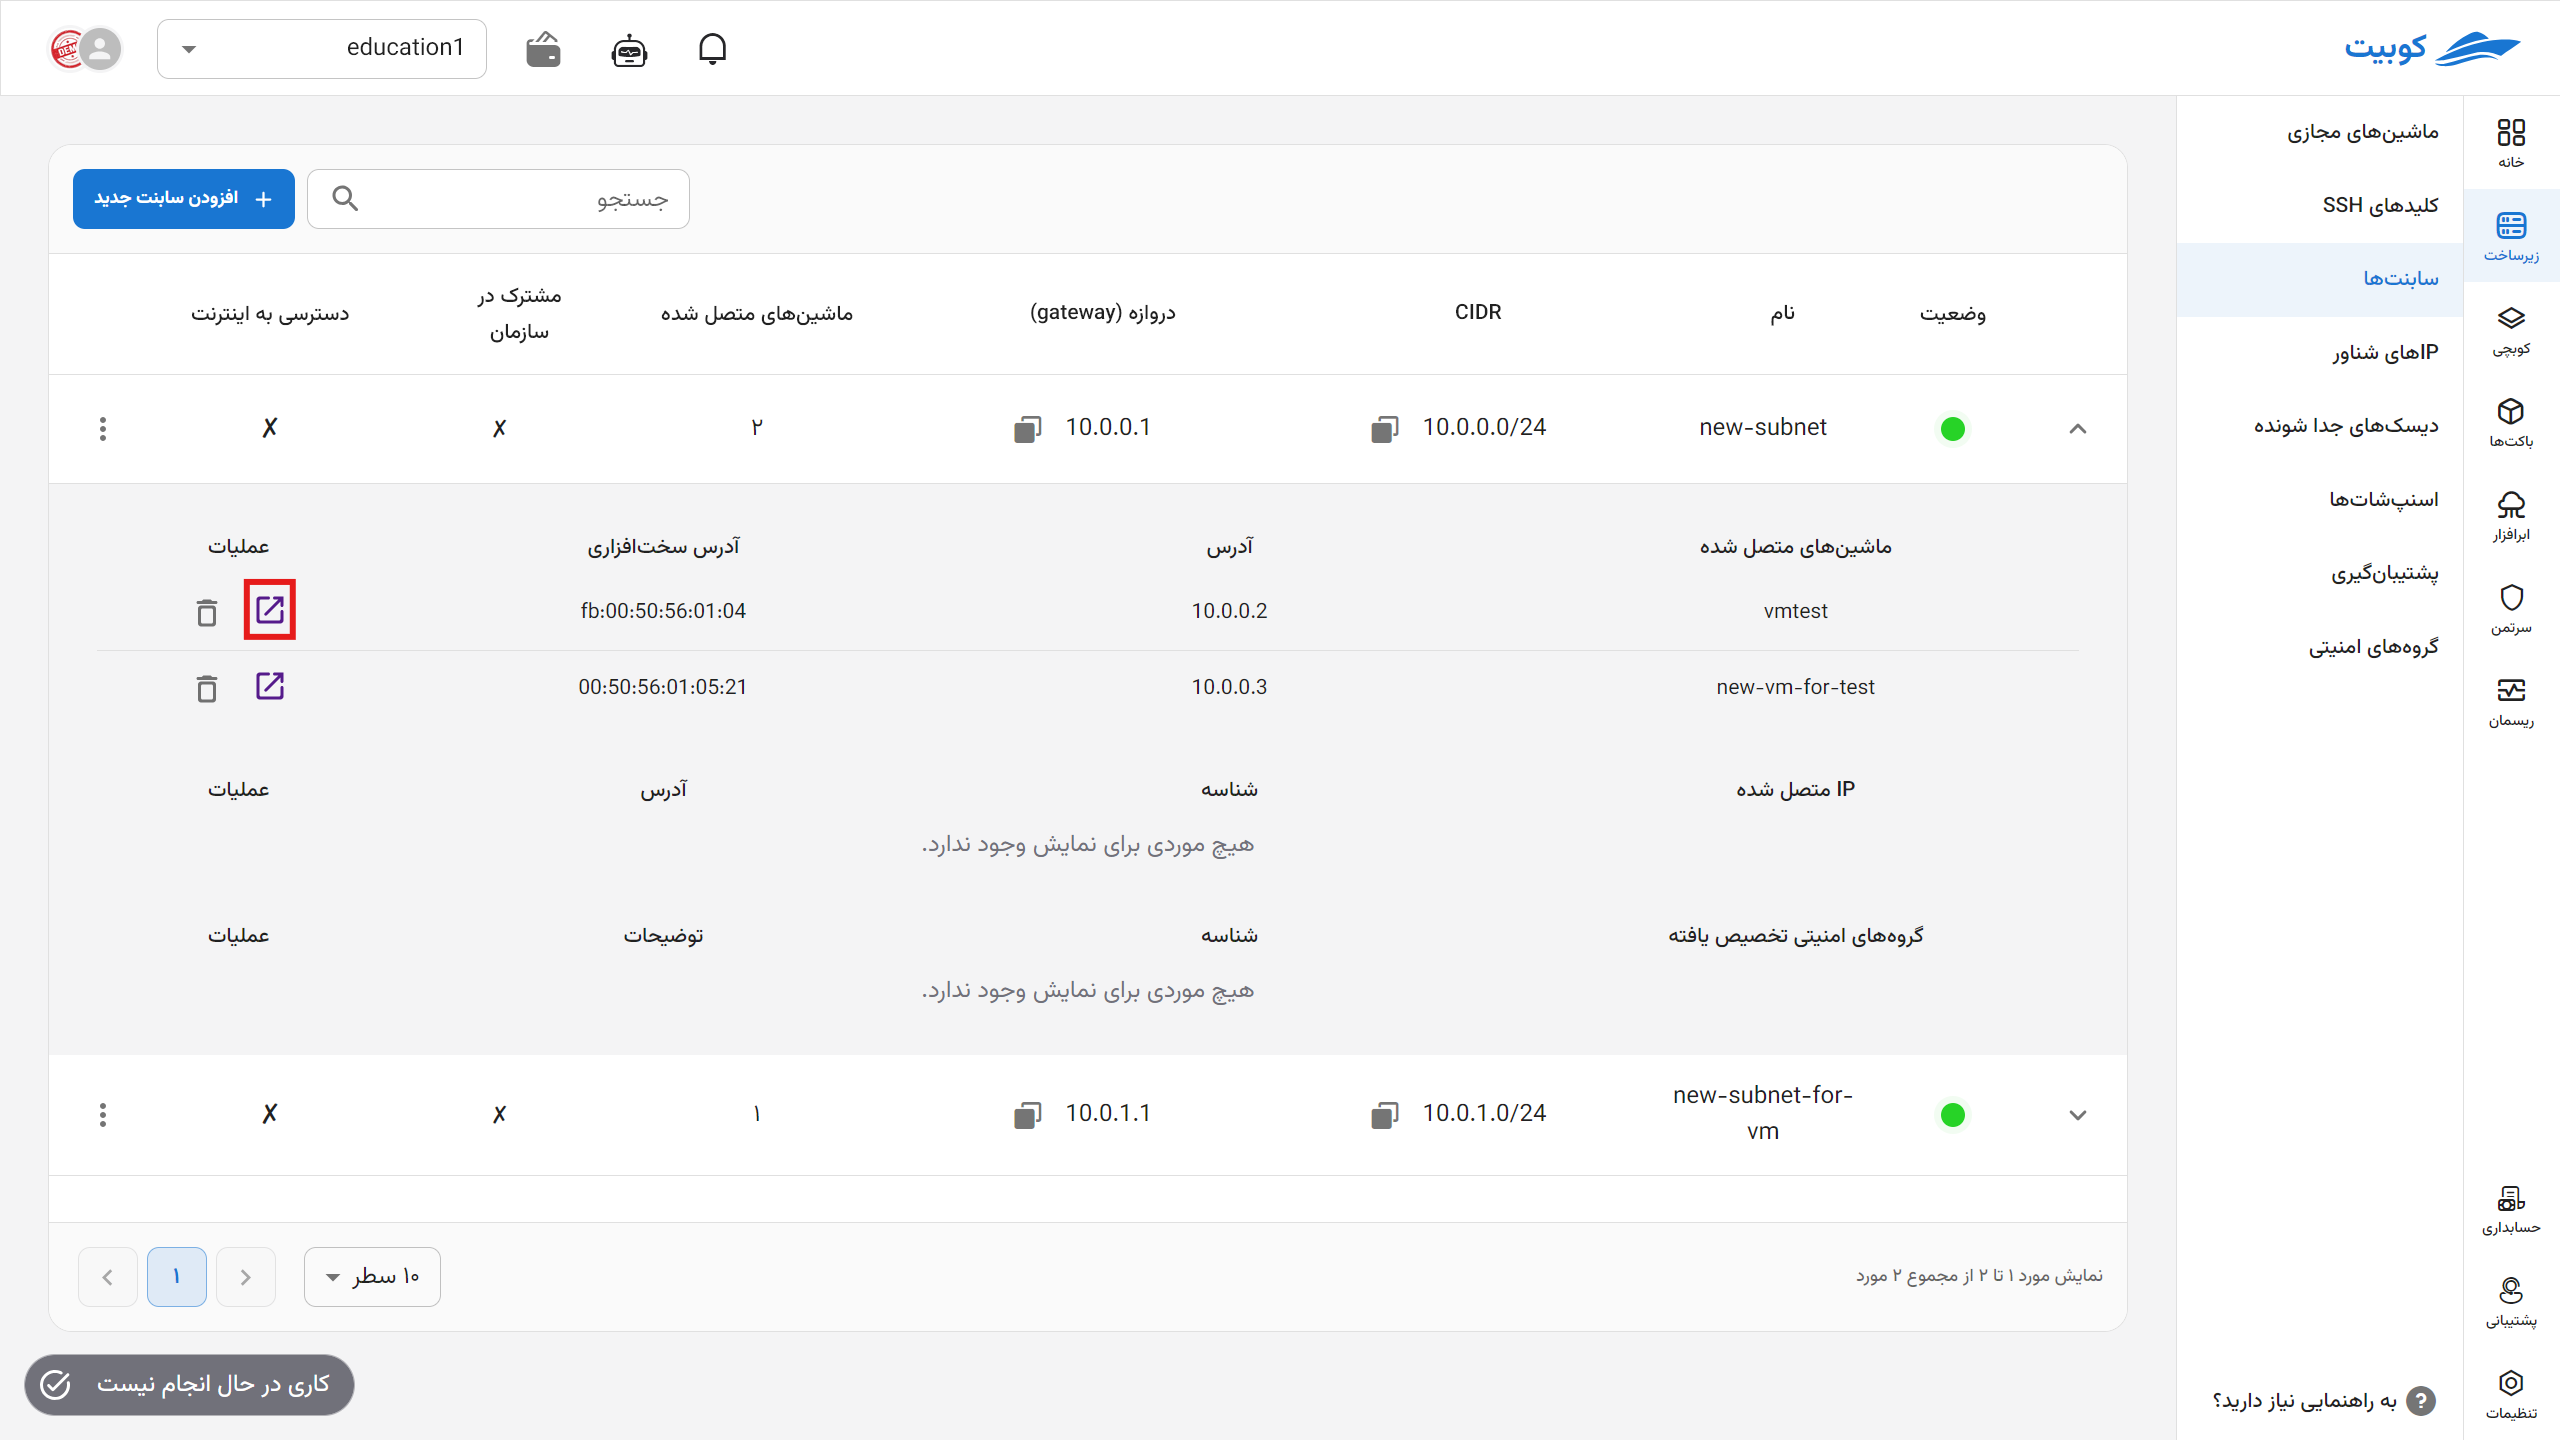
Redirecting to the Virtual Machine
To directly navigate to the overview page of the virtual machine connected to the subnet, click on the specified icon:
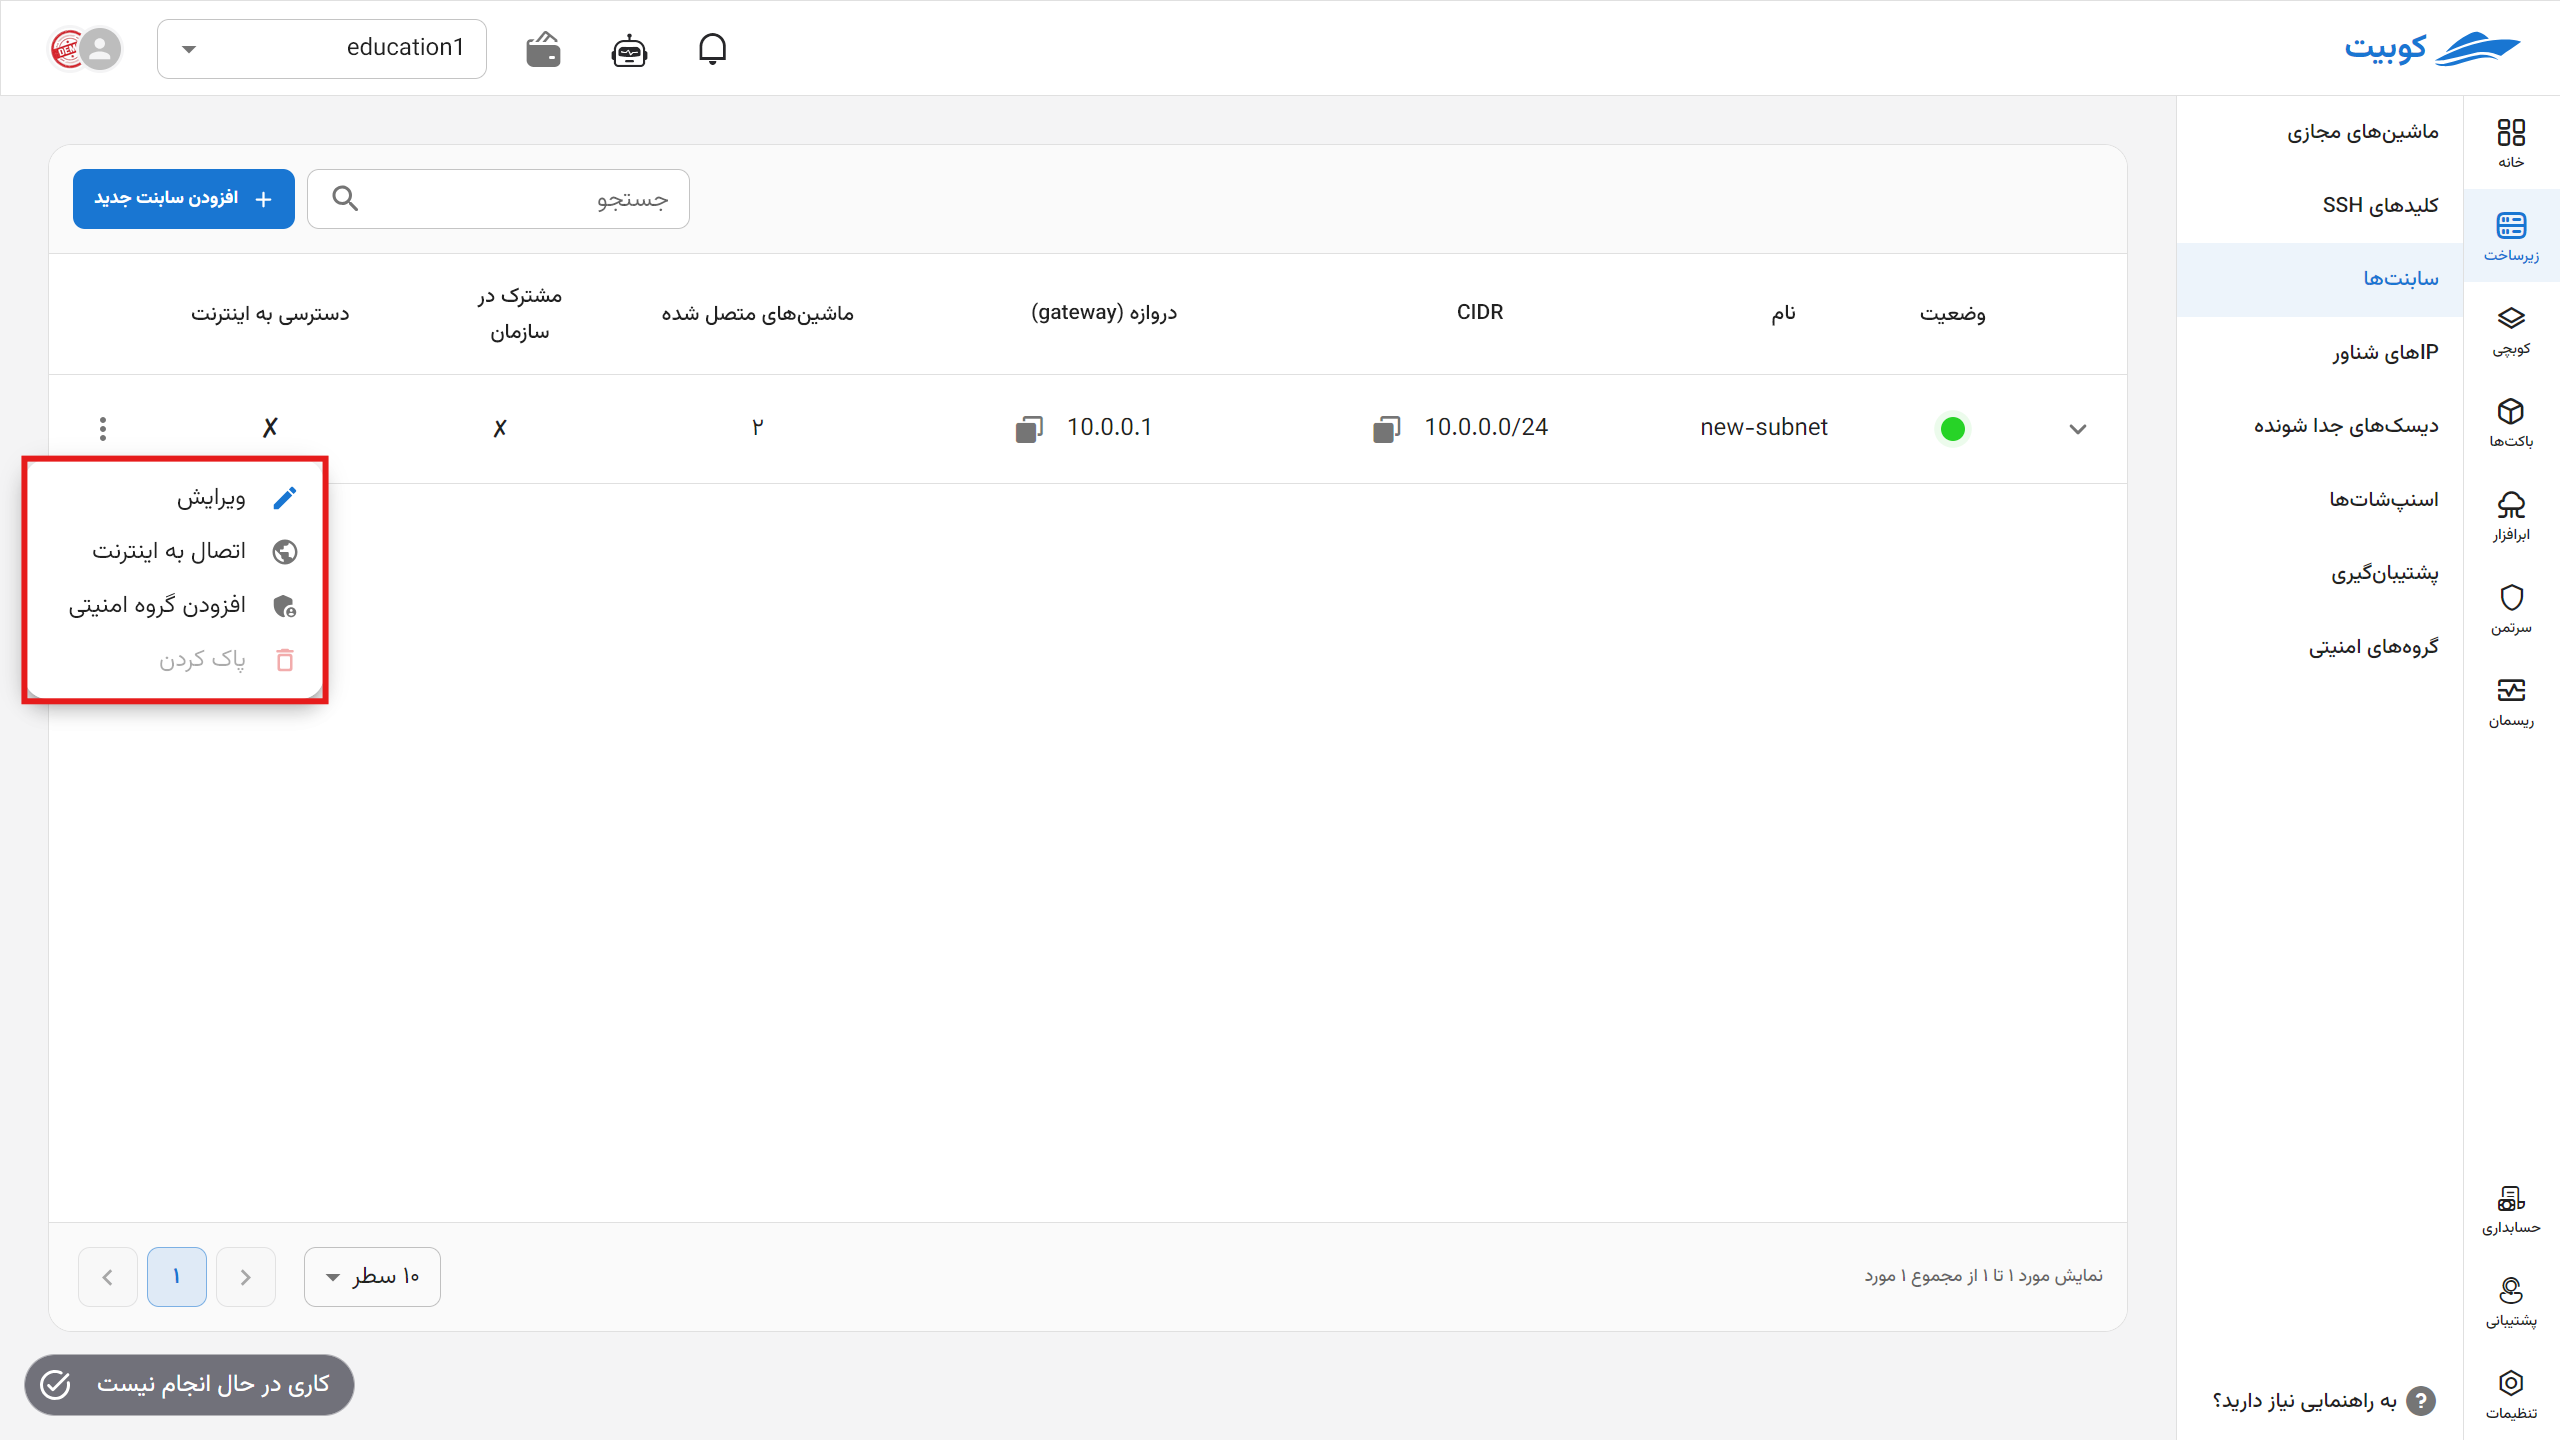
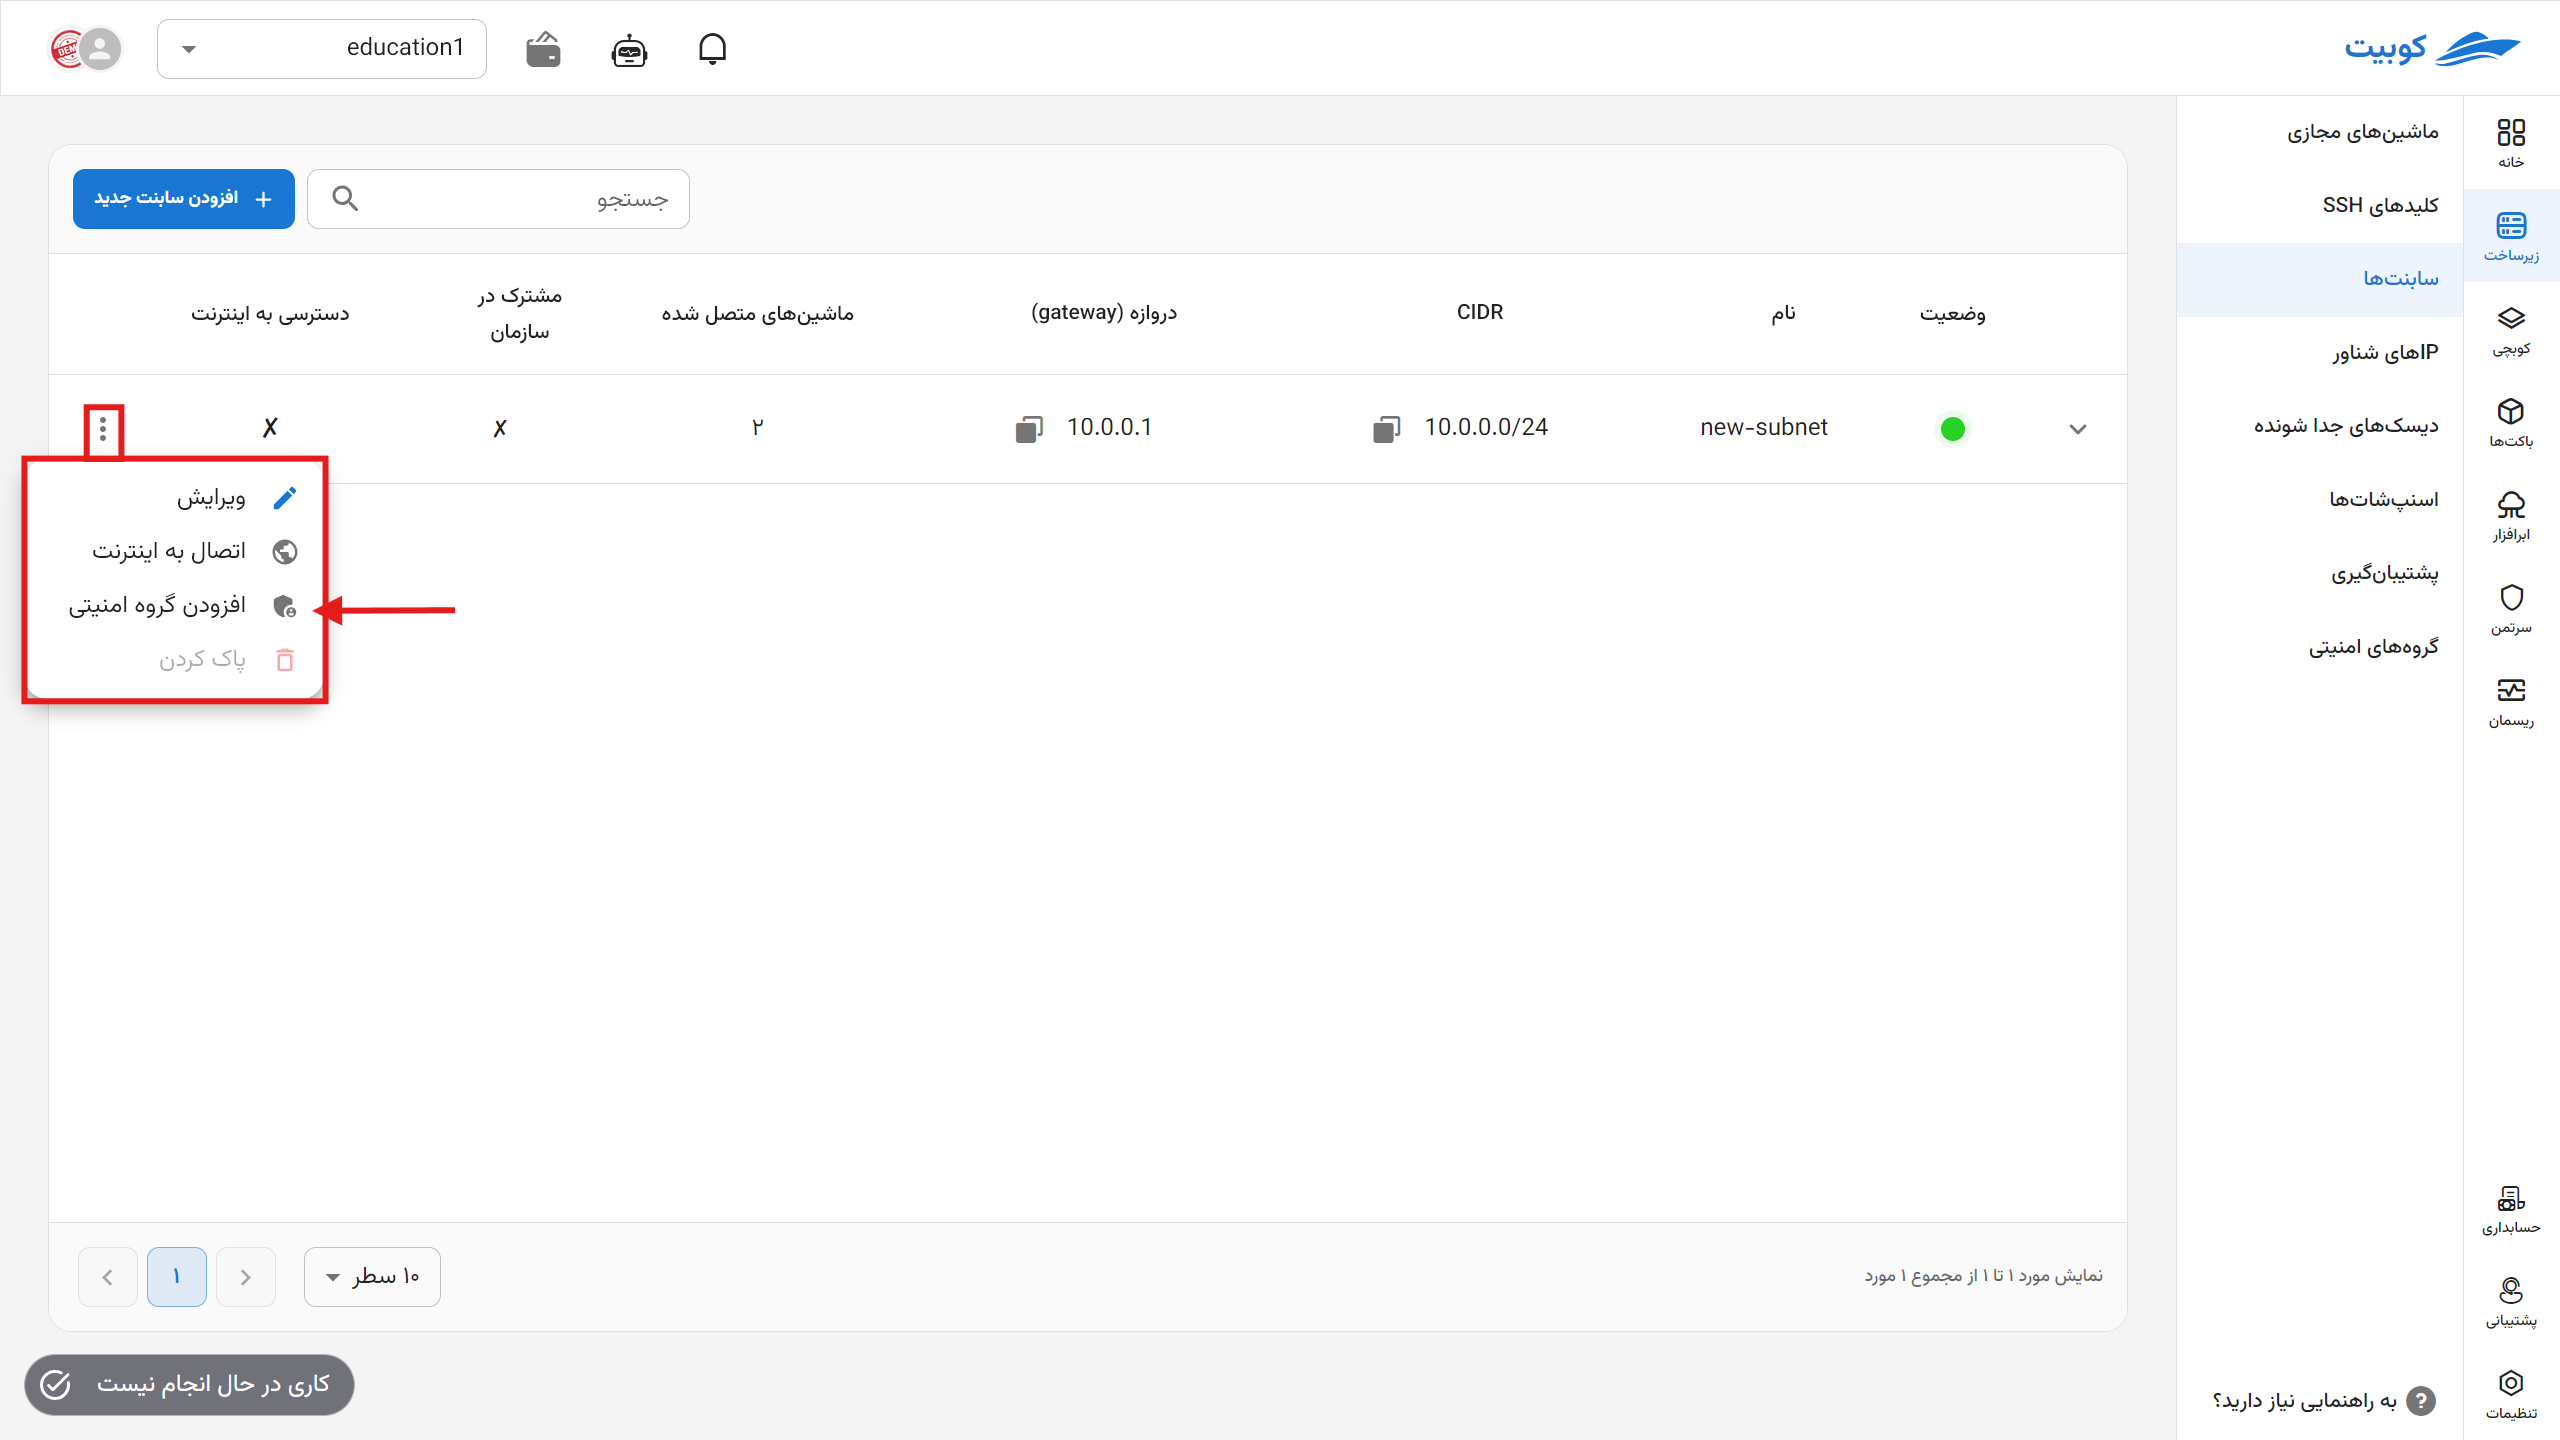
Subnet Operations
To view possible operations for a subnet, click on the three-dot button in the Operations column to display a list of operations:
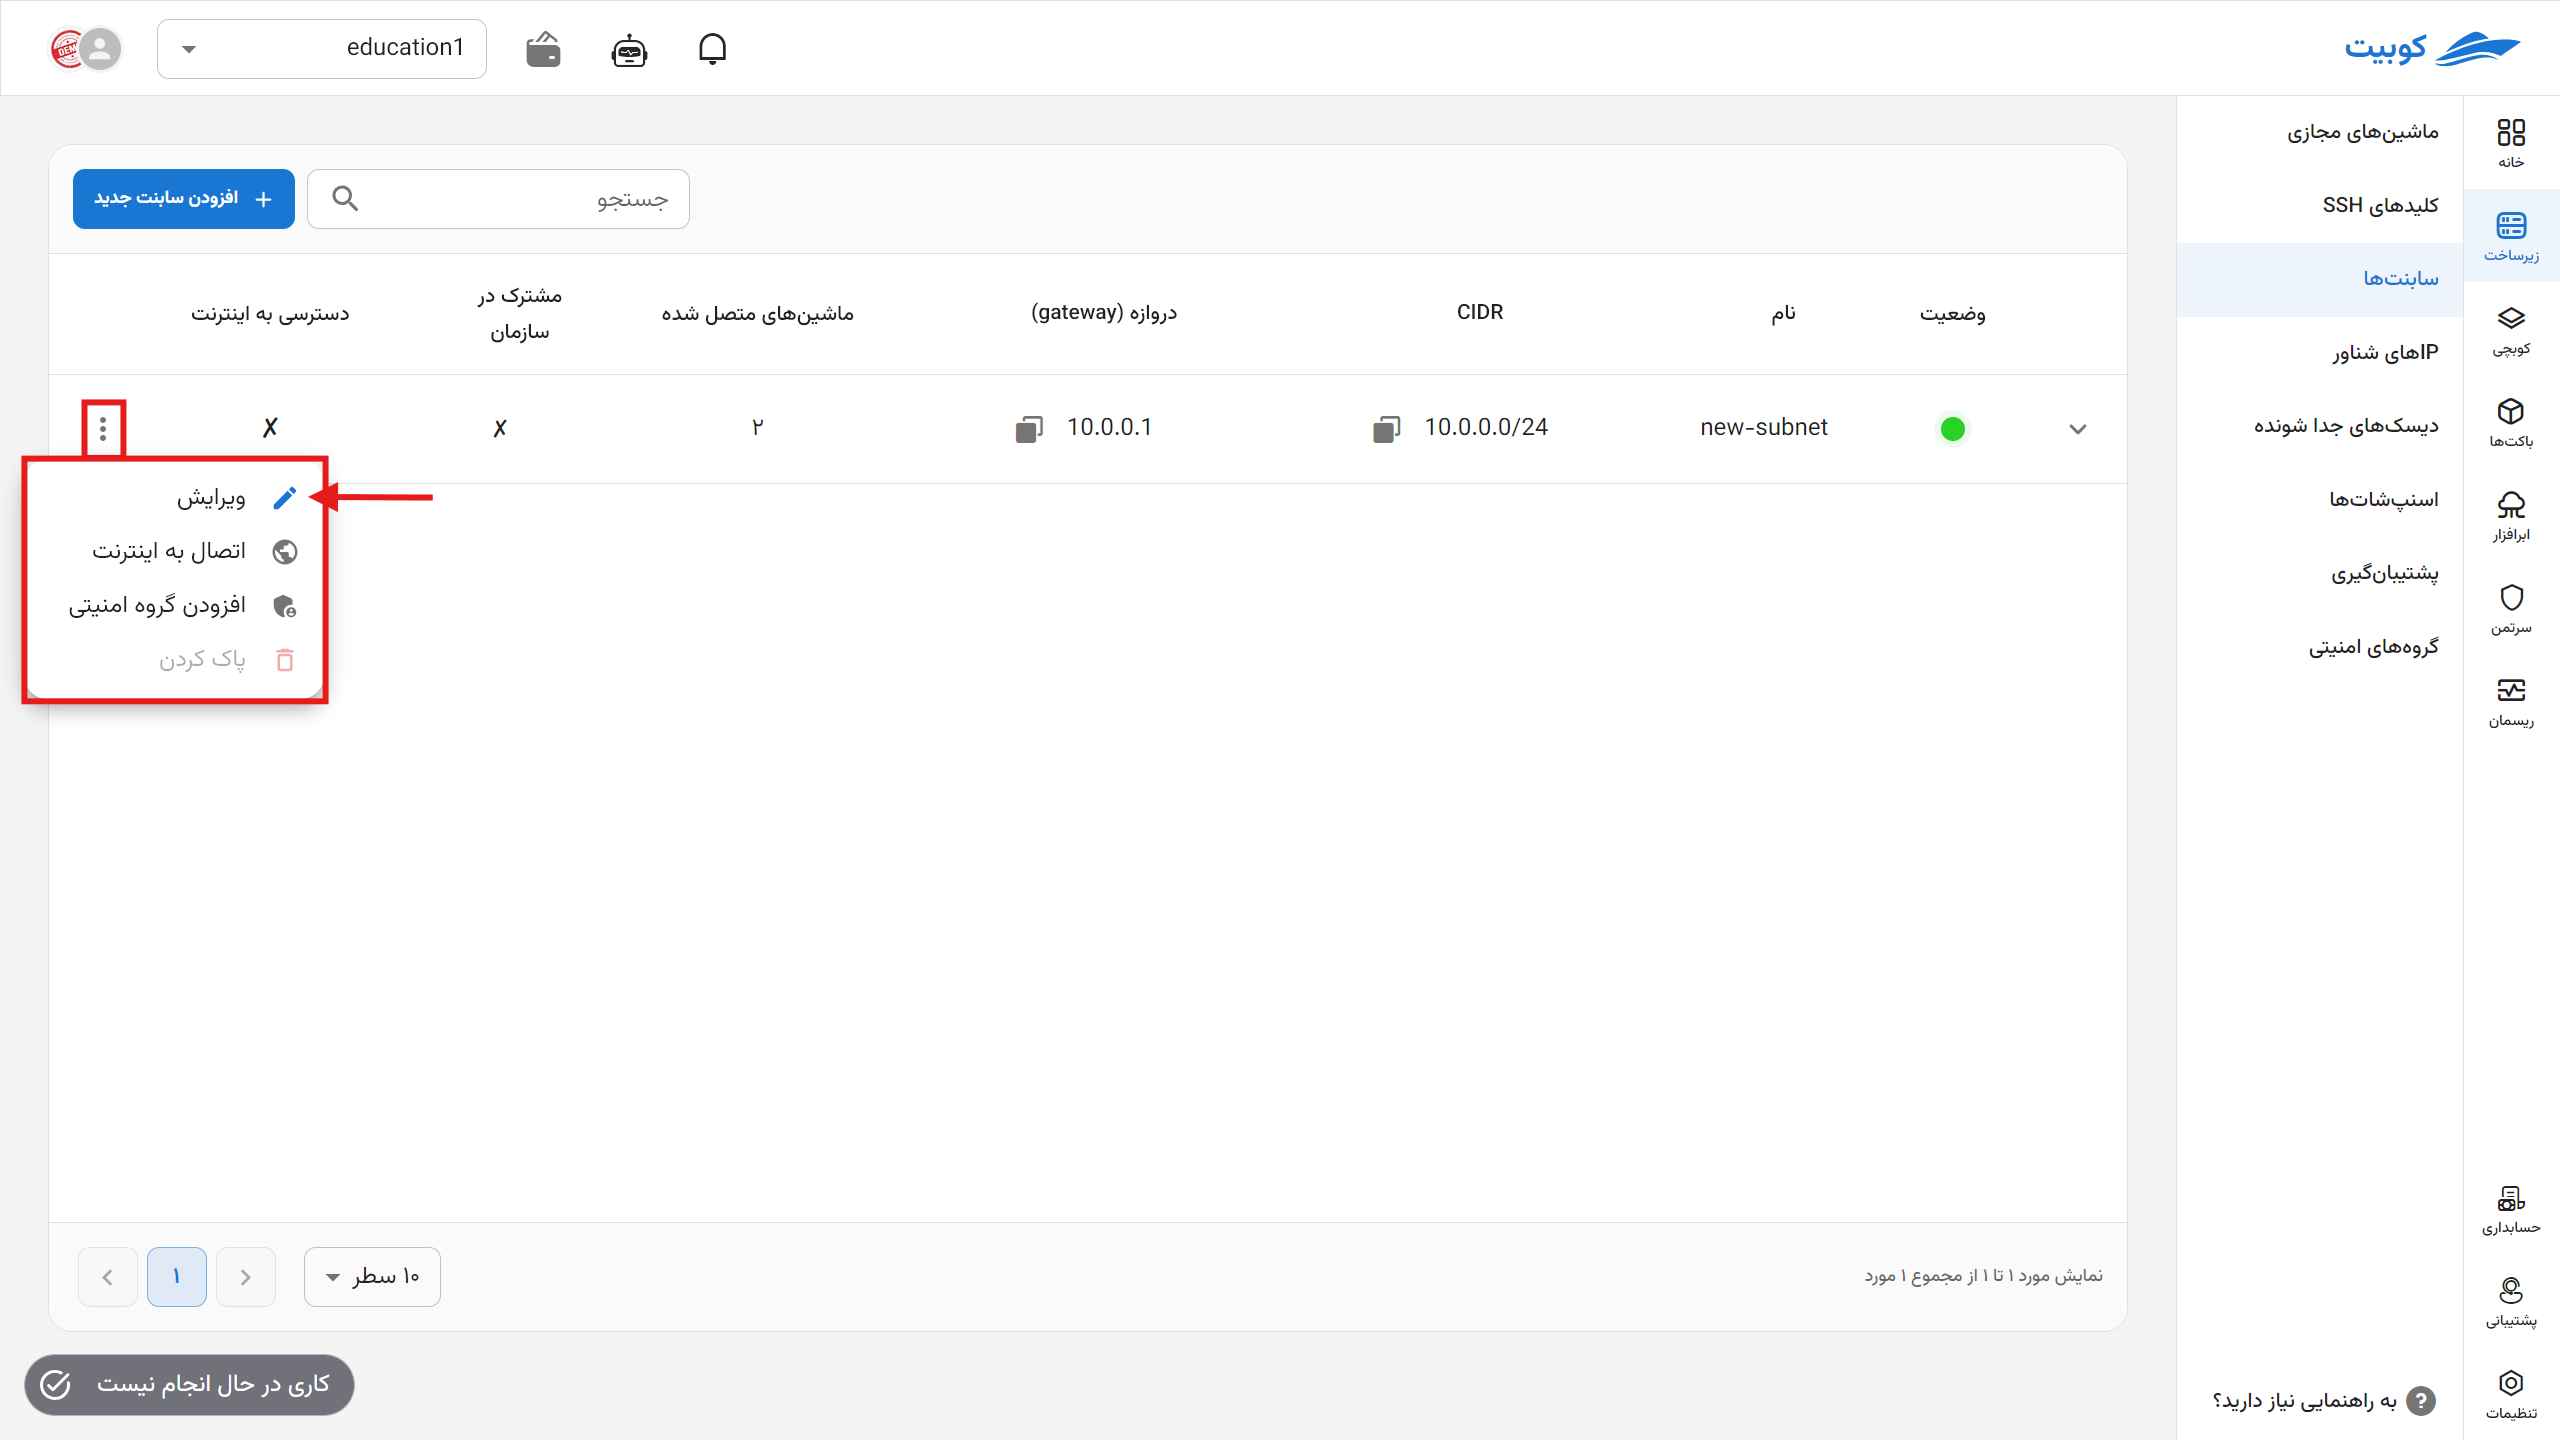
Editing
-
To edit a subnet, click on the Edit option.
-
In the opened dialog, you can only edit the Name and Sharing Status of the subnet. After entering the desired changes, click on the Update Subnet option.
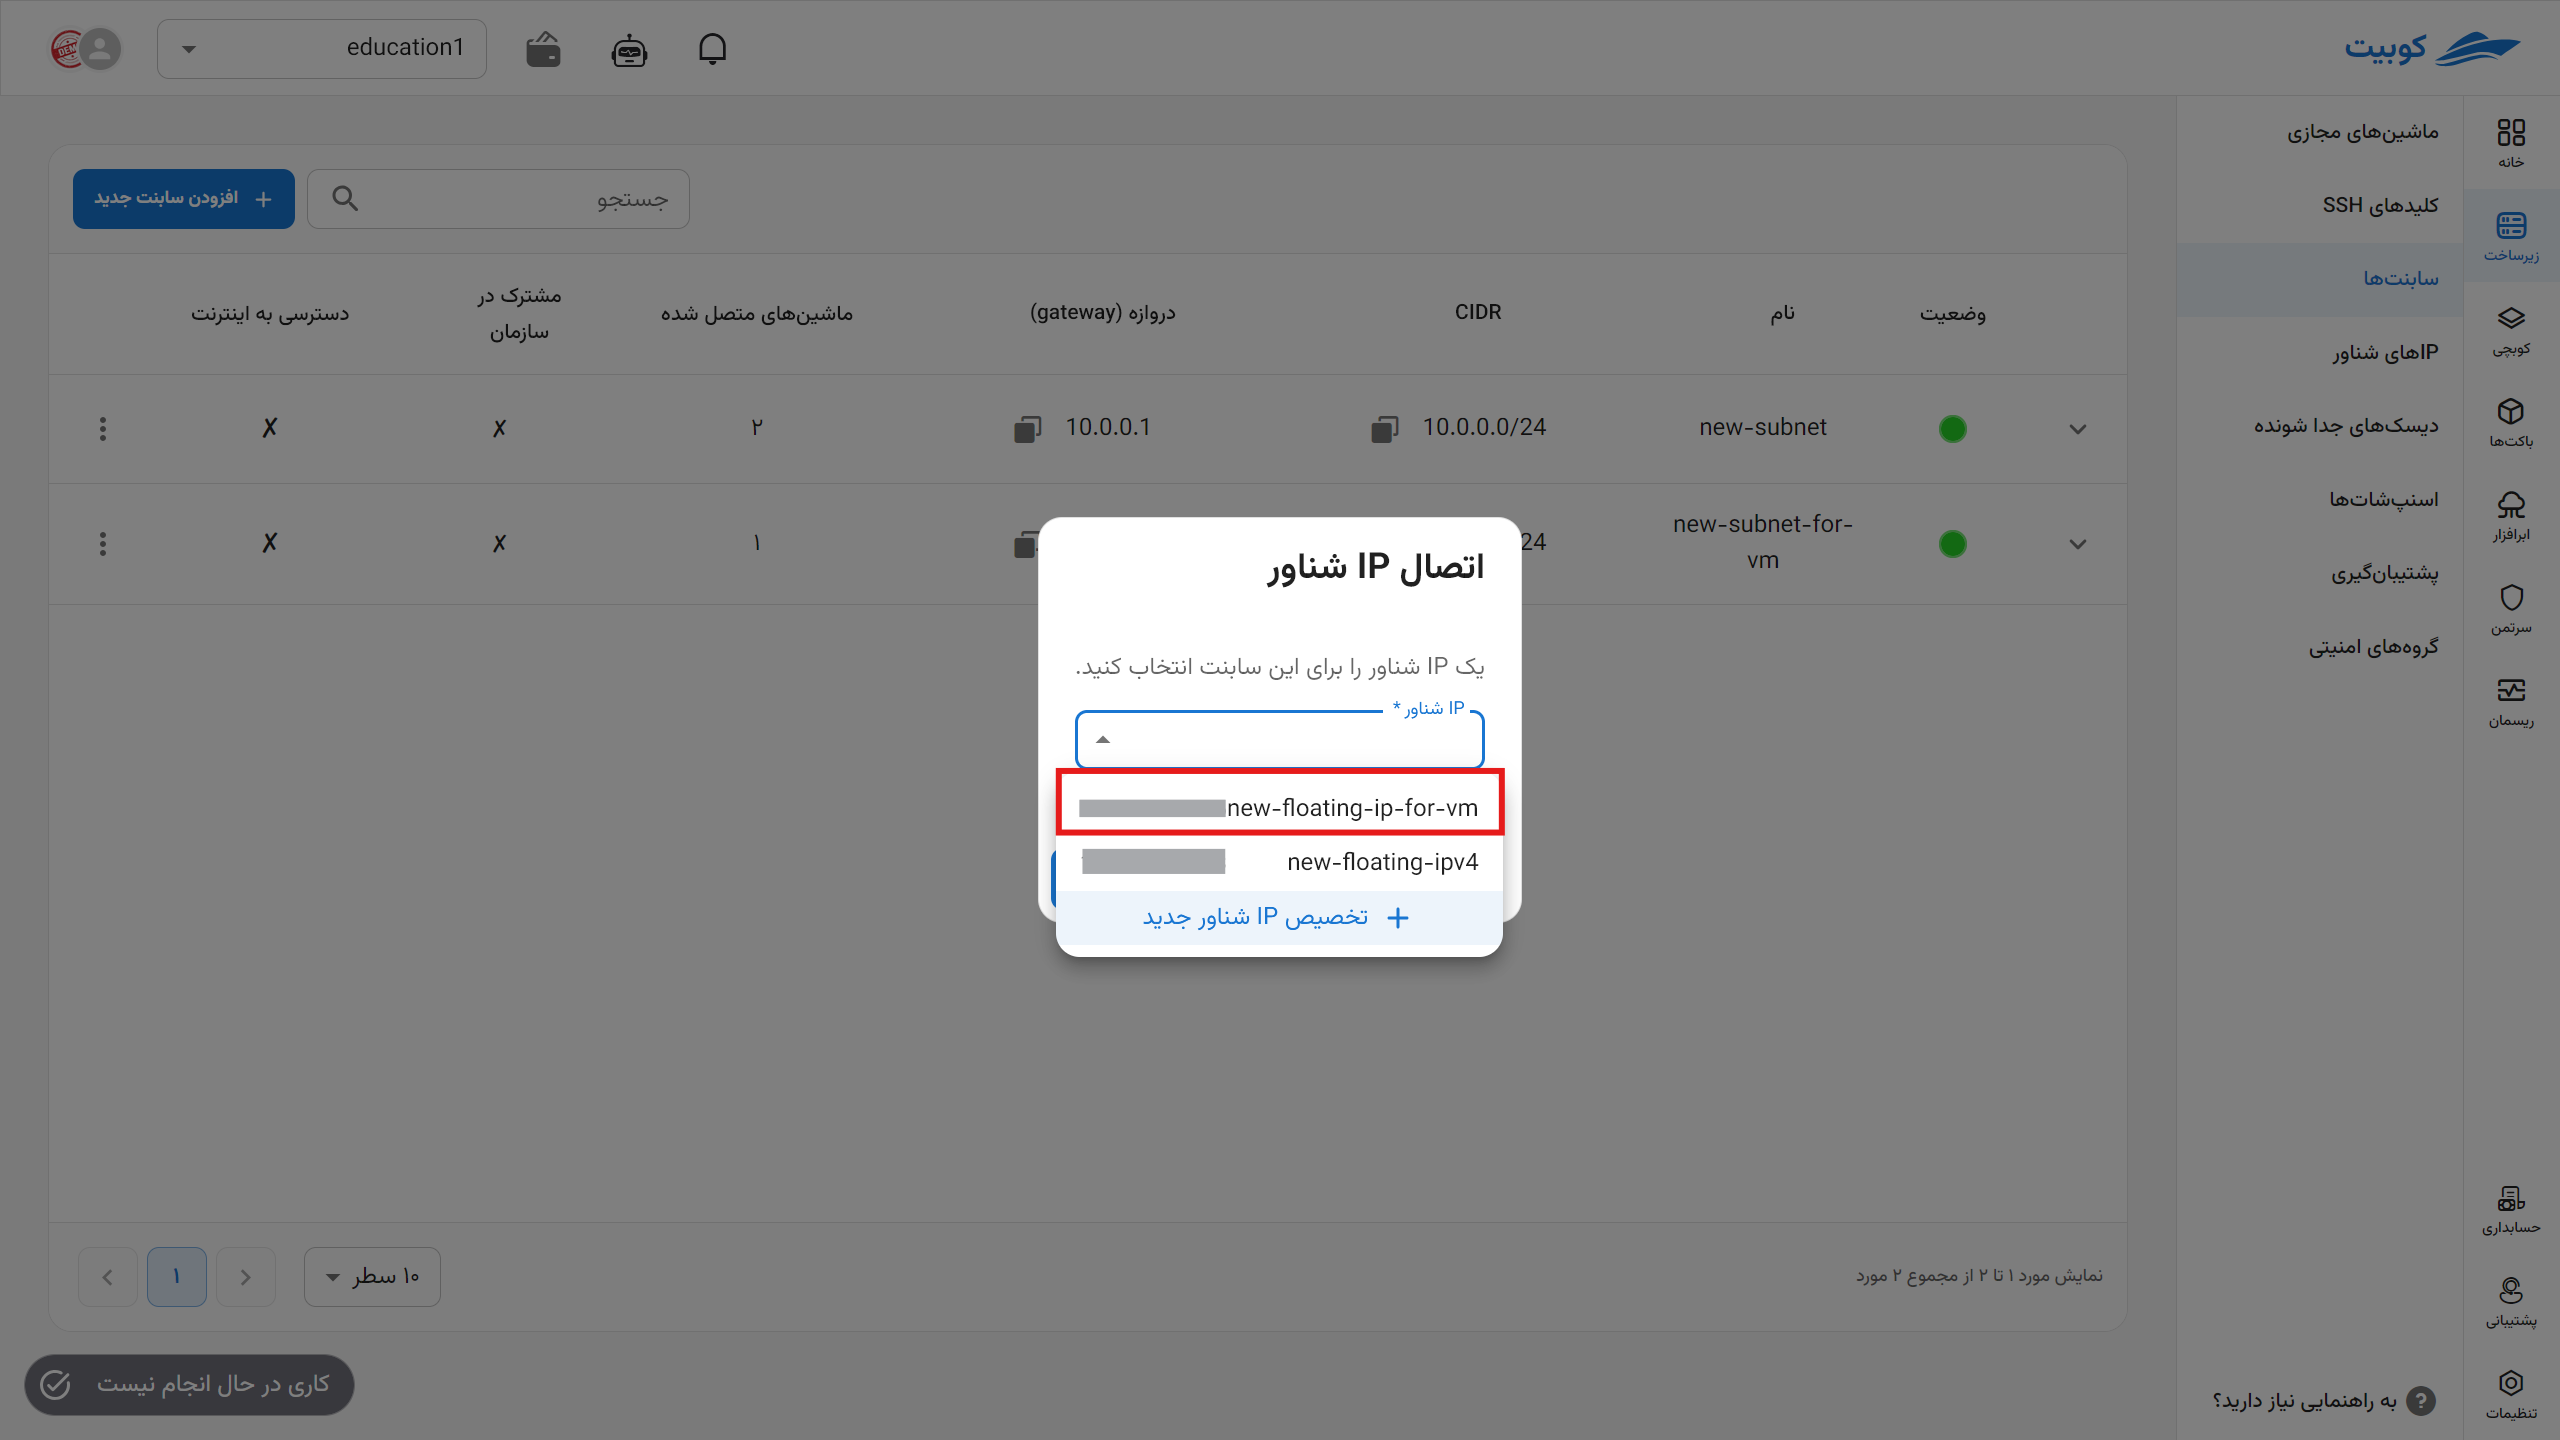
Connecting to the Internet
- To connect a subnet to the internet, click on the Connect to the Internet option.
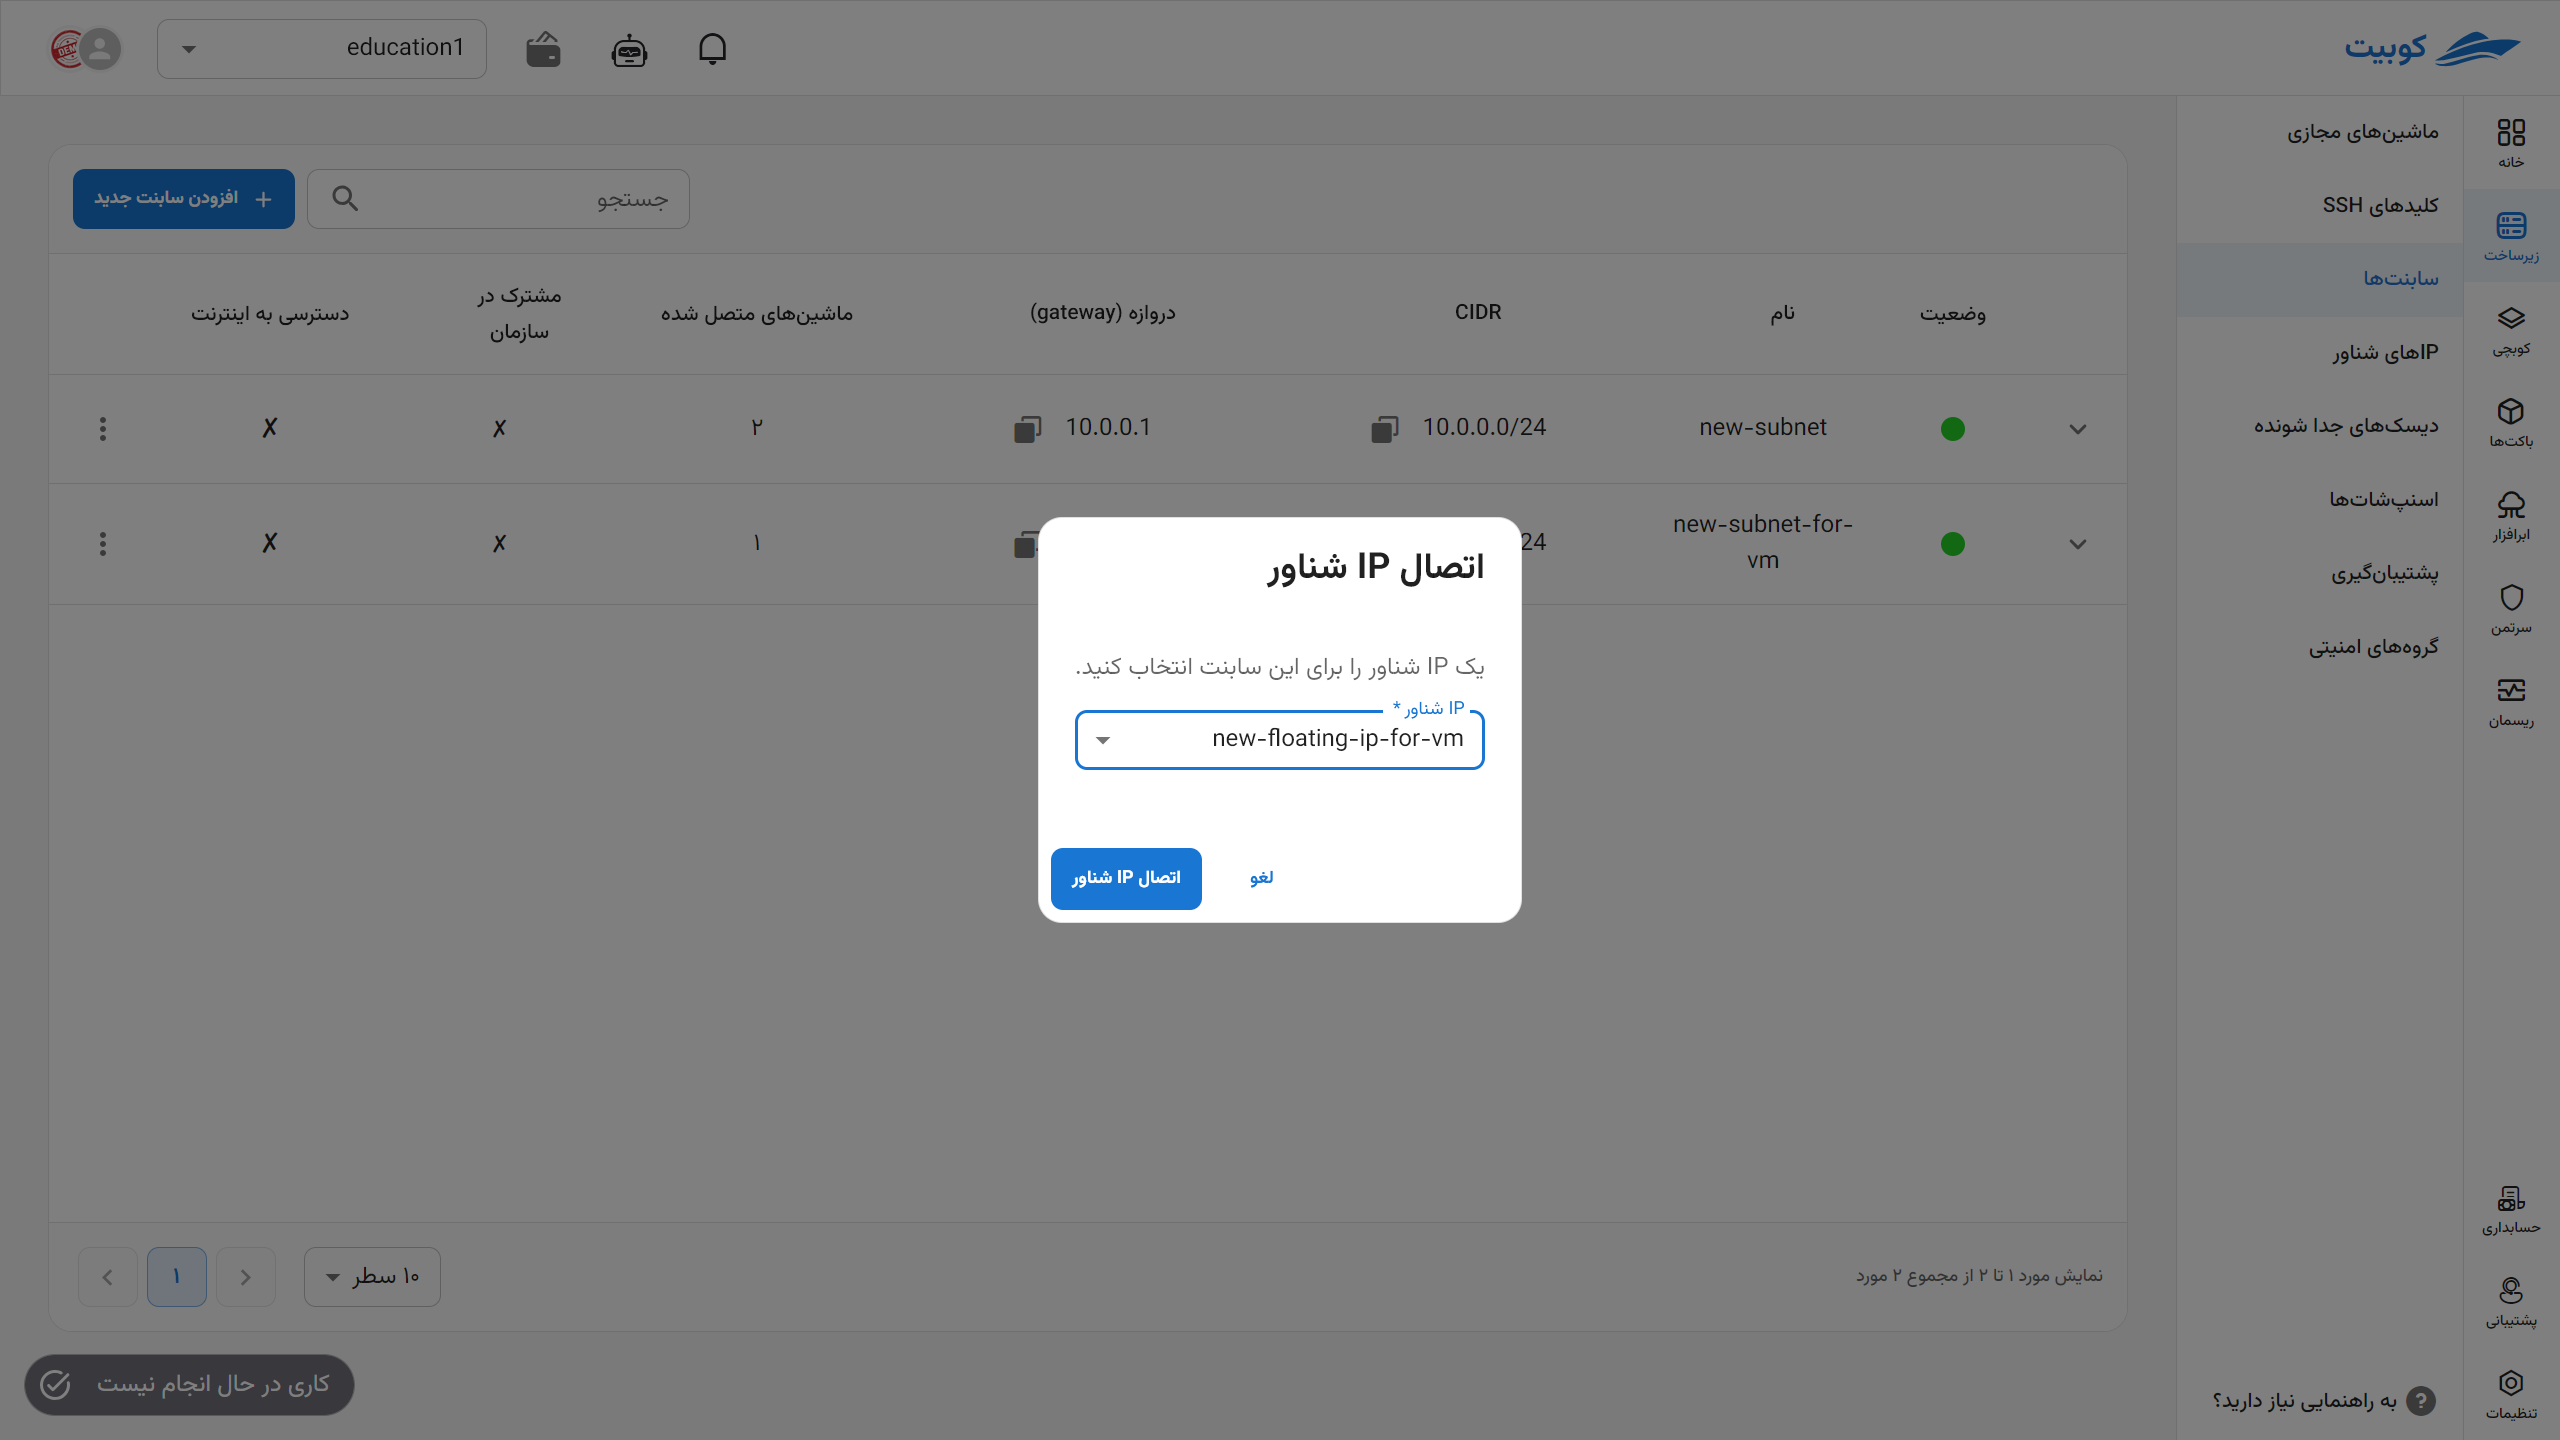
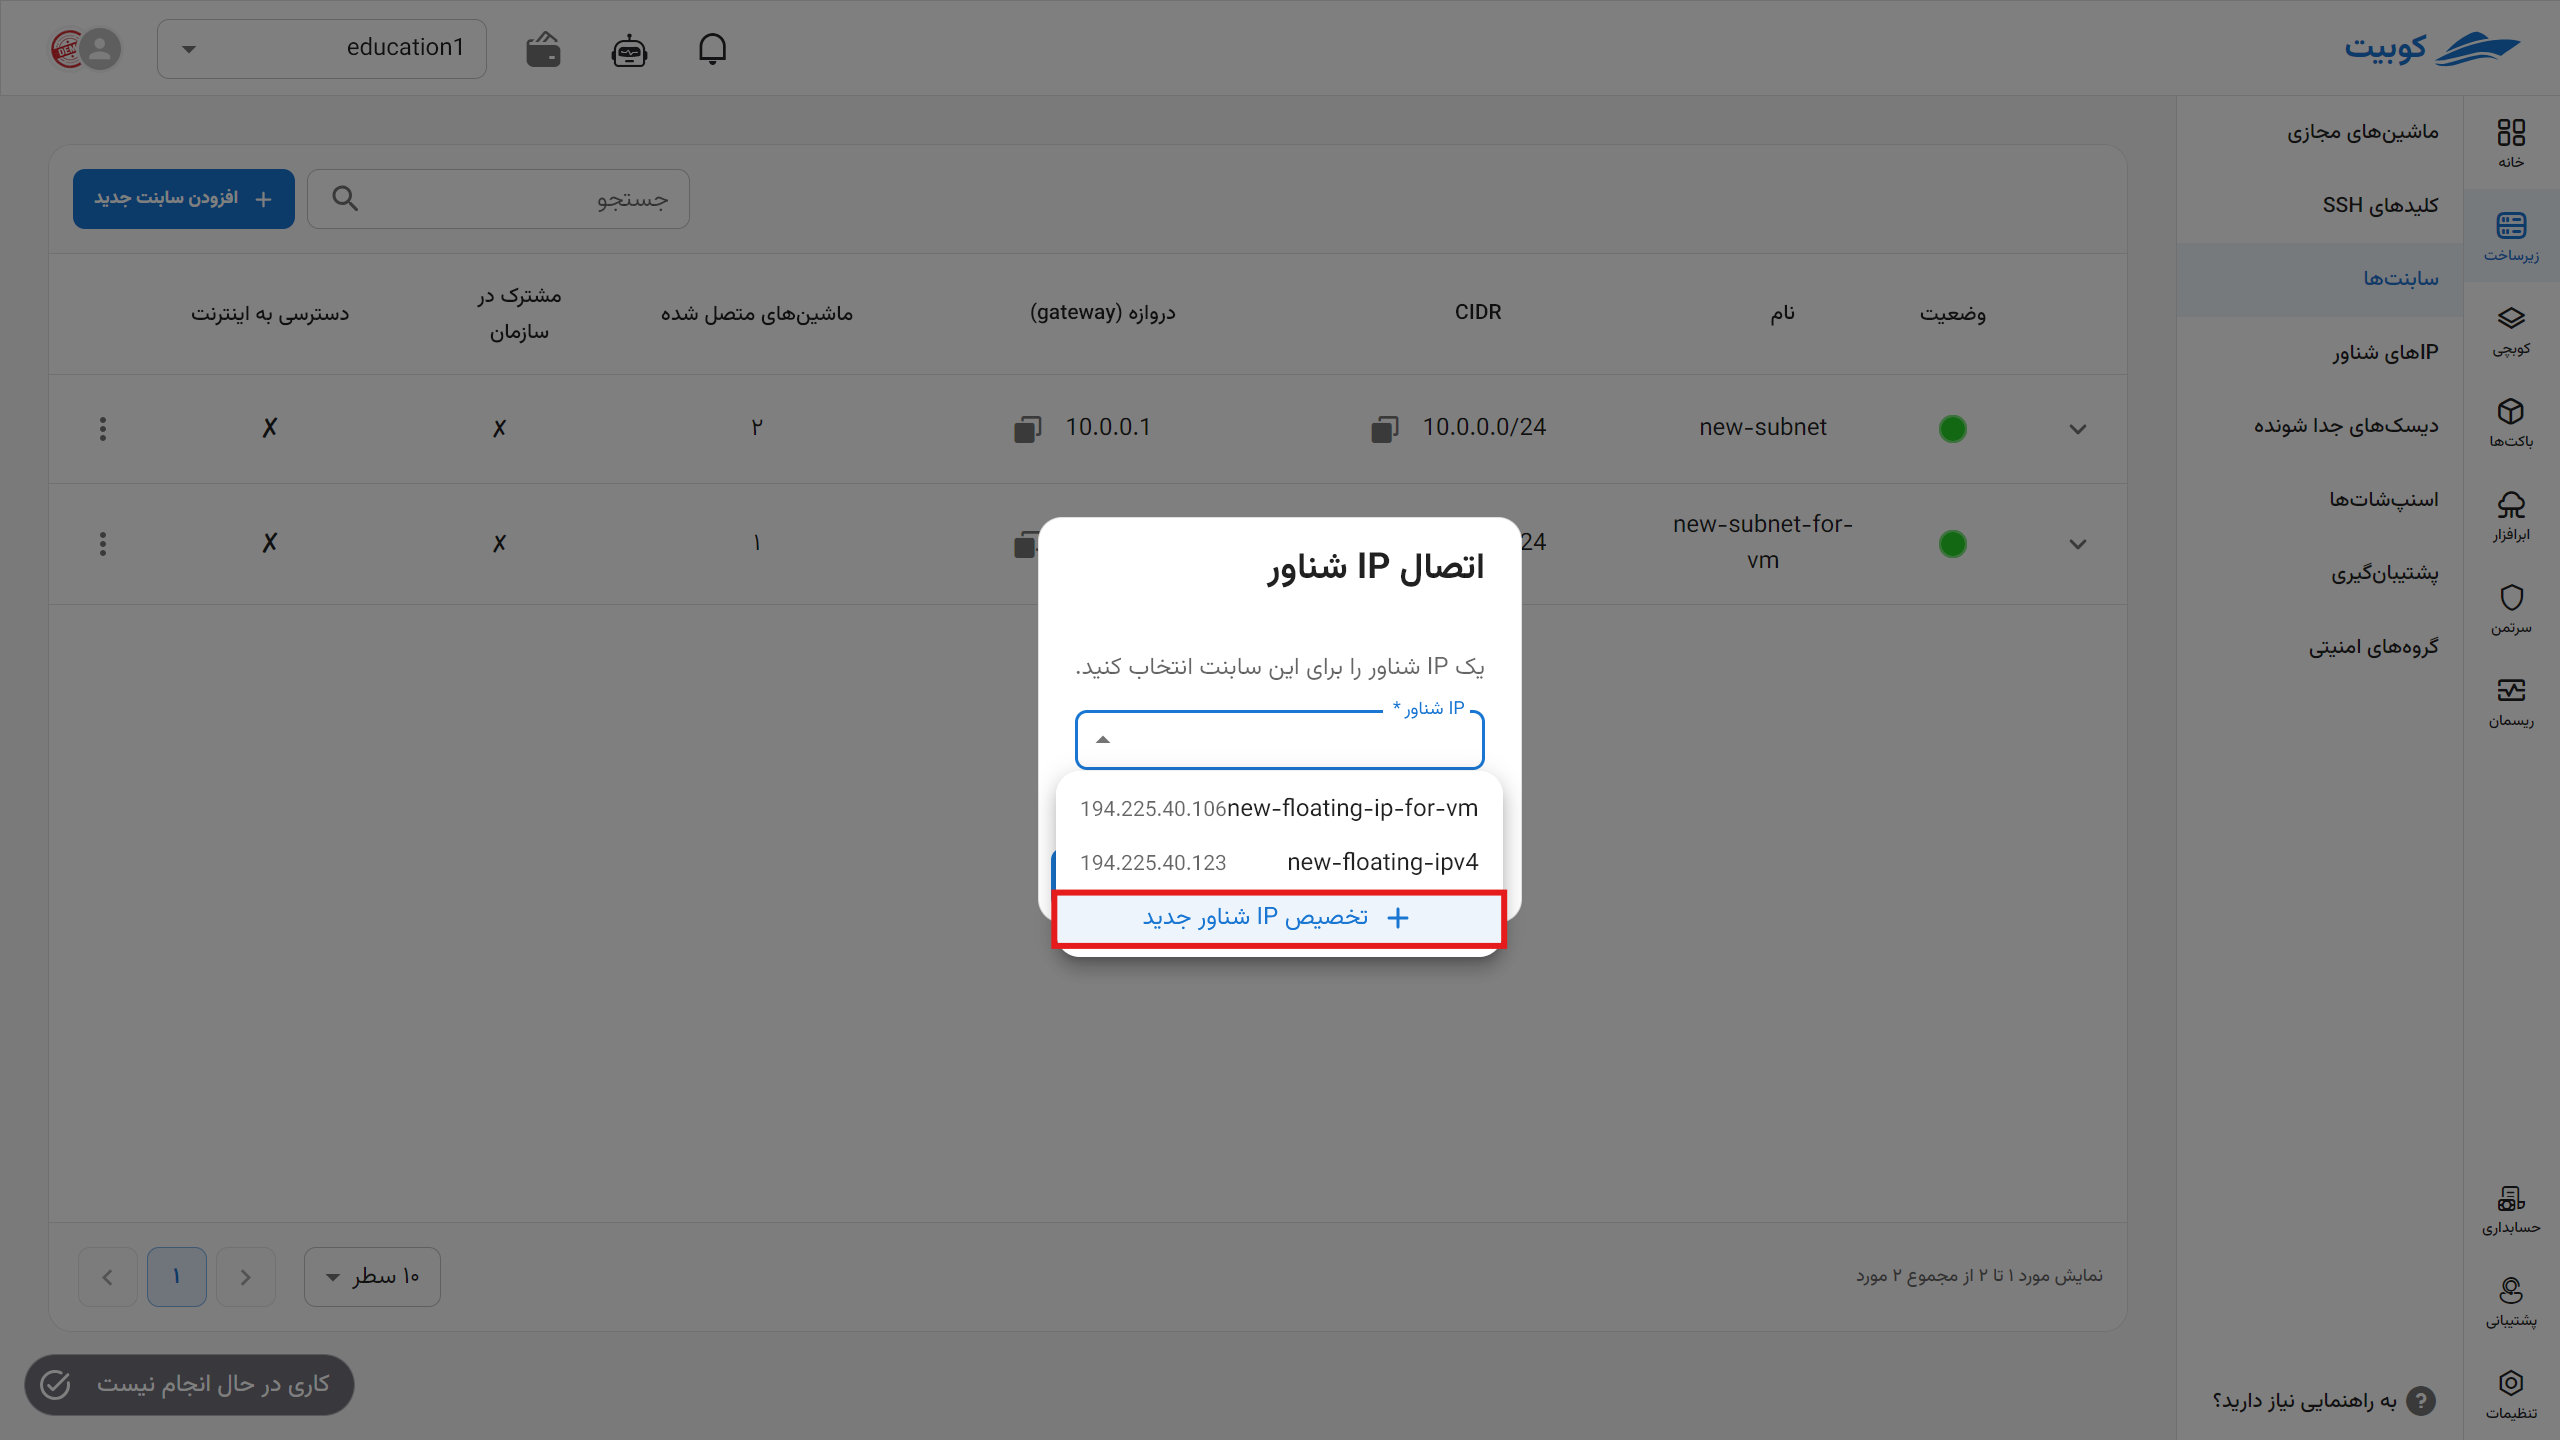
- To establish the connection, a floating IP is required. If a floating IP exists, you can select from the list of unassigned floating IPs or create a new floating IP.

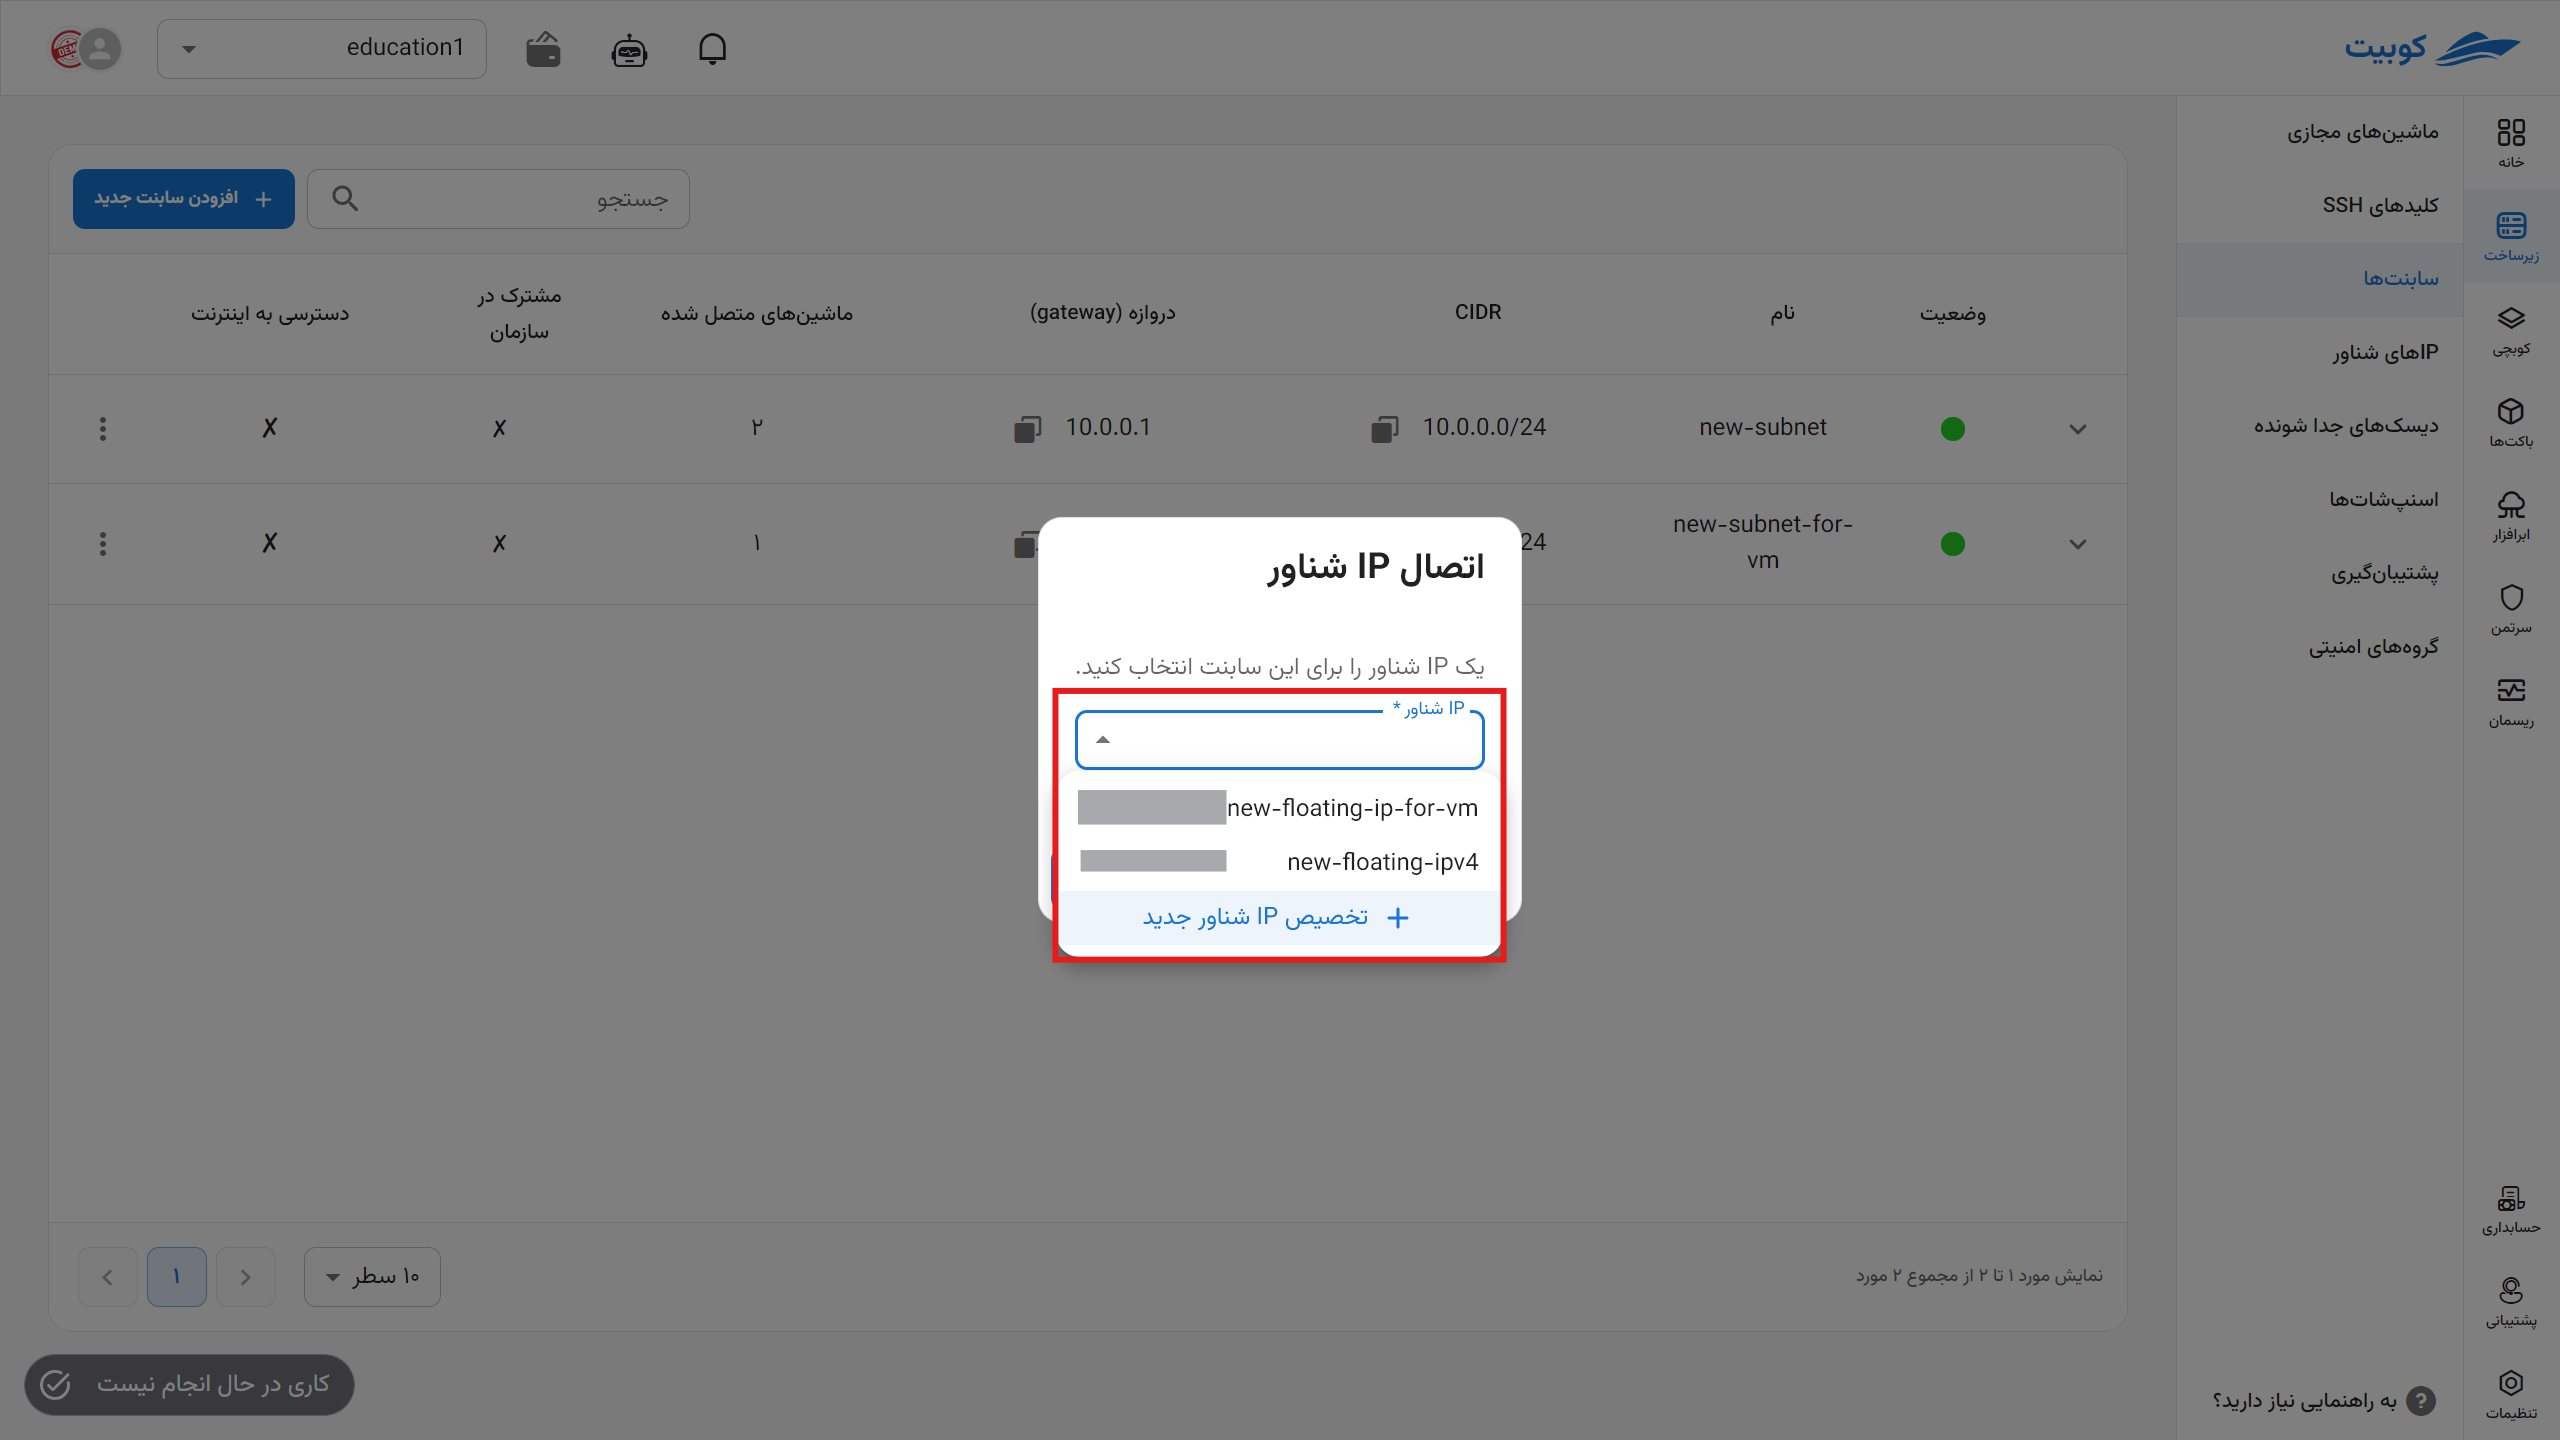
Selecting from Existing Floating IPs
Assigning a New Floating IP
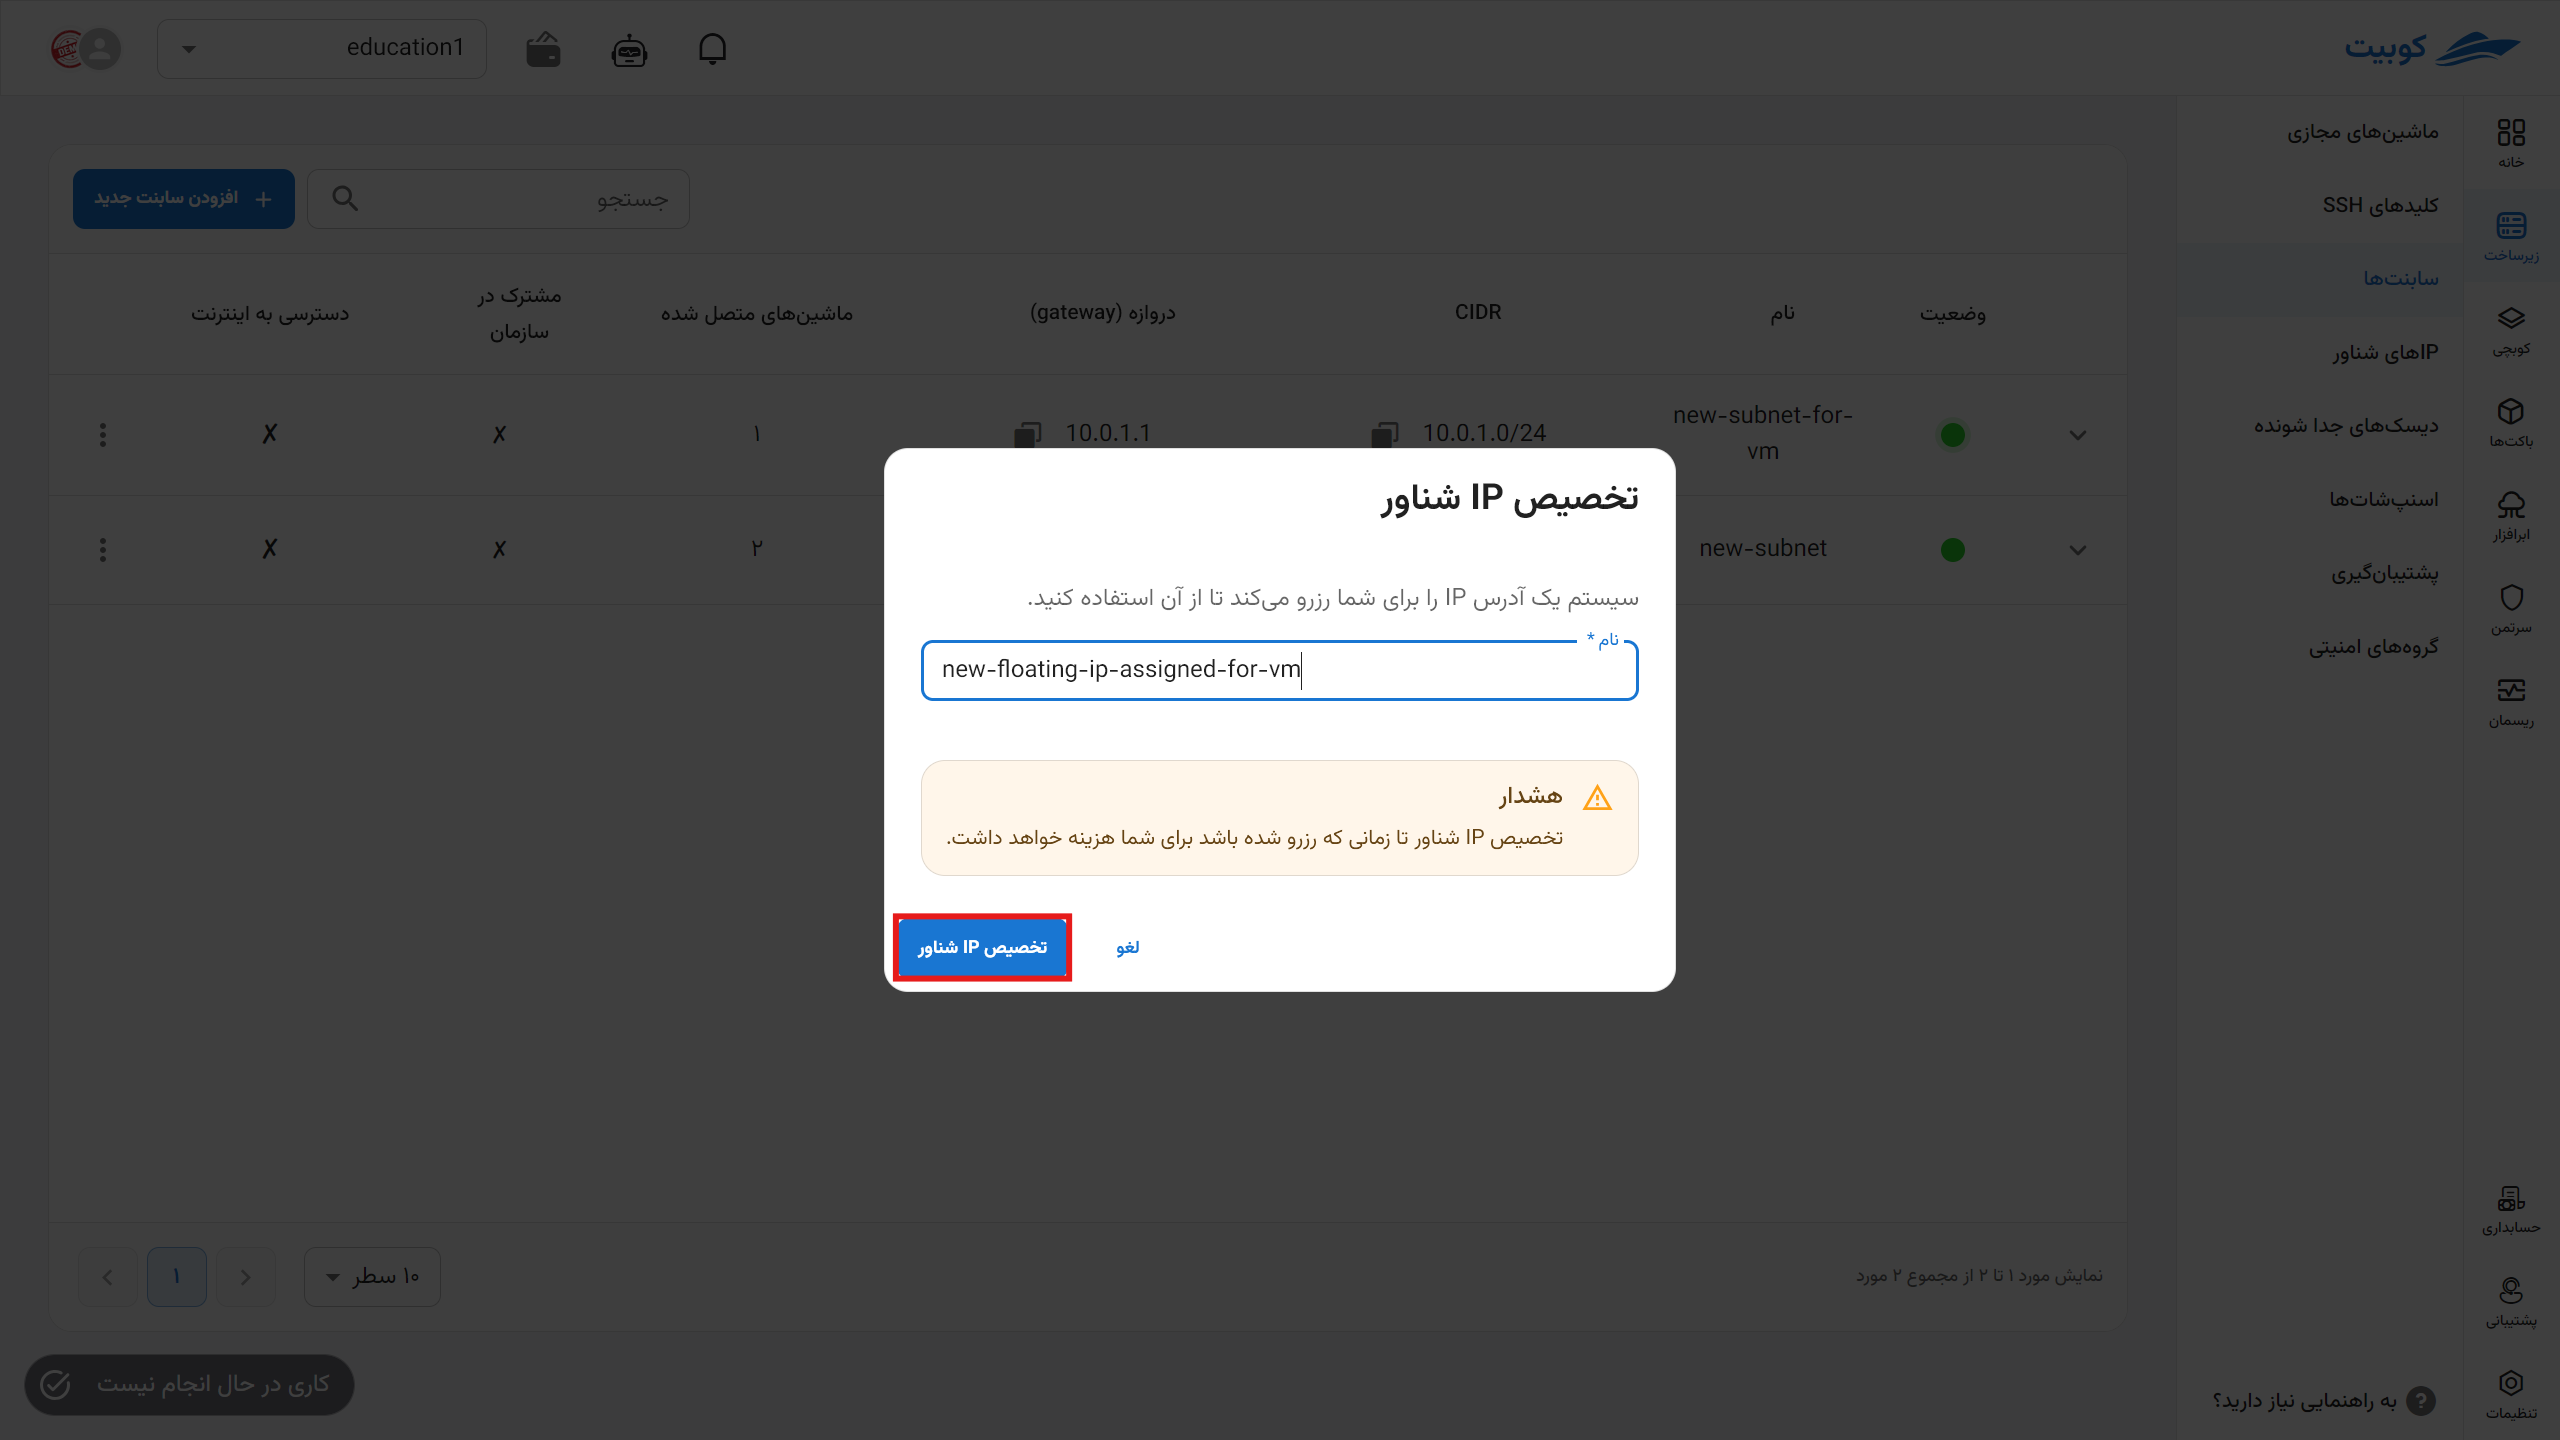
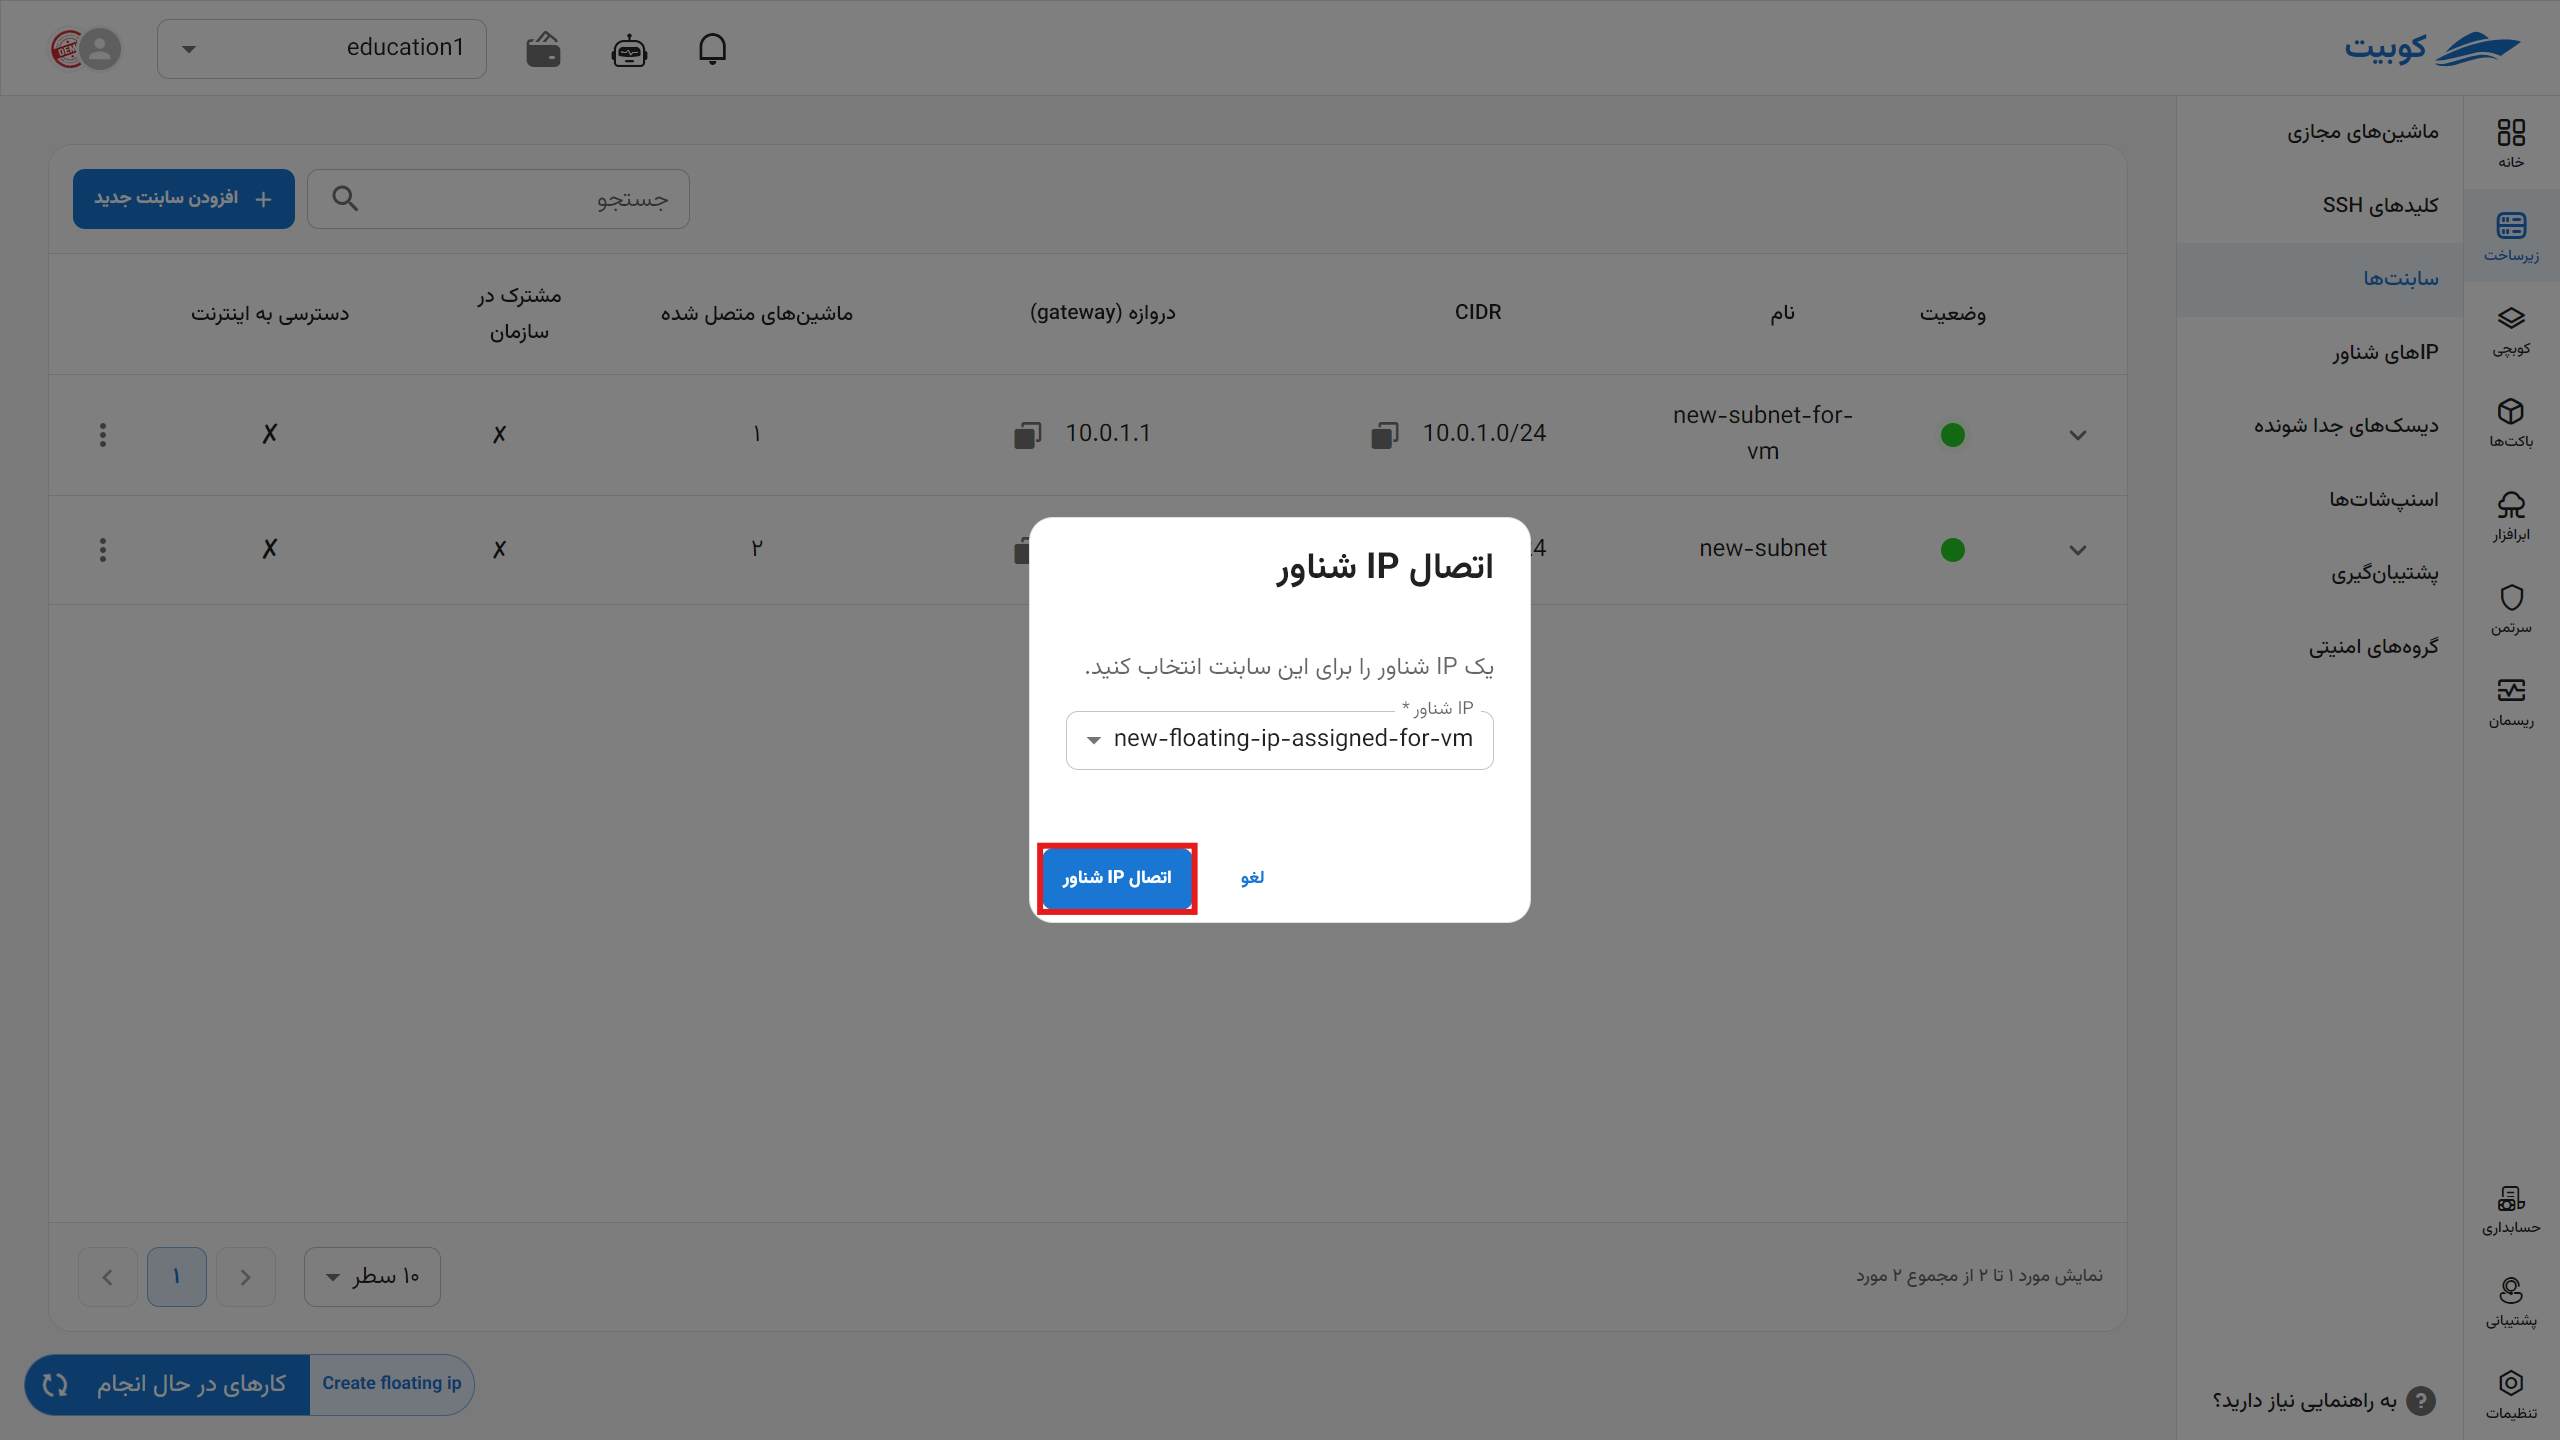
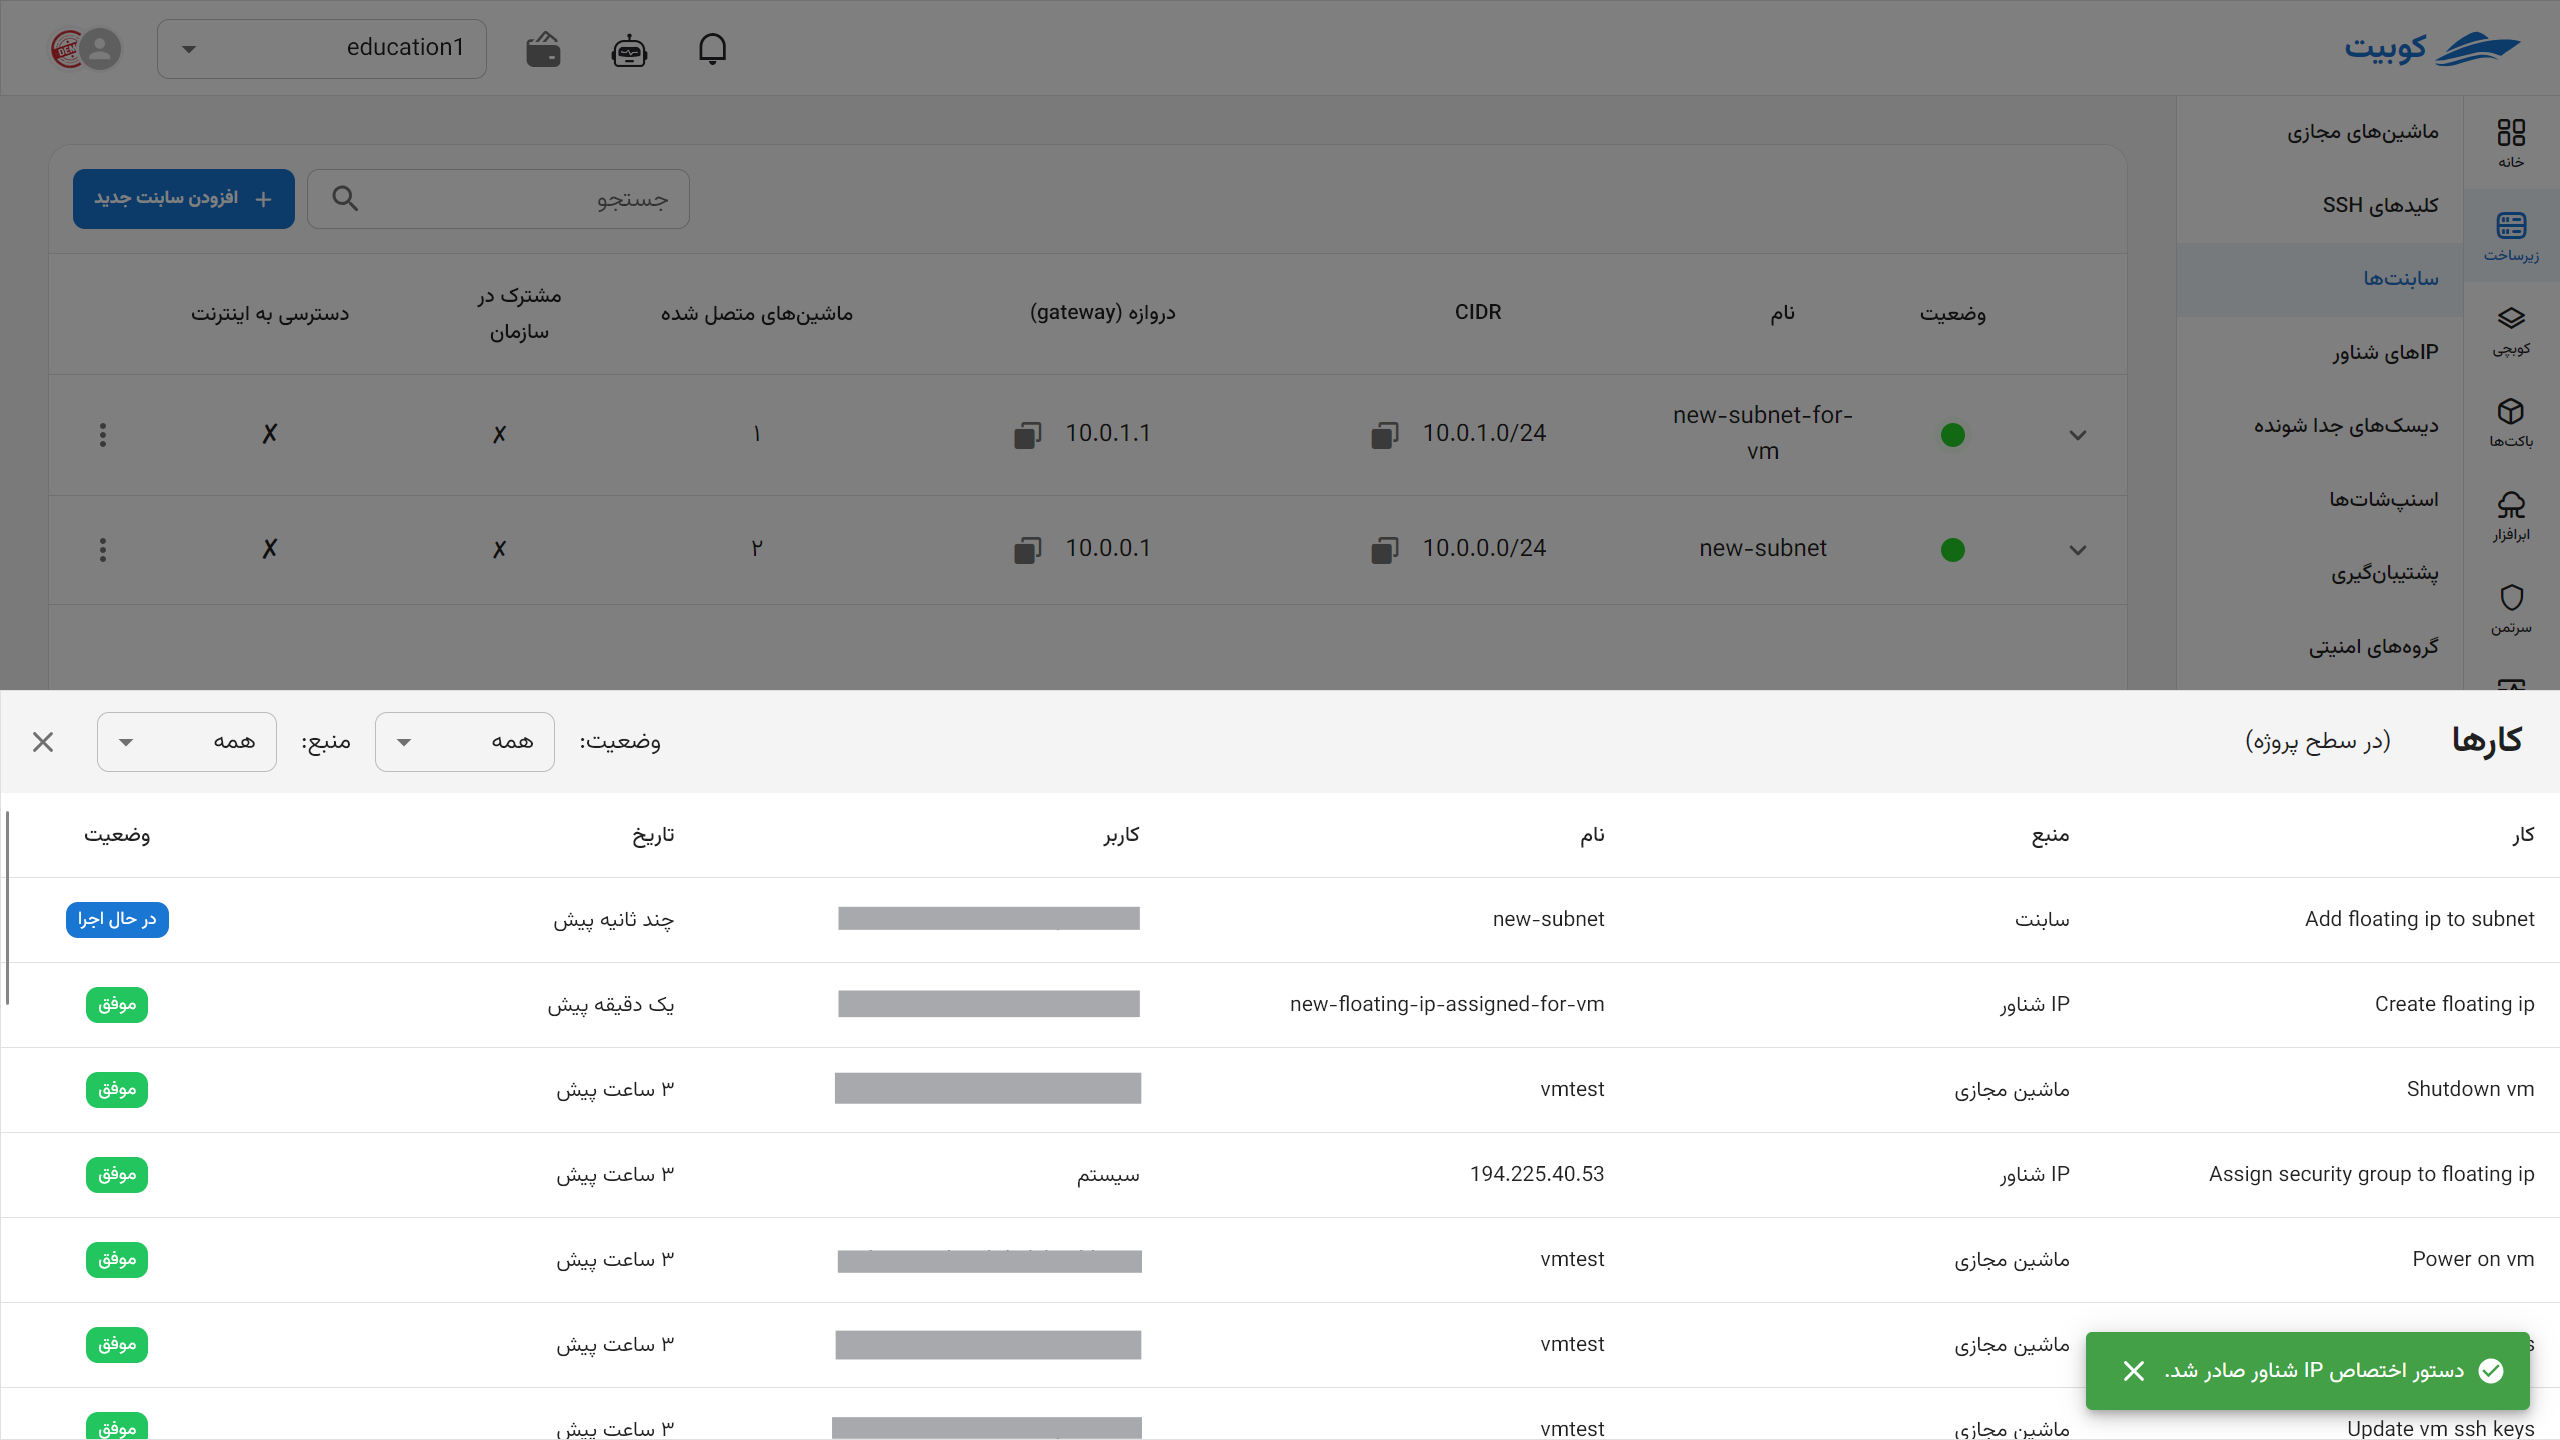
In both methods, after clicking Connect Floating IP, a task related to this operation is created, and if the task is successful, the subnet will be connected to the internet.
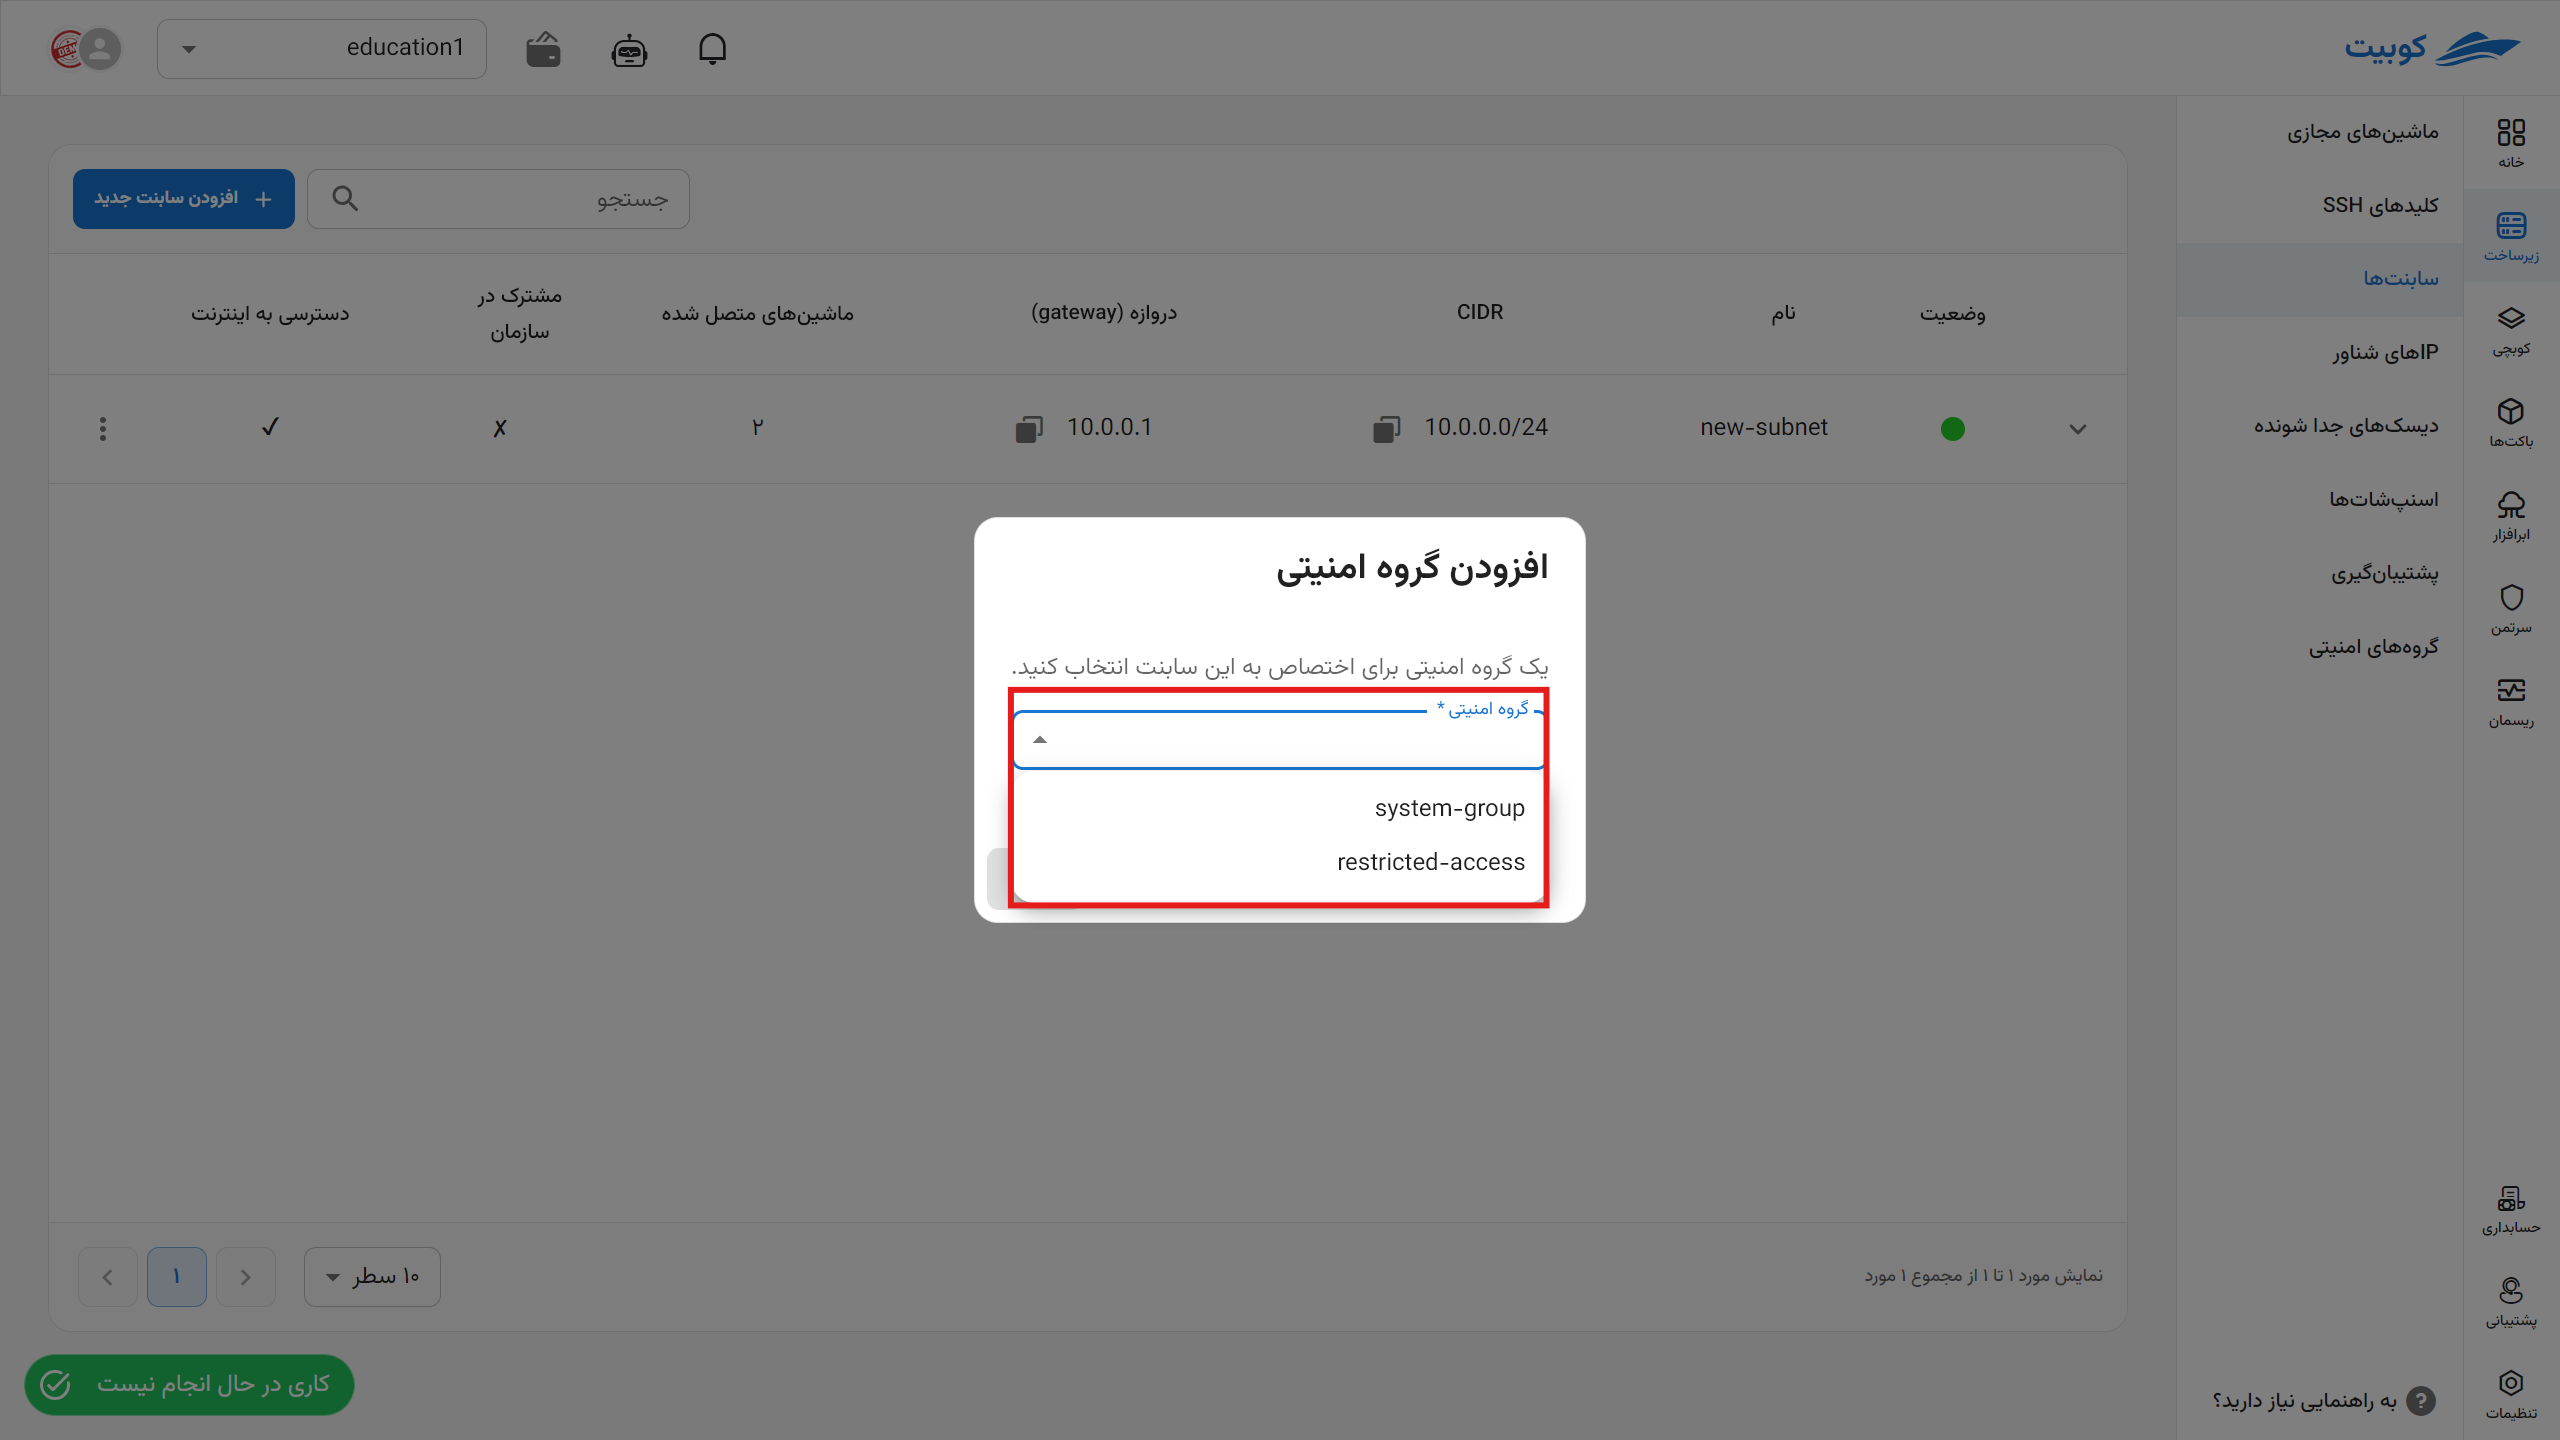
Adding a Security Group
- To add a security group to the subnet, click on the Add Security Group option:
- Then, select the desired security group from the list of project-specific and organization-shared security groups and click on Confirm:
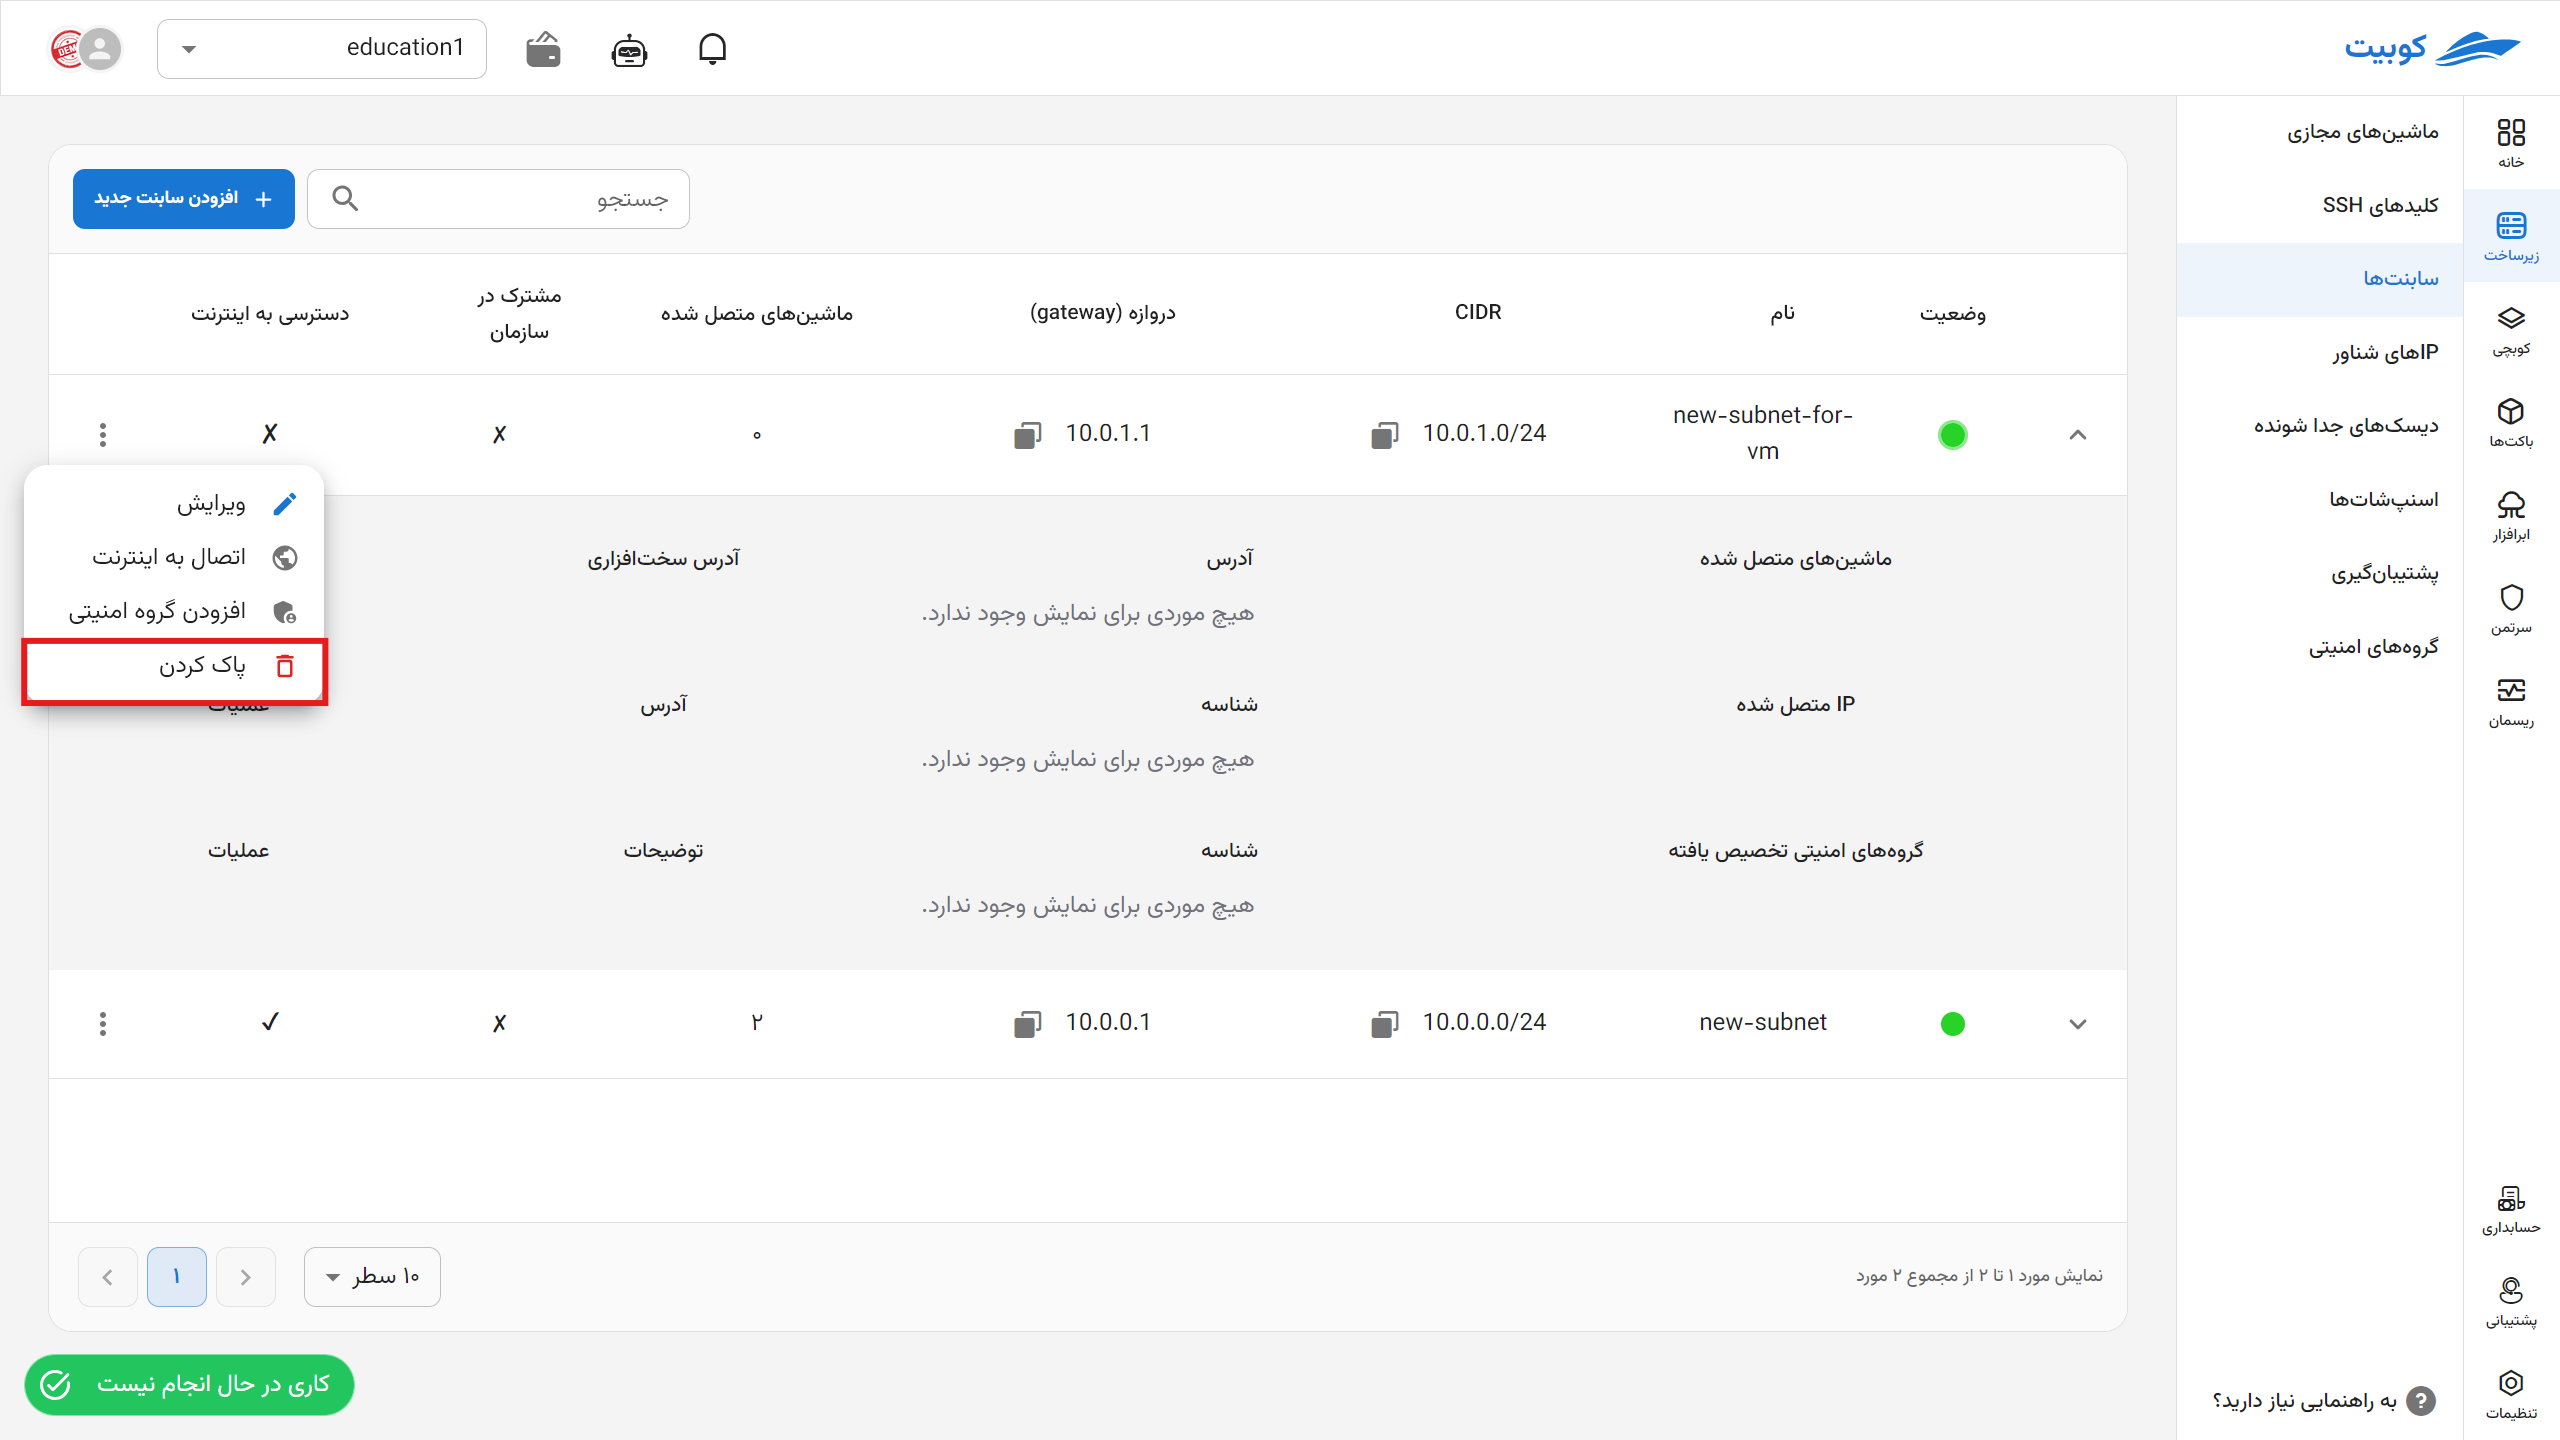
Deleting a Subnet
- To delete a subnet, first detach all resources from it.
- Then, click on the Delete option.
- If you are sure about the deletion, click the Delete button in the opened dialog.