

Virtual Machine Management
In the virtual machine settings, various subpages display information and configurations related to the virtual machine. This information includes machine specifications such as the operating system, processor, memory, etc., as well as security, disks, and network settings.
Note that some configuration changes require the machine to be turned off. If this condition is not met, changes cannot be applied.
Overview
In this subpage, information about the virtual machine is displayed. This includes the name, operating system and its version, processor, memory, and disk details, along with the public IP and monitoring of the machine.

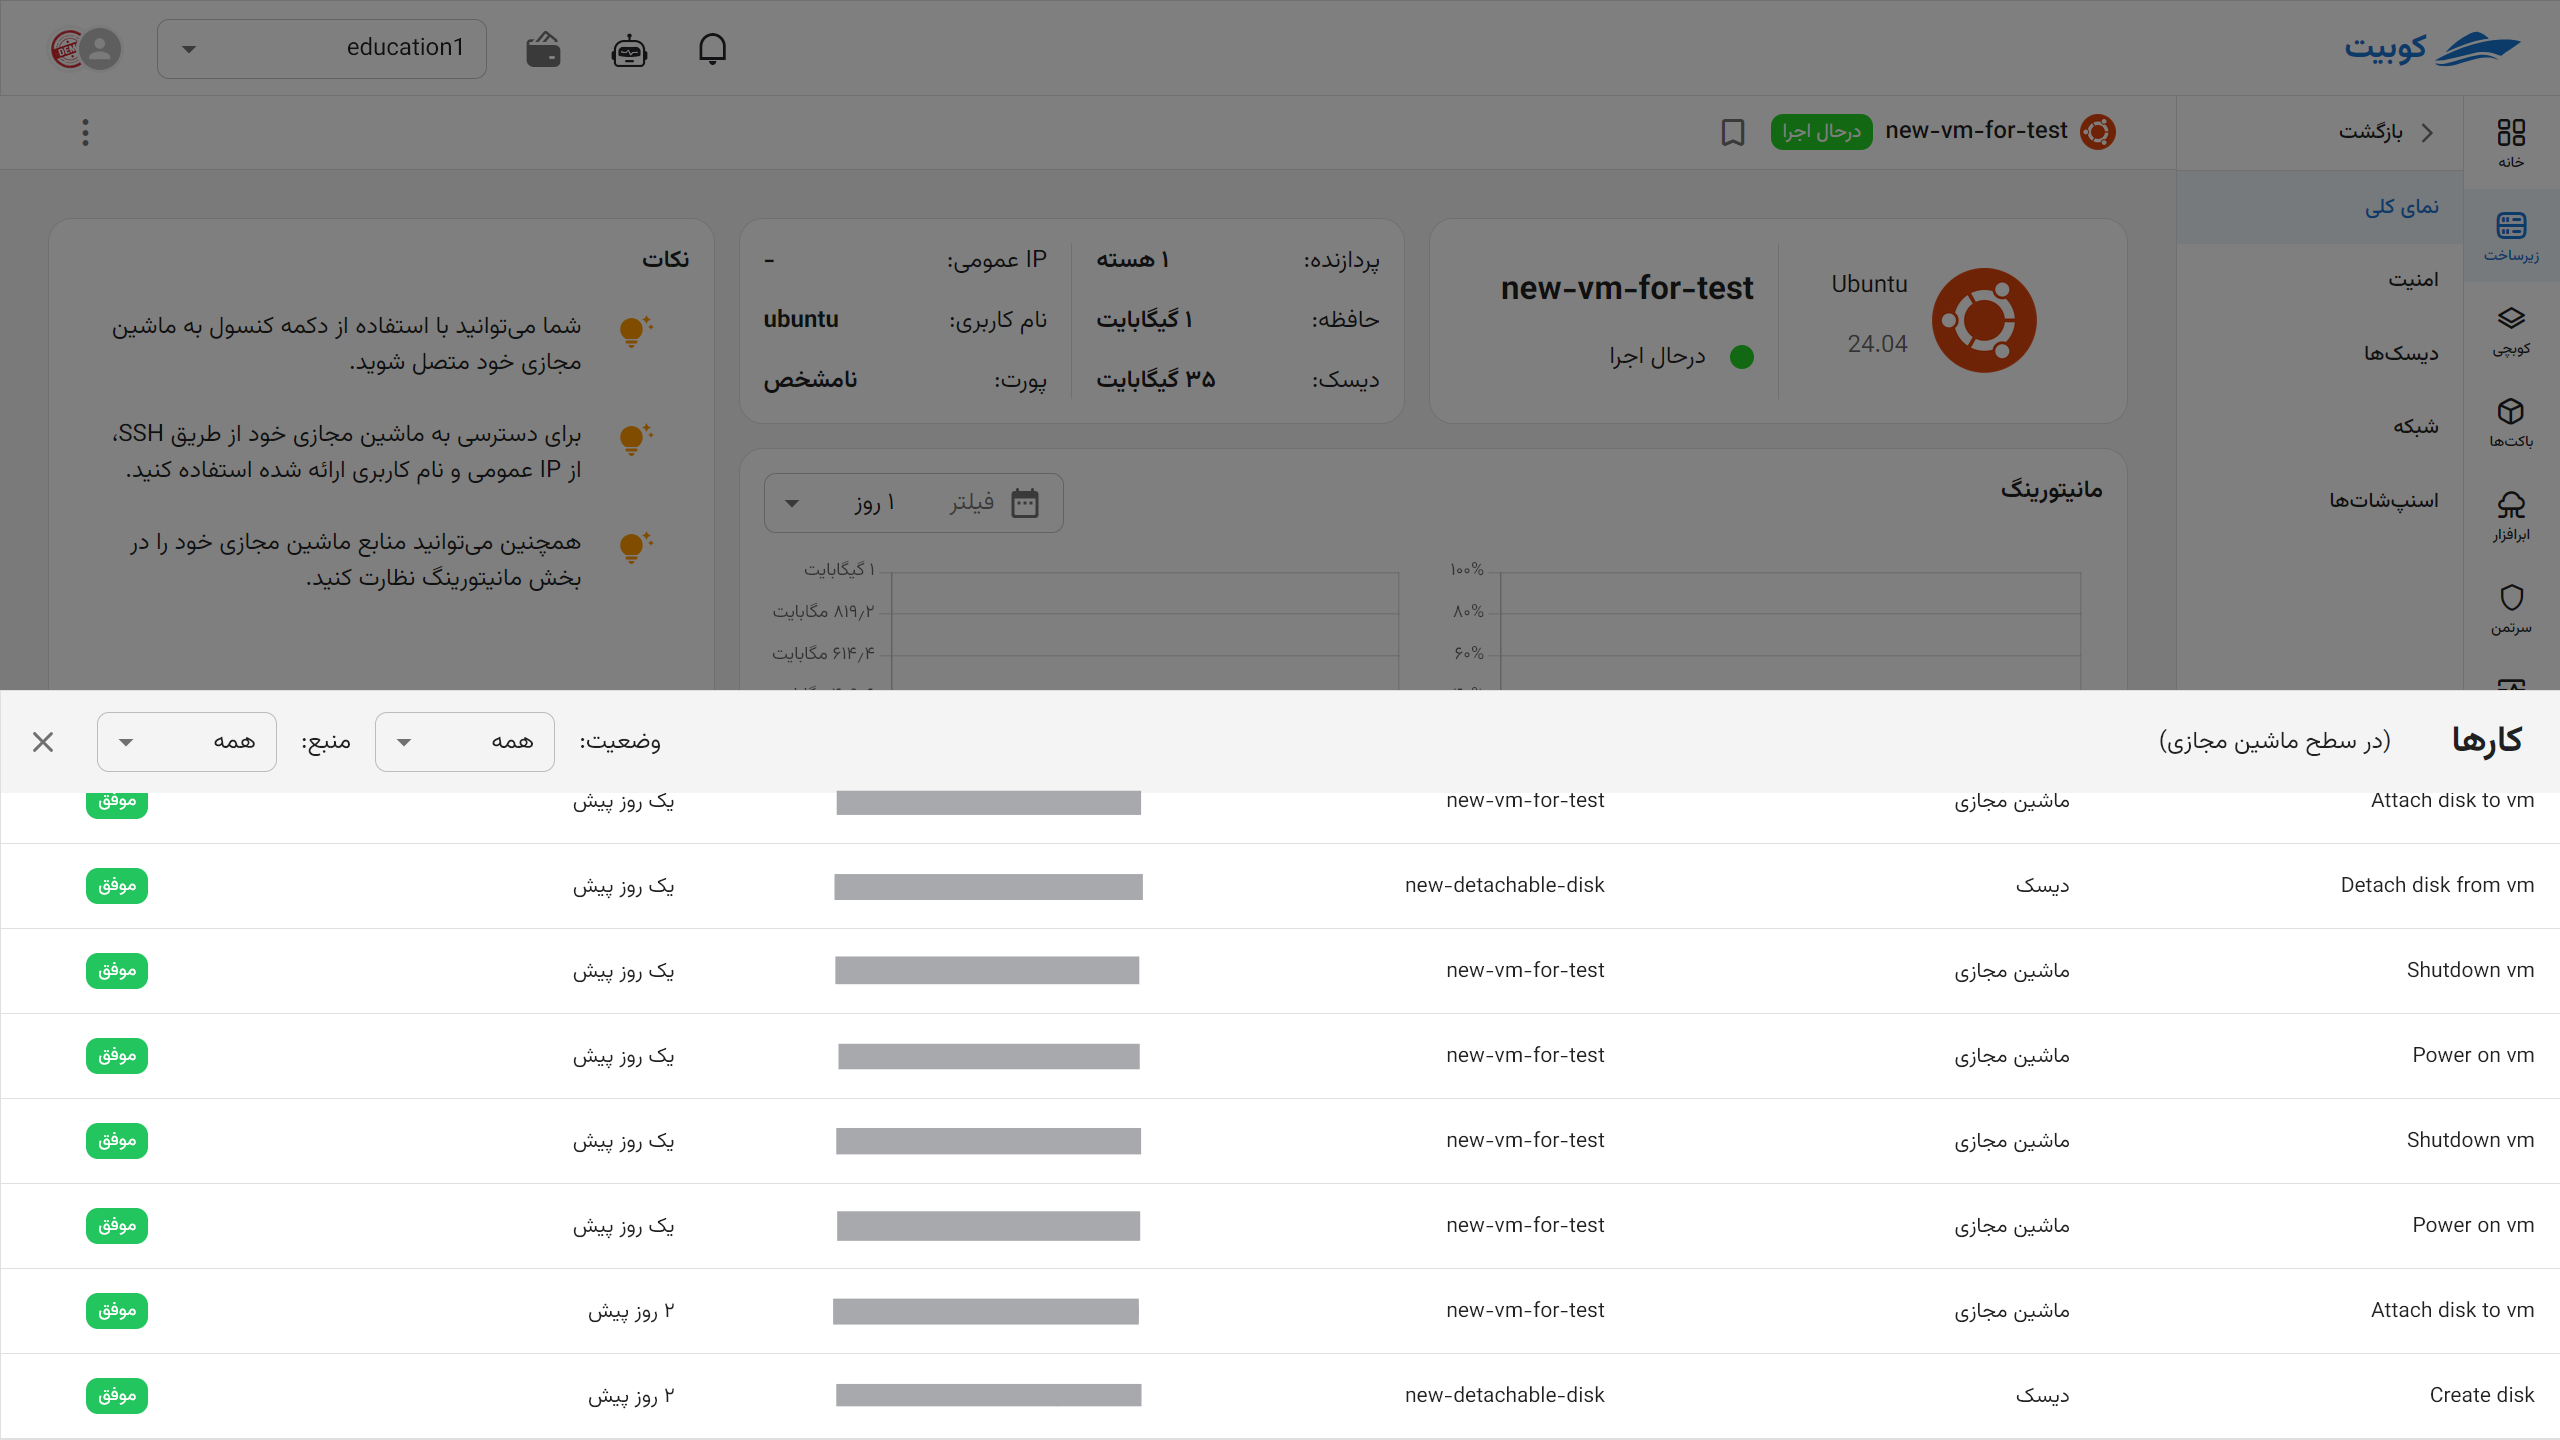
Jobs
In this section, you can view the list of jobs at the machine level and the logs for each job performed on the machine.

Accessing the Console

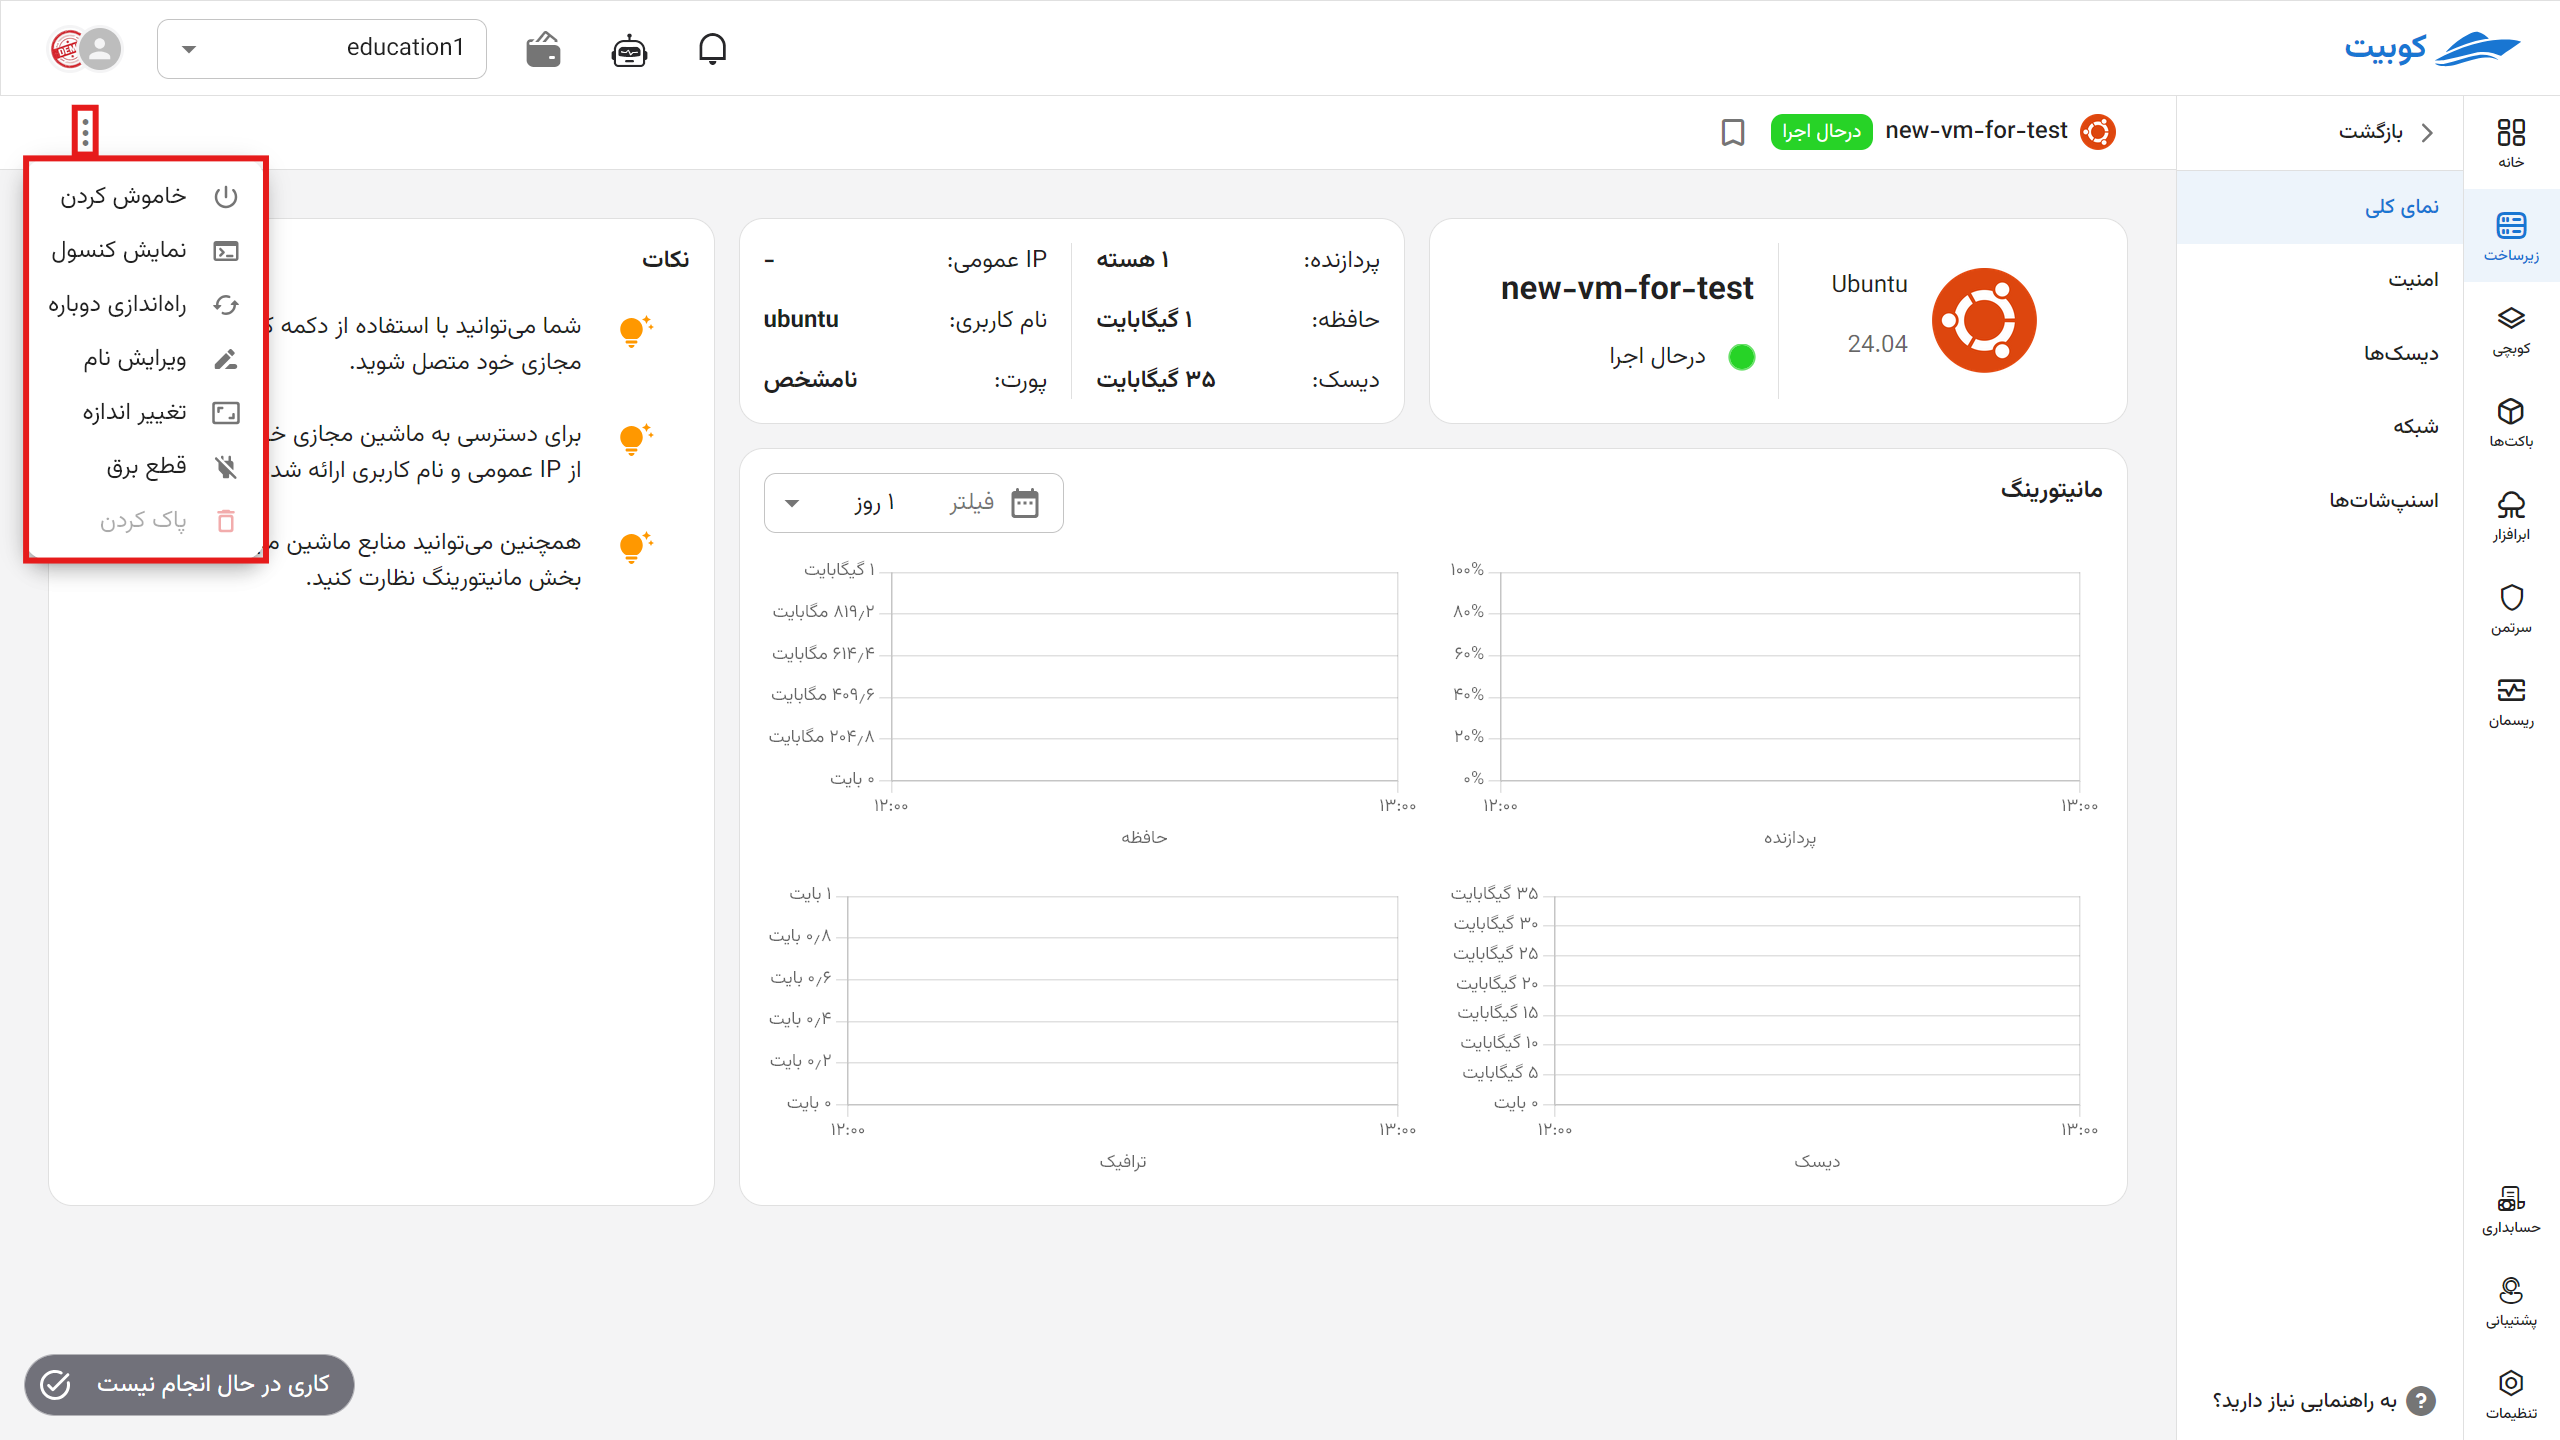
Turn On/Off

Other Operations
See the this section for other operations that can be performed on the machine.
Security
Security-related settings for the machine, such as password, SSH keys, and security groups, are visible in this section. Below, we explain each setting.
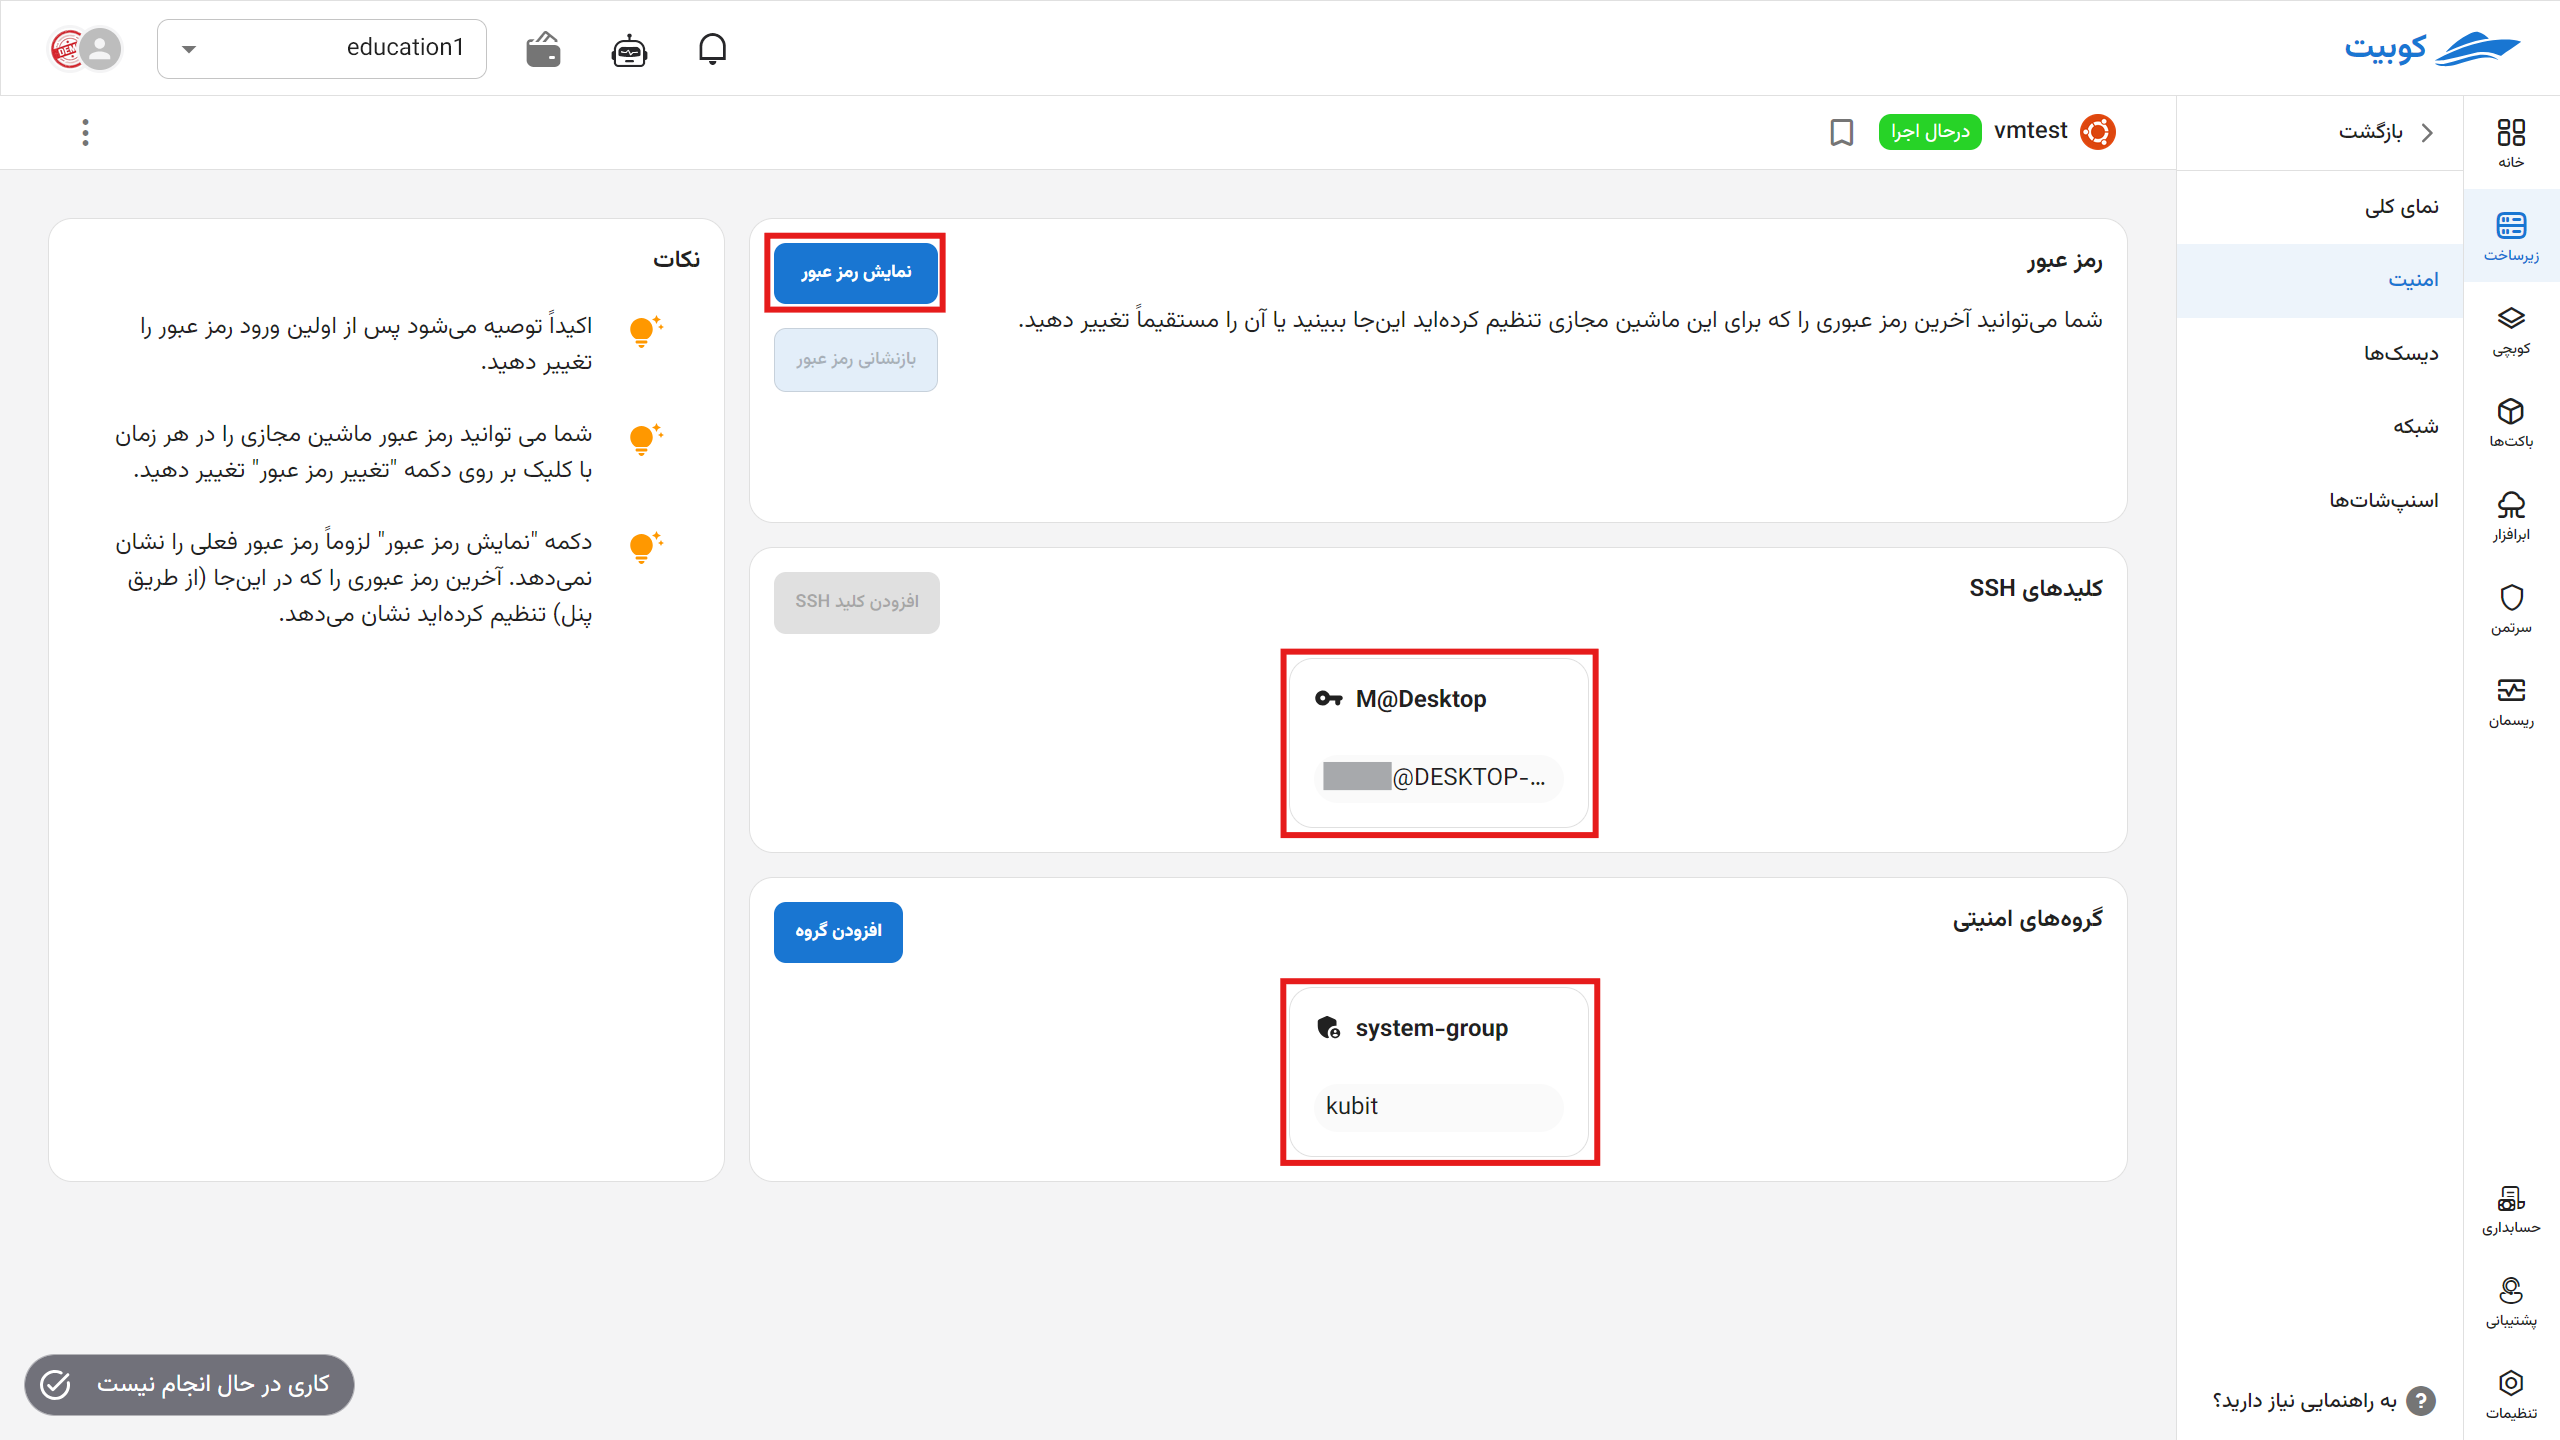
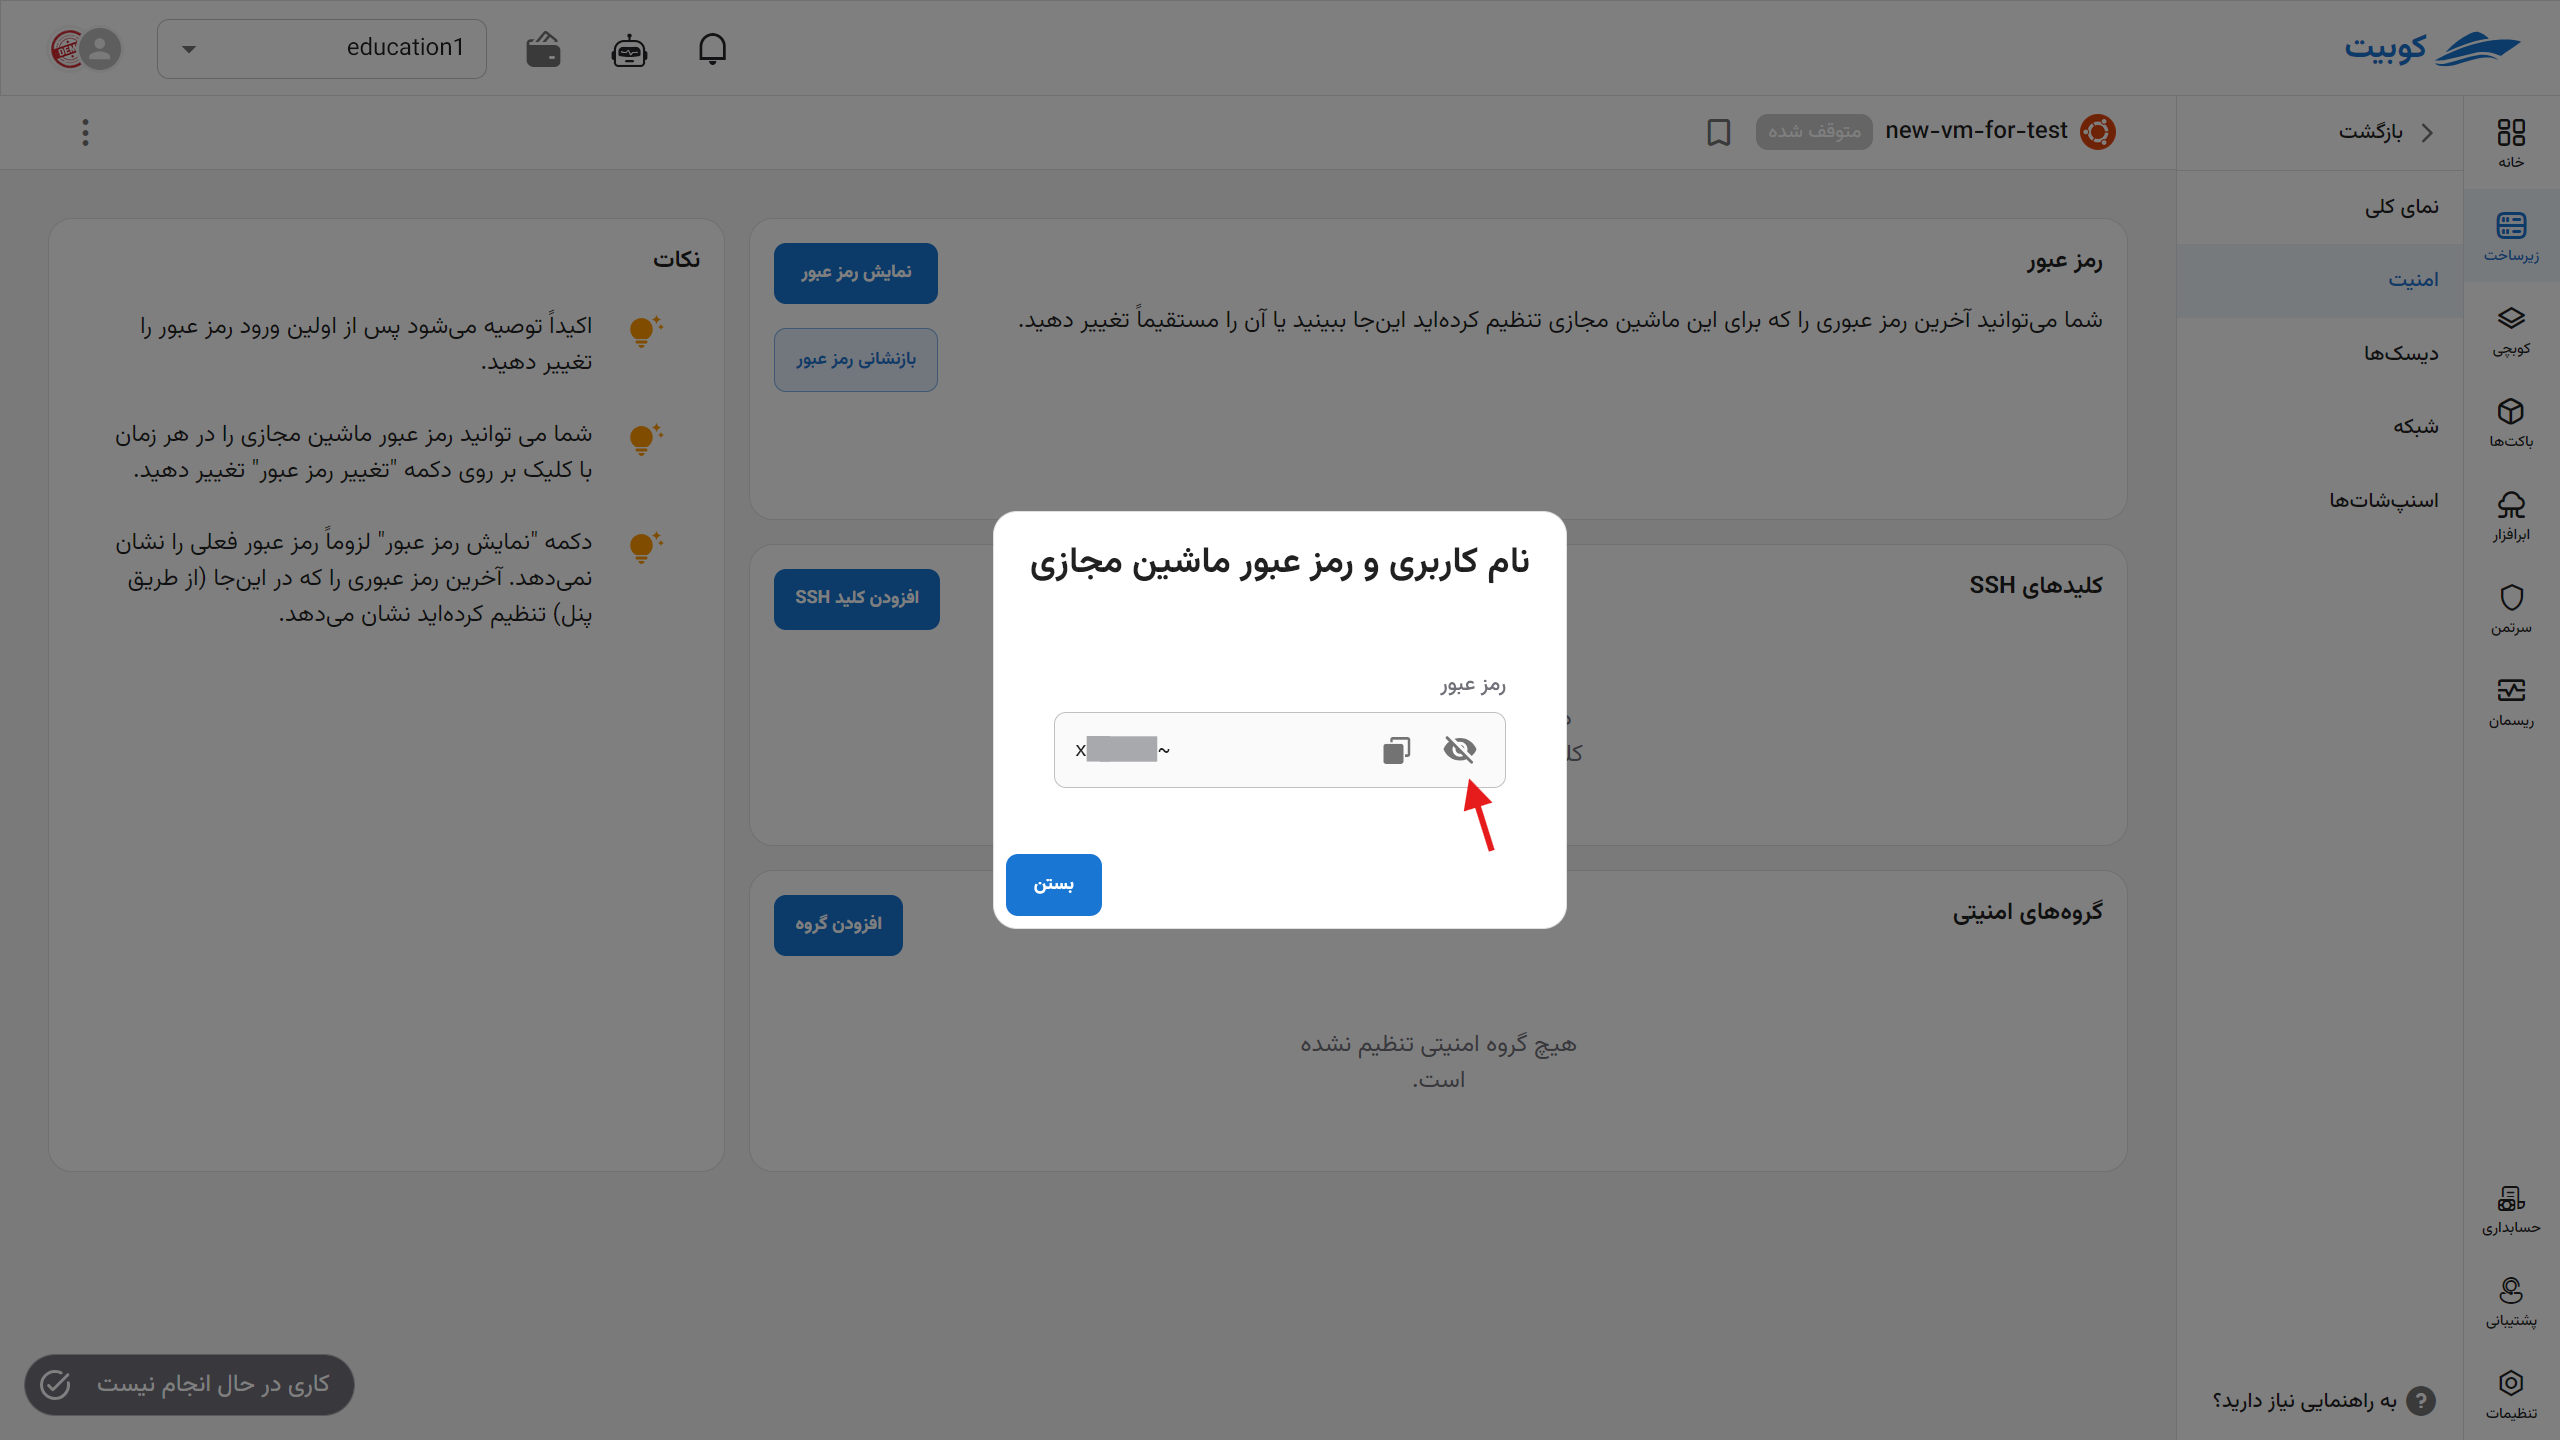
Display Password
If a password has been set for the machine, you can view it by clicking the Display Password button.
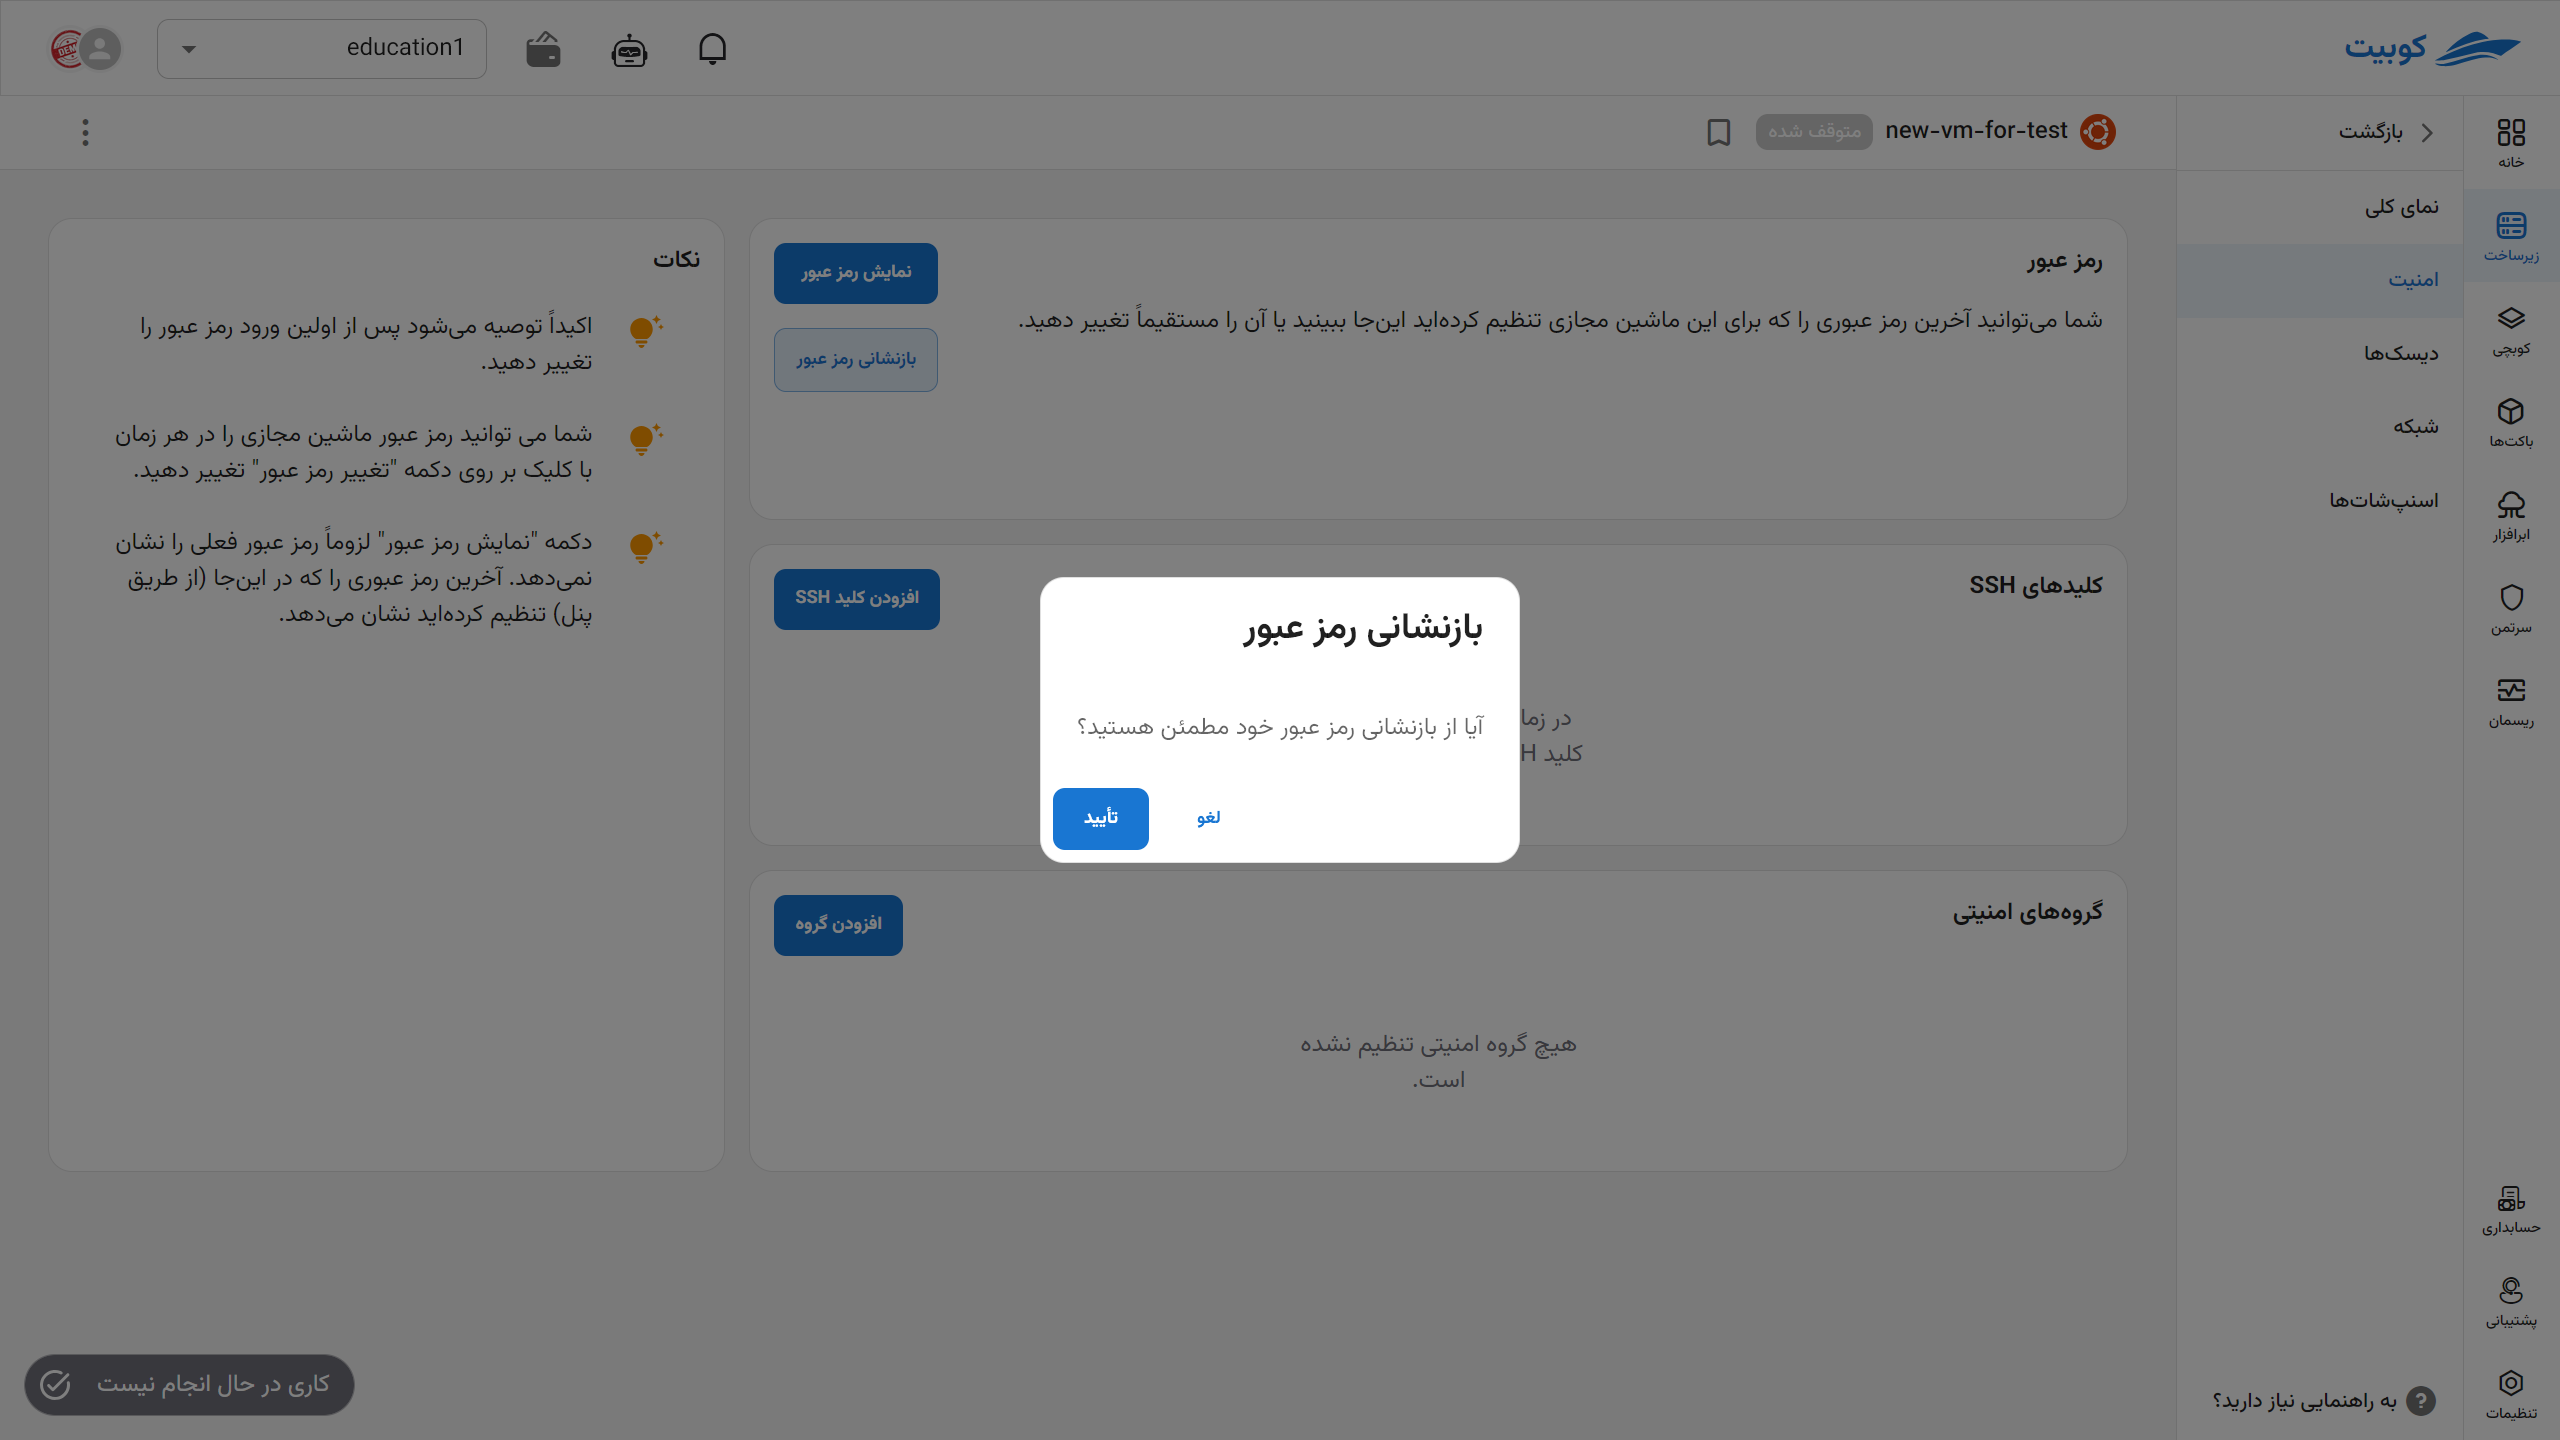
Reset Password
- To reset the password, first ensure the machine is turned off. Then, click the Reset Password button.
- If you are sure, click the Confirm option.
- Upon successful completion of the operation, the new password details will be sent to your email and displayed.
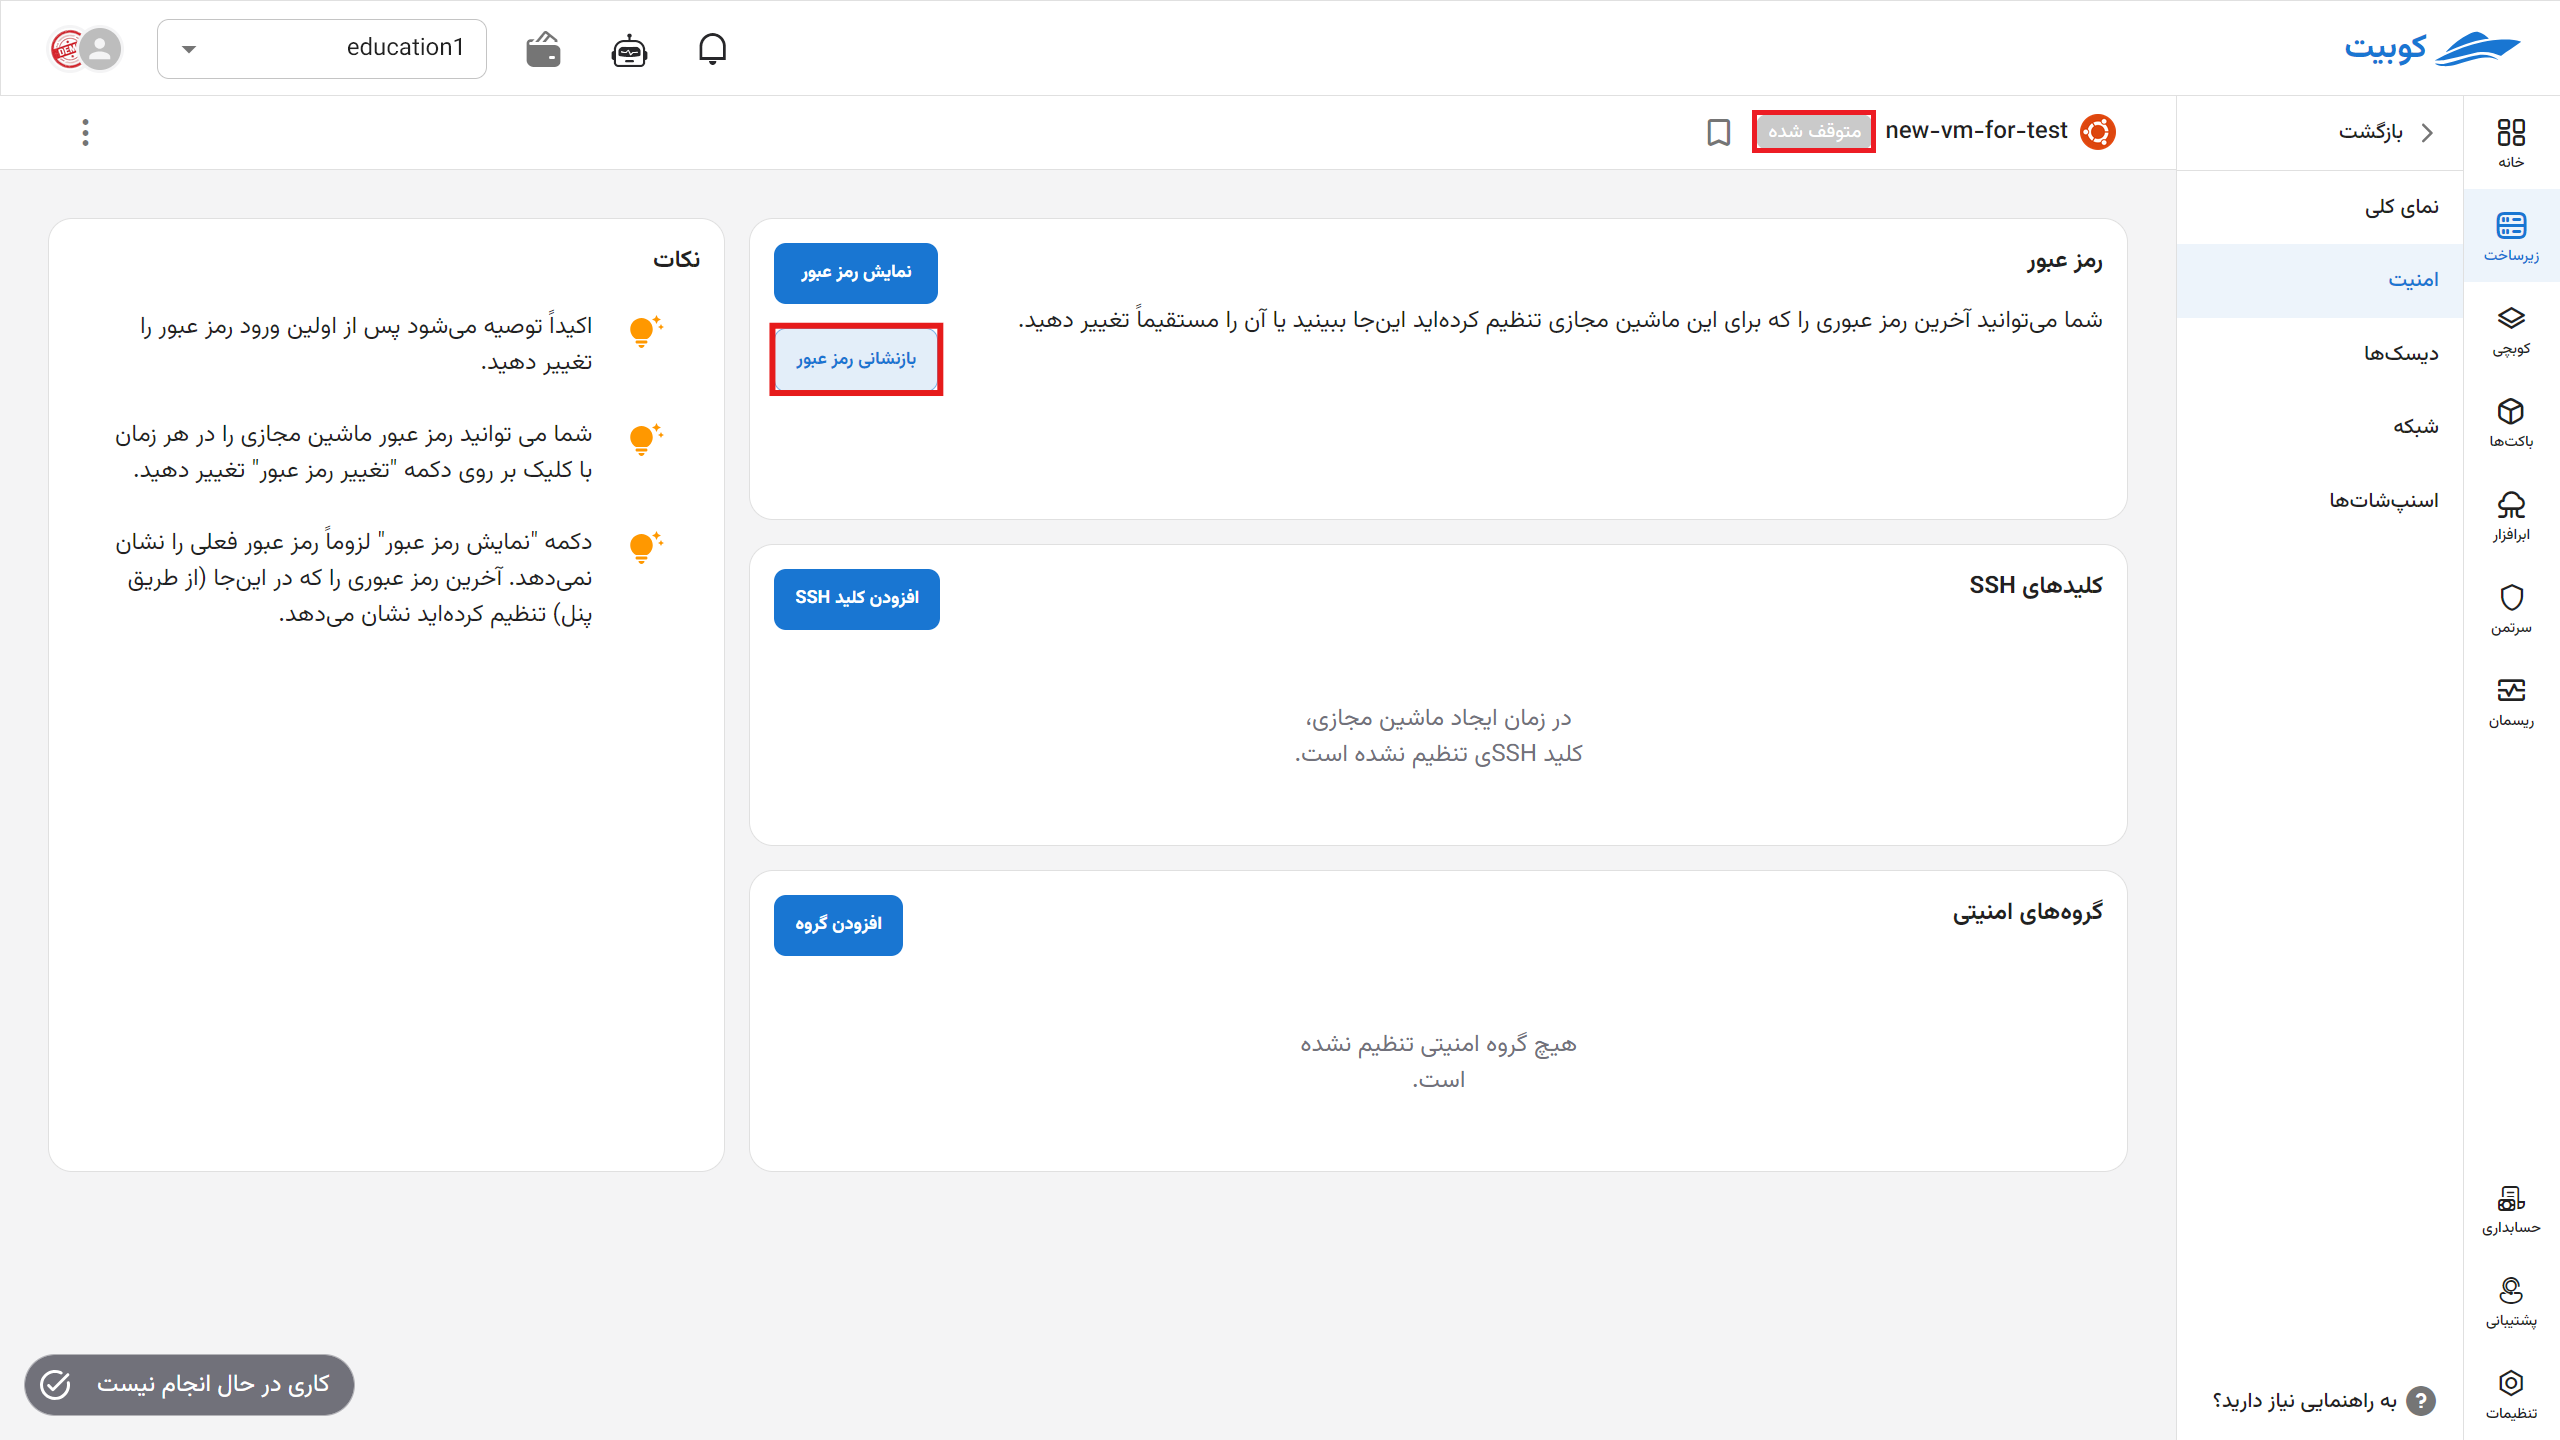
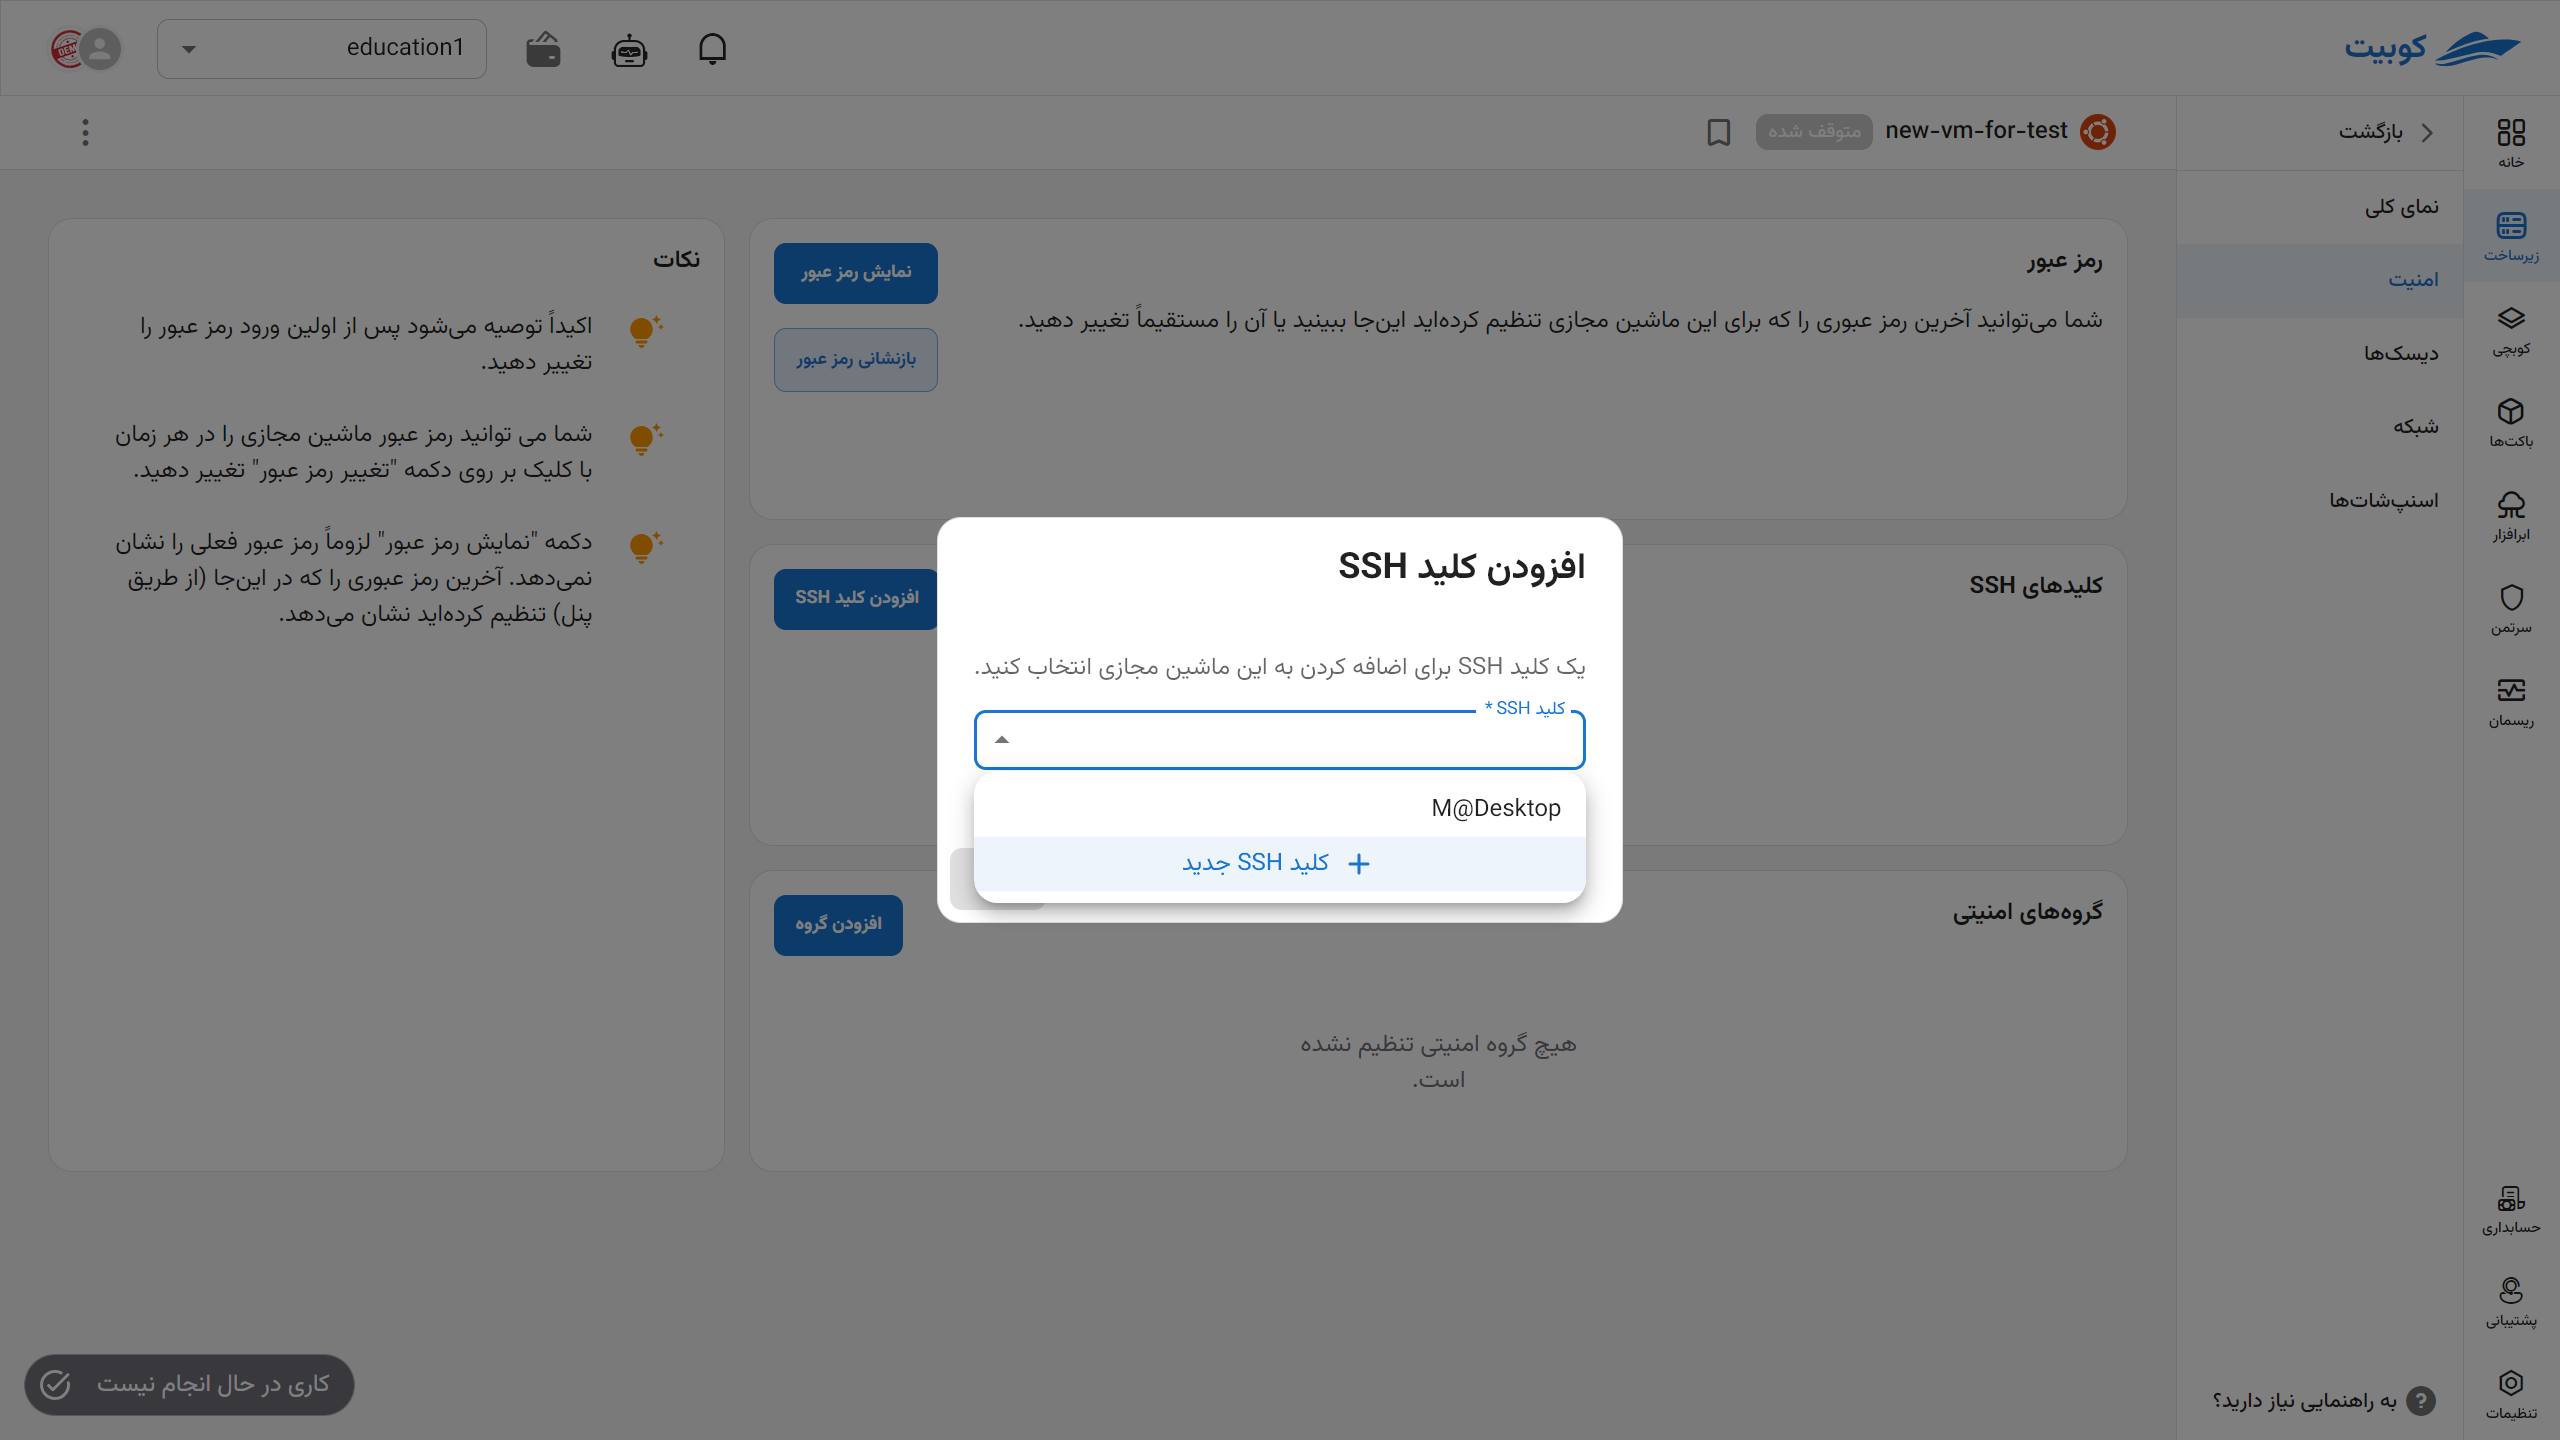
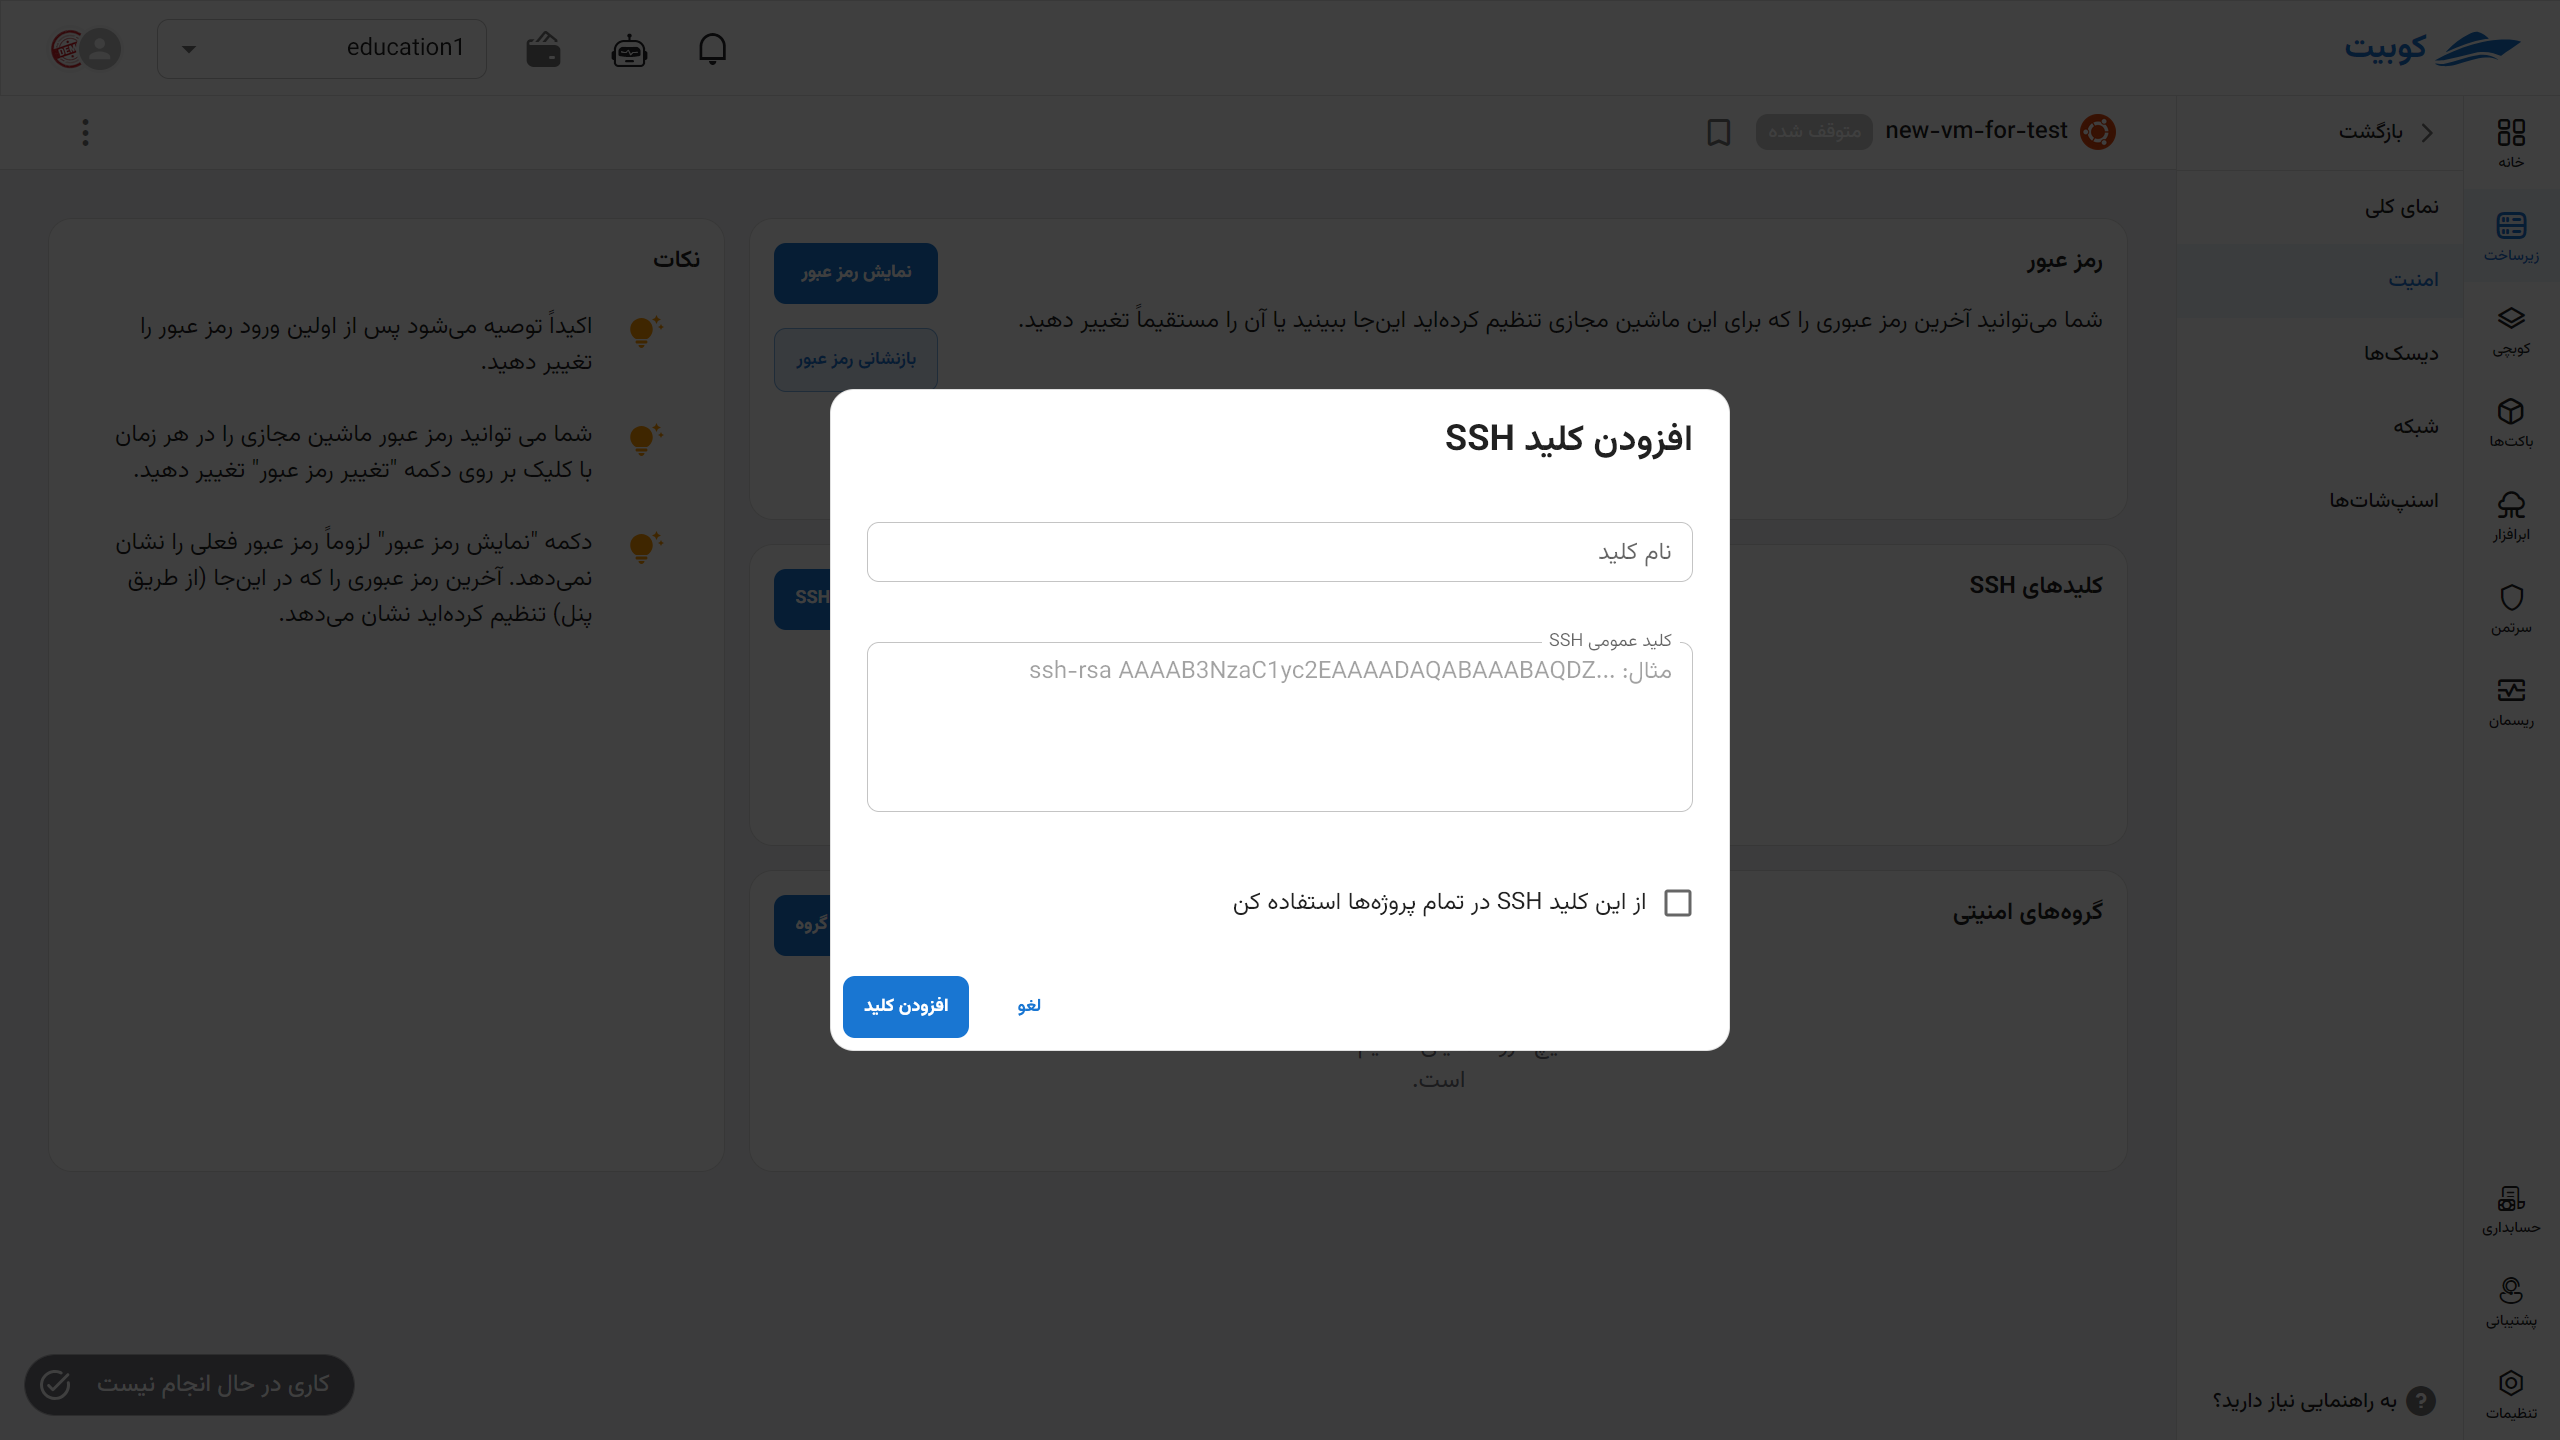
Add SSH Key
-
To add an SSH key, first ensure the machine is turned off. Then, click the Add SSH Key button.
-
Select the desired key from the available keys or define a new key.
-
Finally, click the Add button.
- List of keys:
- Adding a key:
- List of keys:
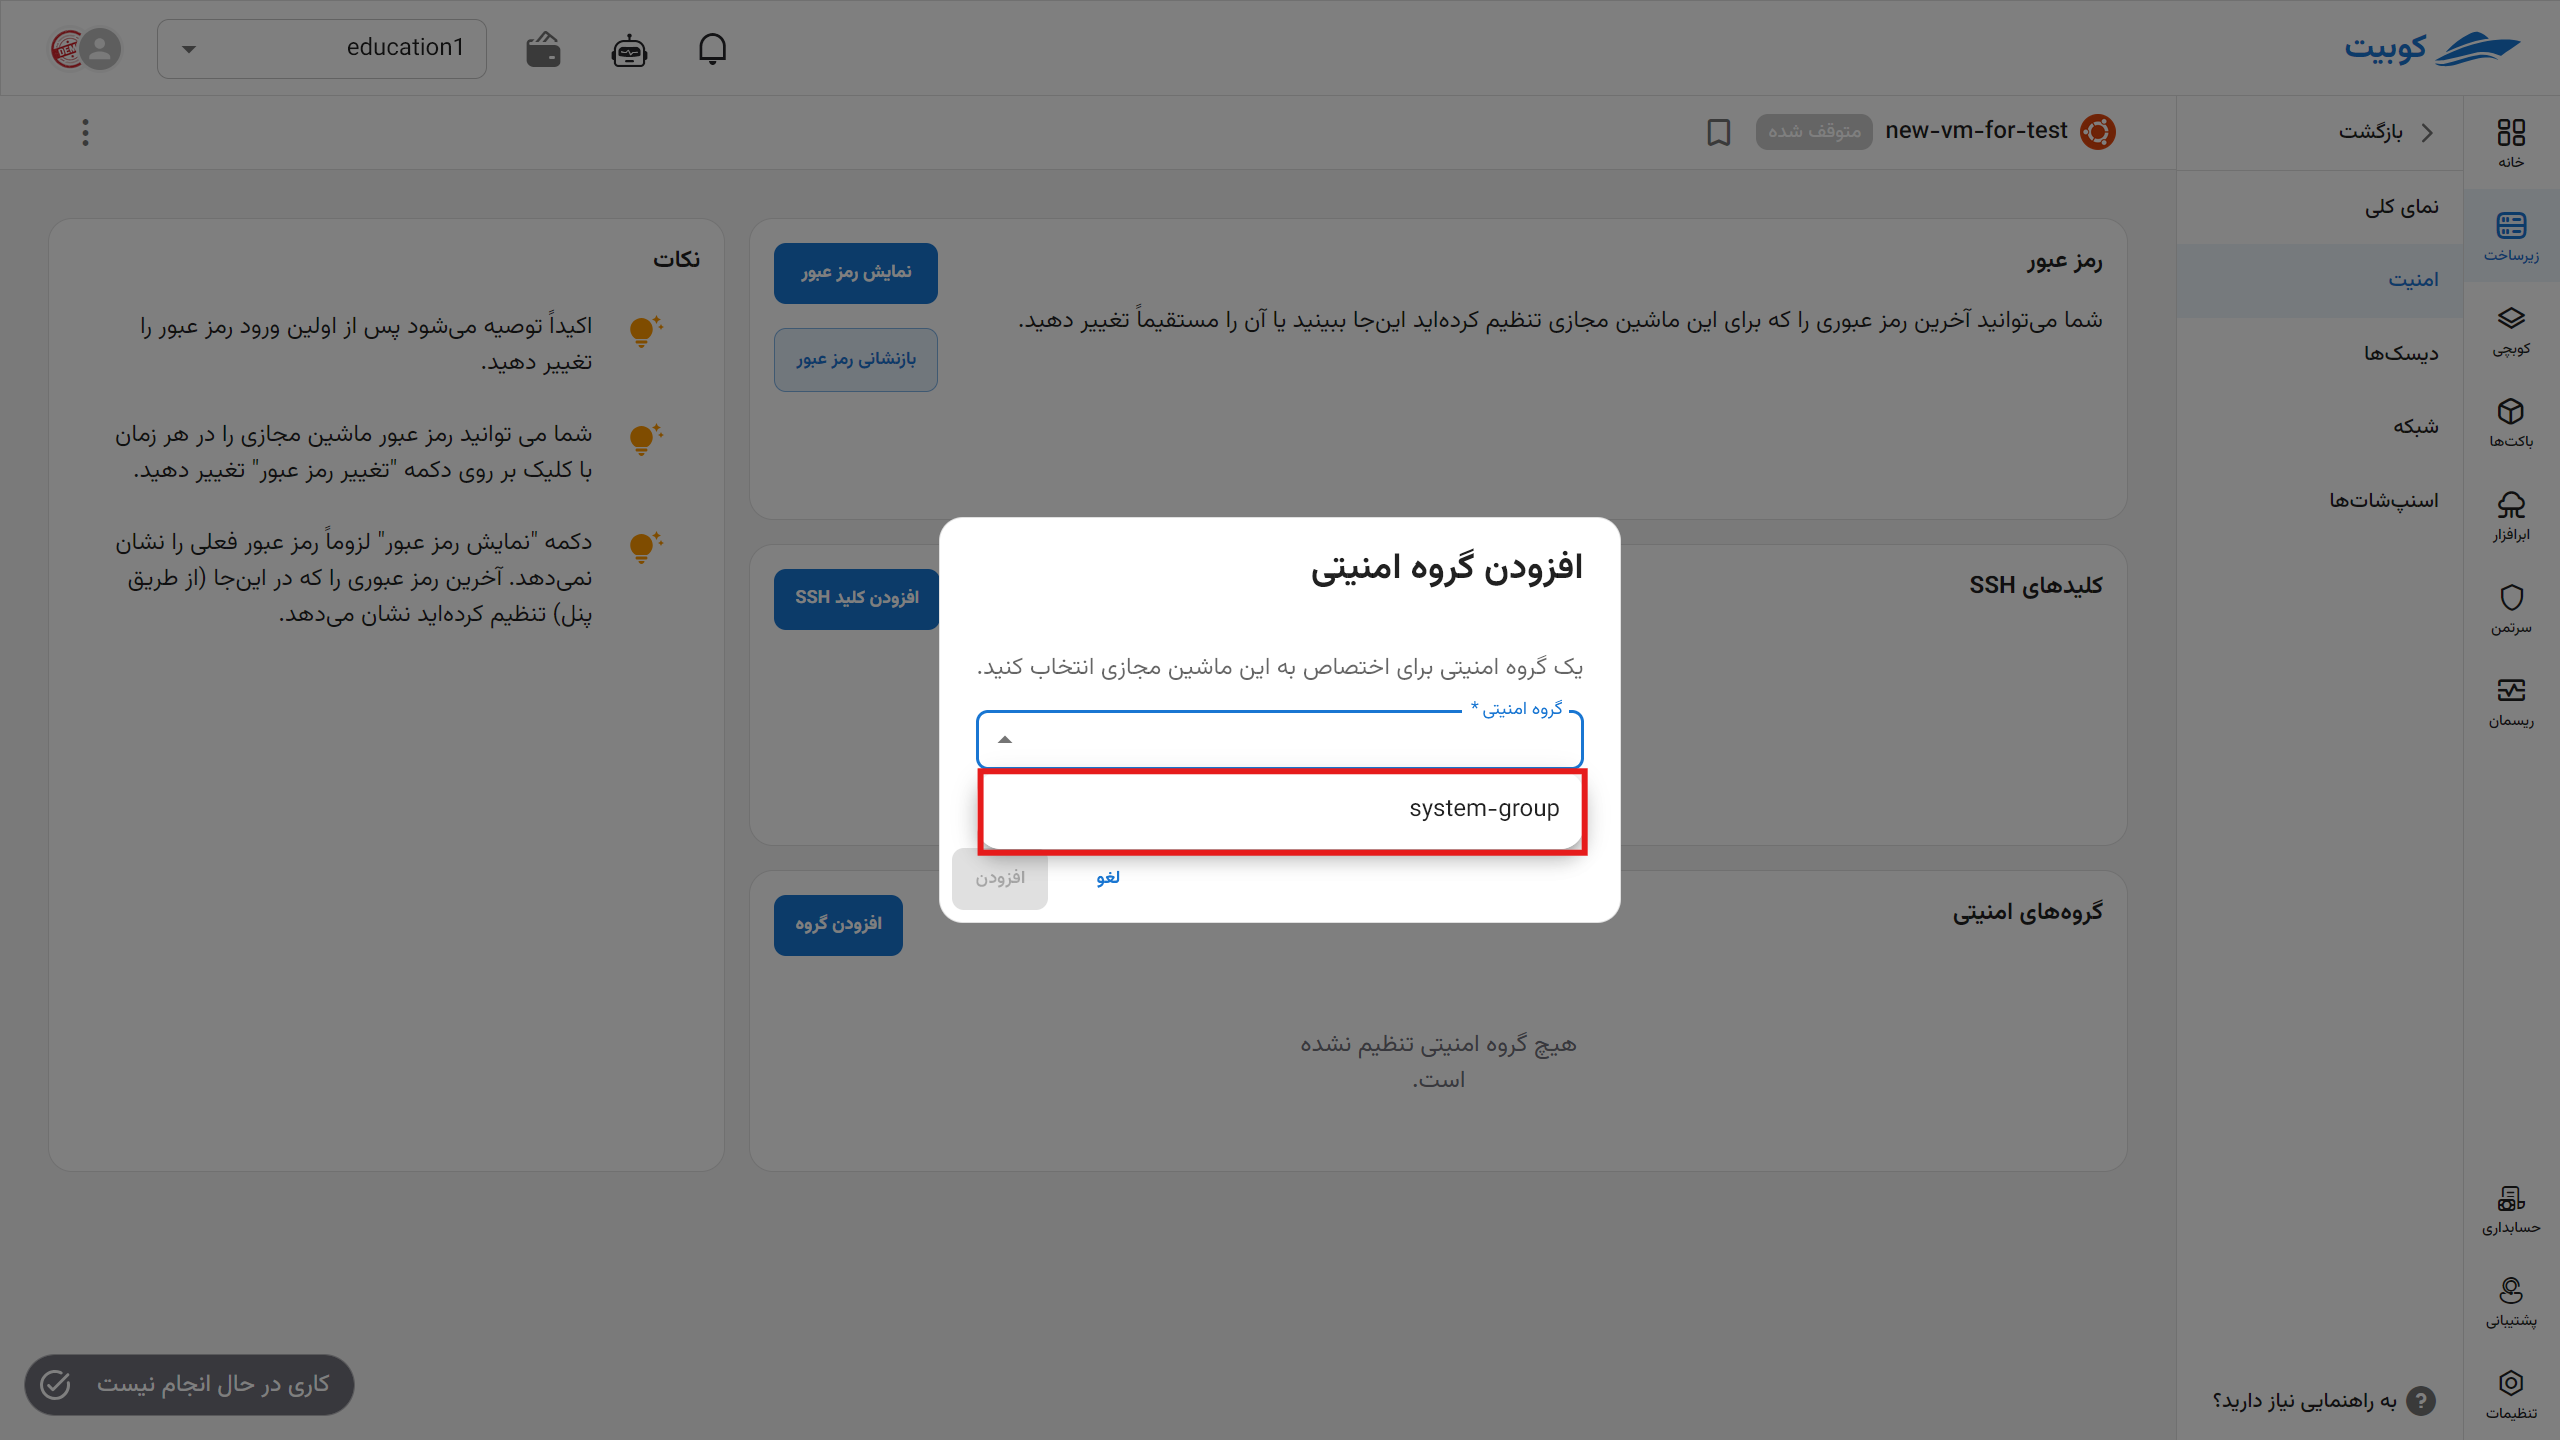
Add Security Group
-
To add a security group, click the Add Security Group button.
-
Then, select the desired group from the available groups.
-
Finally, click the Add button.
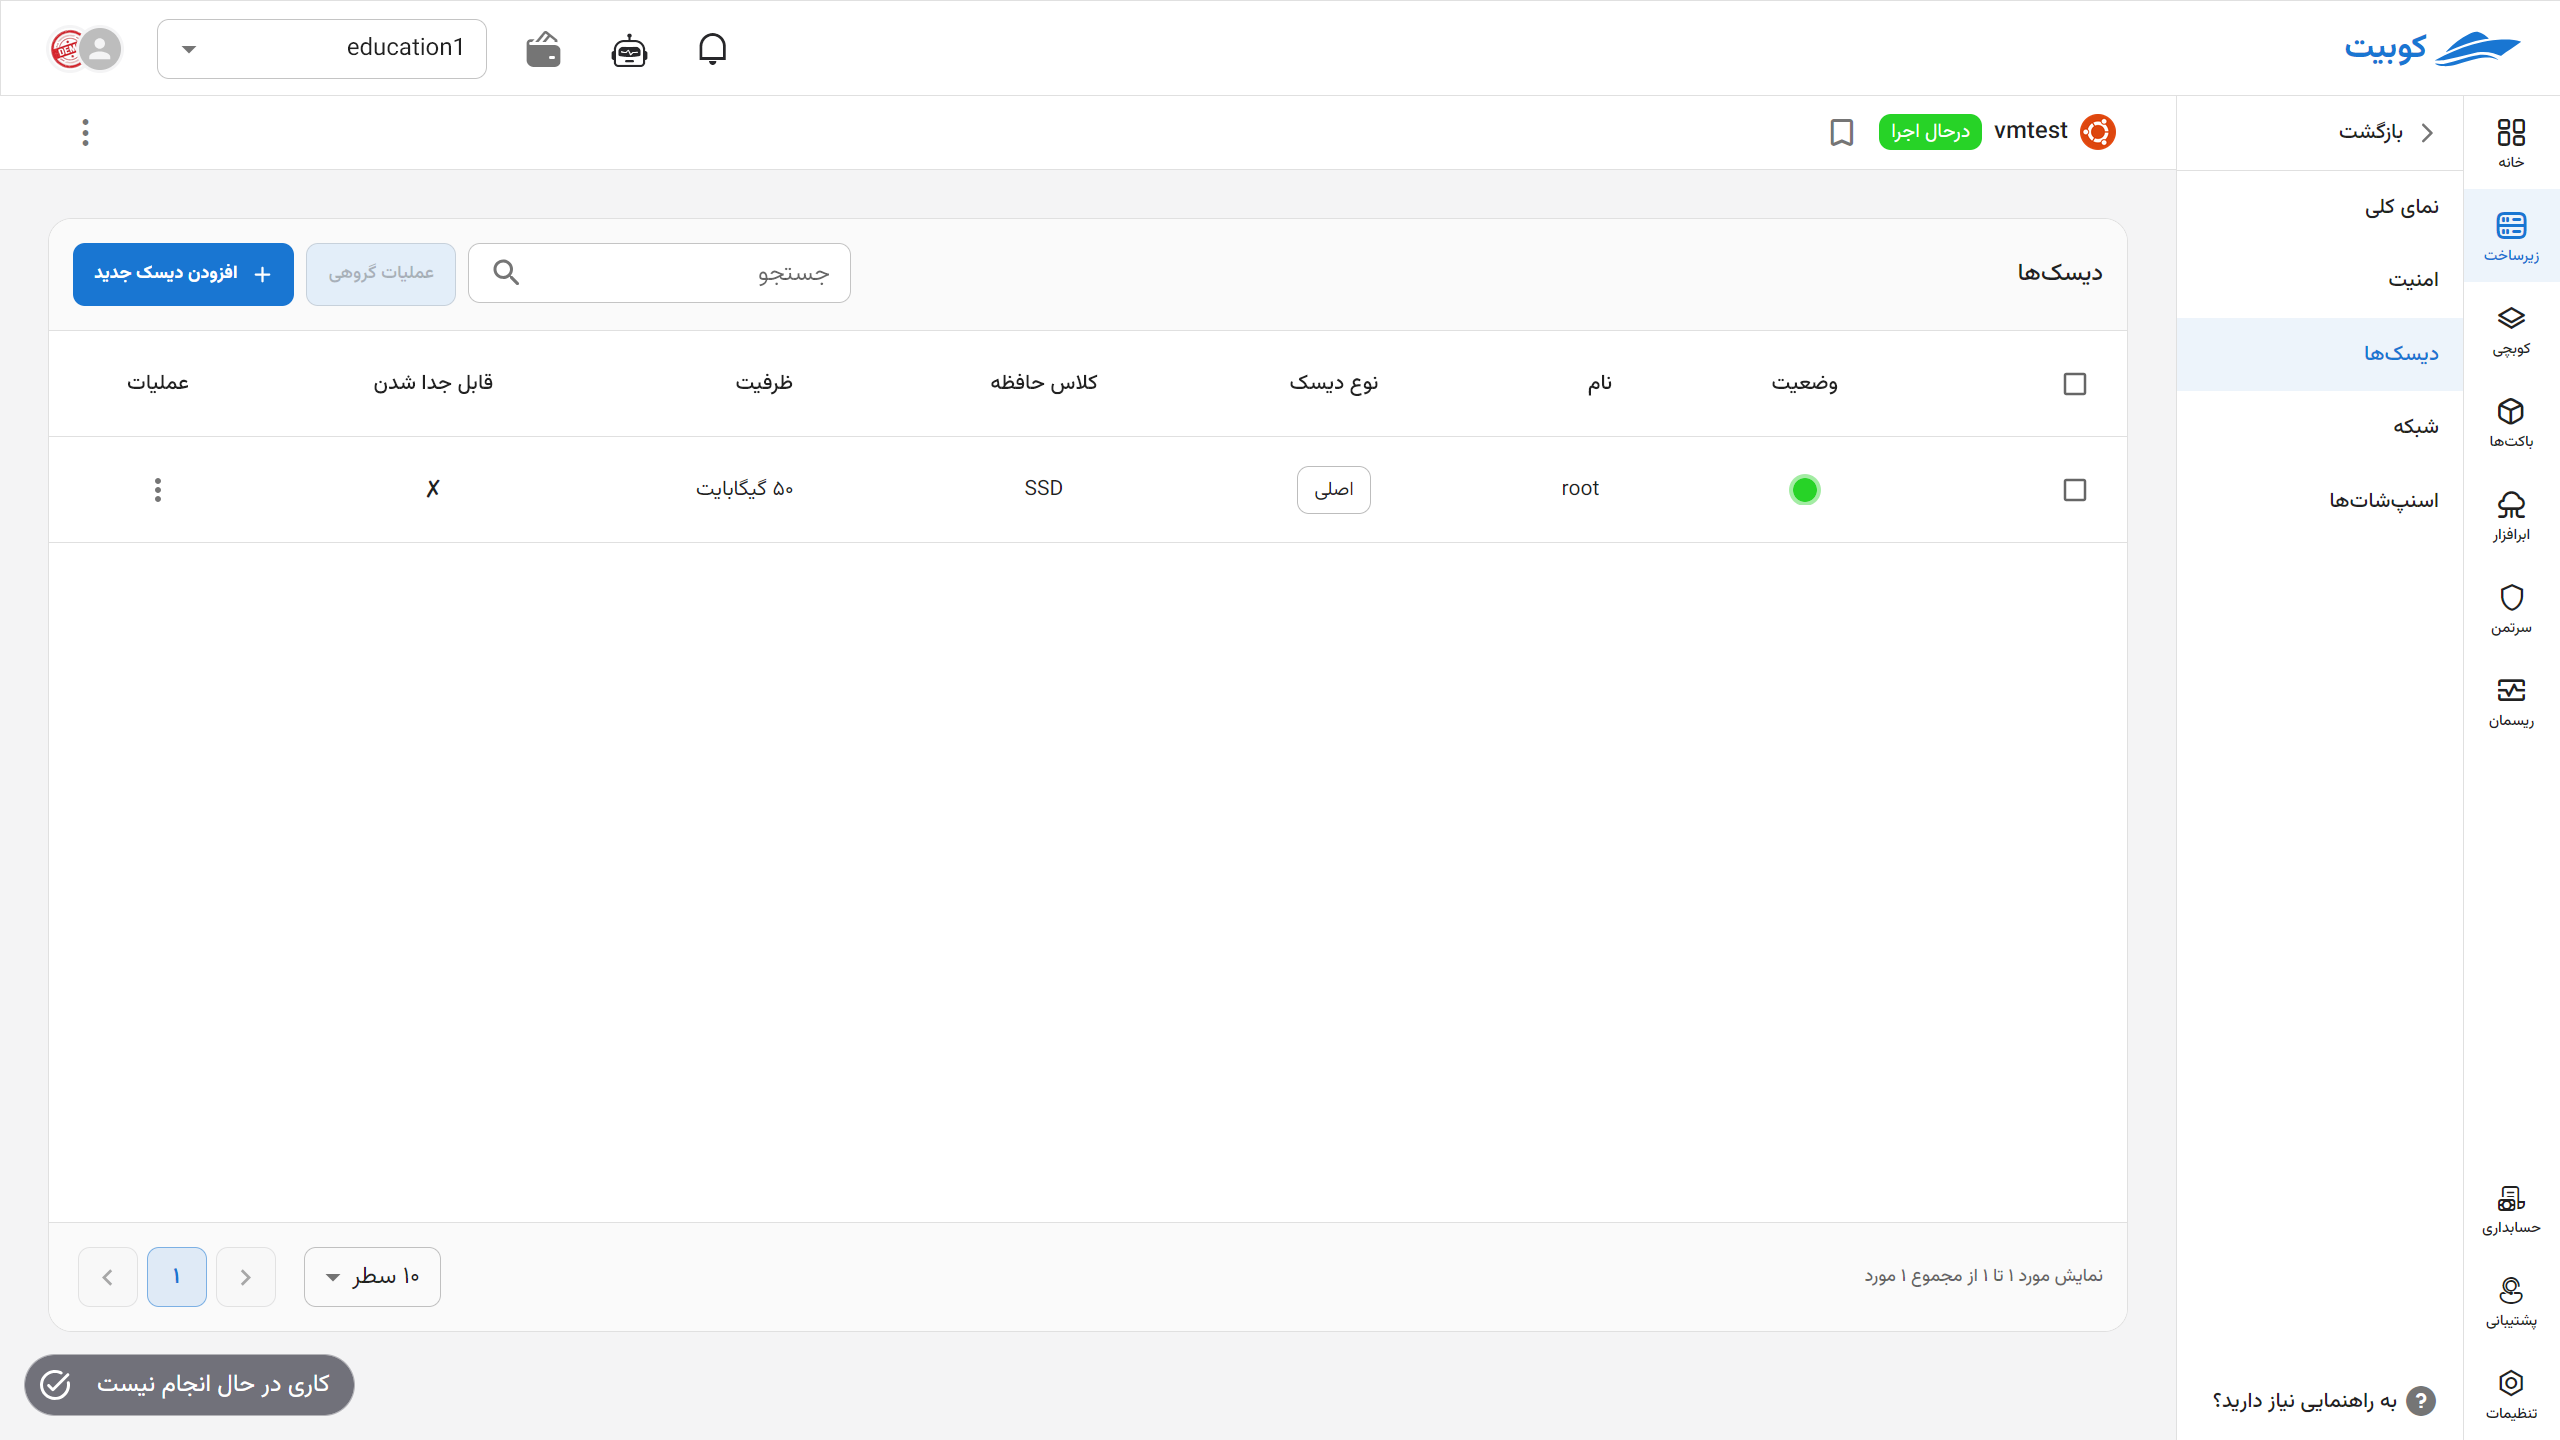
Disks
In this subpage, information about the virtual machine’s disks is displayed. This includes status, name, disk type, capacity, and more, along with operations such as adding, deleting, and resizing.
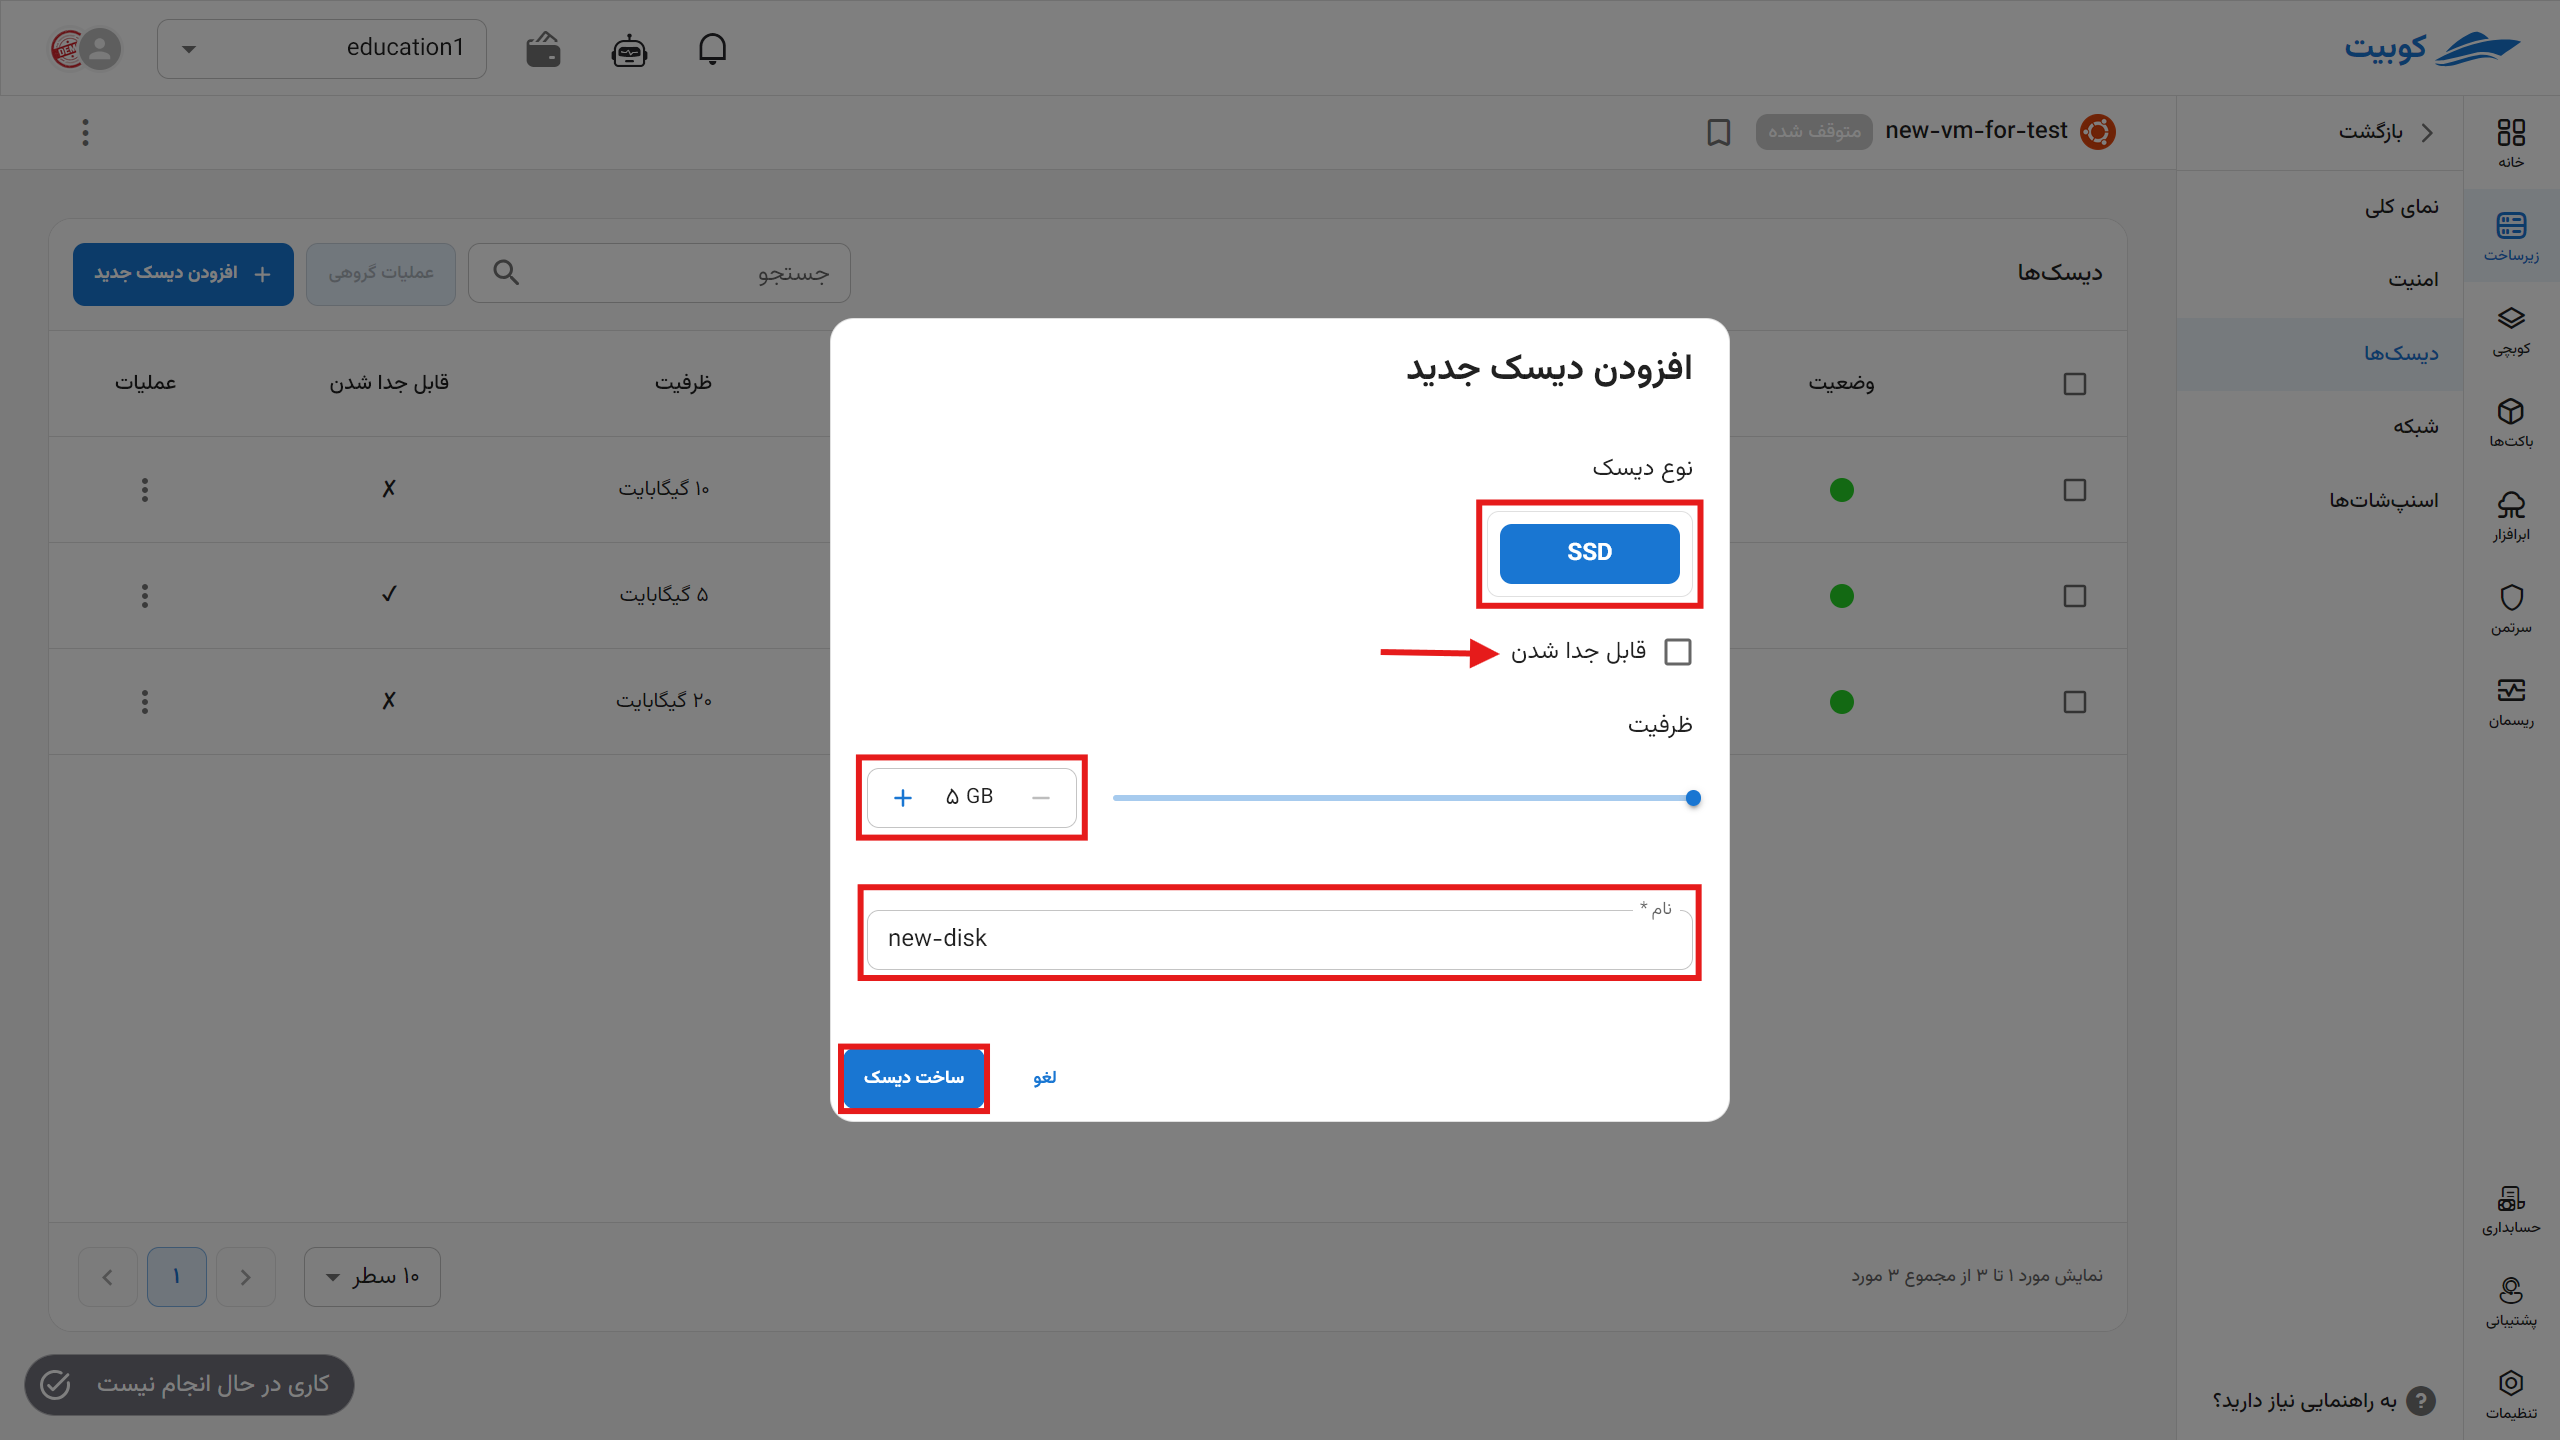
Add Disk
- To add a disk, click the Add New Disk button.
- Then, enter the desired specifications for the disk.
- Finally, click the Create Disk button.
Disk Operations
Various operations available for a disk can be accessed through the Operations column:
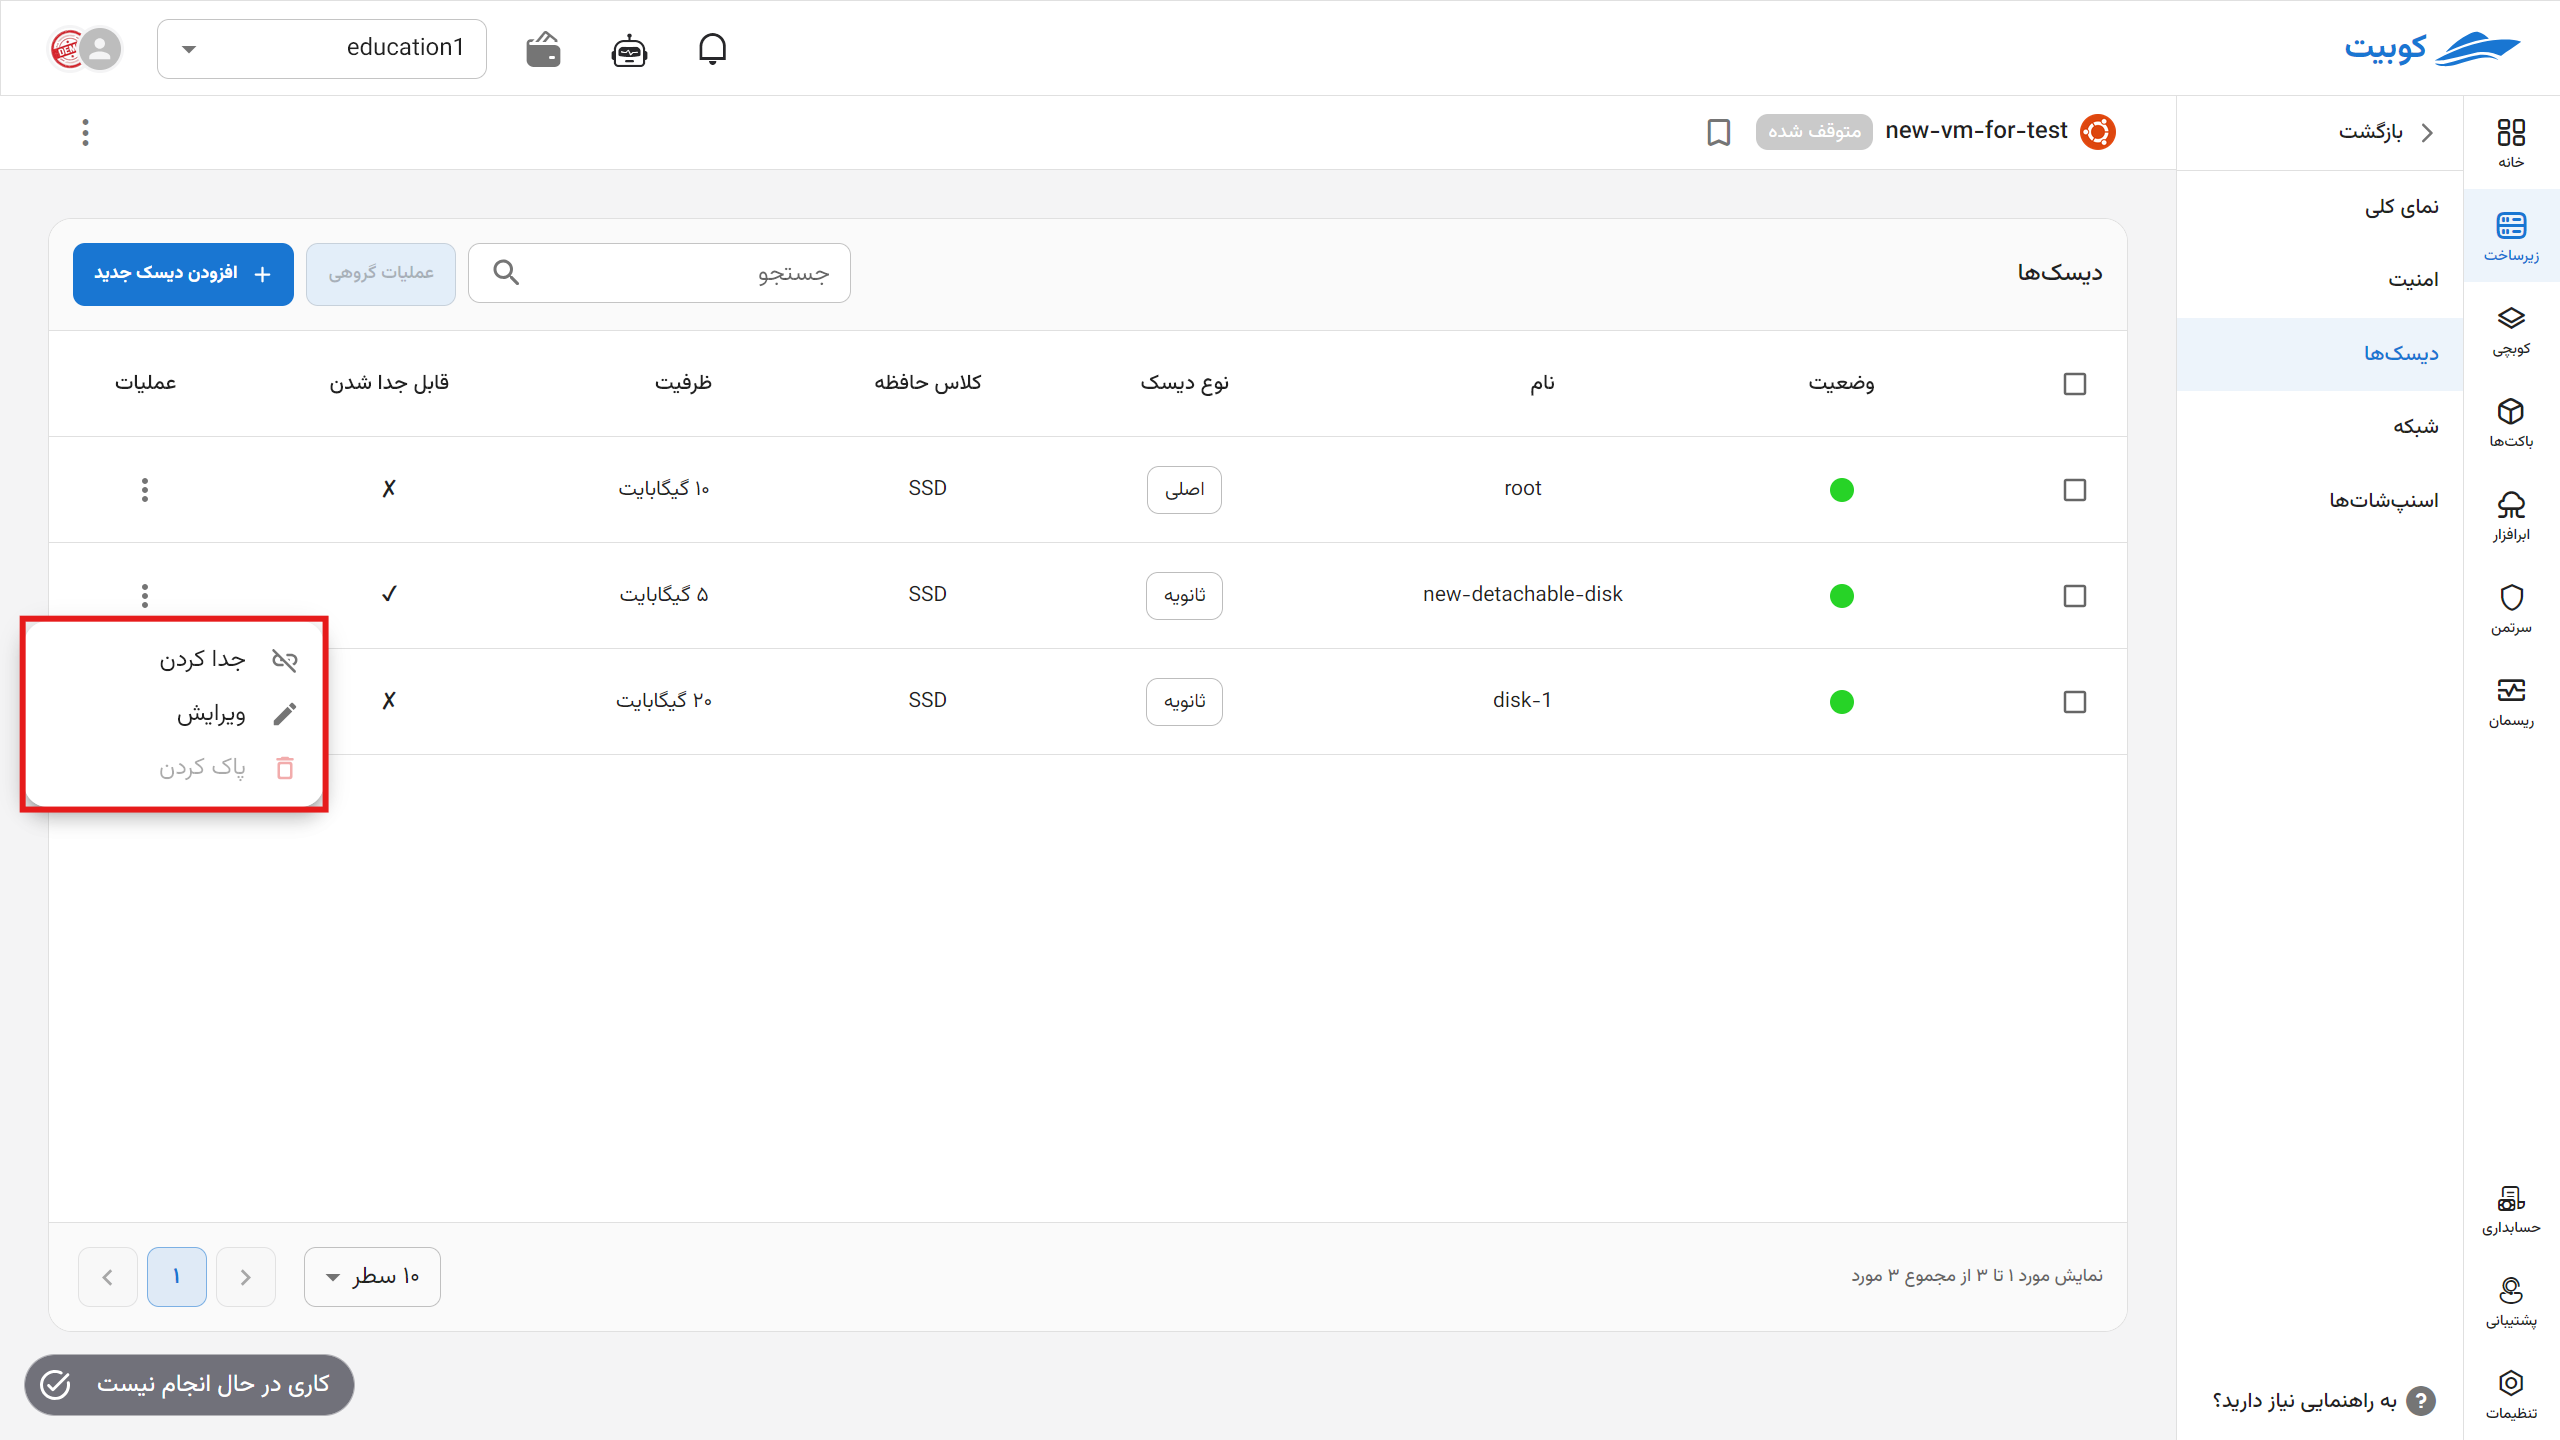
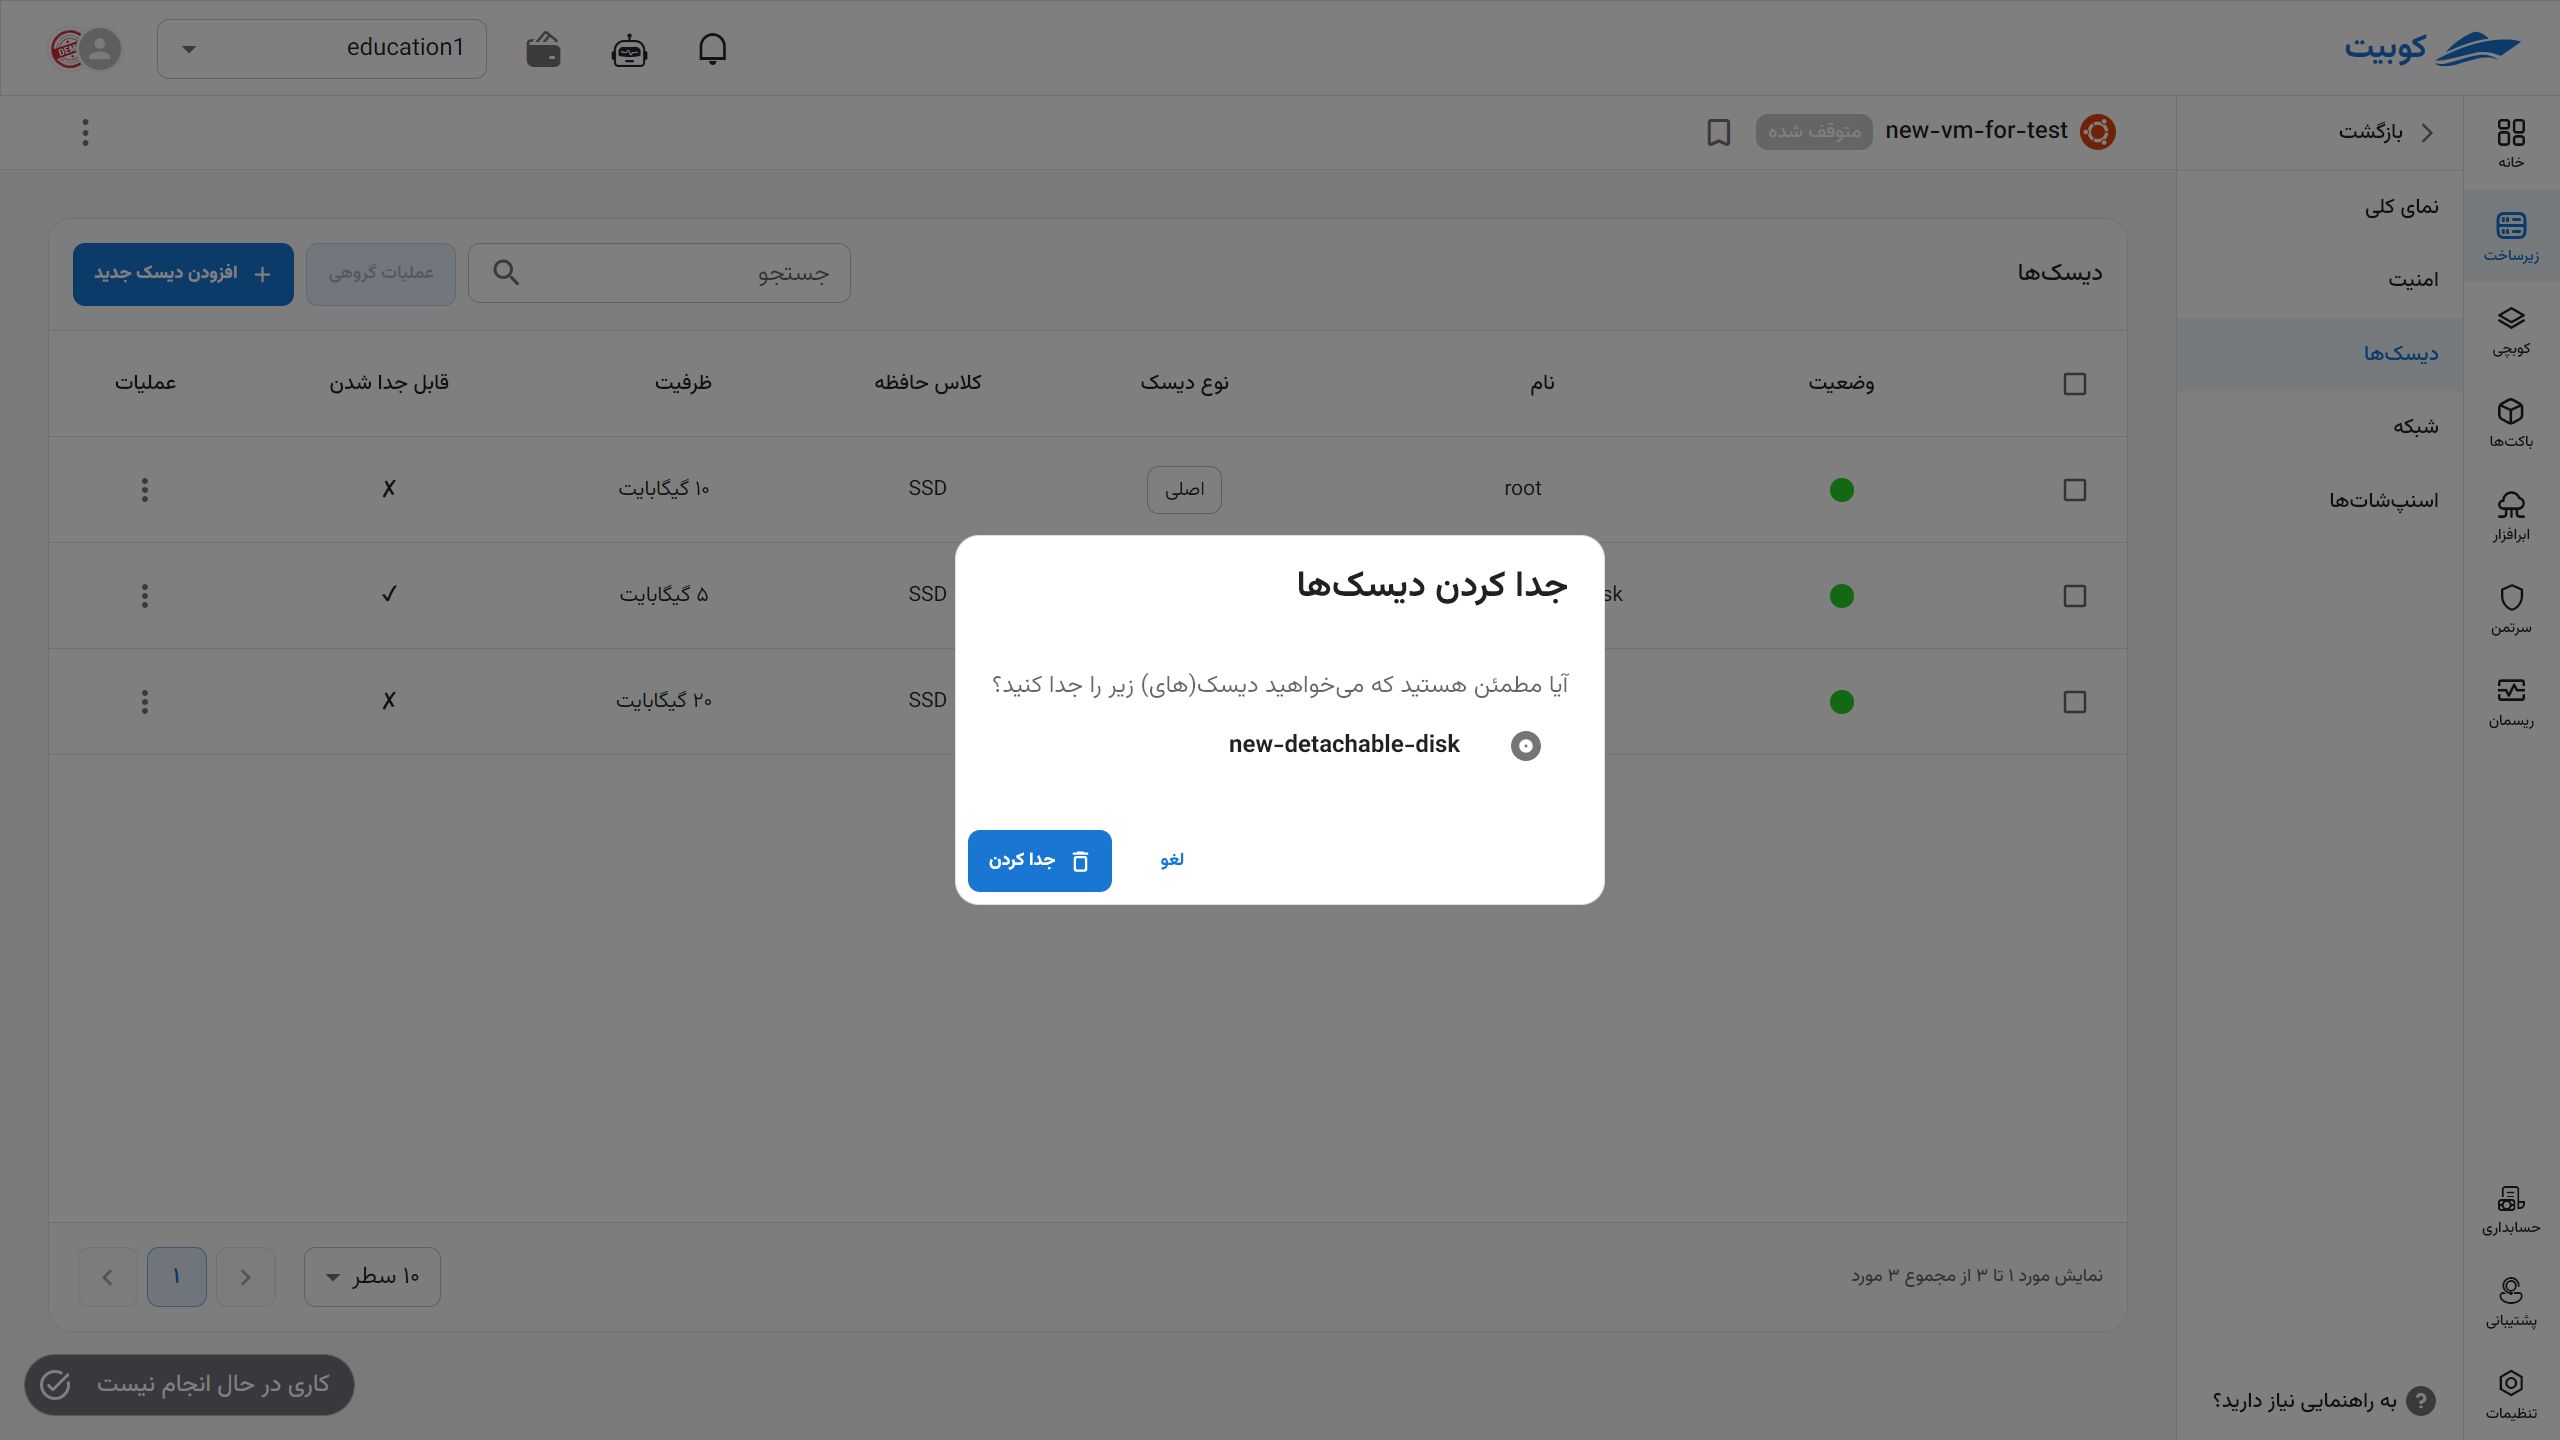
Detach Disk
- To detach a disk, click the Detach option in the operations column.
- If you are sure, click the Detach button in the opened dialog.
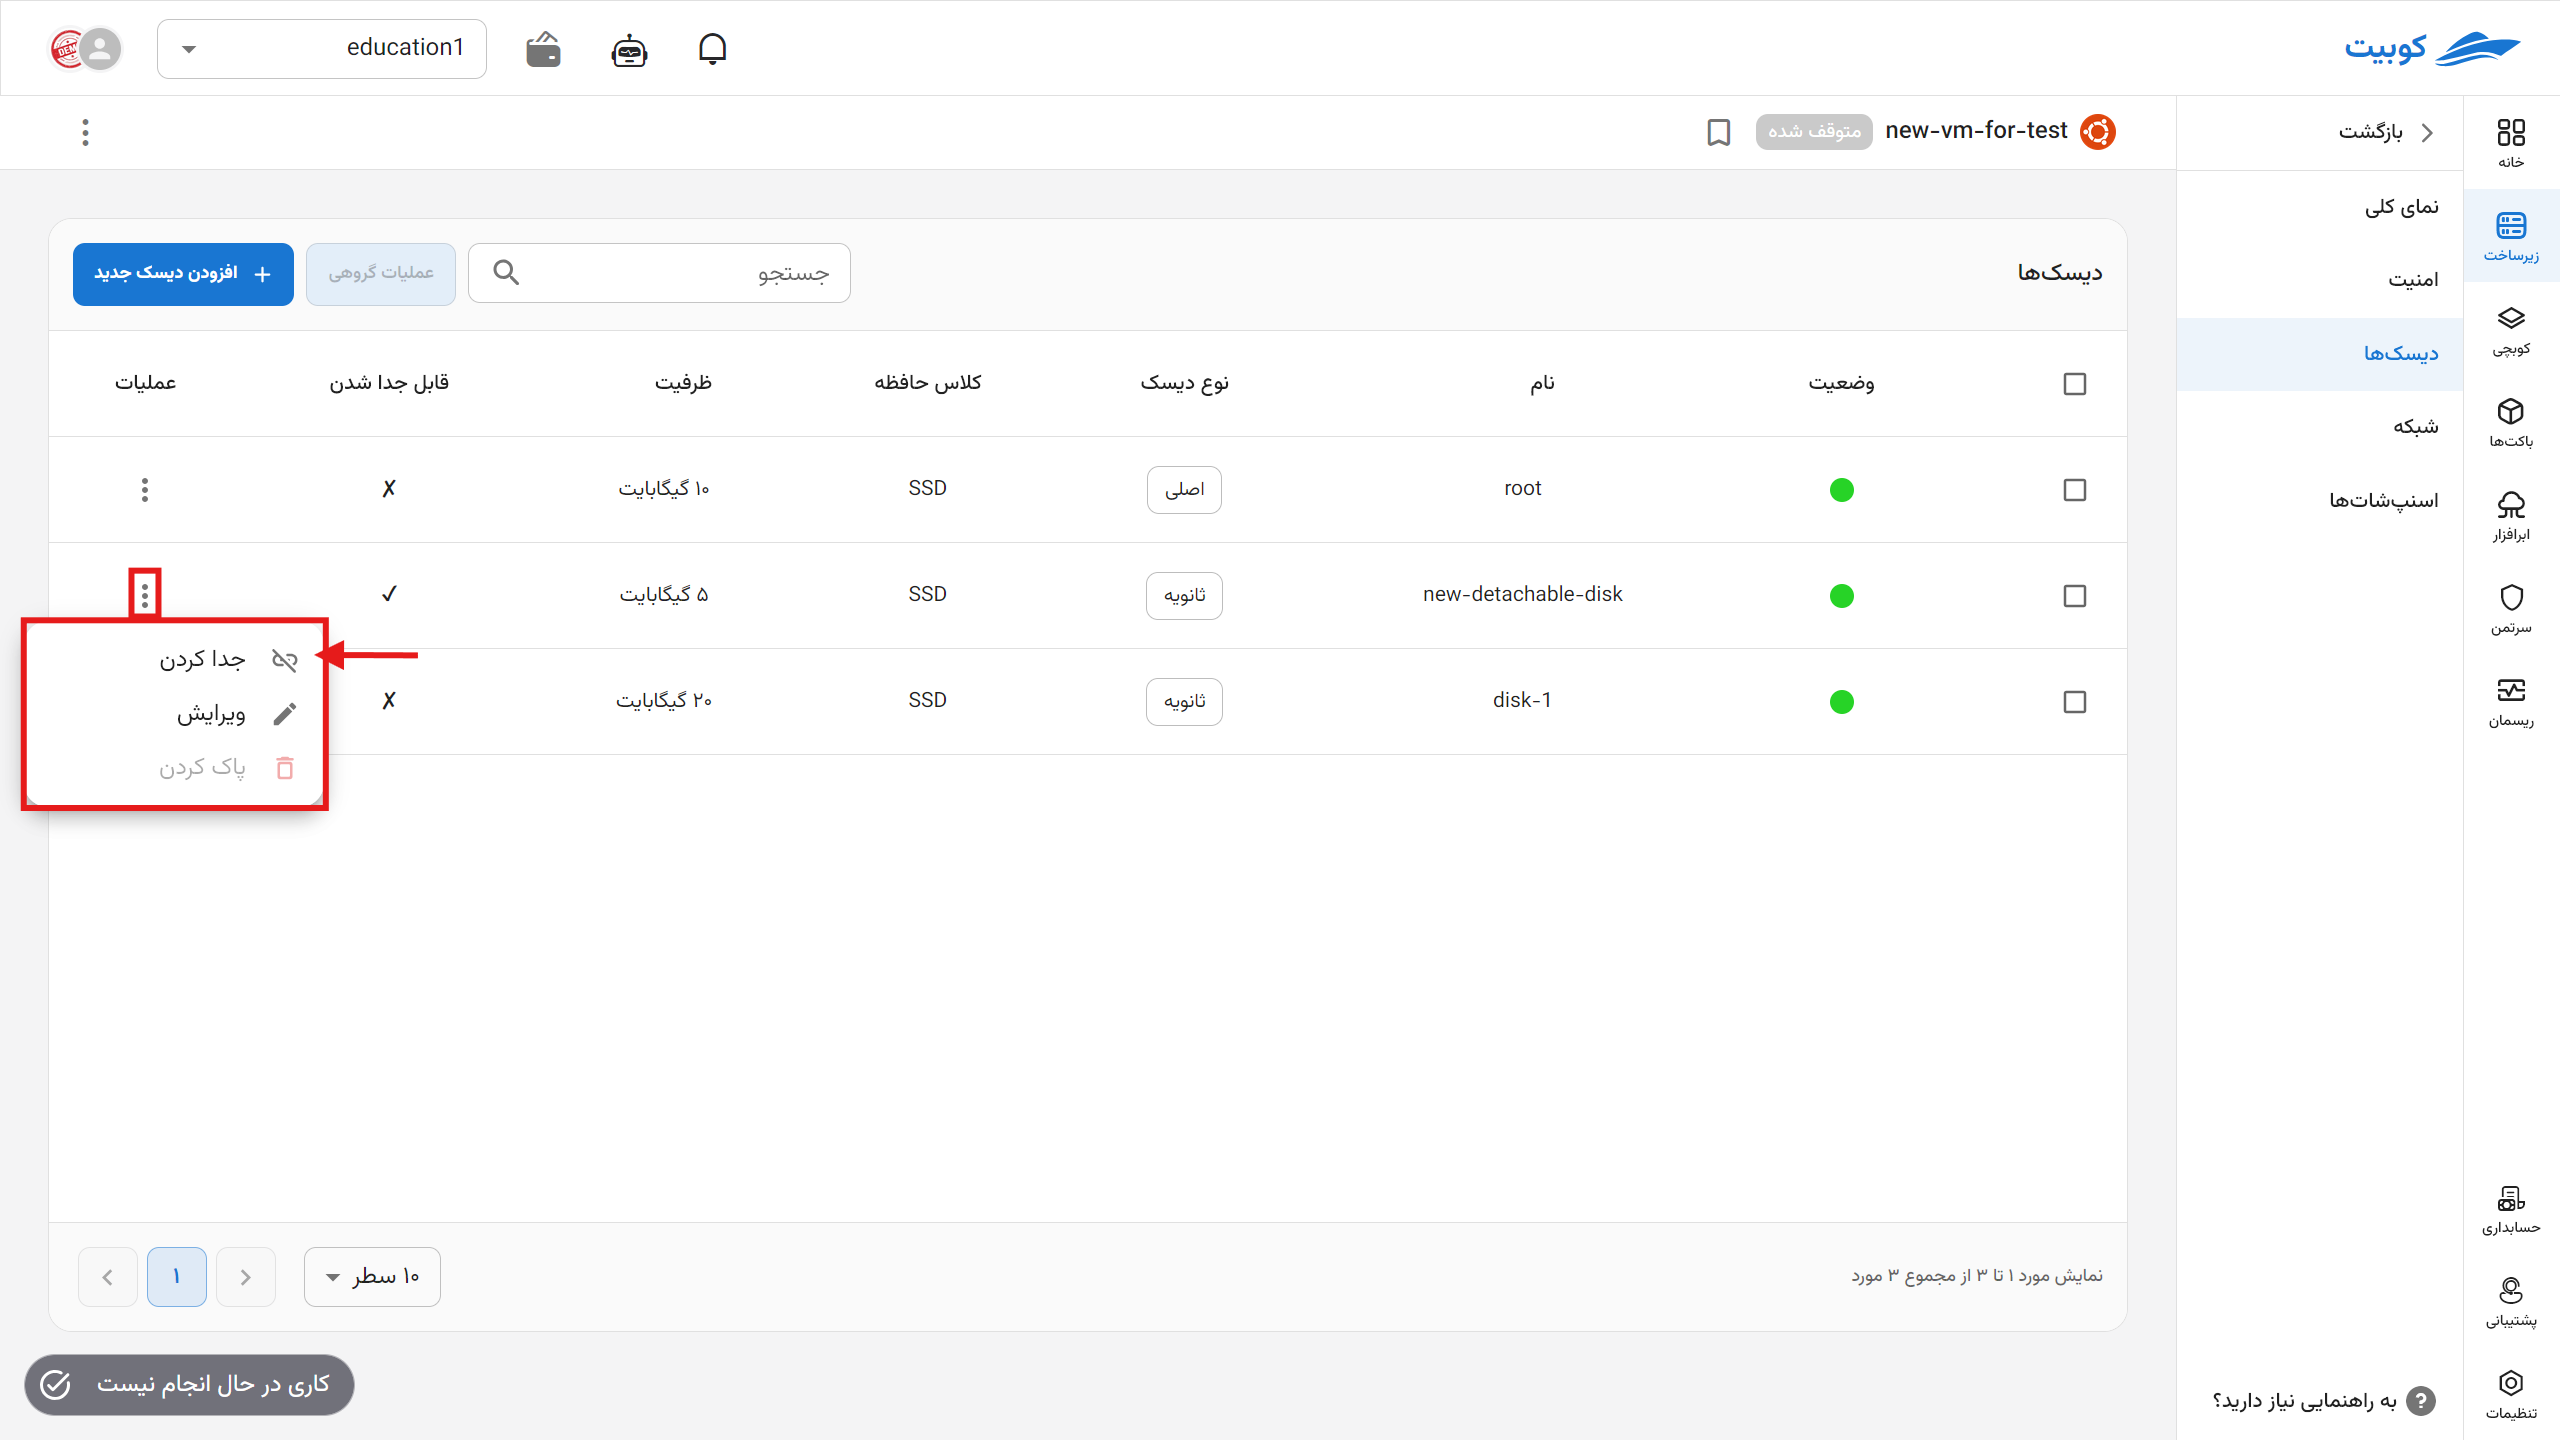
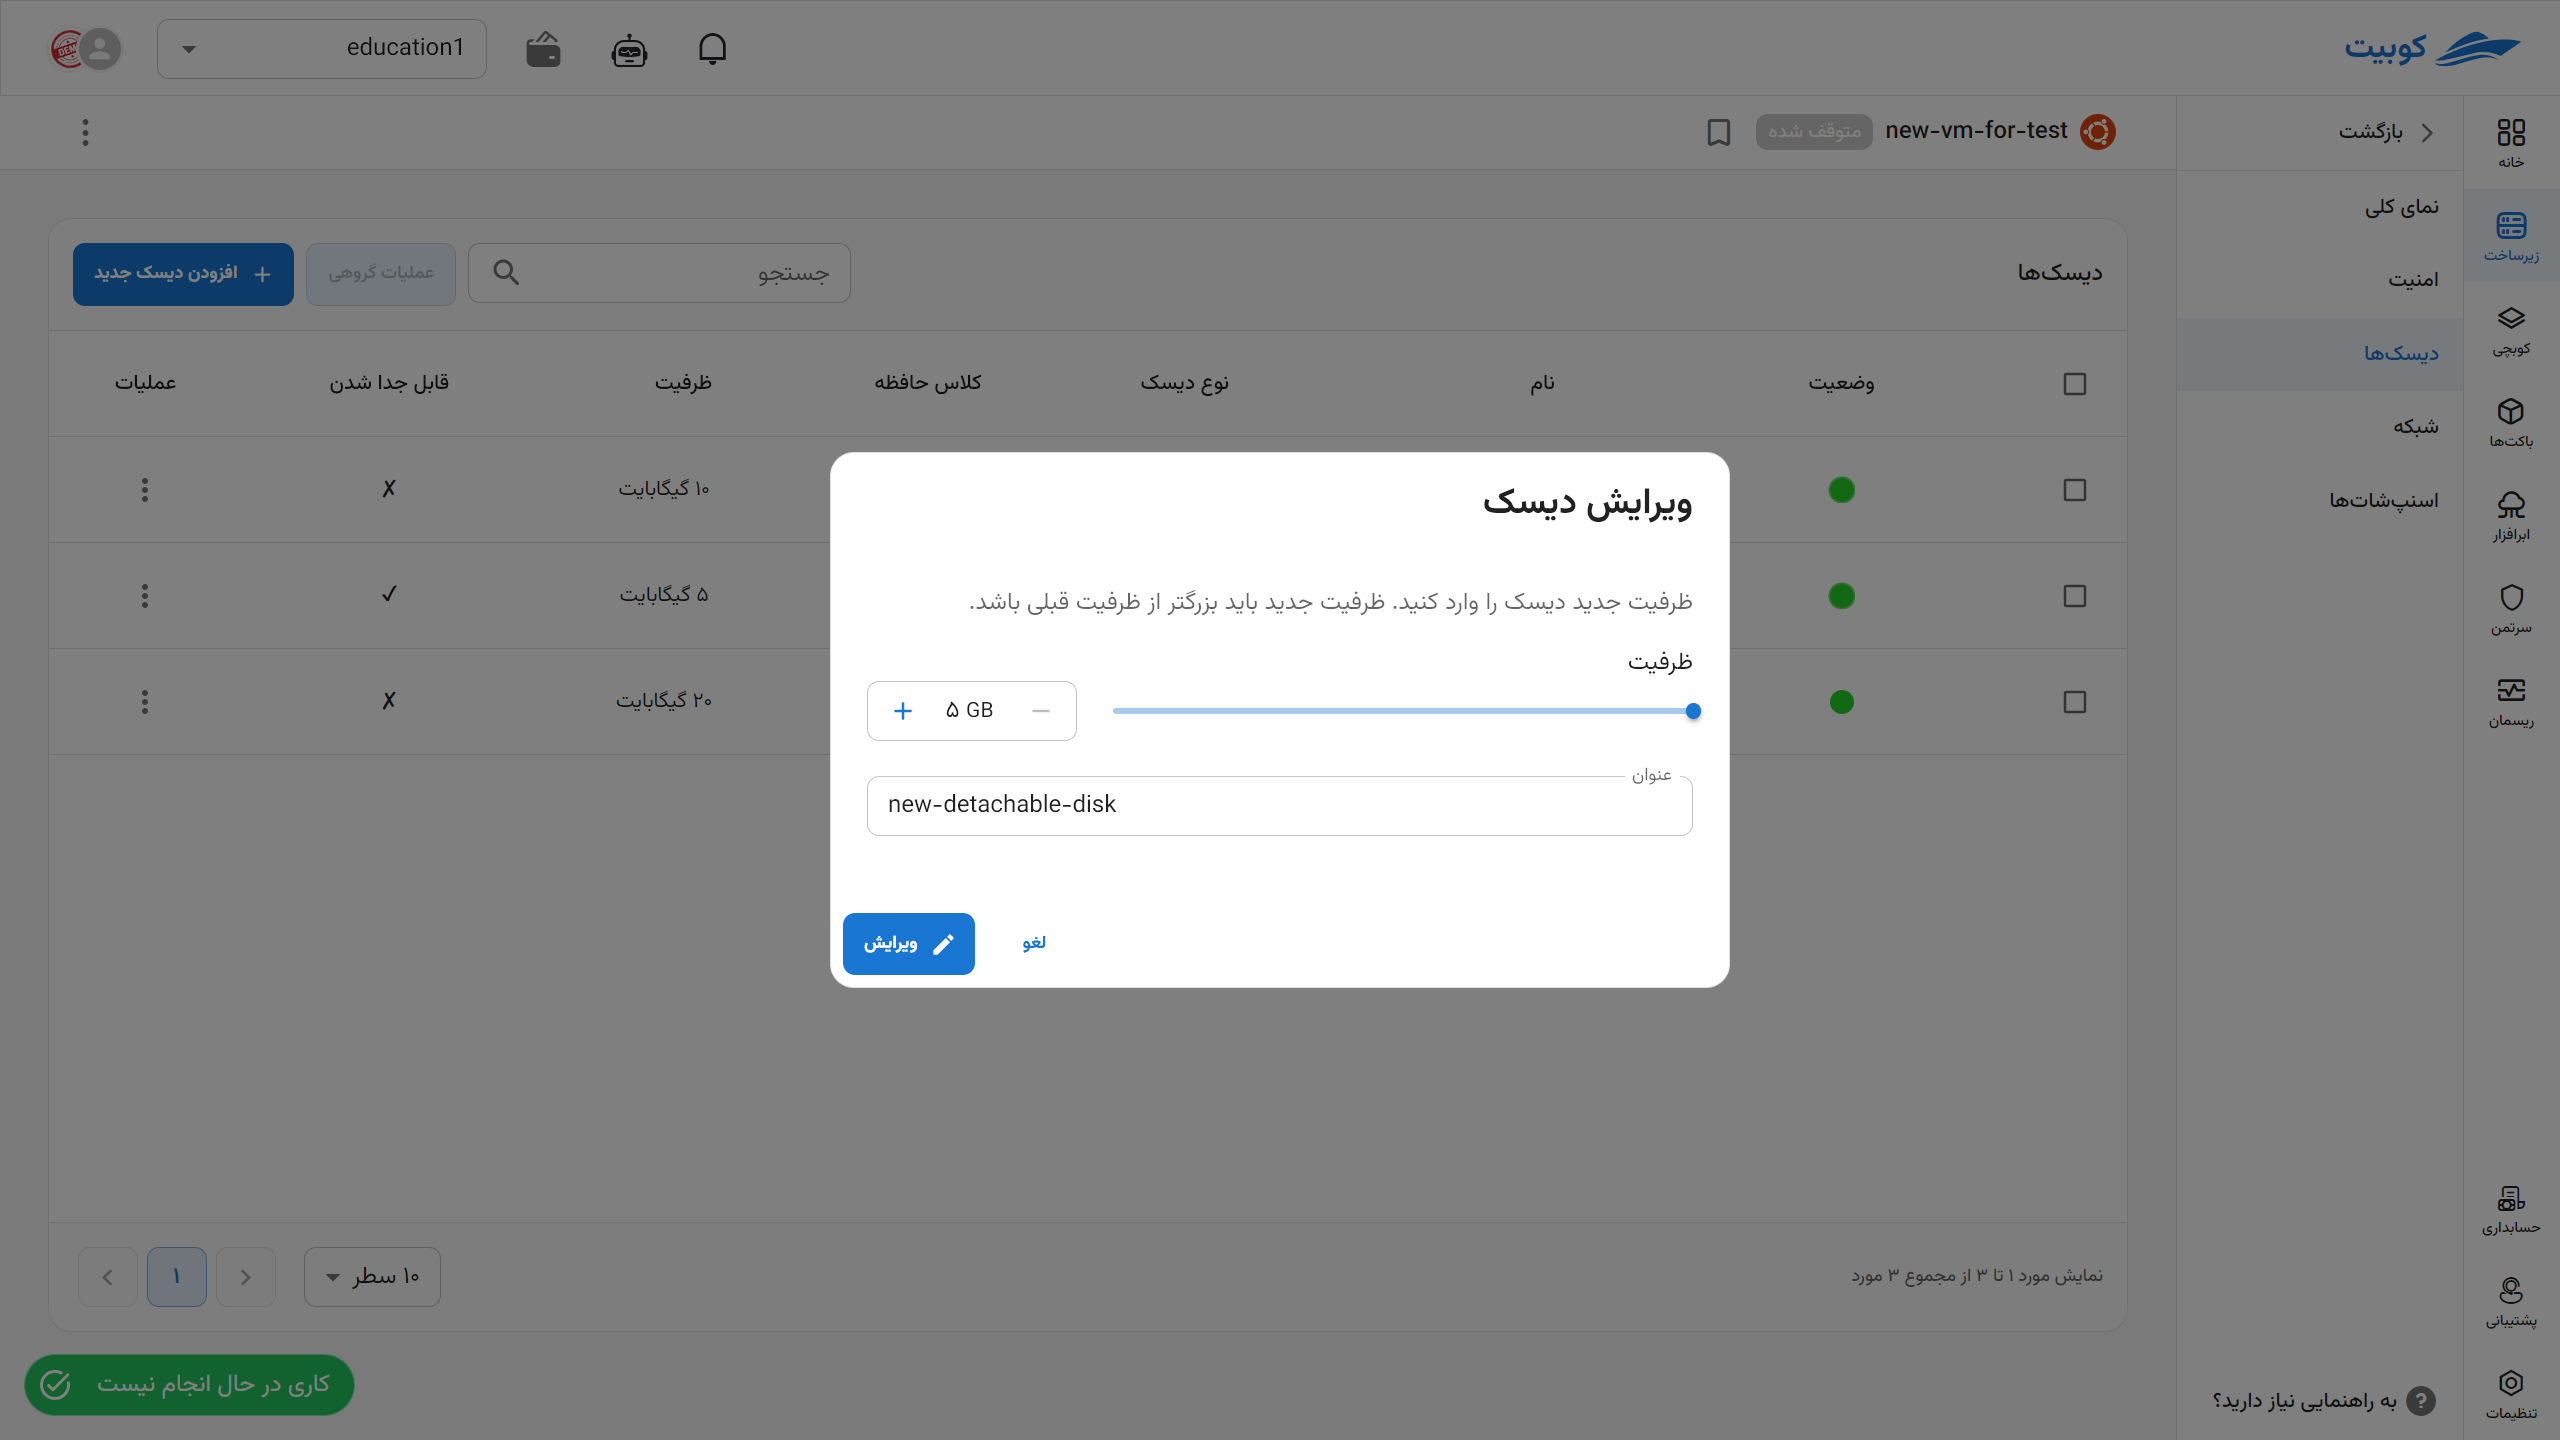
Edit Disk
- To edit a disk, click the Edit option in the operations column.
- Then, enter the new size and desired name as needed.
- Finally, click the Edit button.

Delete
- To delete a disk, click the Delete option in the operations column.
- If you are sure about the operation, enter the disk’s name as confirmation for deletion and click Delete.


Delete Detachable Disk
- To delete a detachable disk, first detach the disk. This will remove the disk from the machine’s disk list.
- Then, from the Detachable Disks section, find the desired disk and select the Delete option.
- If you are sure about the operation, enter the disk’s name as confirmation for deletion and click Delete.
Batch Operations
For ease of performing operations on multiple disks, some of the above operations are available through the Batch Operations option. First, select one or more disks. After selecting the disks, the Batch Operations button becomes active. Clicking on Batch Operations will display a list of available operations for the disks:
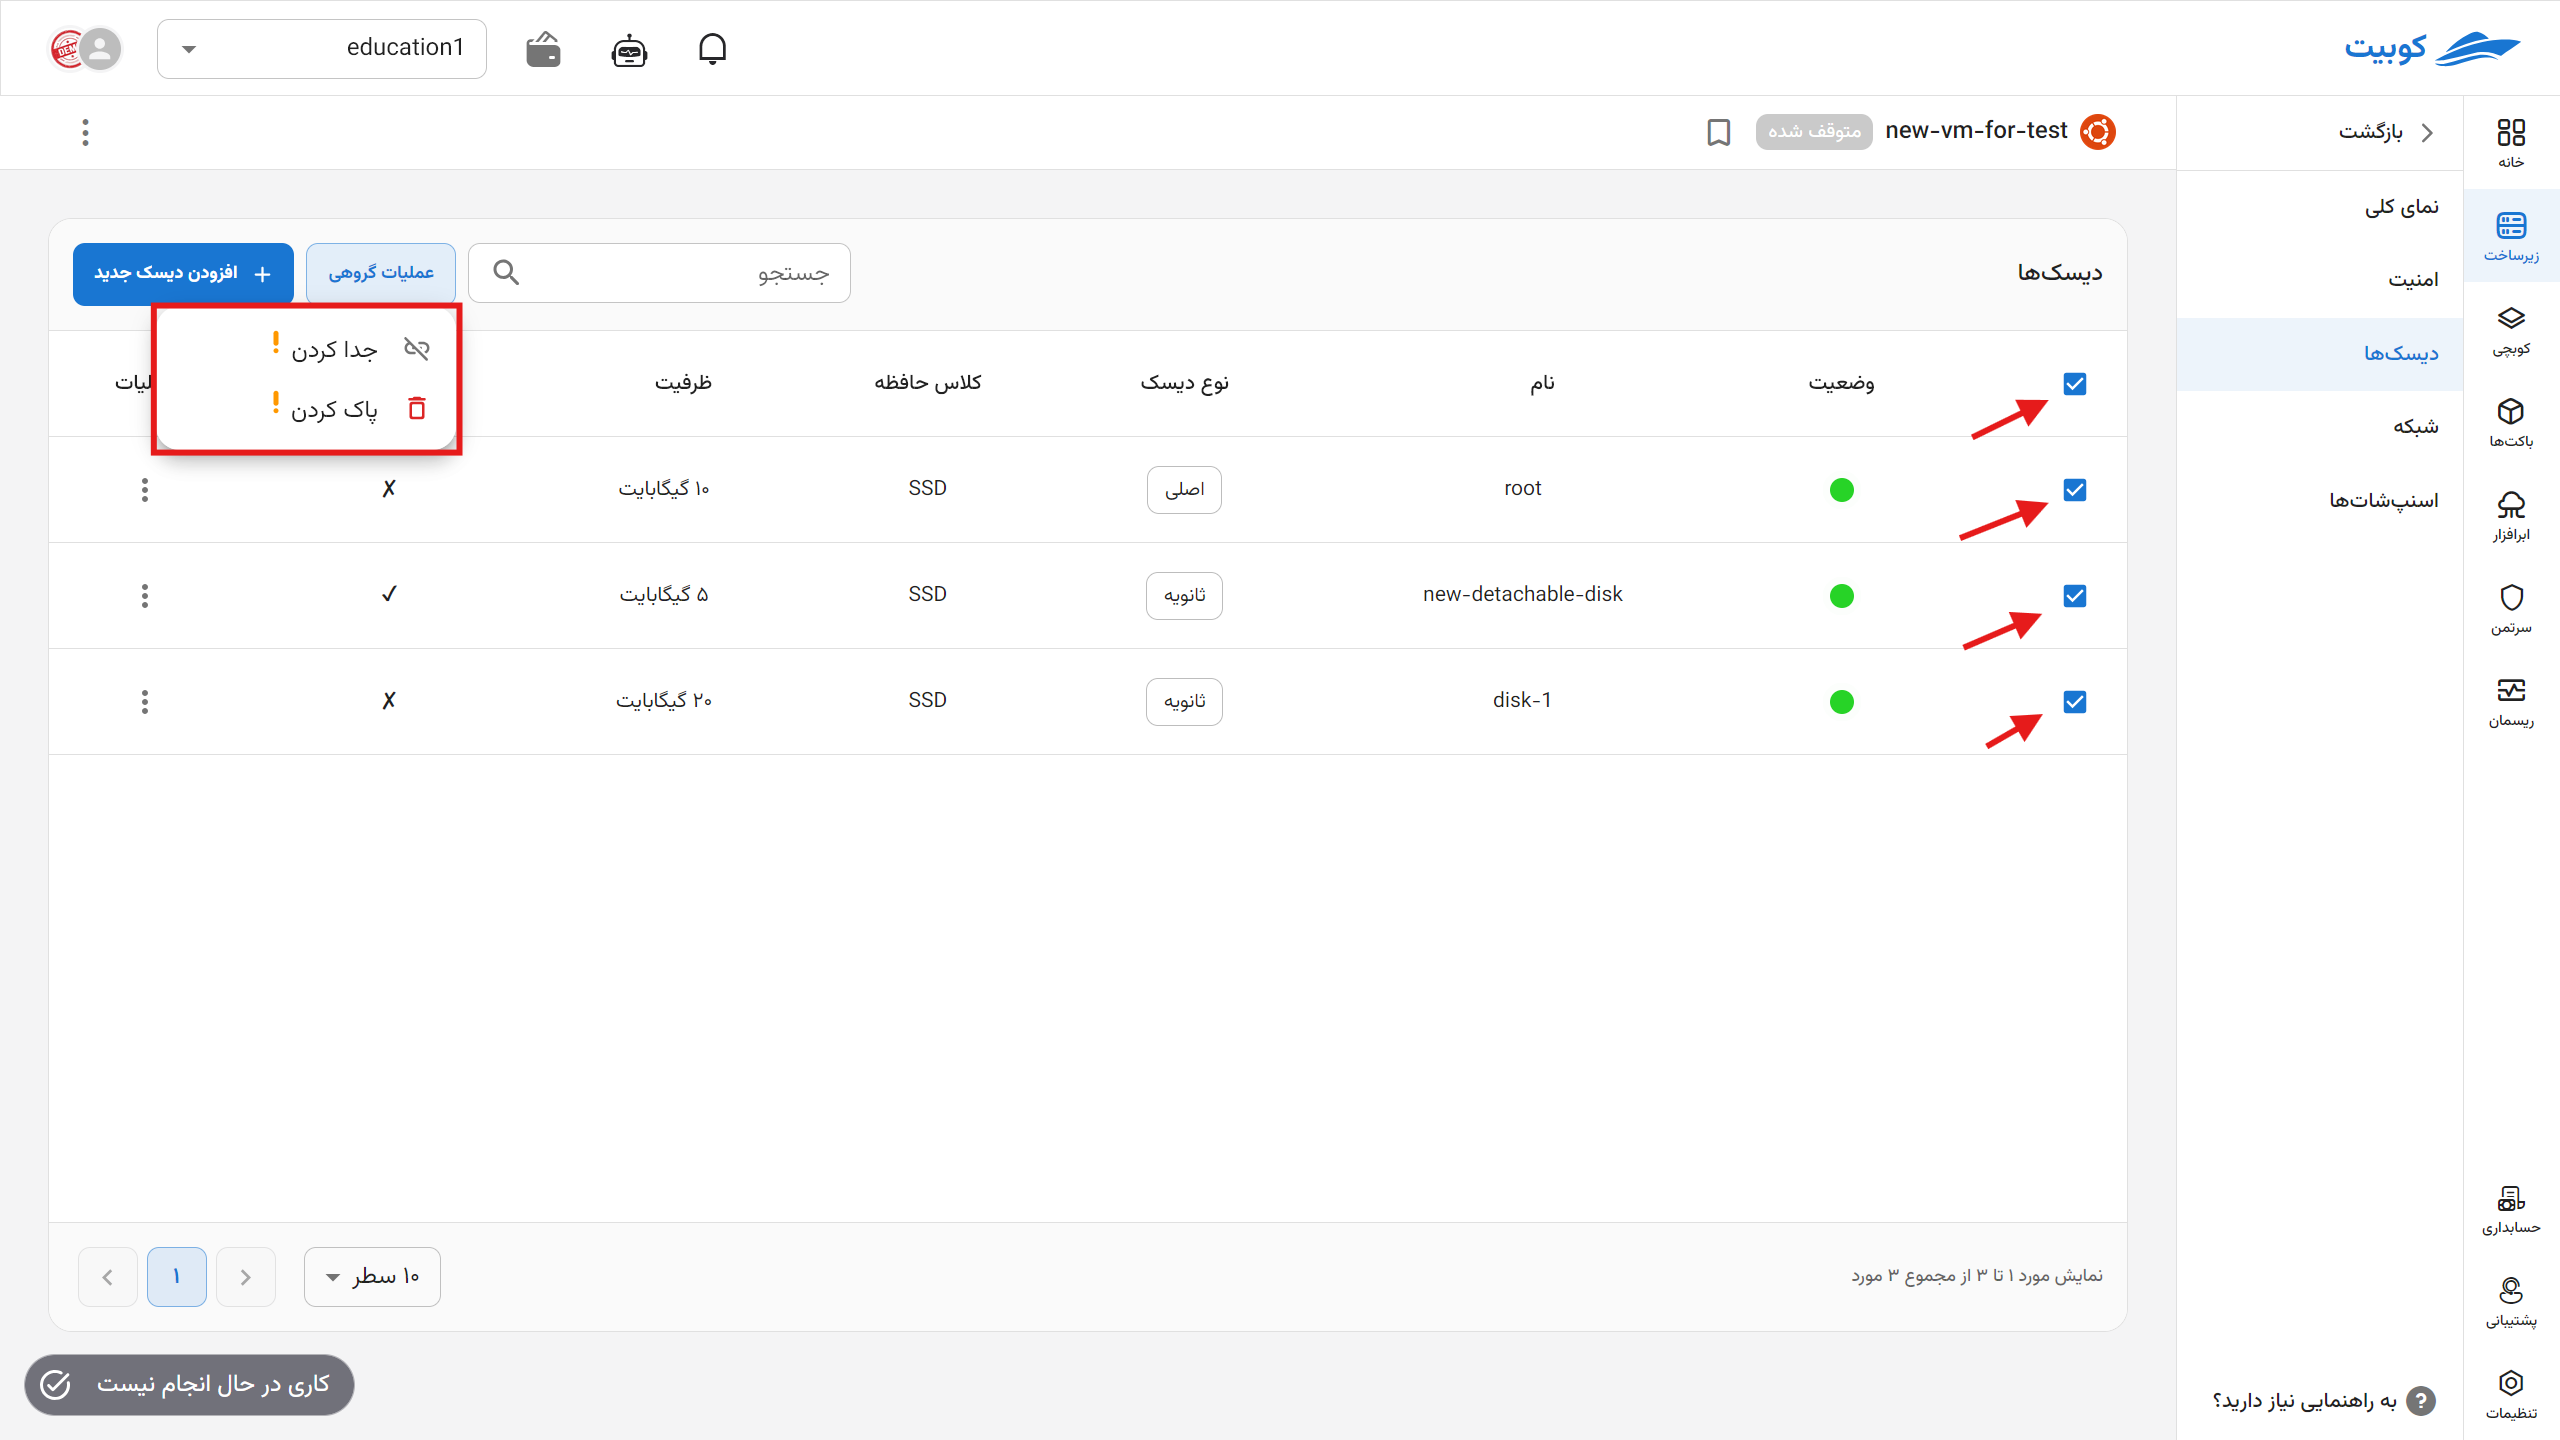 By clicking on any of the options, the selected operation will be applied to all chosen disks.
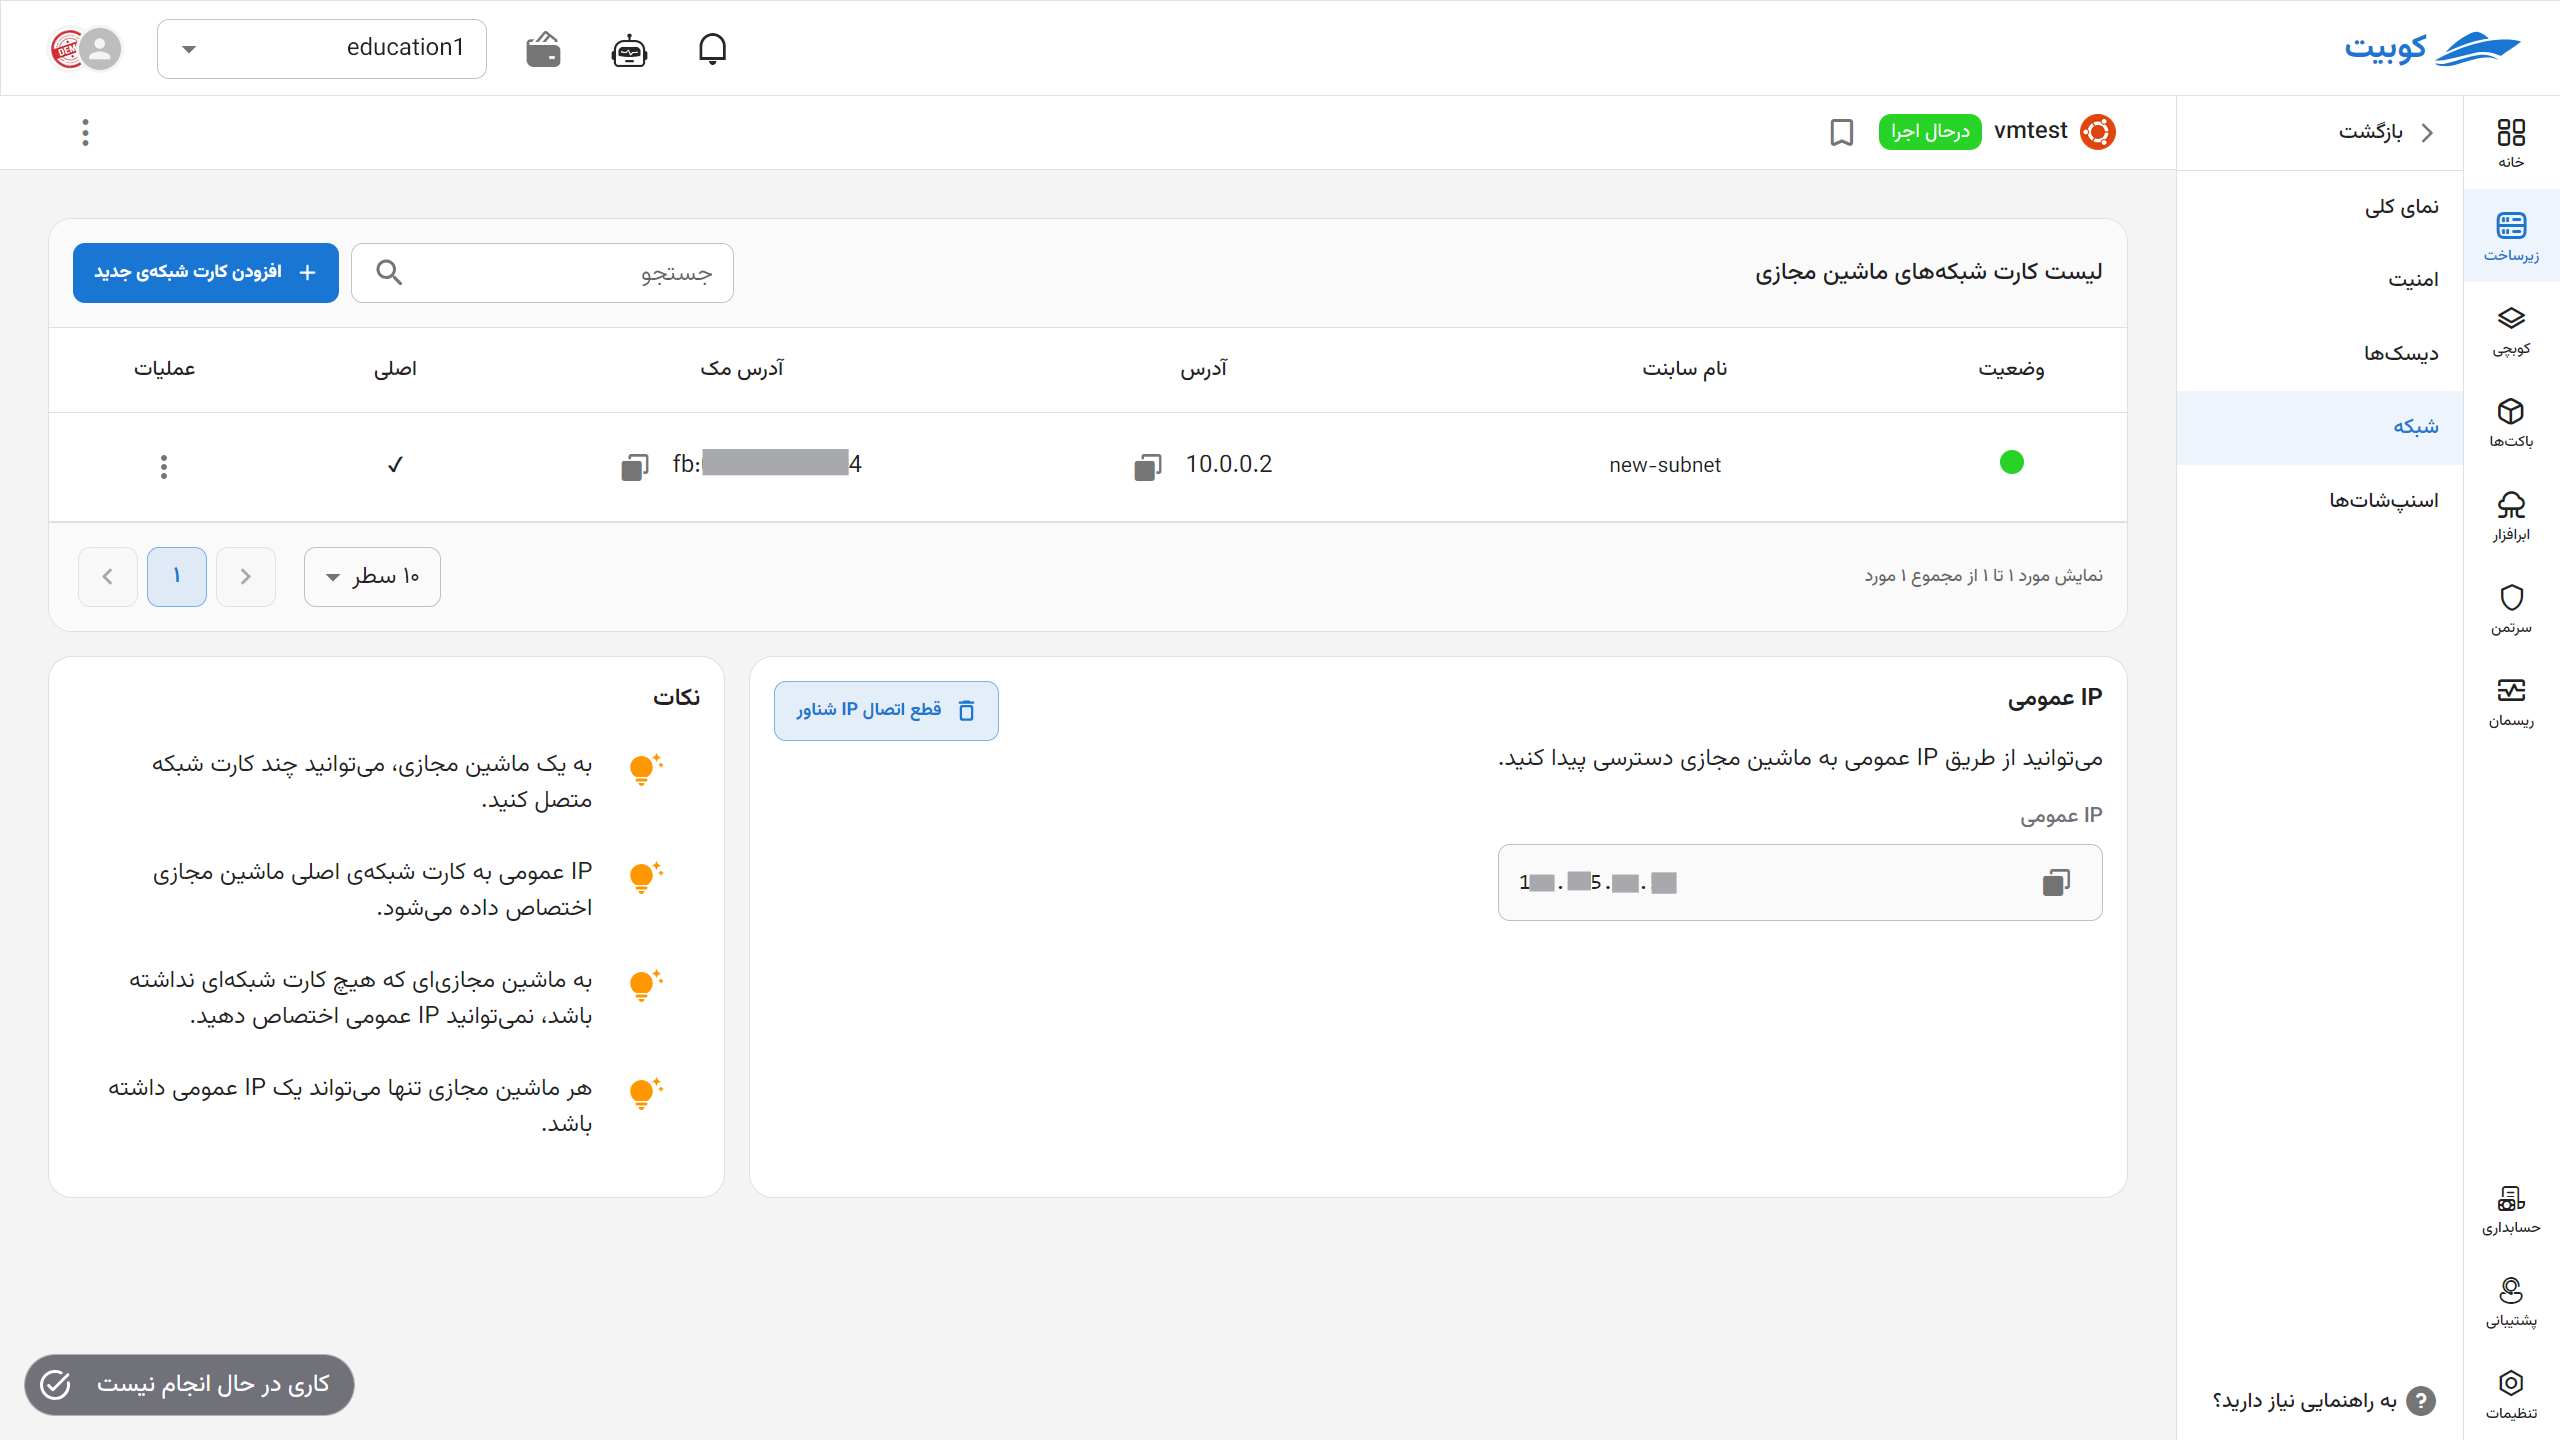
Network
In this subpage, information about the virtual machine’s network settings is displayed. This includes subnets, public IP addresses, and more, along with operations such as adding a network interface, deleting a subnet, and disconnecting a public IP.
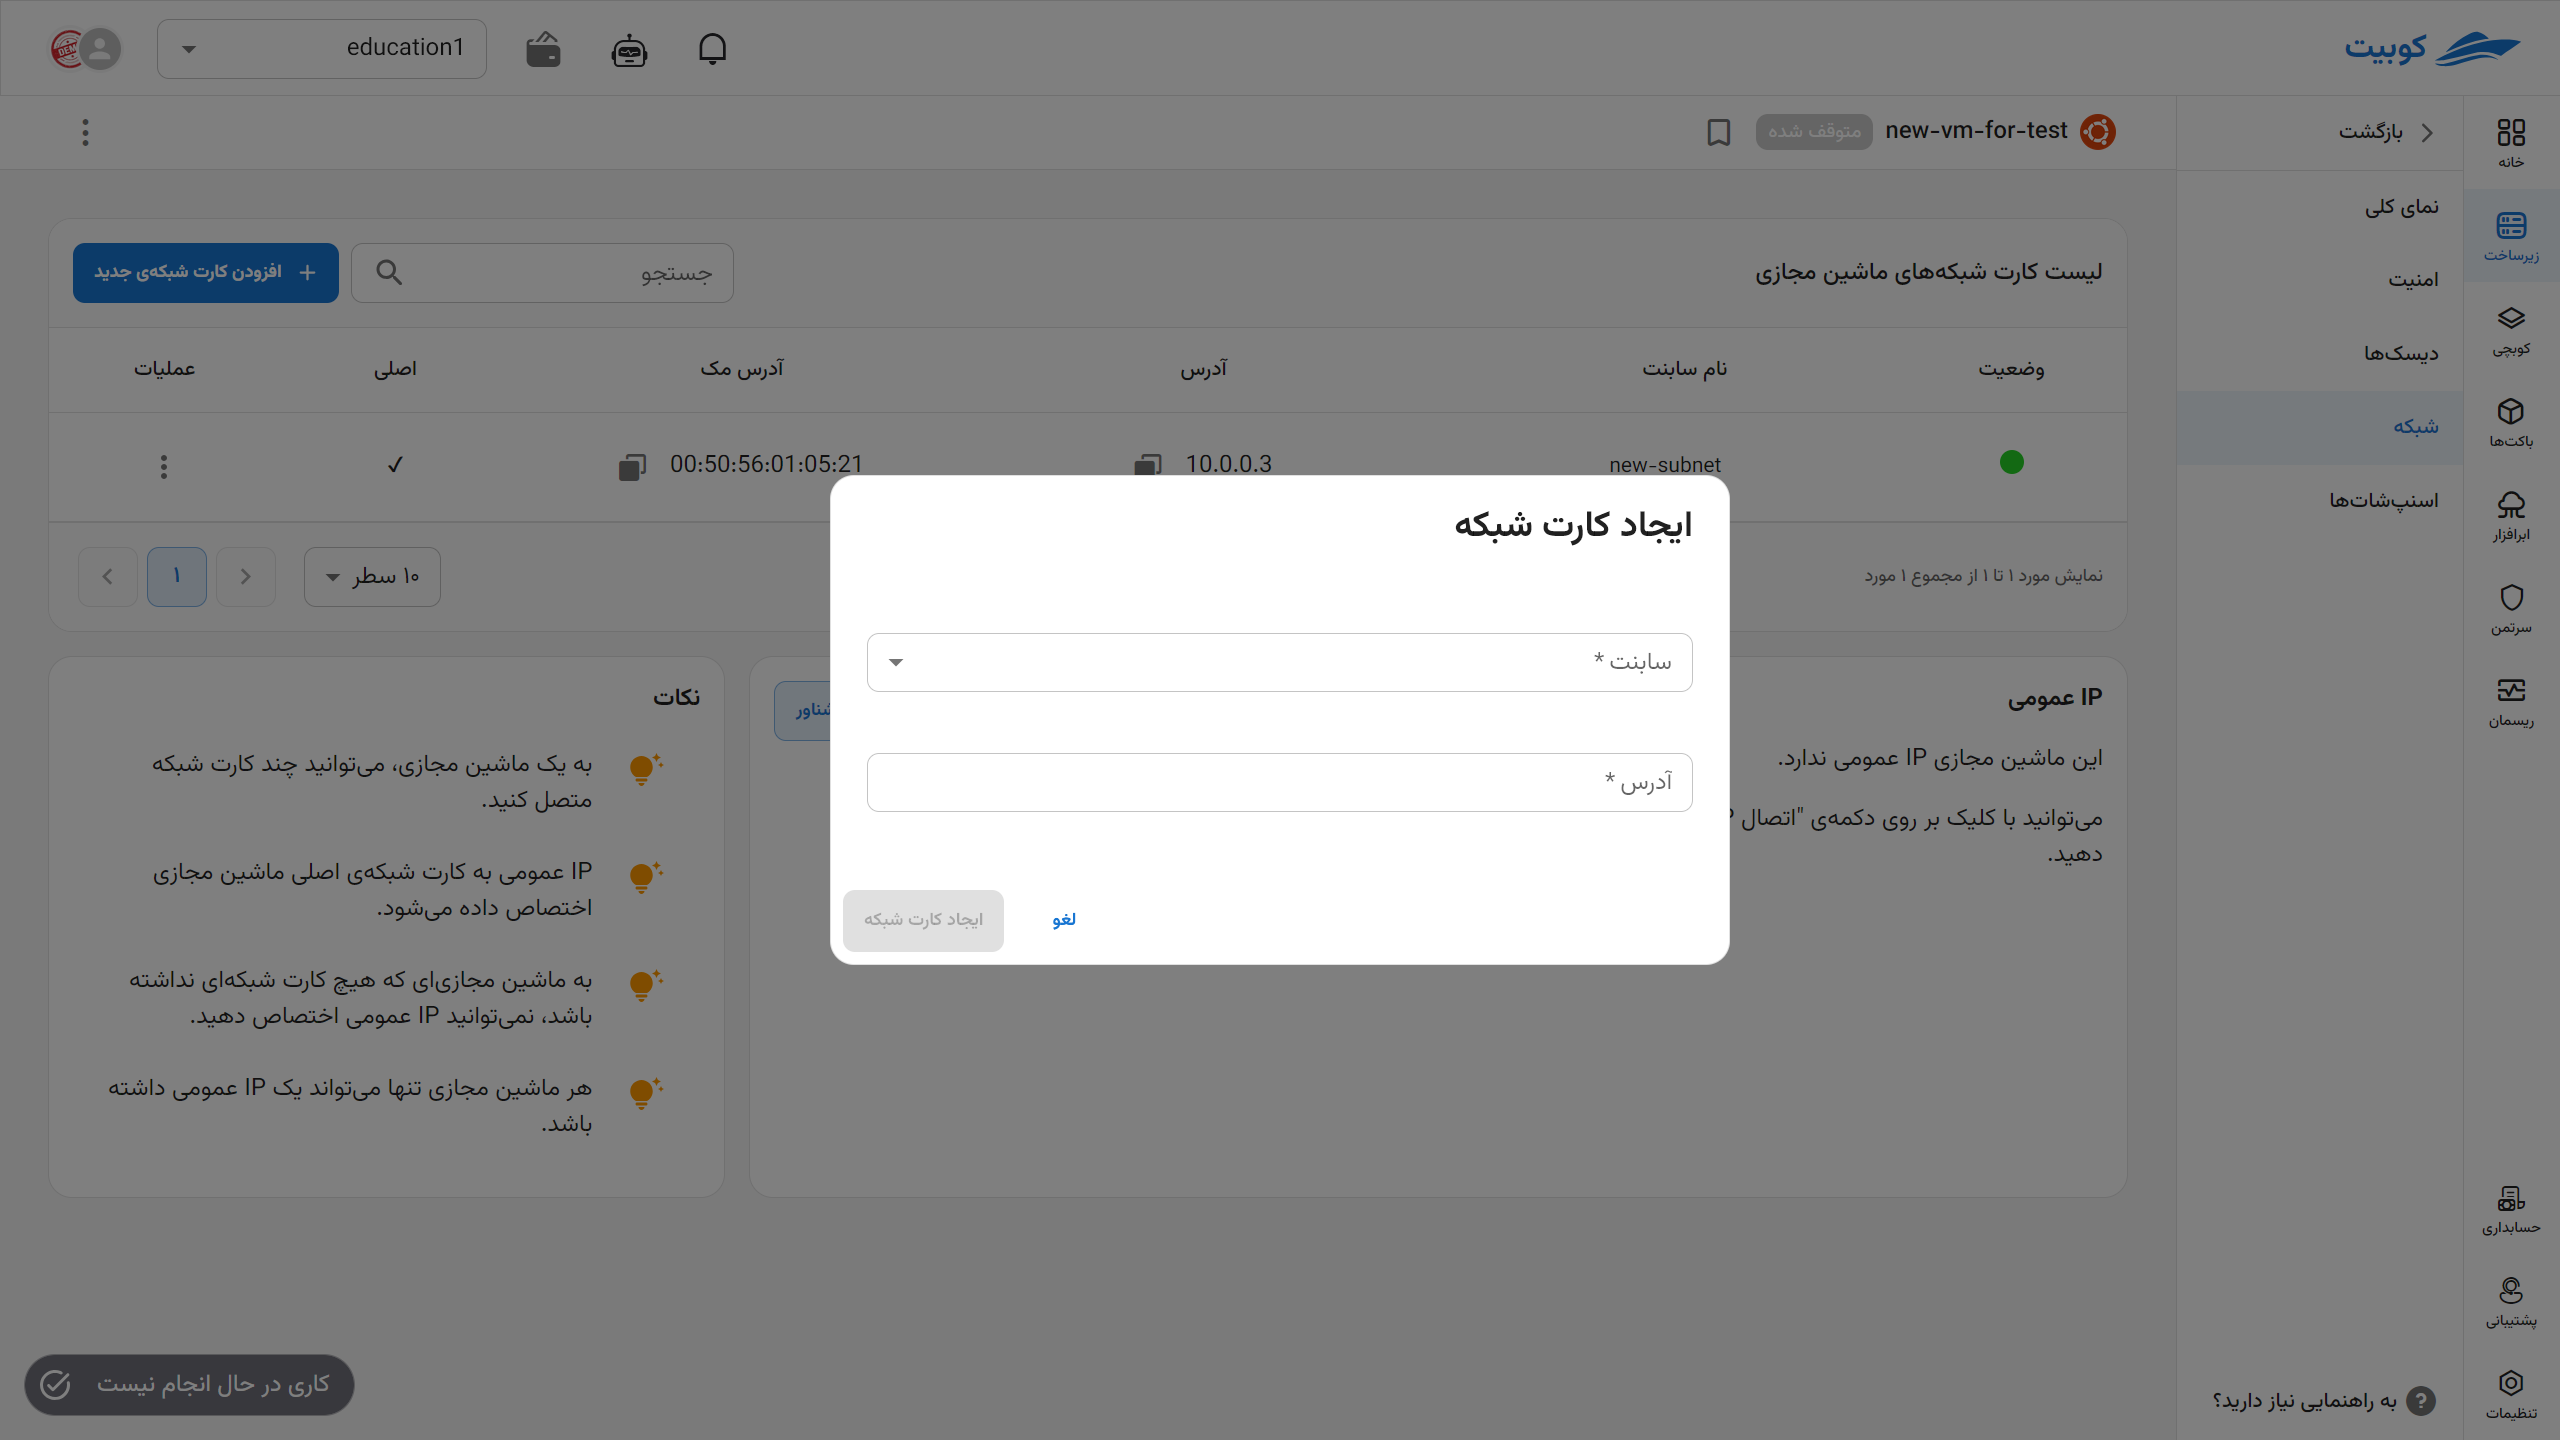
Add Network Interface
-
To add a network interface, click the Add Network Interface button.
-
In the opened dialog, select a subnet from the available subnets and enter the desired IP address.
-
Finally, click the Add button.


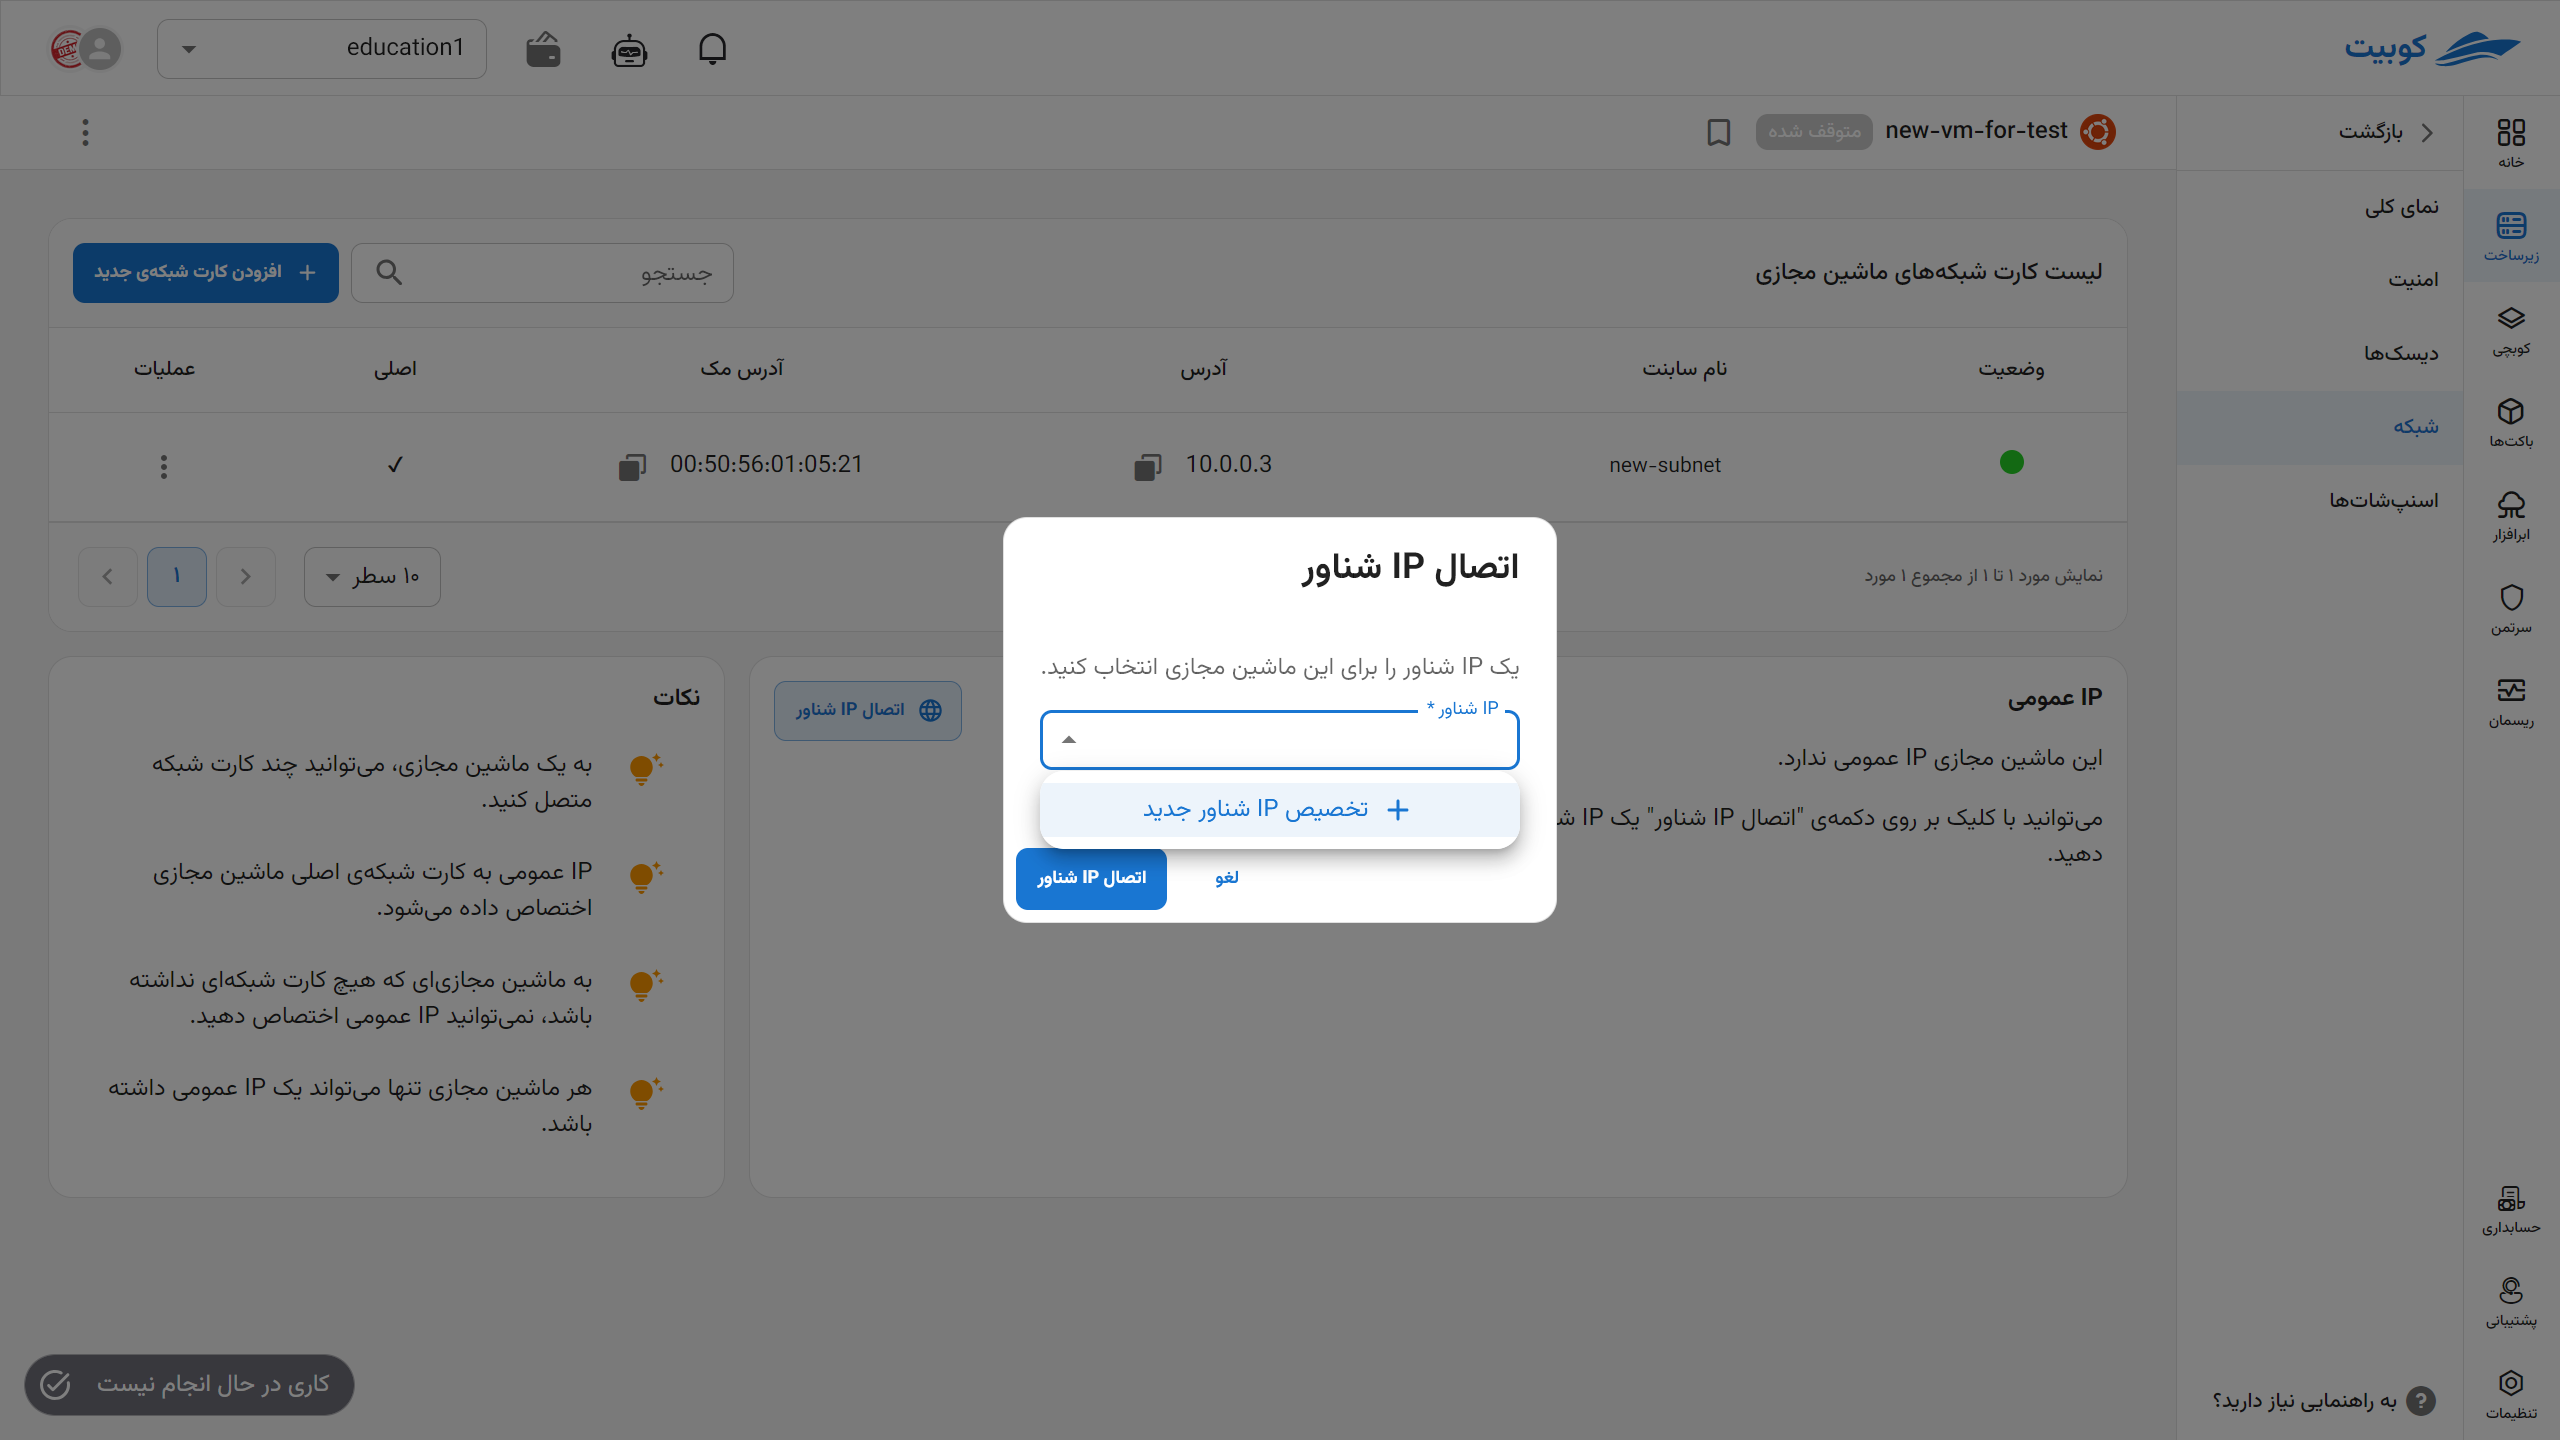
Connect/Disconnect Public IP
- First, click on the Connect Floating IP option.
- Then, select one from the list of public IPs.
- If no IP has been assigned to you, you can request one, and the system will automatically assign a floating IP to you.


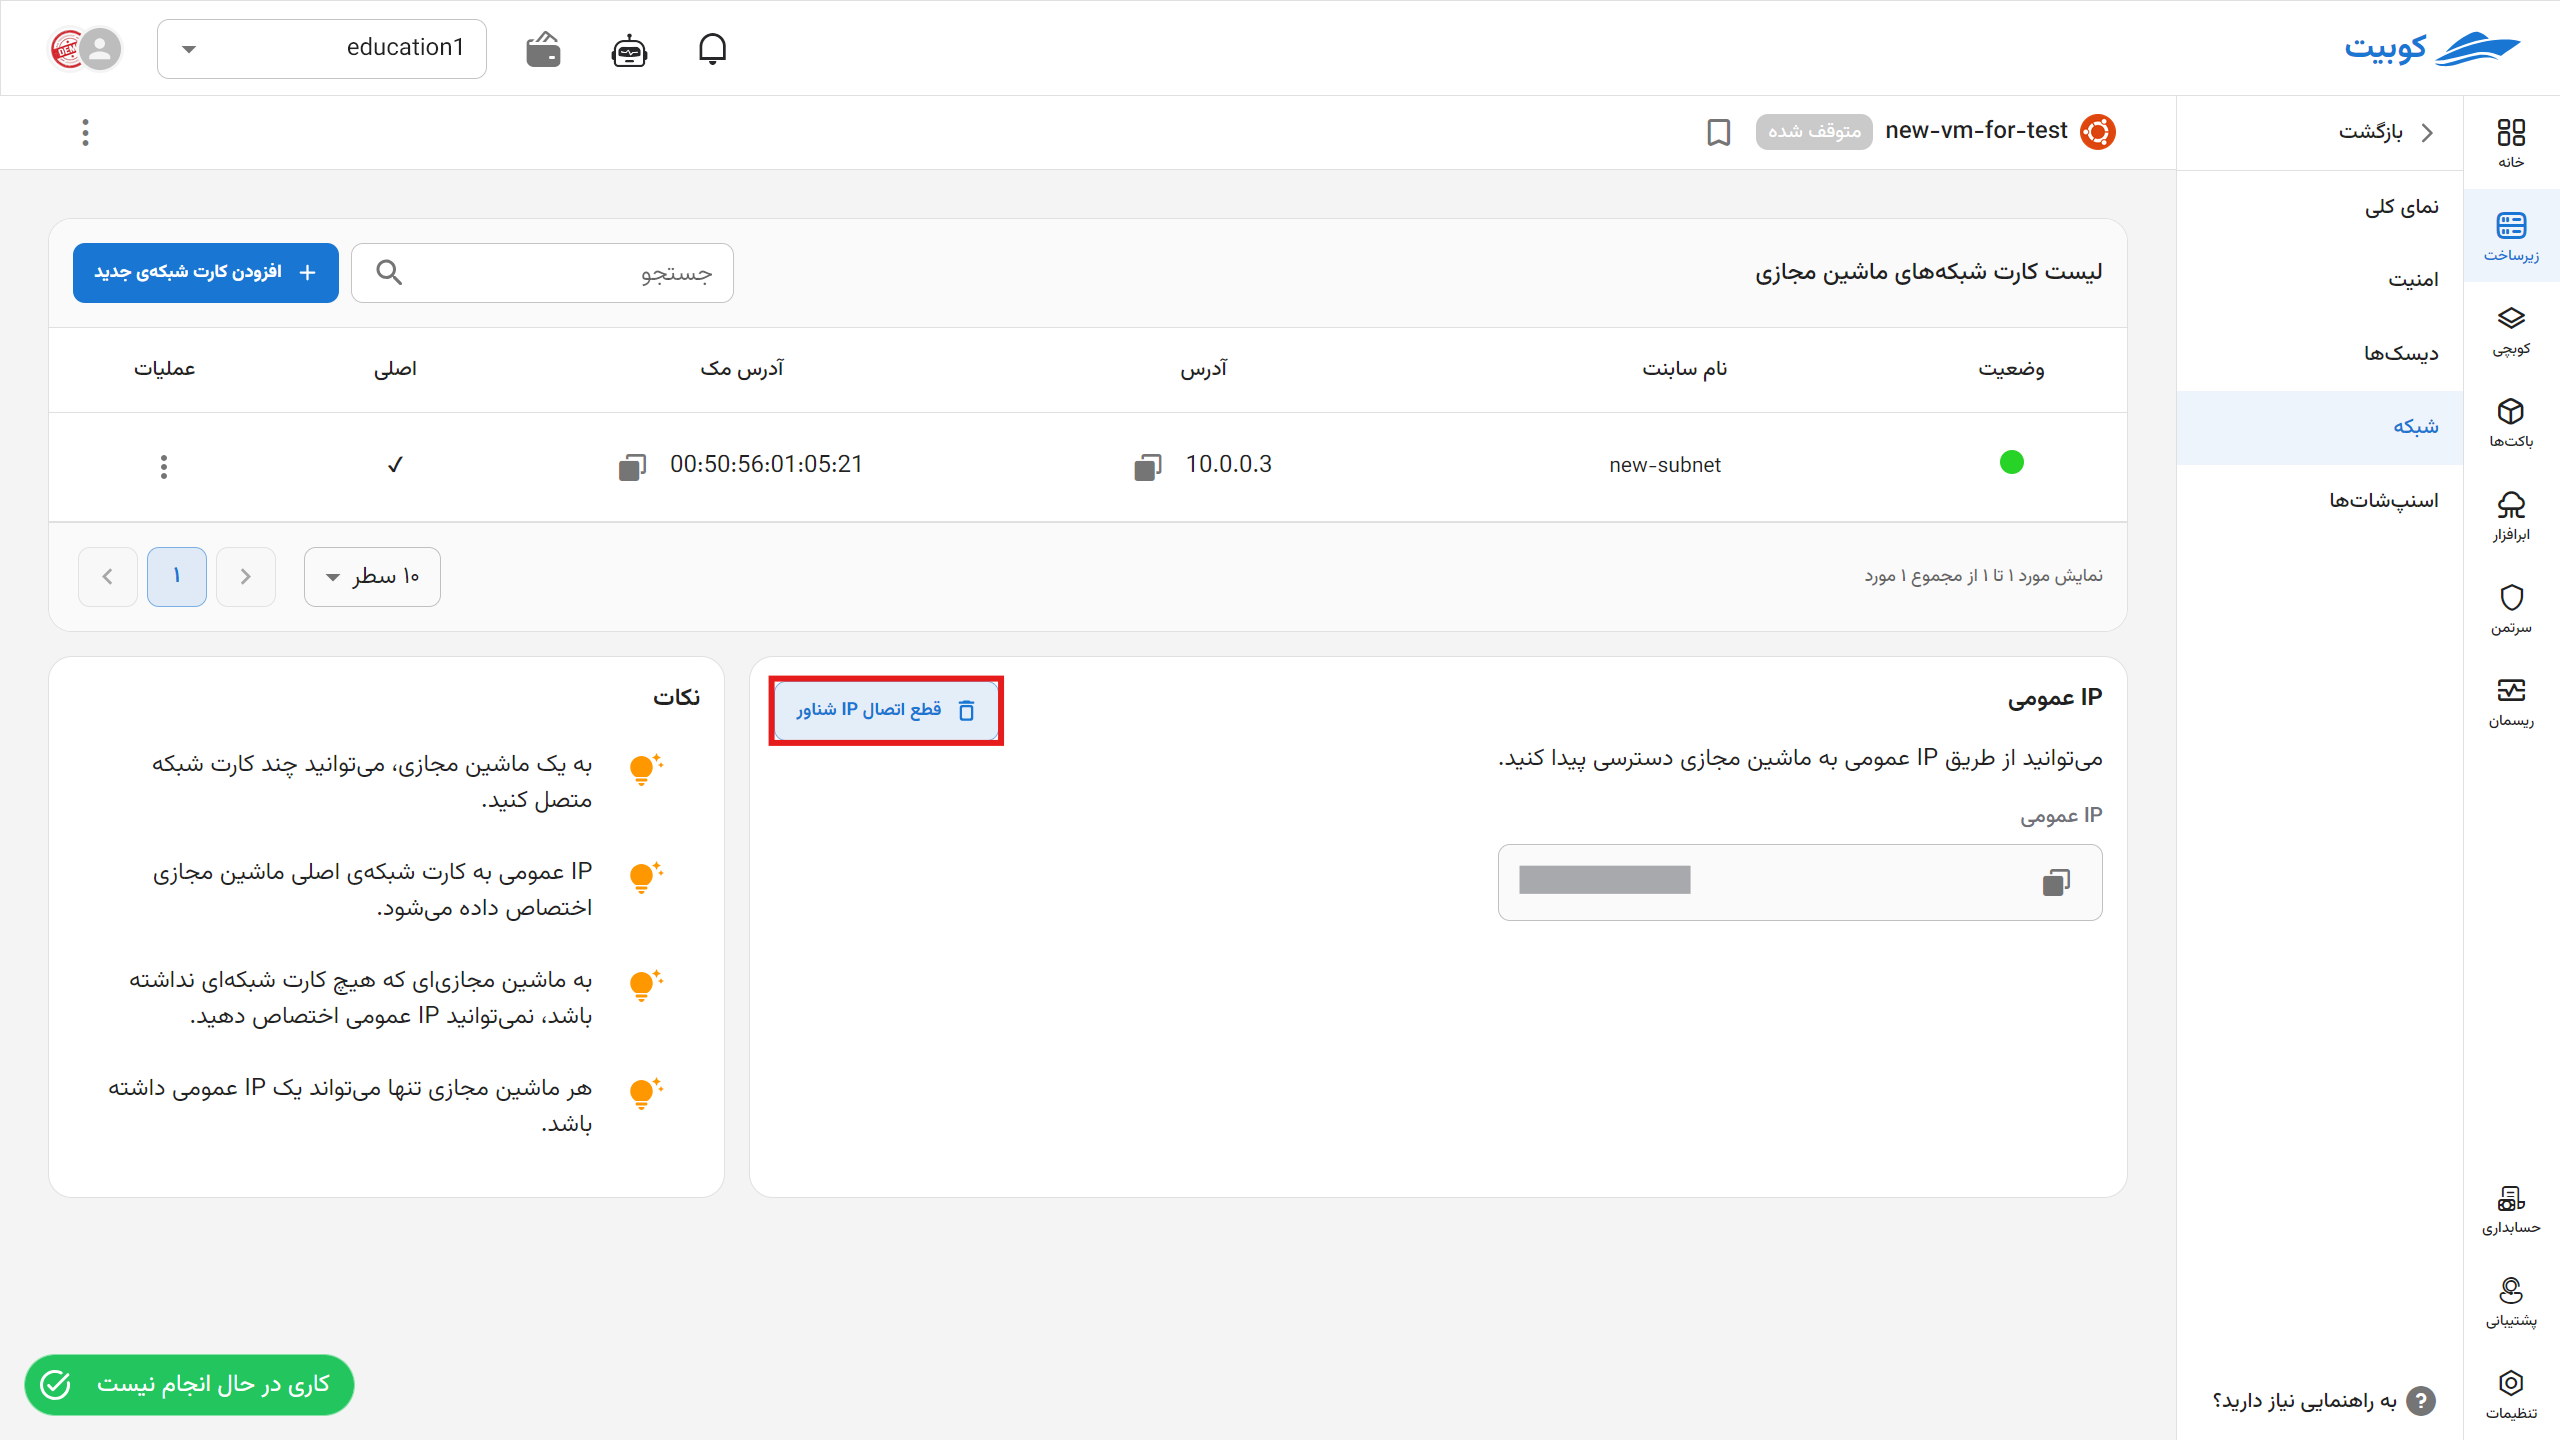
- To disconnect the public IP and isolate the machine from the internet, click the Disconnect Public IP button.
- If you are sure about the operation, click the Confirm button.

Subnet Operations
Add:
- To add a new subnet, click the Add New Network Interface button.


- Wait for the subnet to be created. Then, attach it to the network interface.

A list of available operations for subnets can be accessed through the three-dot button in the Operations column:
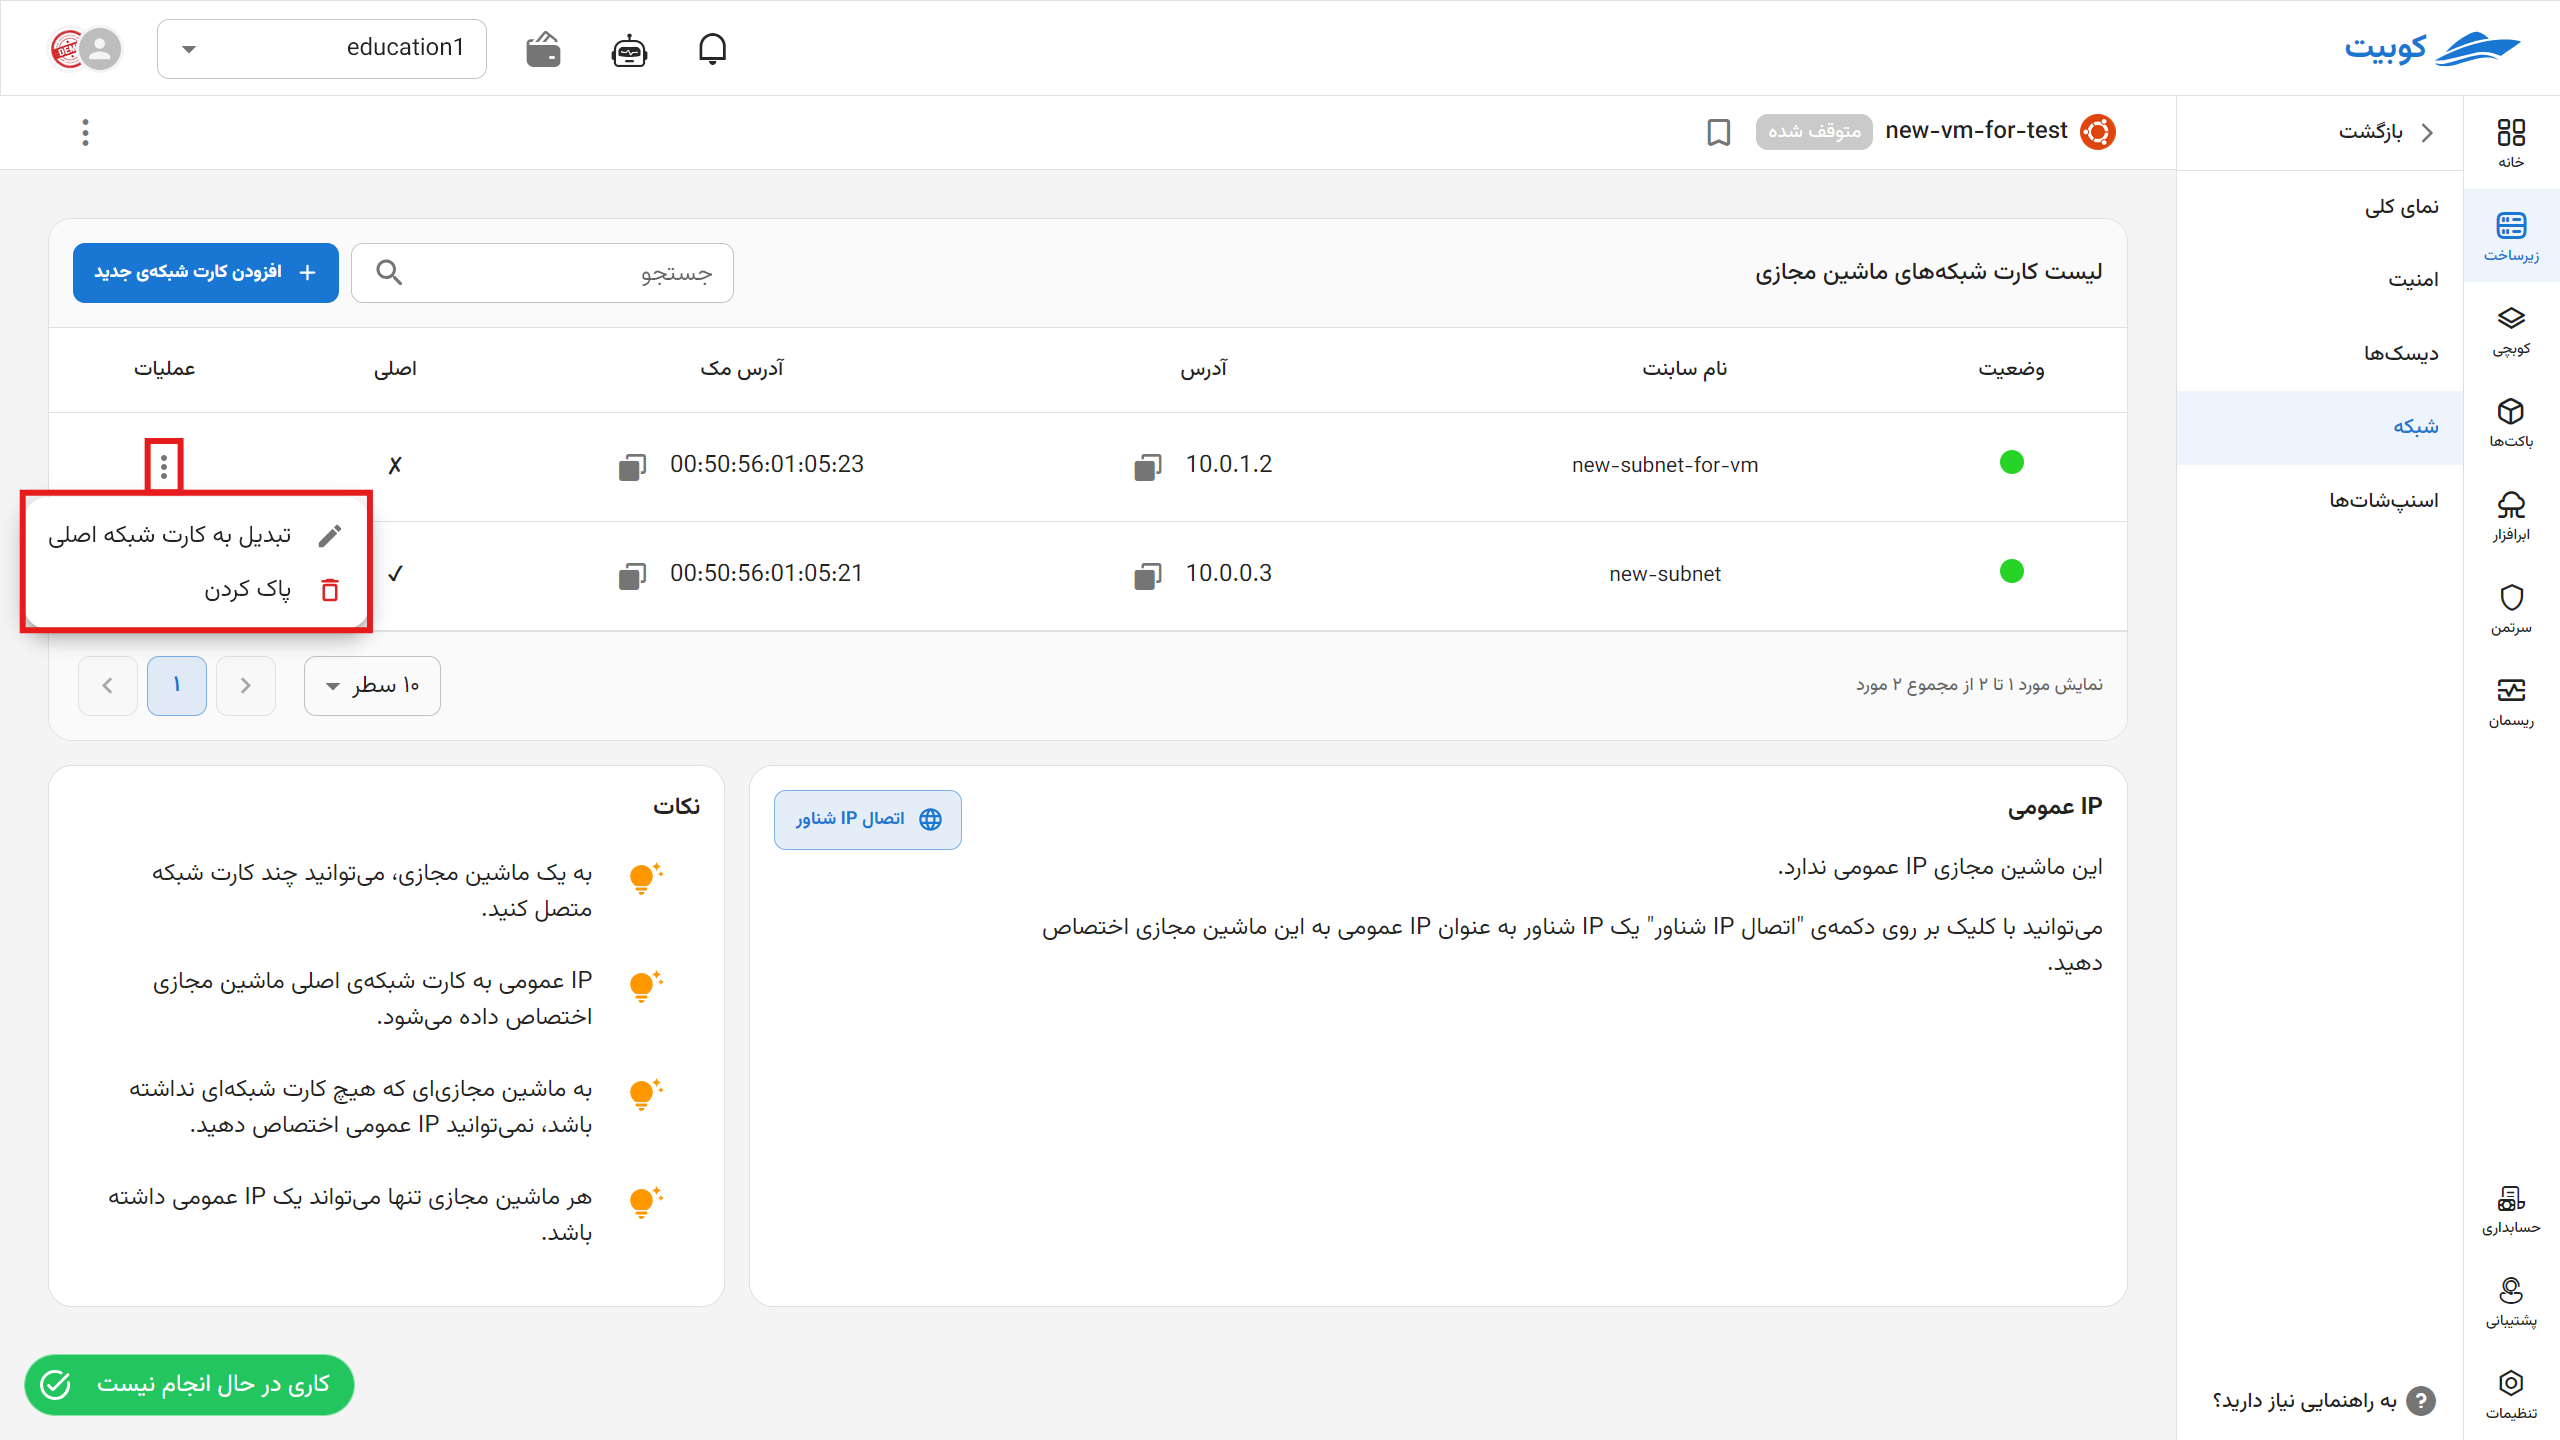
Convert to Primary Network Interface
- To convert a subnet to the primary network interface, click the Convert to Primary option.
- If you are sure about the operation, click the Confirm button.

Delete Subnet
- To delete a subnet, click the Delete button.
- If you are sure about the operation, enter the subnet’s name as confirmation for deletion and click Delete.
