

Setting Up a Virtual Machine (Step One)
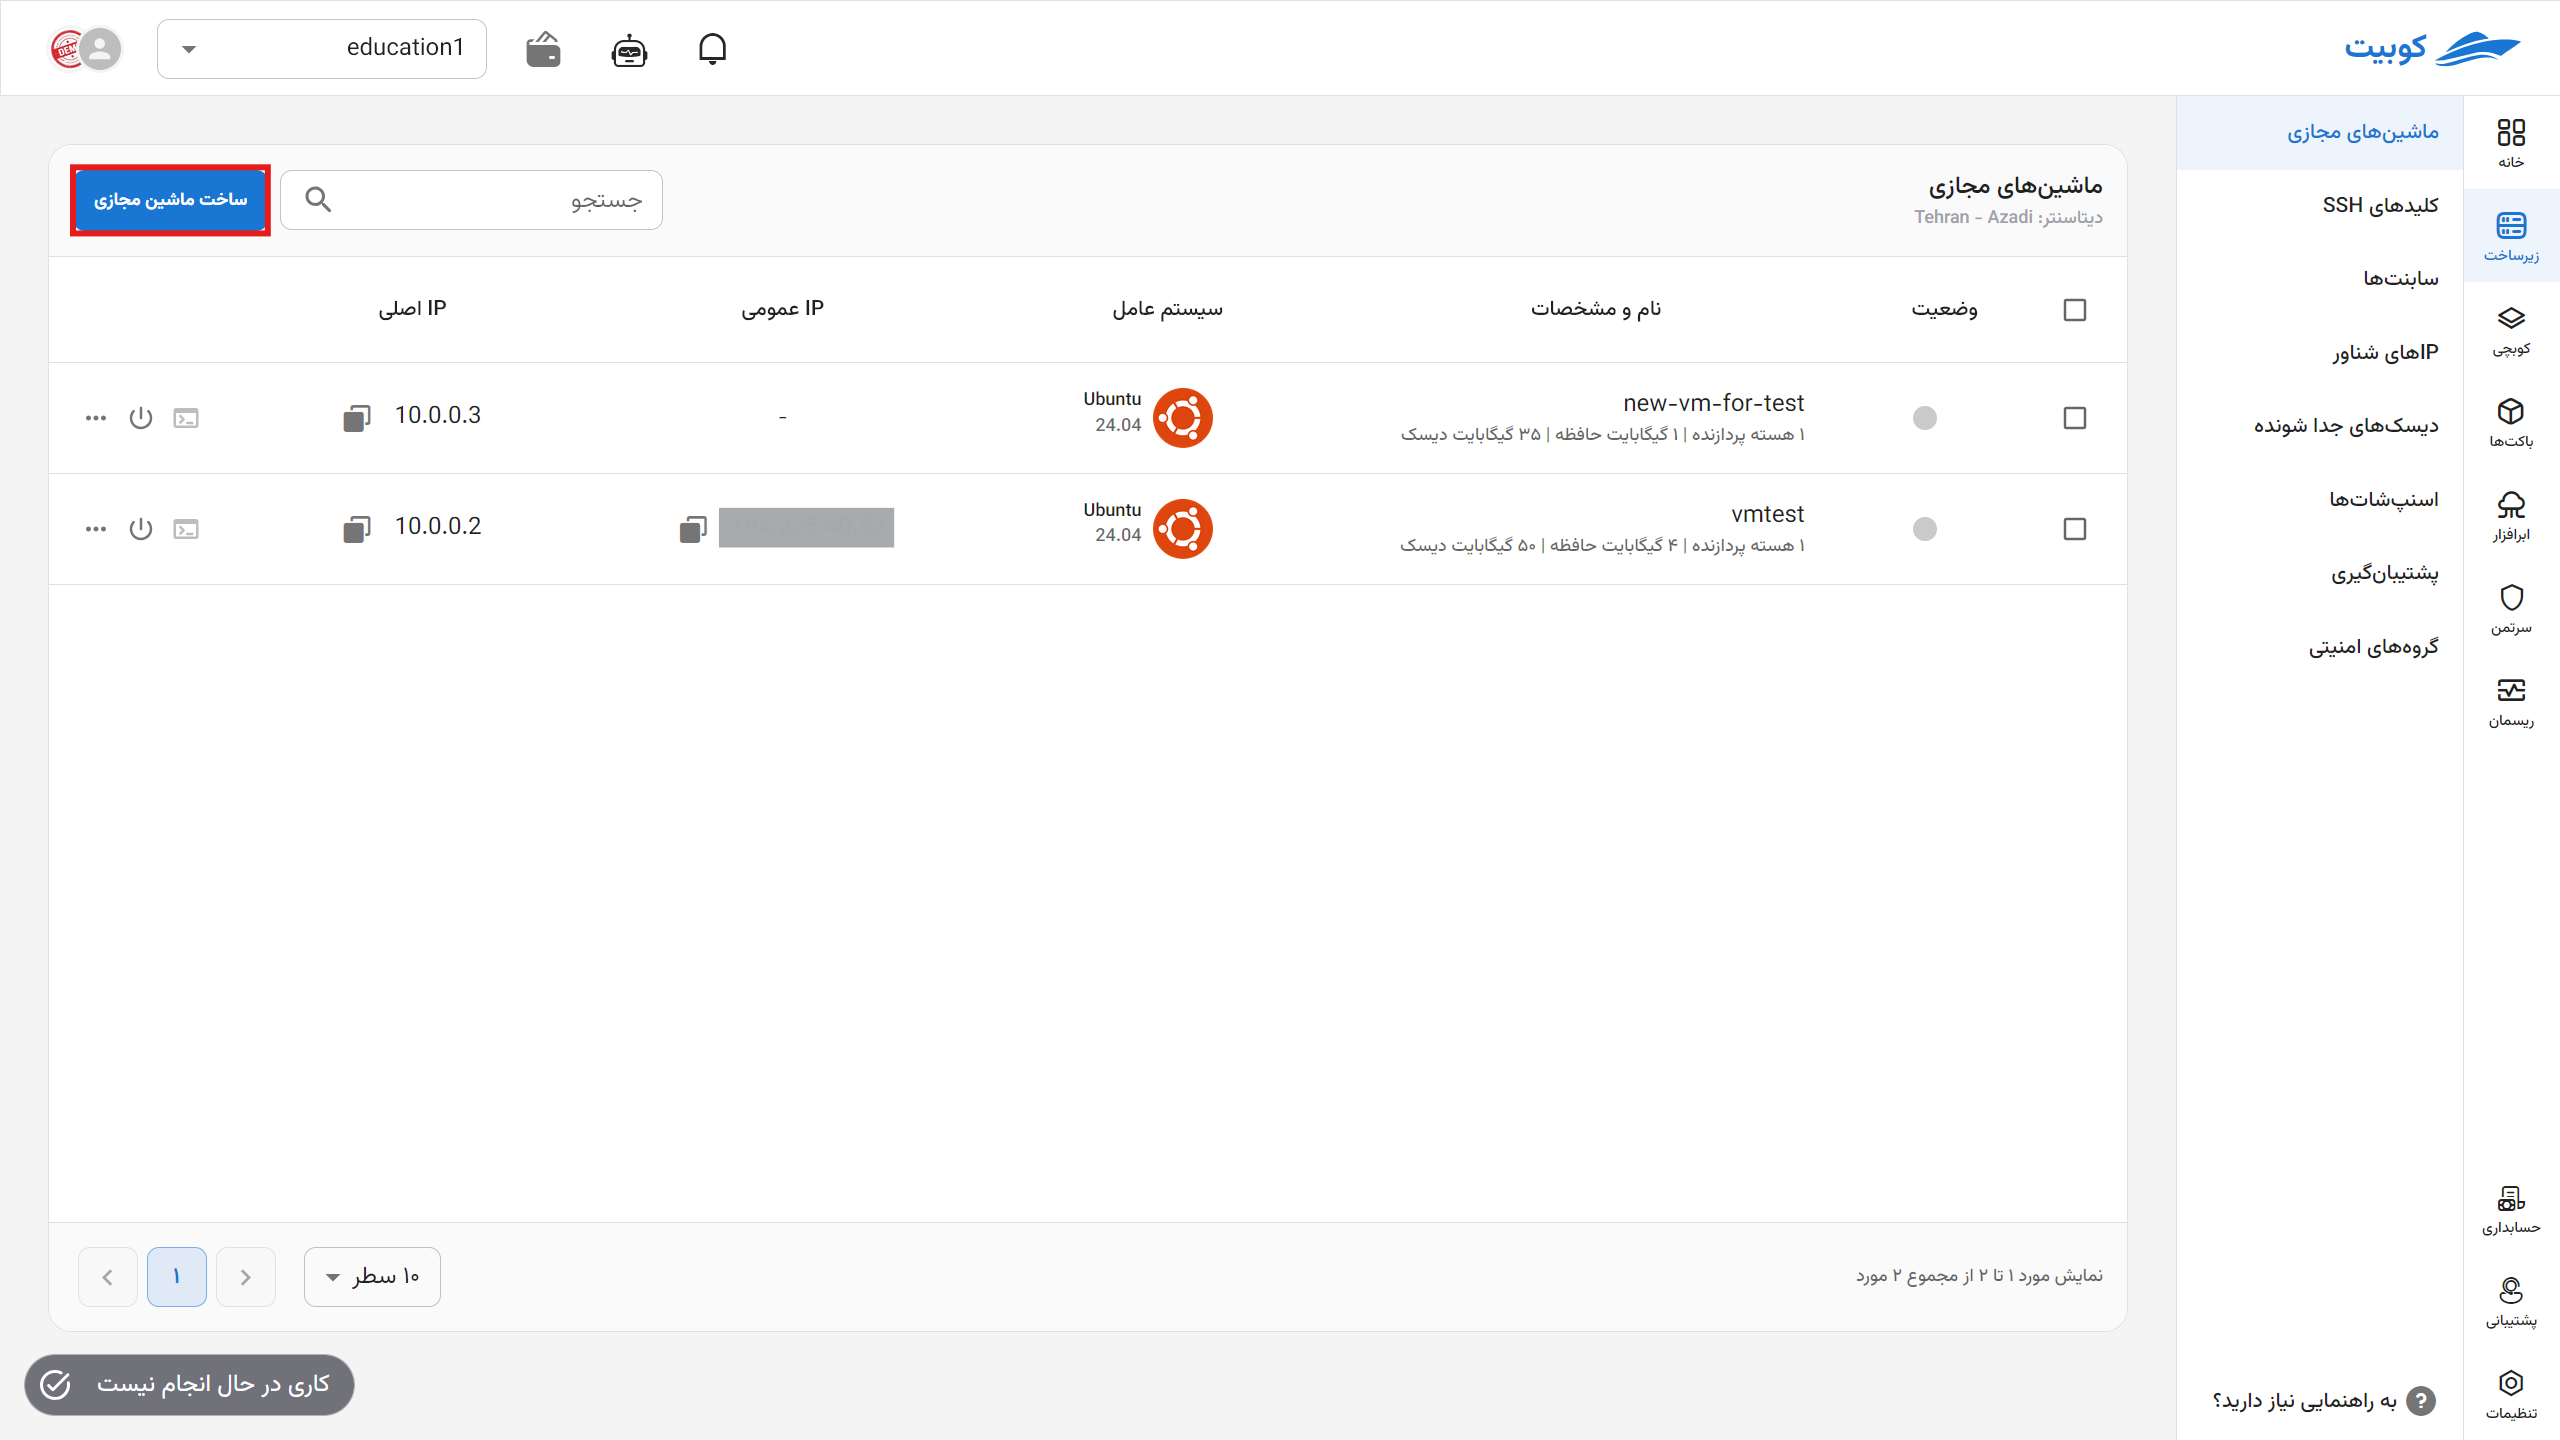
In the infrastructure page, after selecting a connected project, to create your first virtual machine, go to the Virtual Machines section and click on the Create Virtual Machine button:
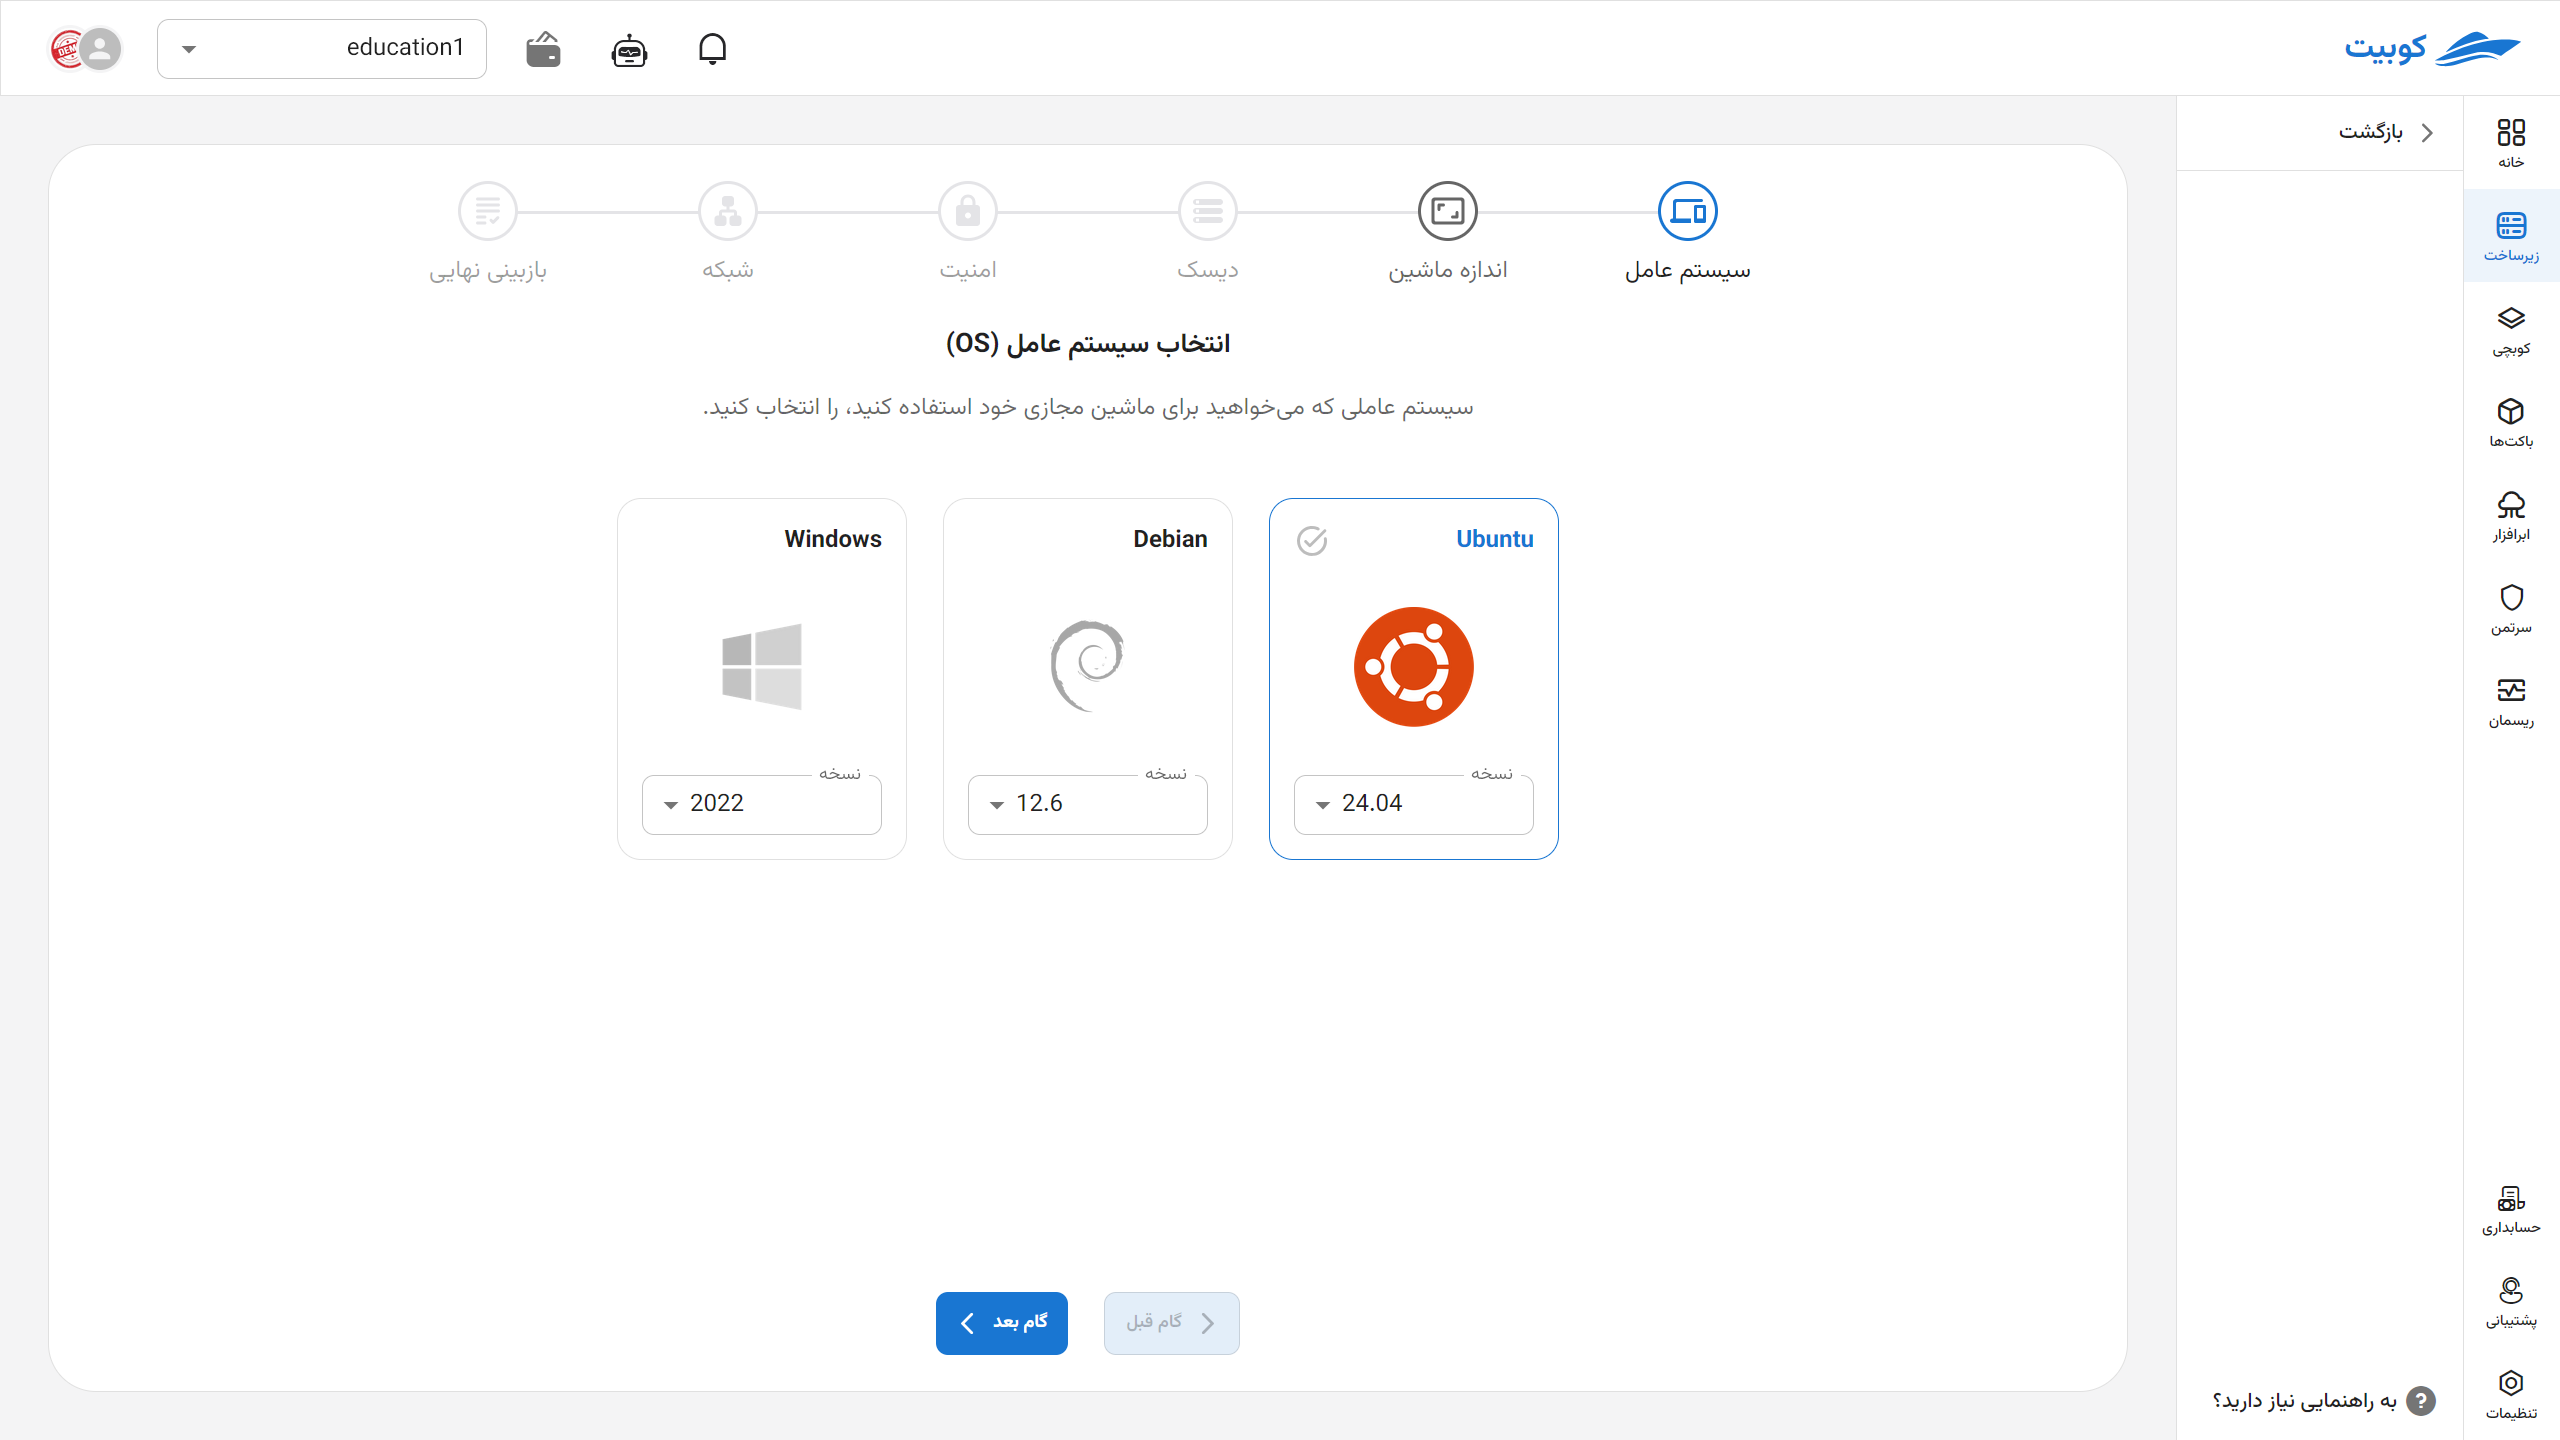
Step One: Selecting the Operating System
The first step in creating a new virtual machine is selecting the Operating System. Choose the desired operating system:
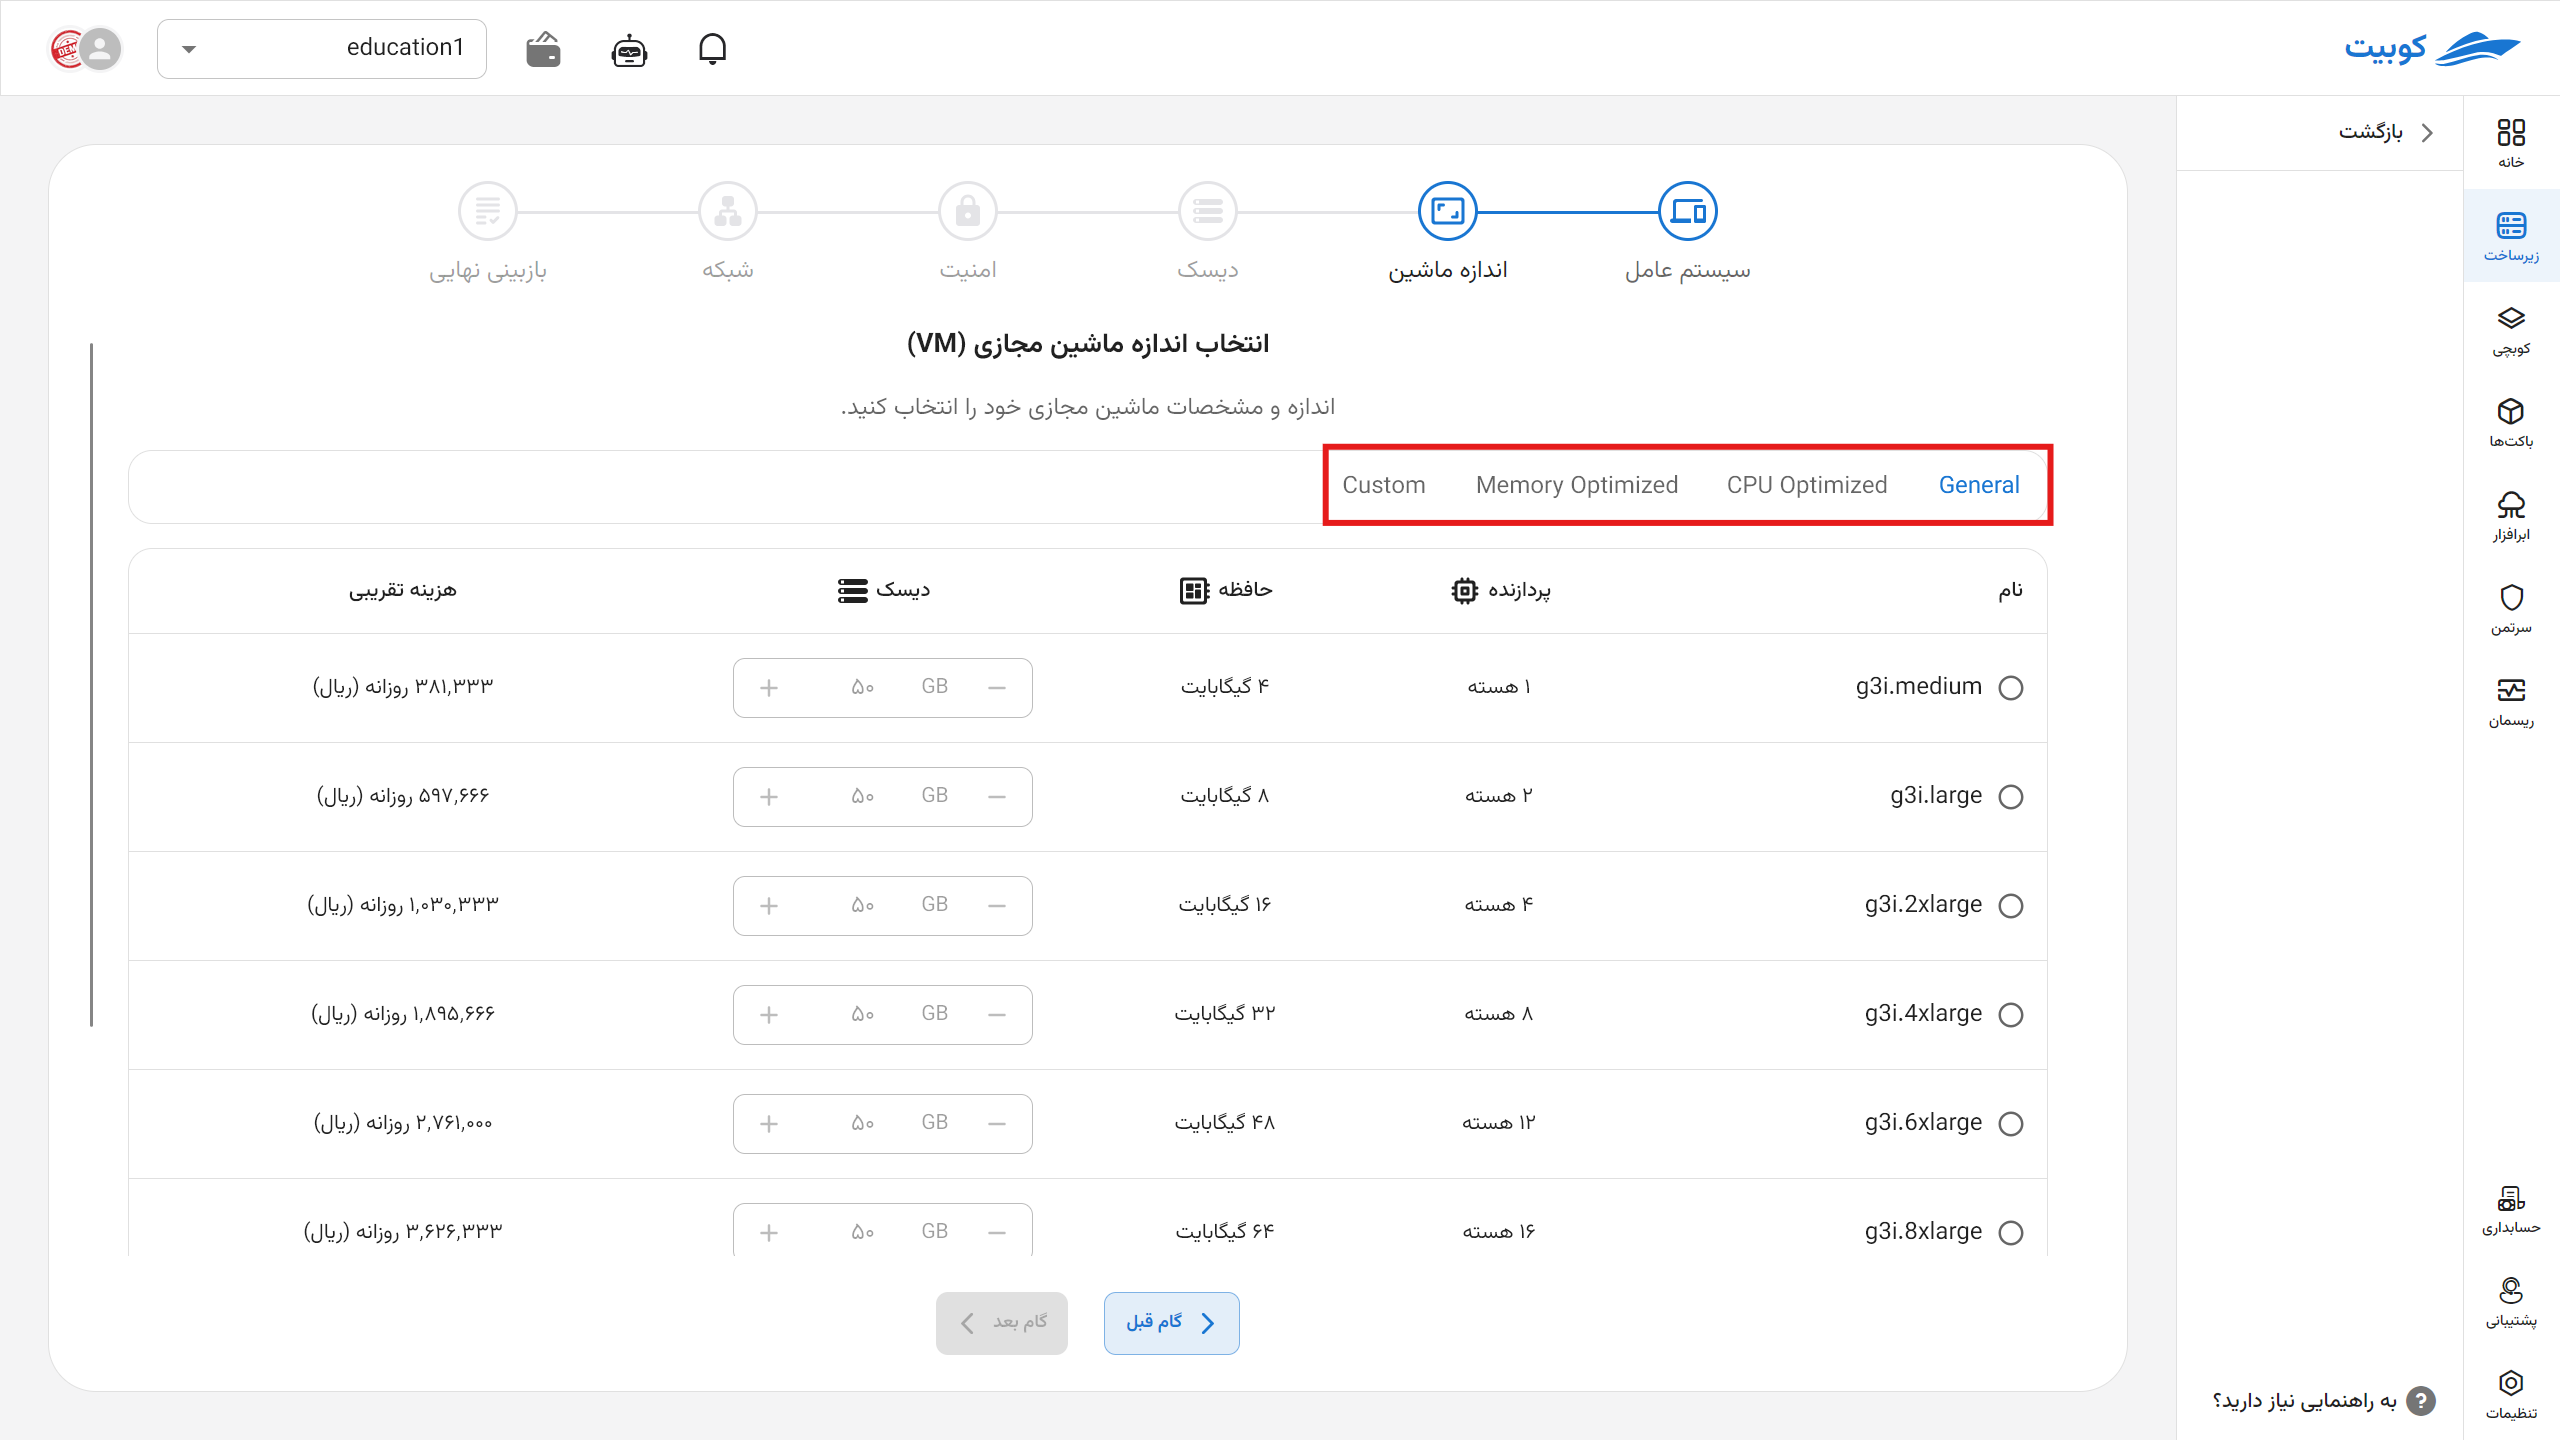
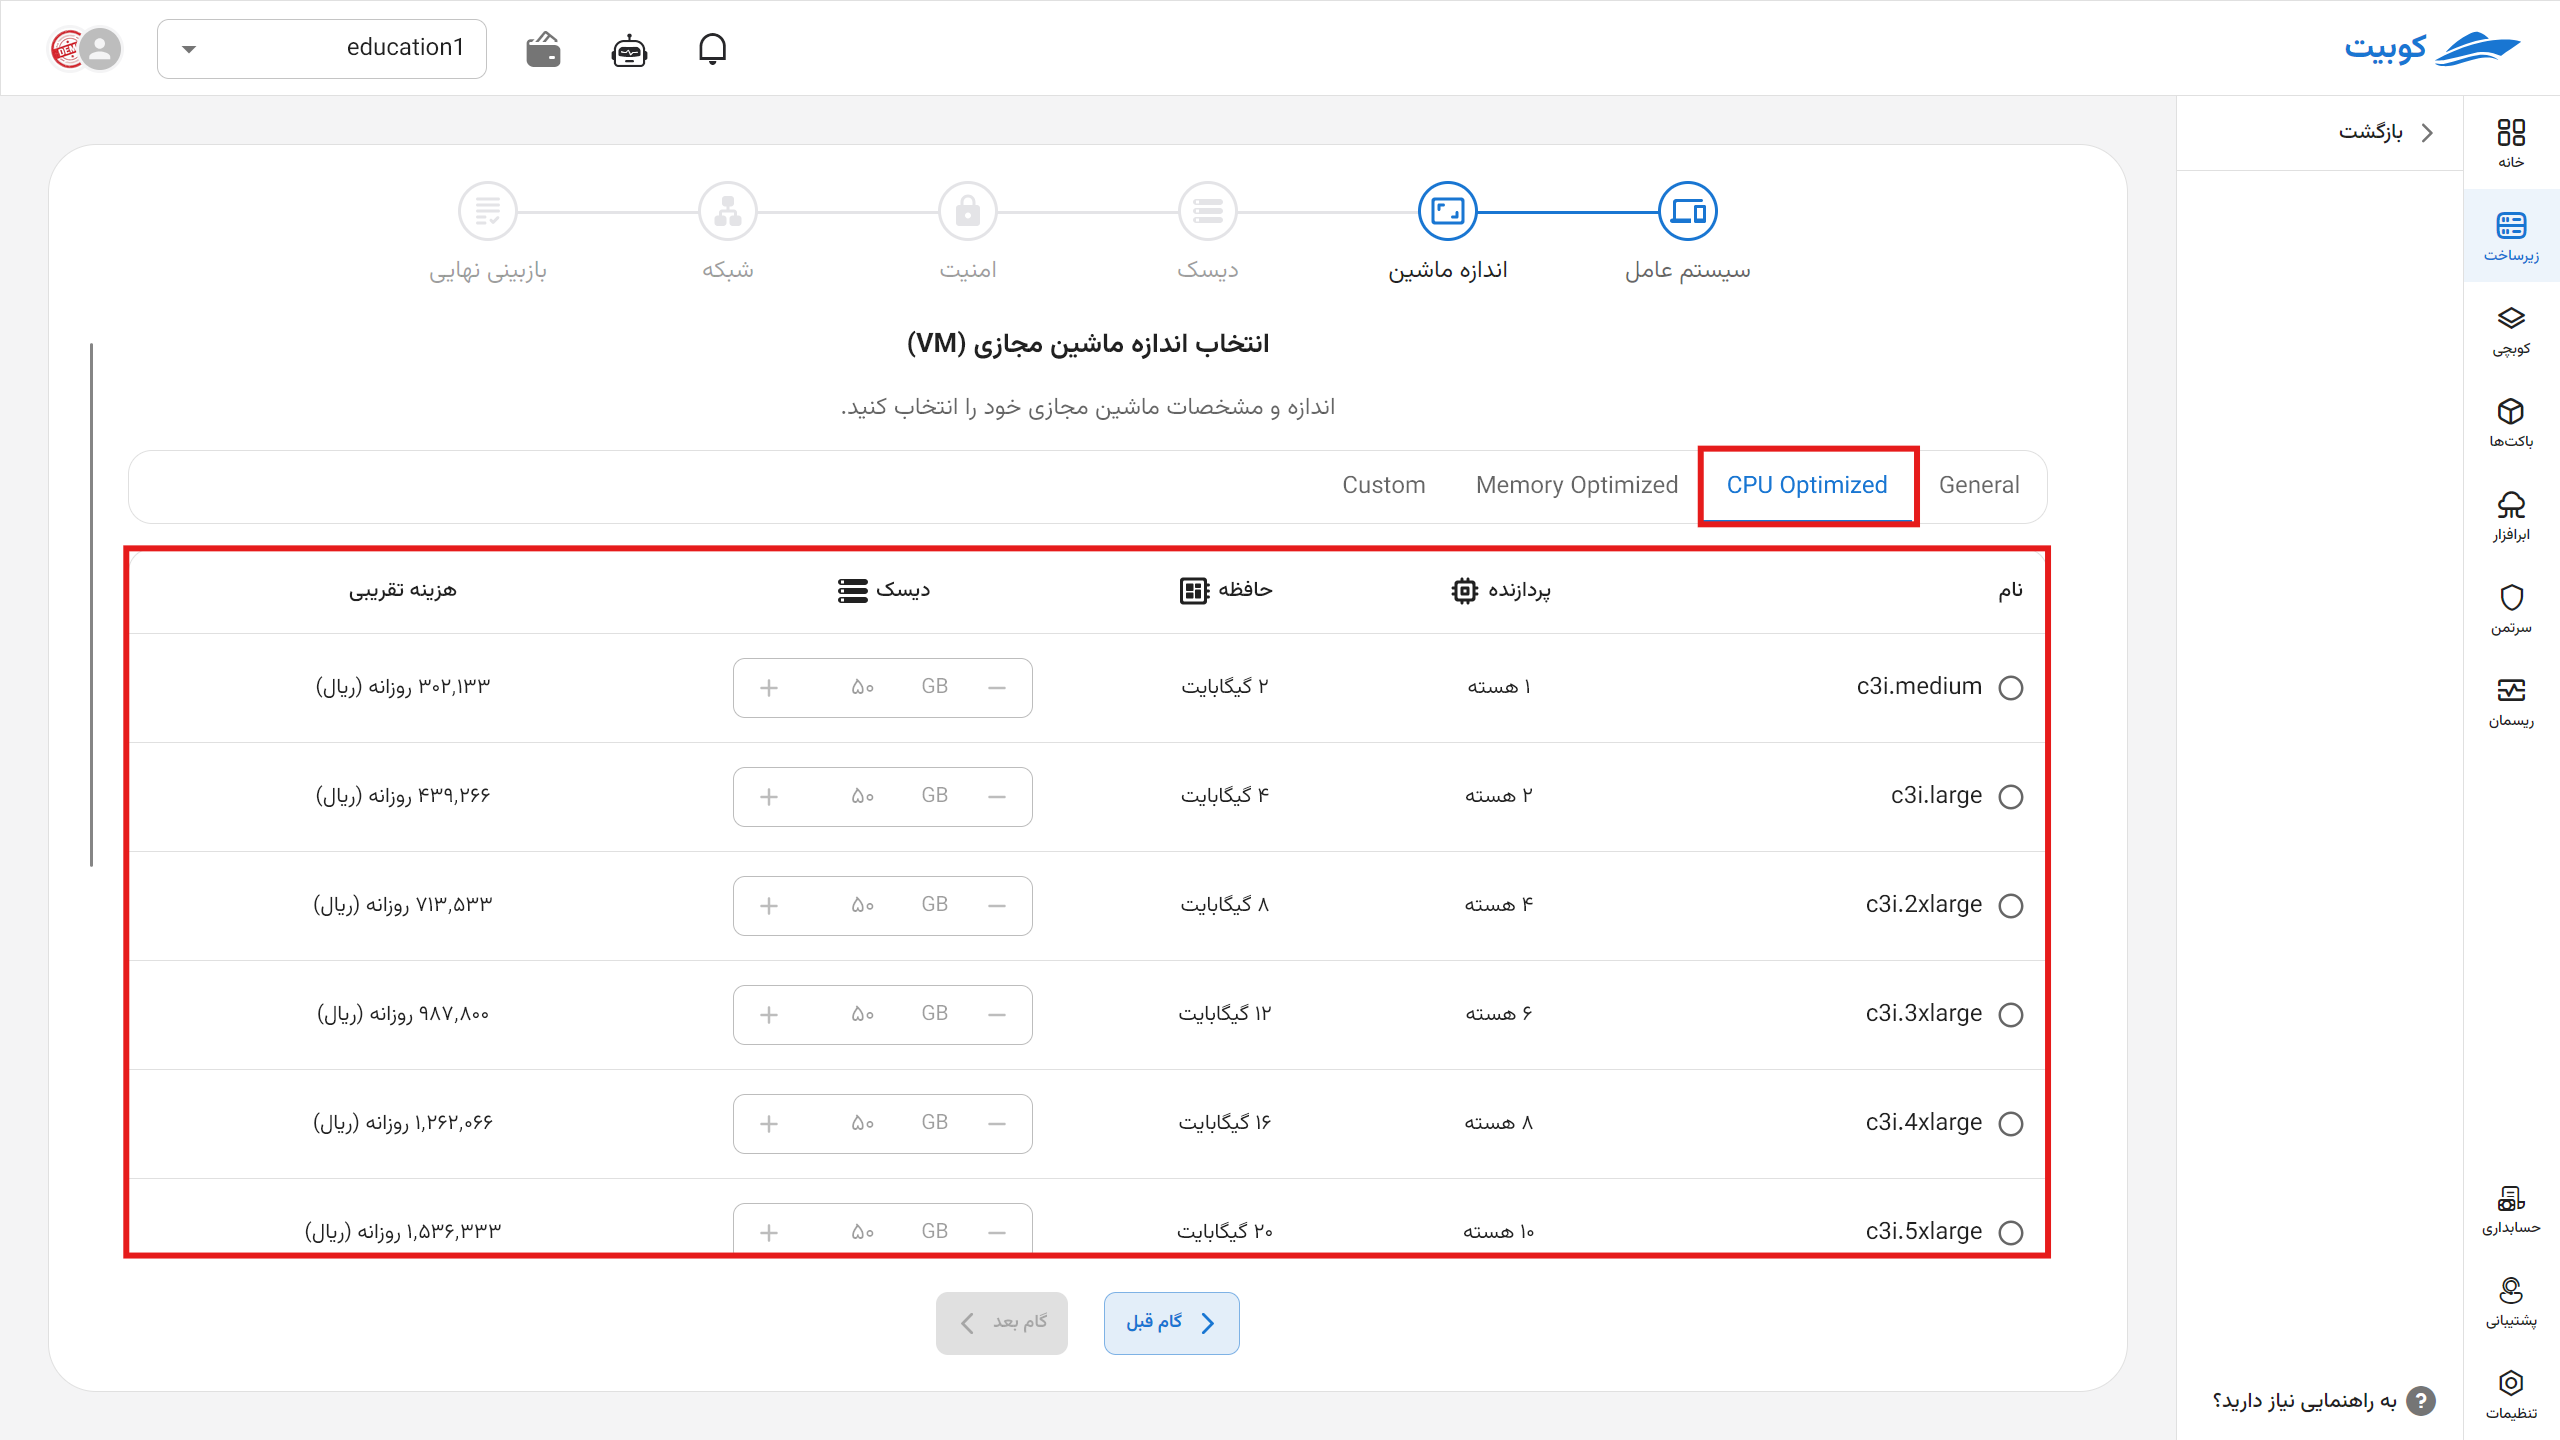
Step Two: Machine Size
In the second step, a list of available resources in Kubit is provided. Select the appropriate size and specifications based on your needs:
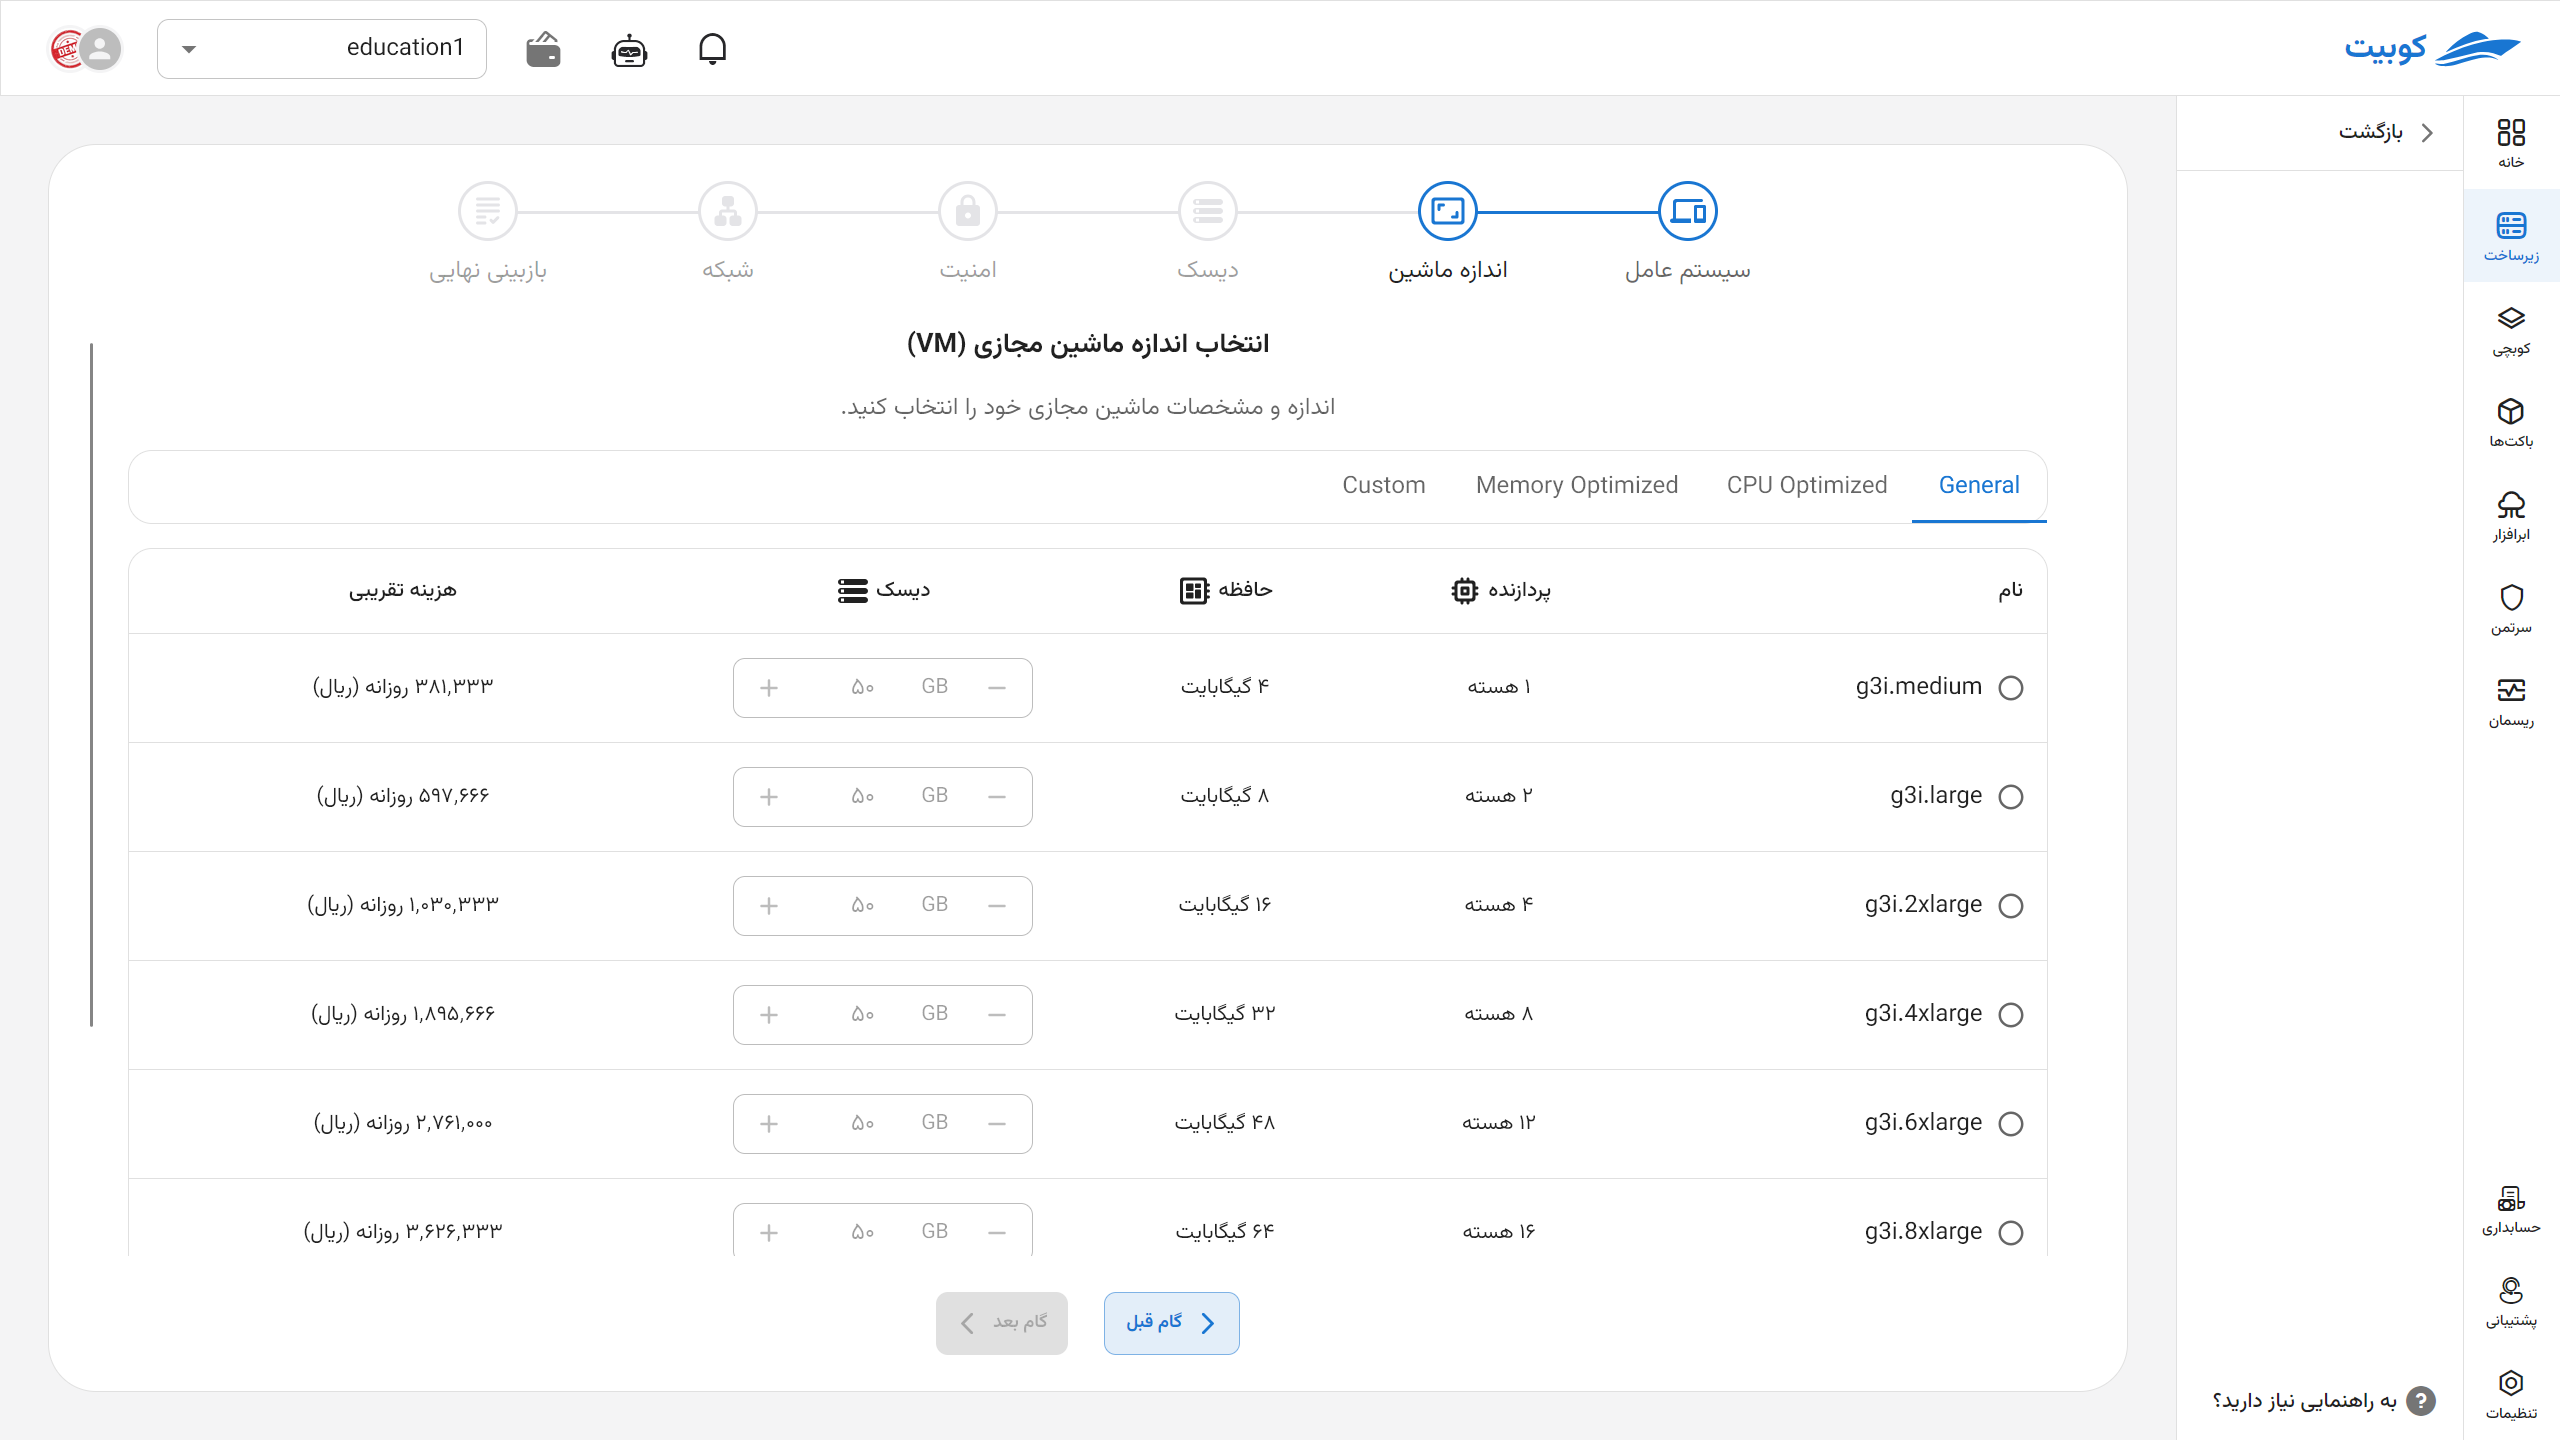
The resource list includes various categories based on optimization criteria. Each section contains a list of optimized resources based on processor, memory, etc. You can choose any of them based on your needs.
Note that only the Operating System and Machine Size steps are mandatory, and after the second step, you can proceed directly to the final step, which is Final Review.
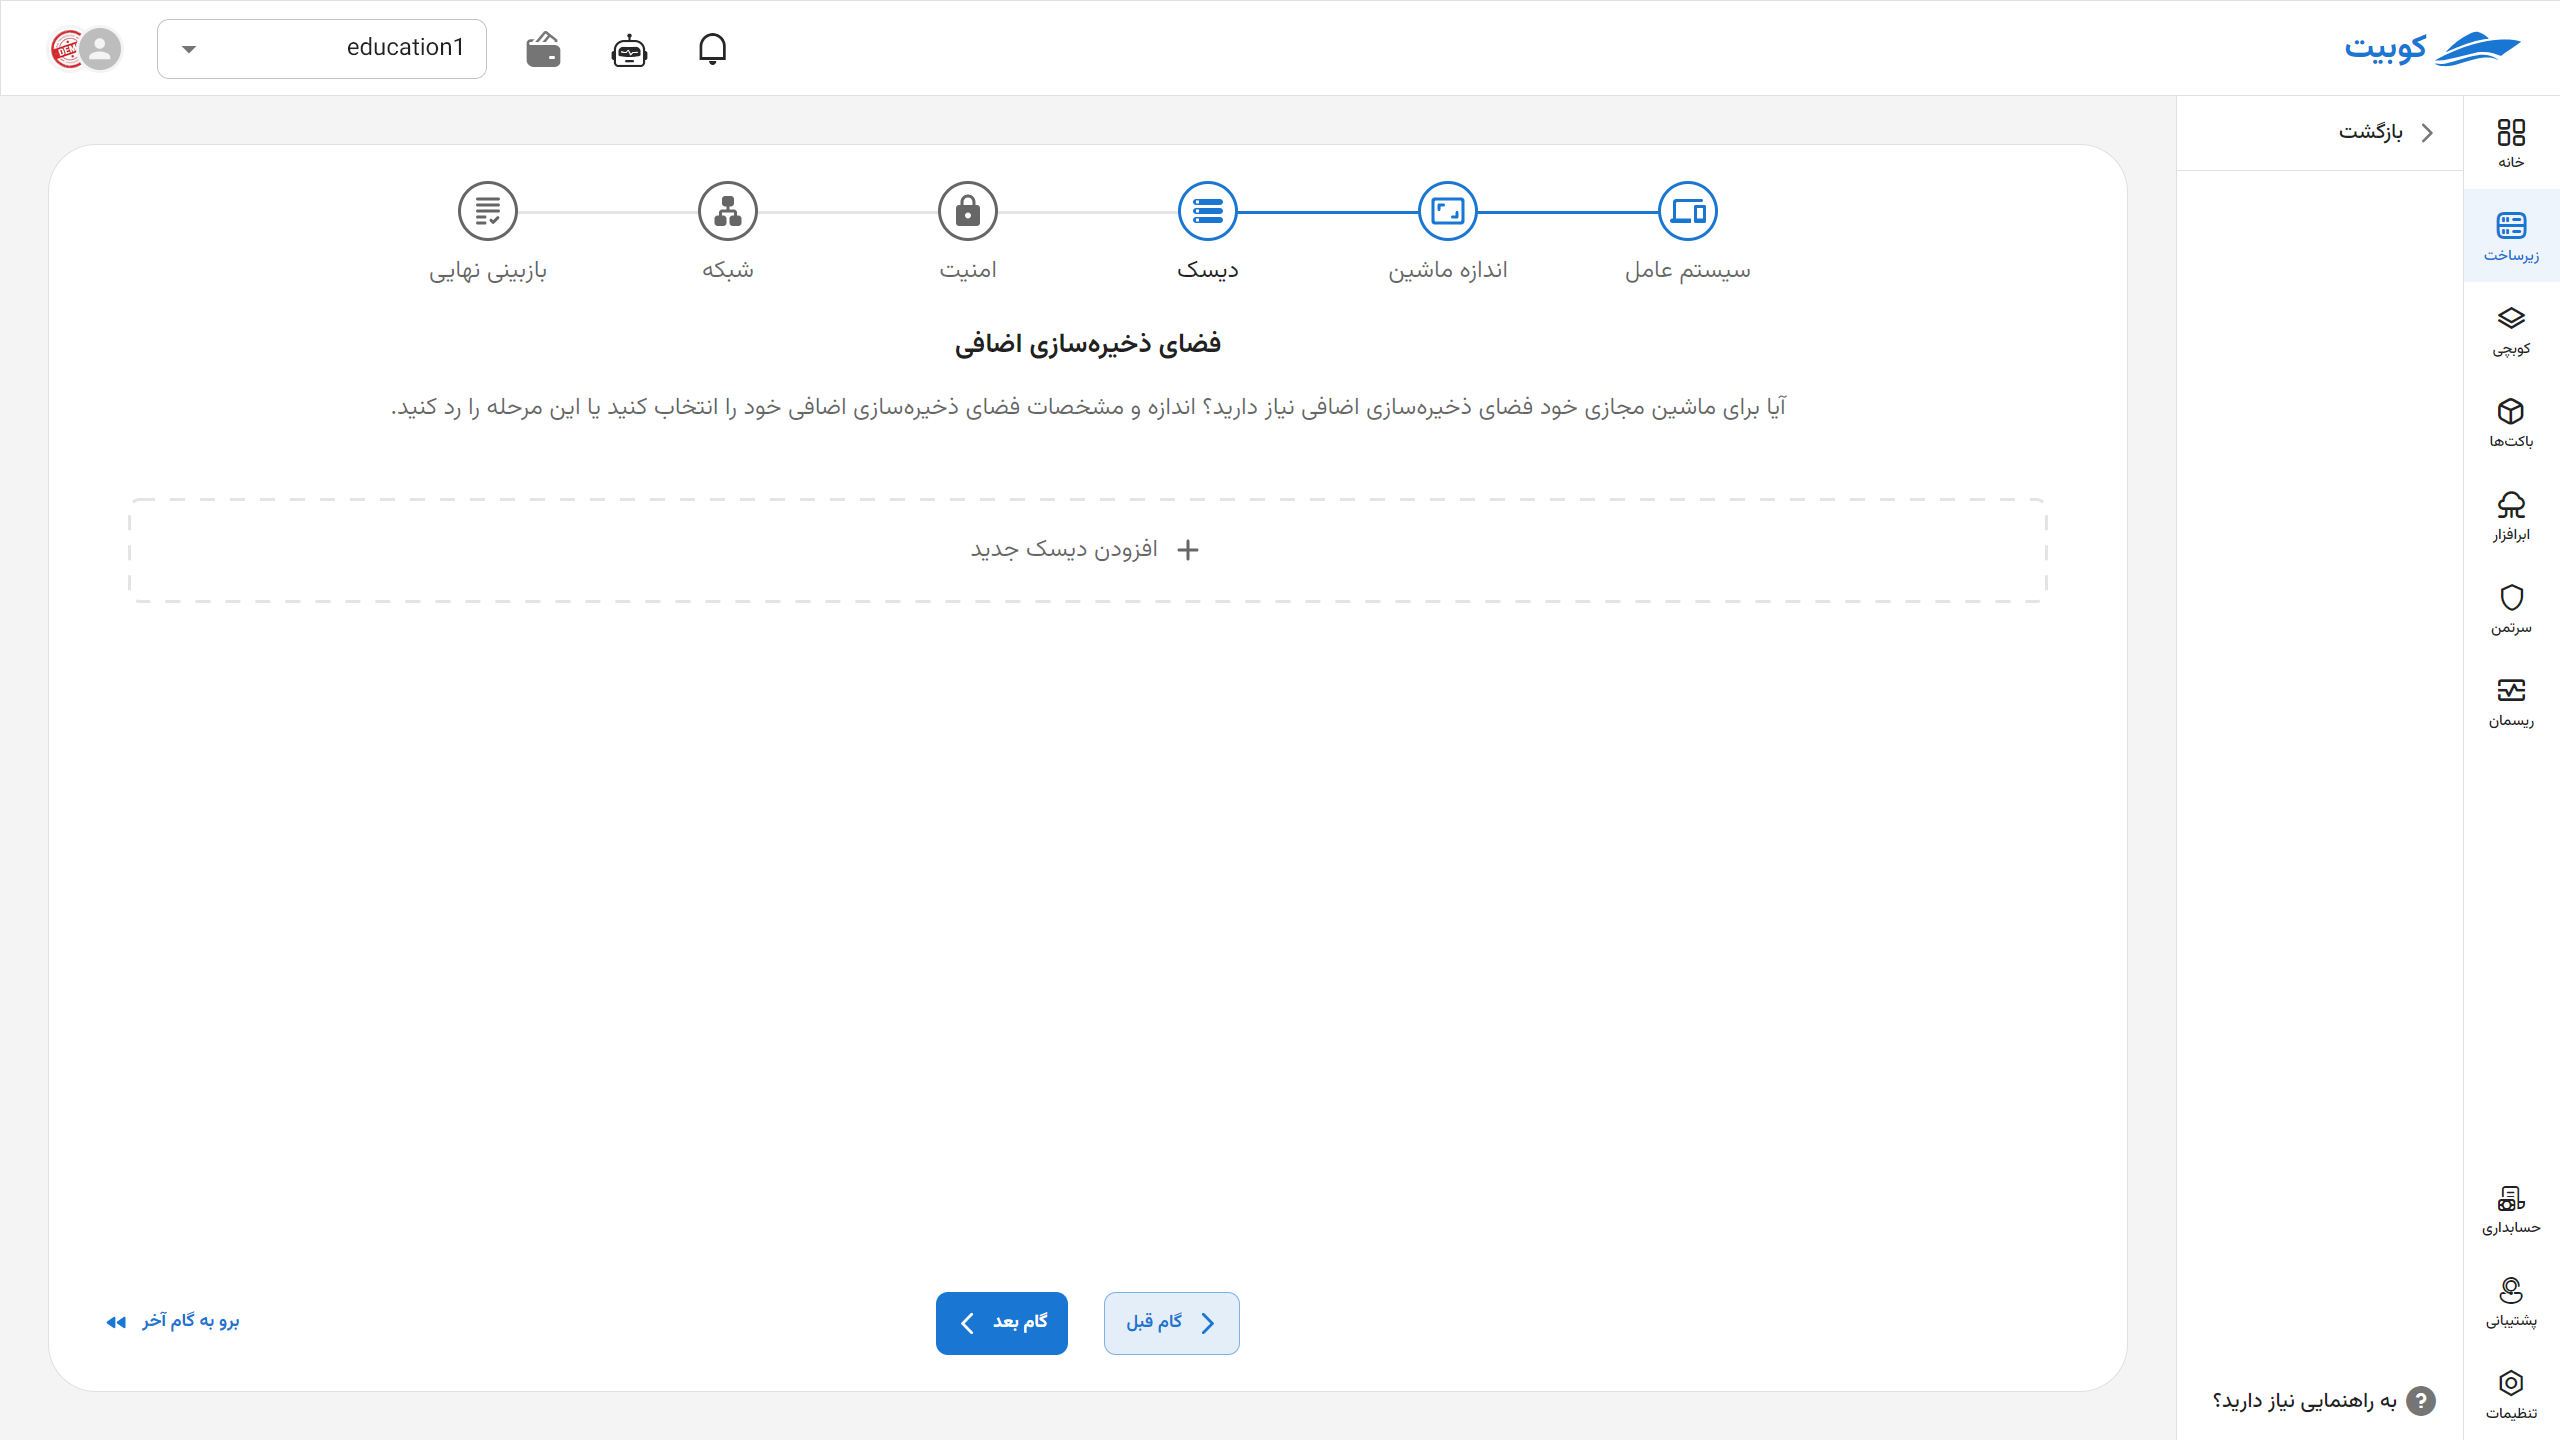
Step Three: Disk
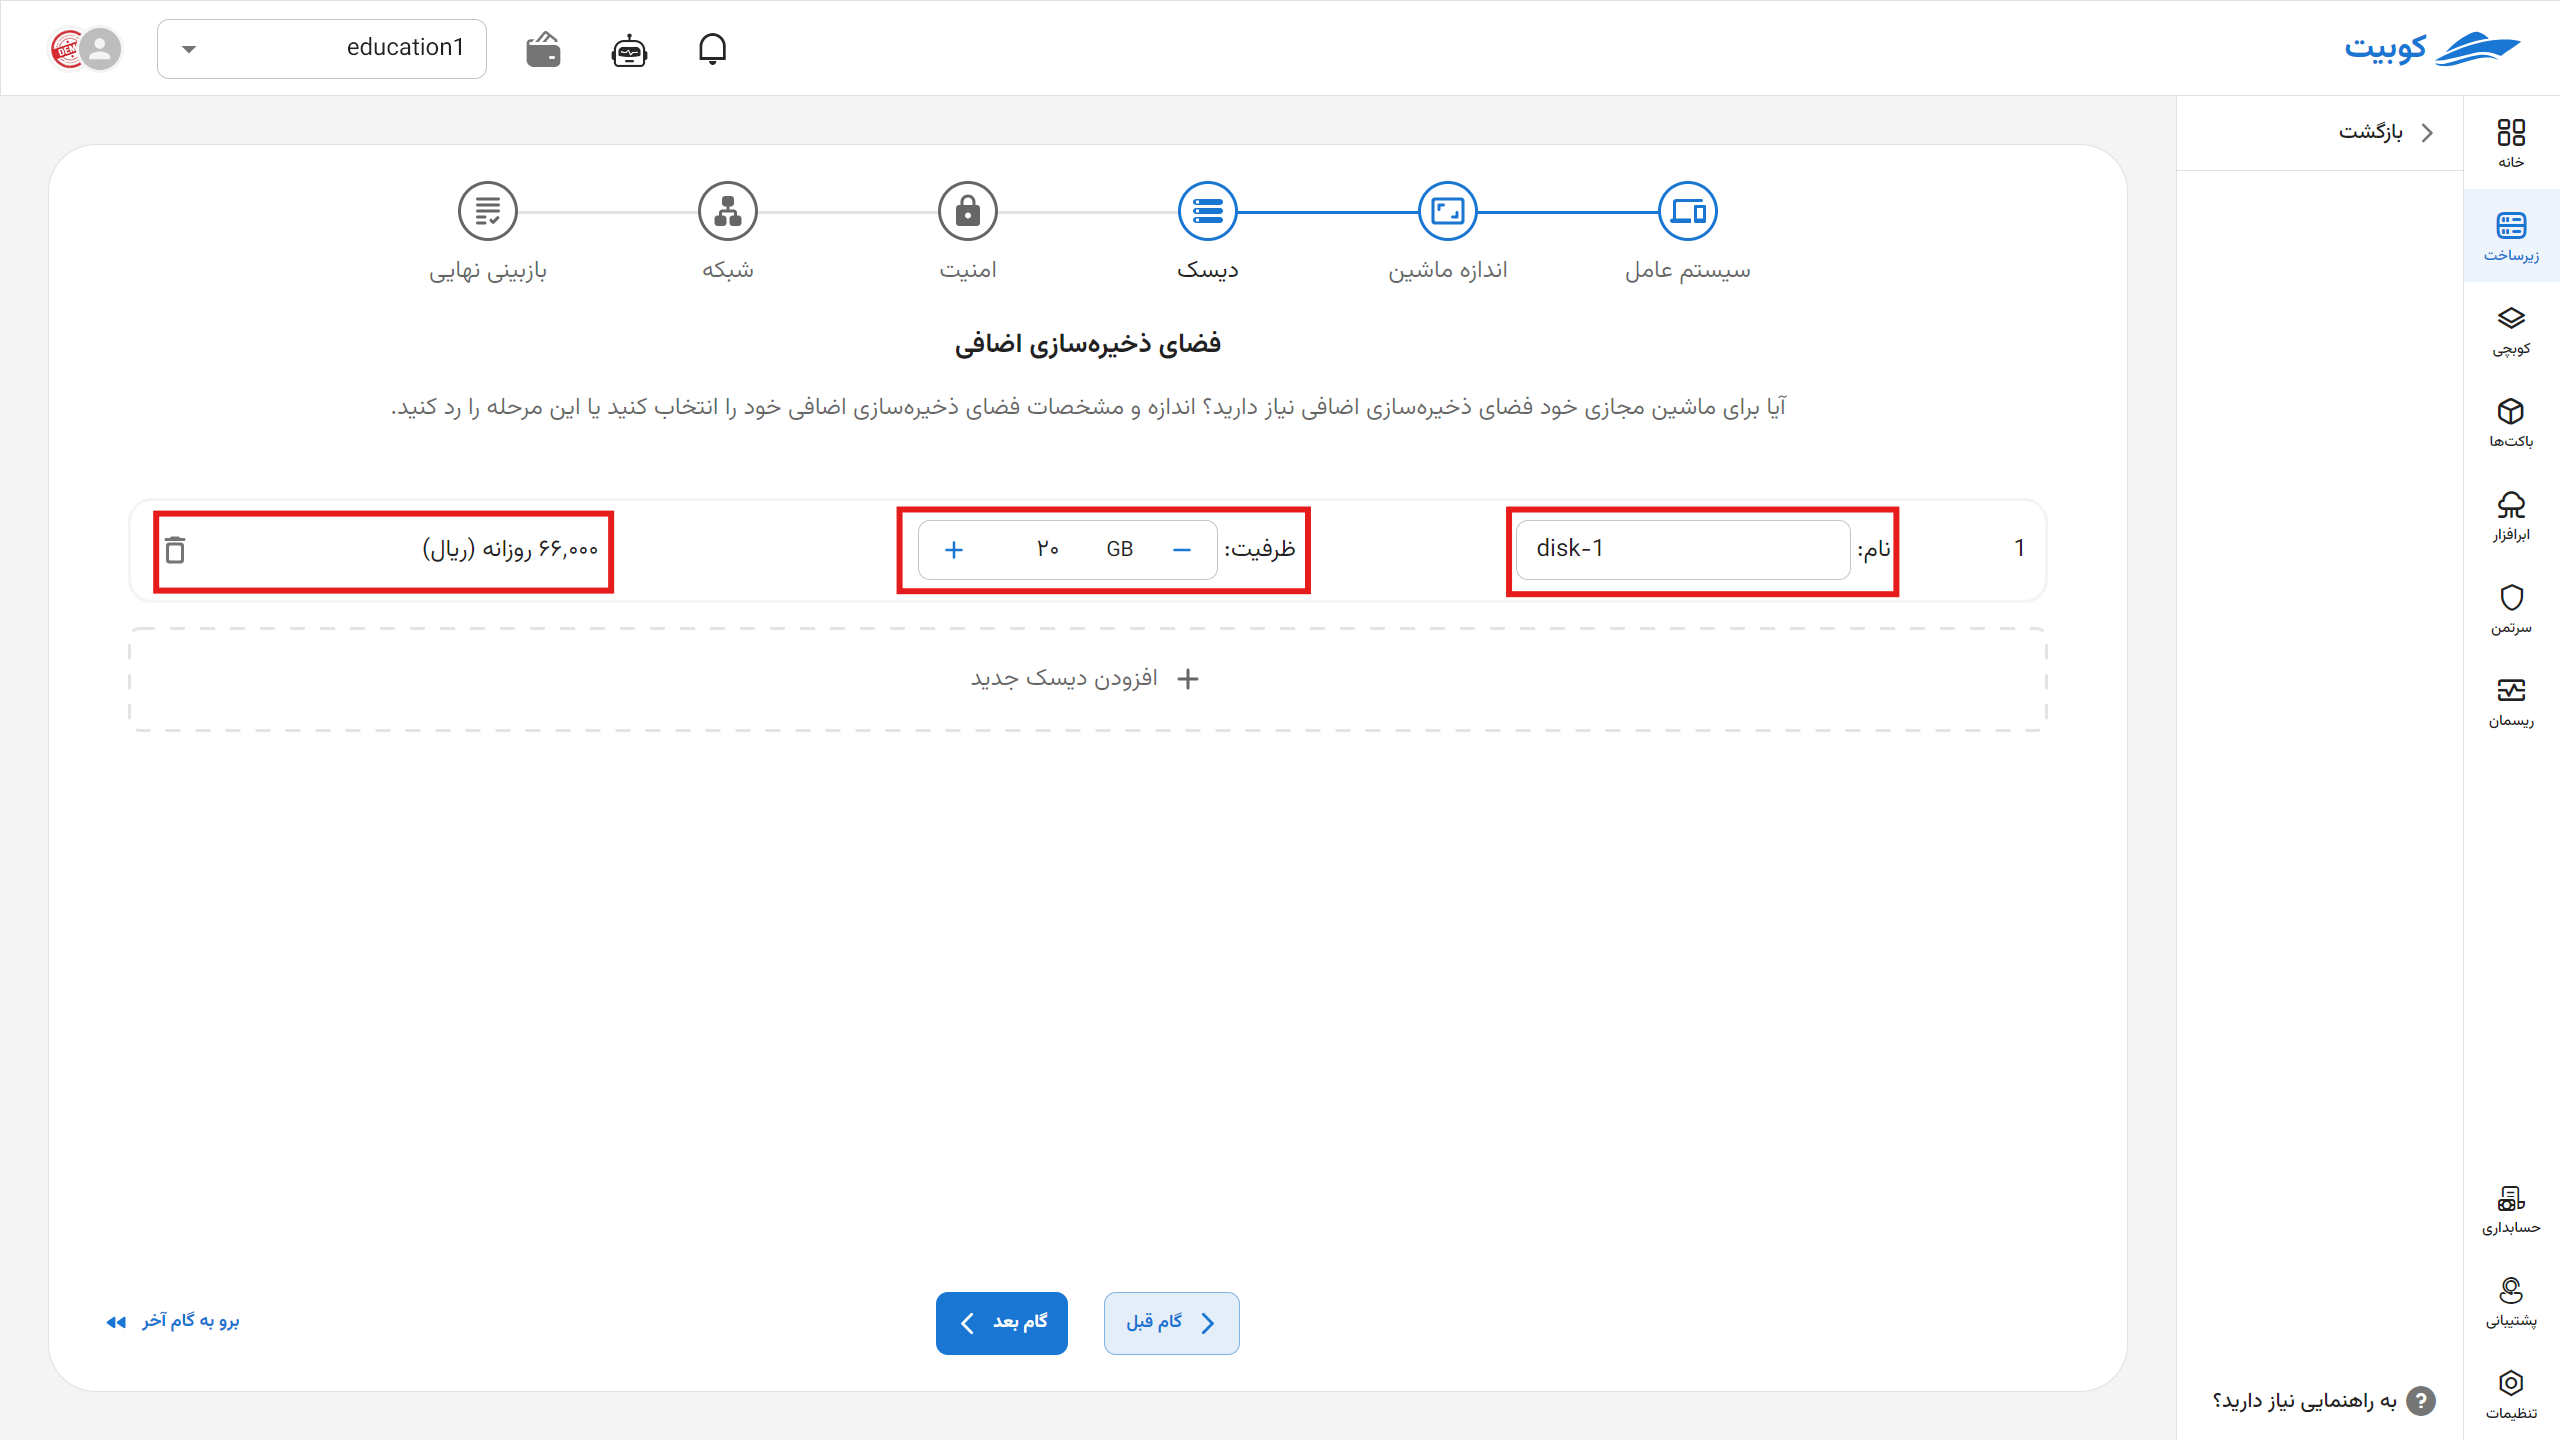
If you need additional storage space, in this step, you can select an additional disk for your machine. Click on the Add New Disk button:
Then, select the Name and Capacity you need:
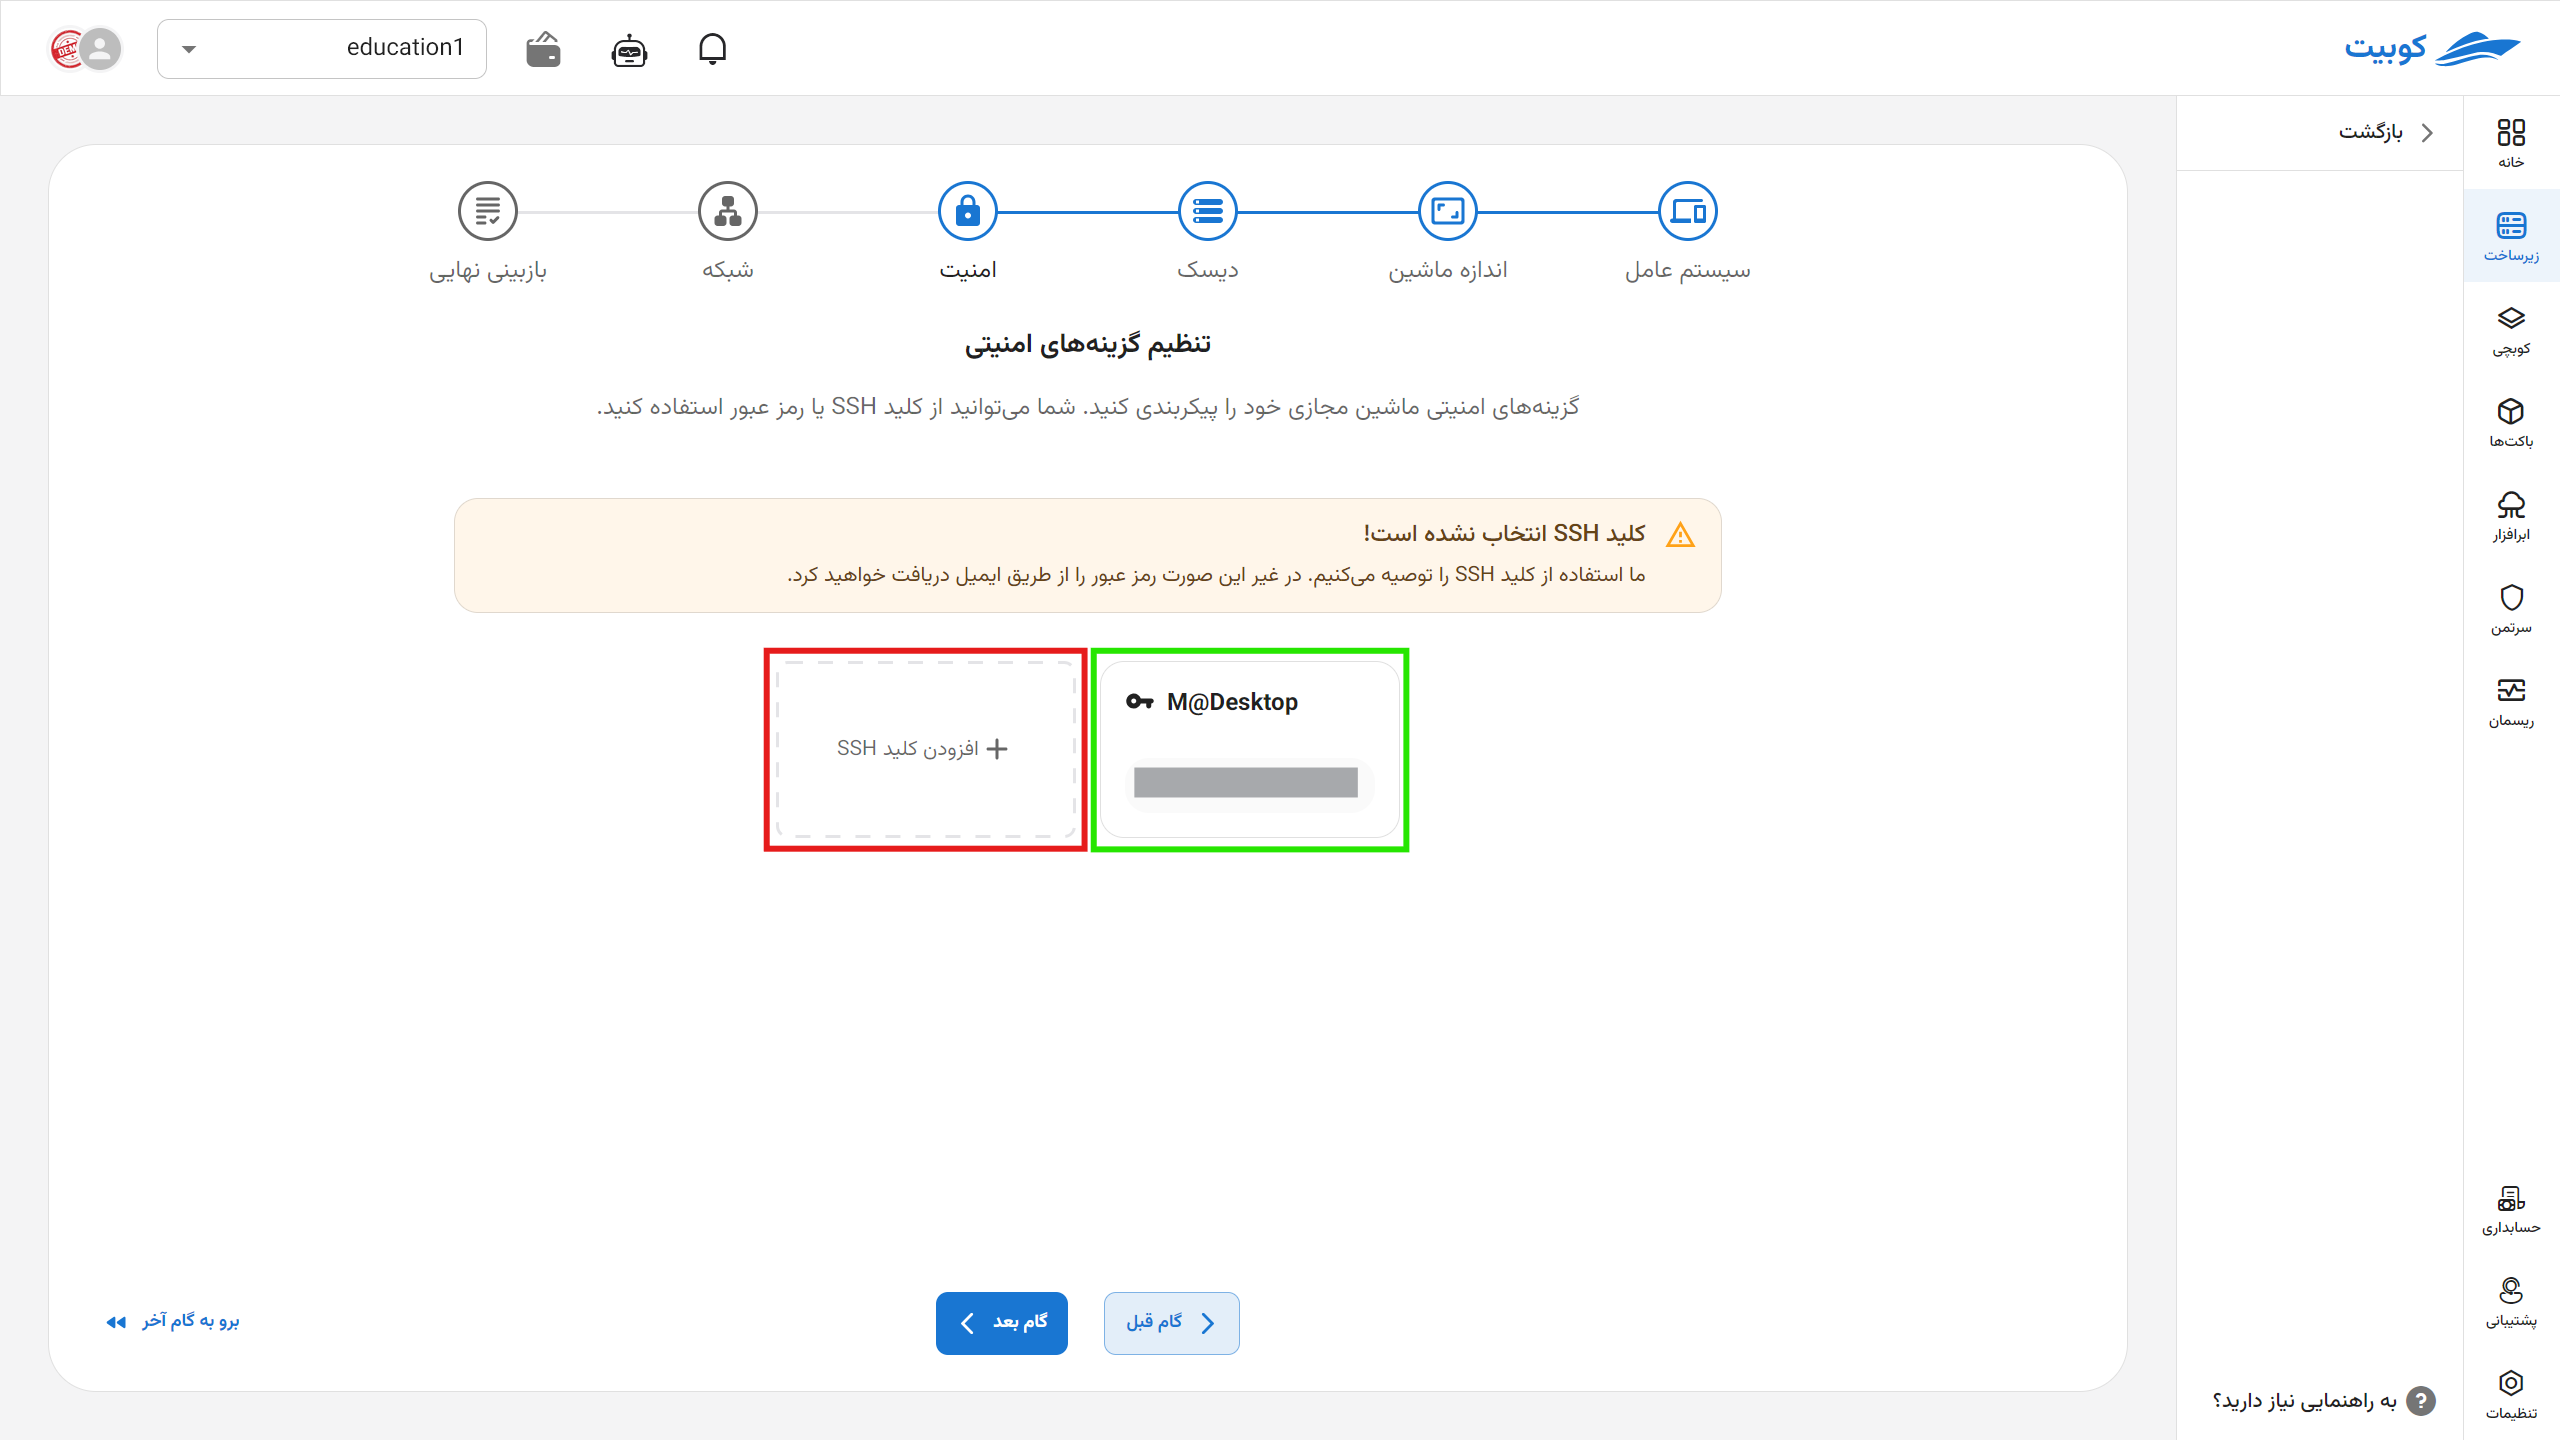
Step Four: Security
For configuring your machine’s security settings, you can use an SSH key or a password. If using a key, you can select multiple SSH keys, and if no SSH key is selected, a password will be sent via email.
In this step, a list of keys created in the project and organization-shared keys is available, from which you can choose, or you can directly add a new key.
Selecting a Key from Existing Keys
Choose the desired keys from the existing ones and click Next Step:
Note that even with an SSH key configured, it is still possible to use a password for the machine. By enabling the Generate a random password for the virtual machine option, the machine’s password will be emailed to the user.
Adding a New Key
-
Click on the Add SSH Key field.
-
Then, enter the key details, including Name and SSH Public Key, and click Add Key.
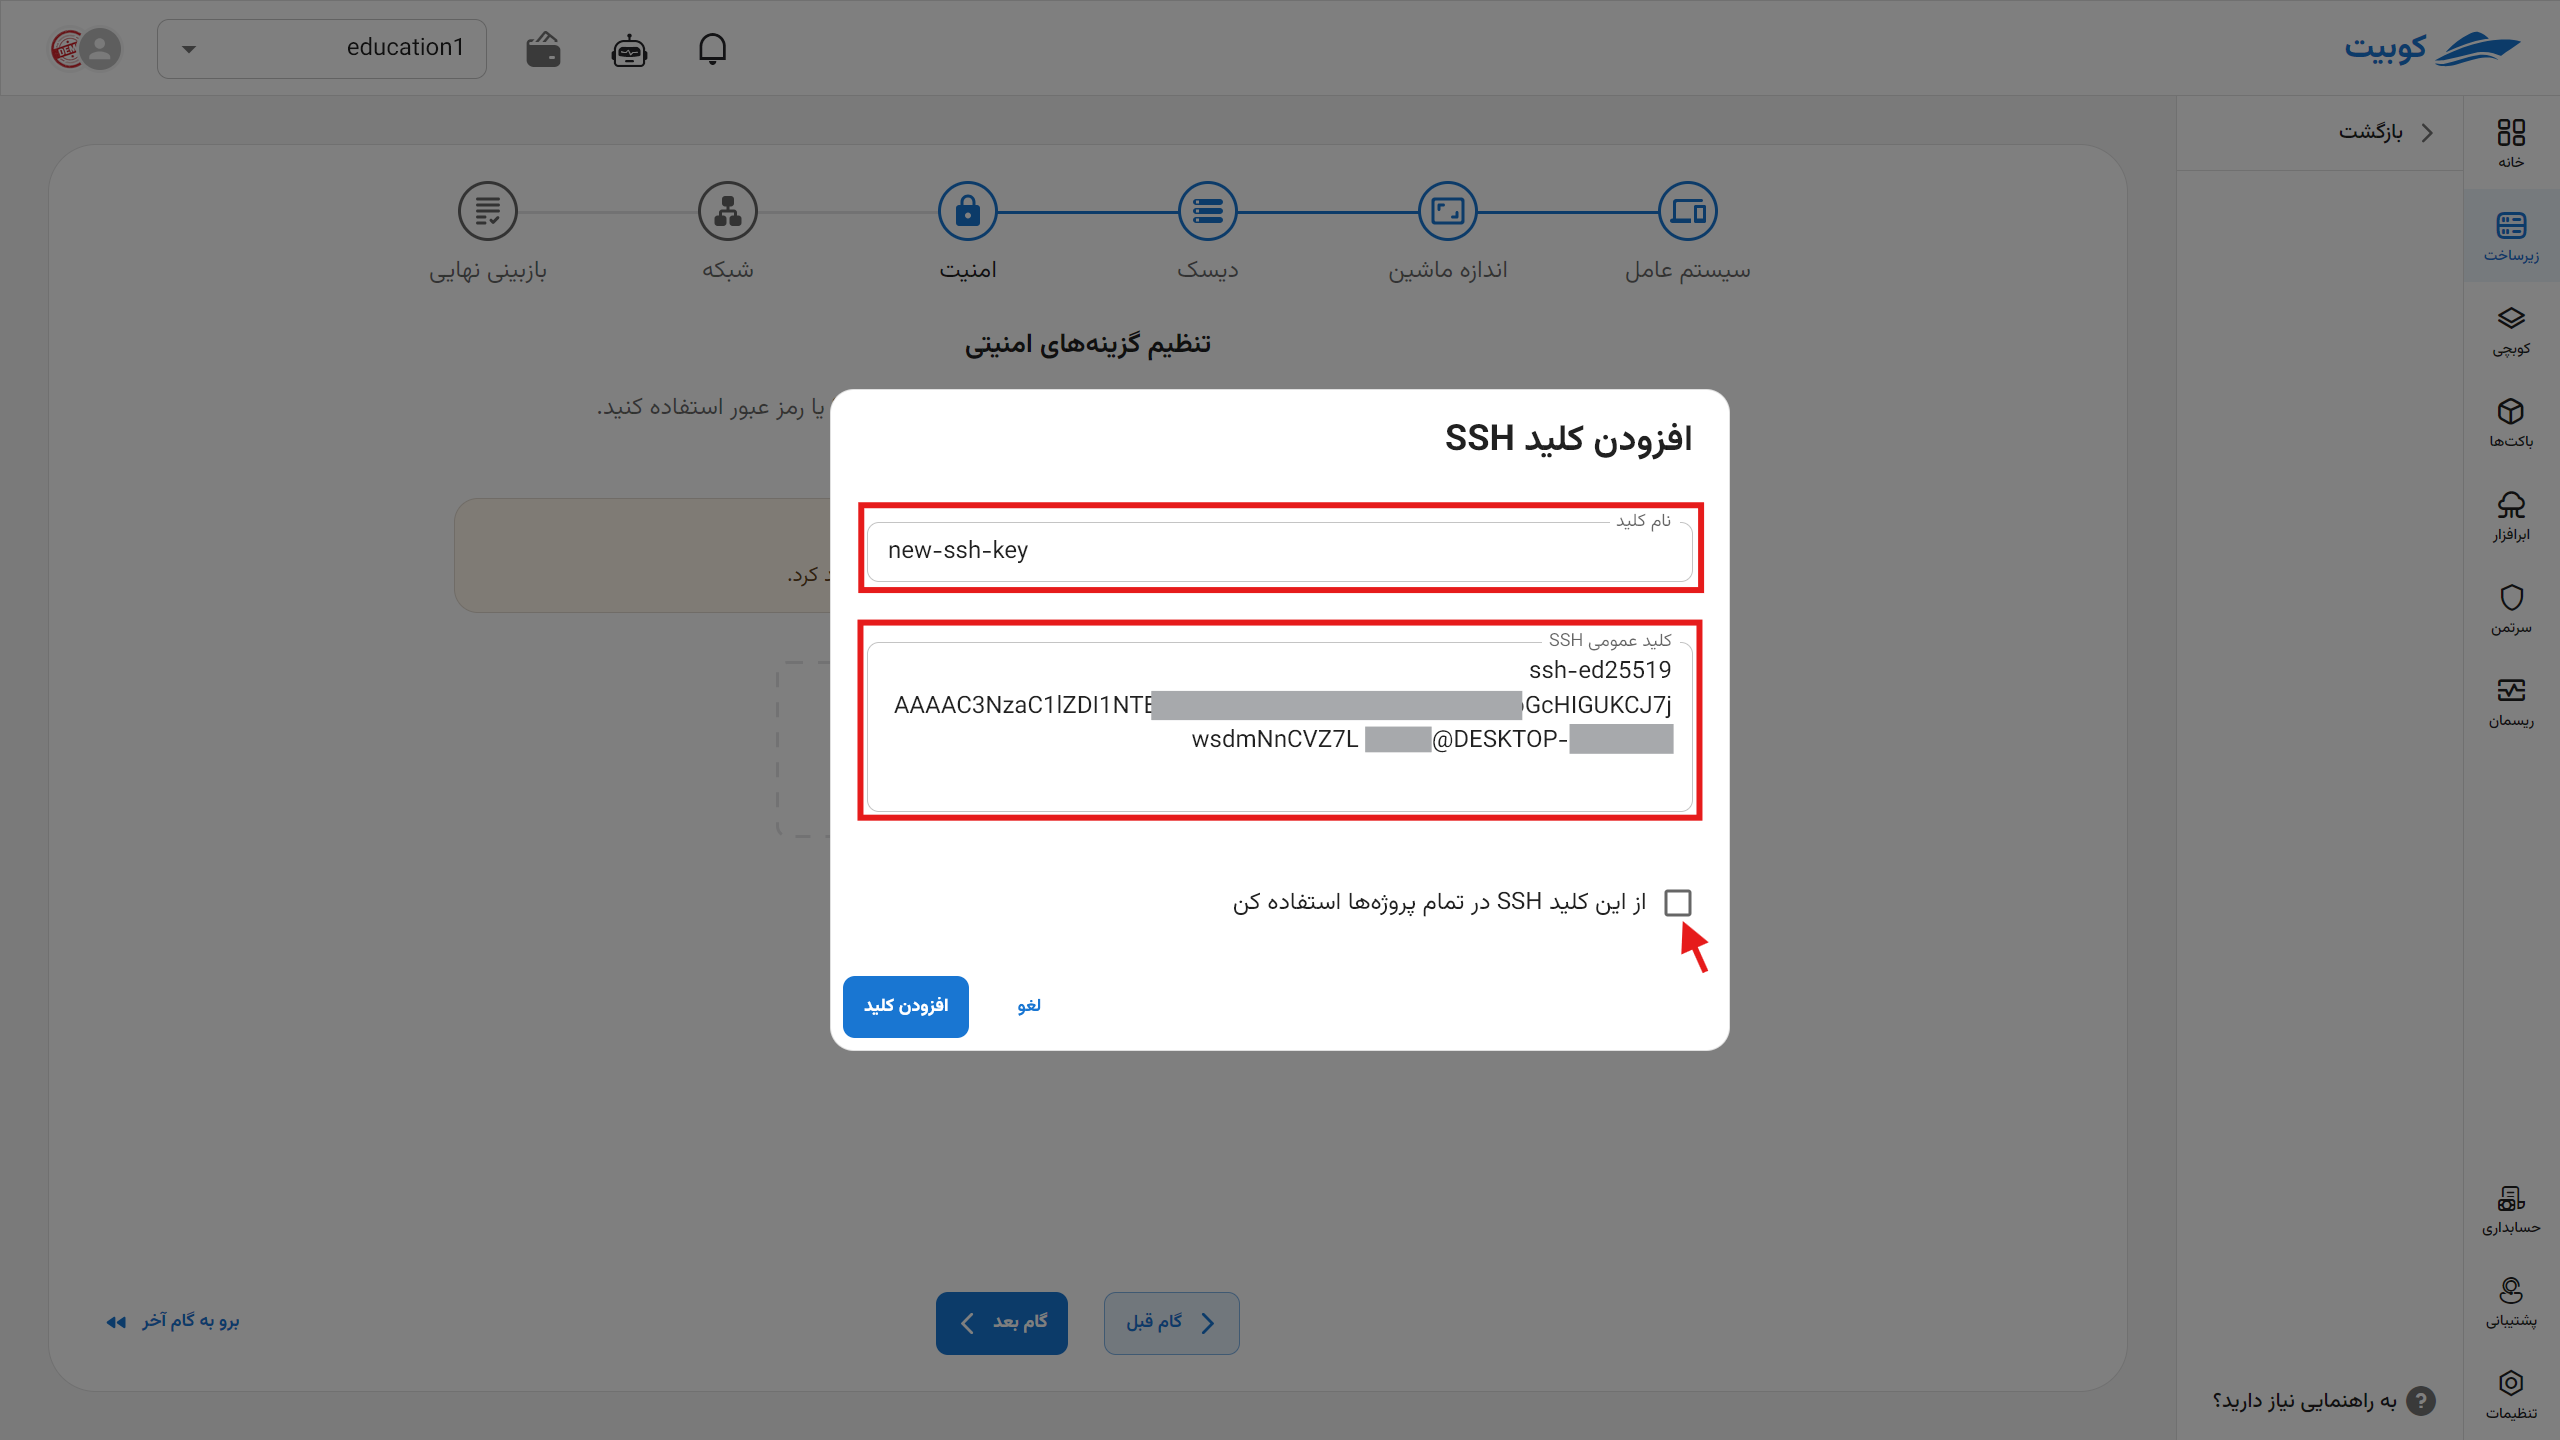 Then, the added key will be available, and you can select it.
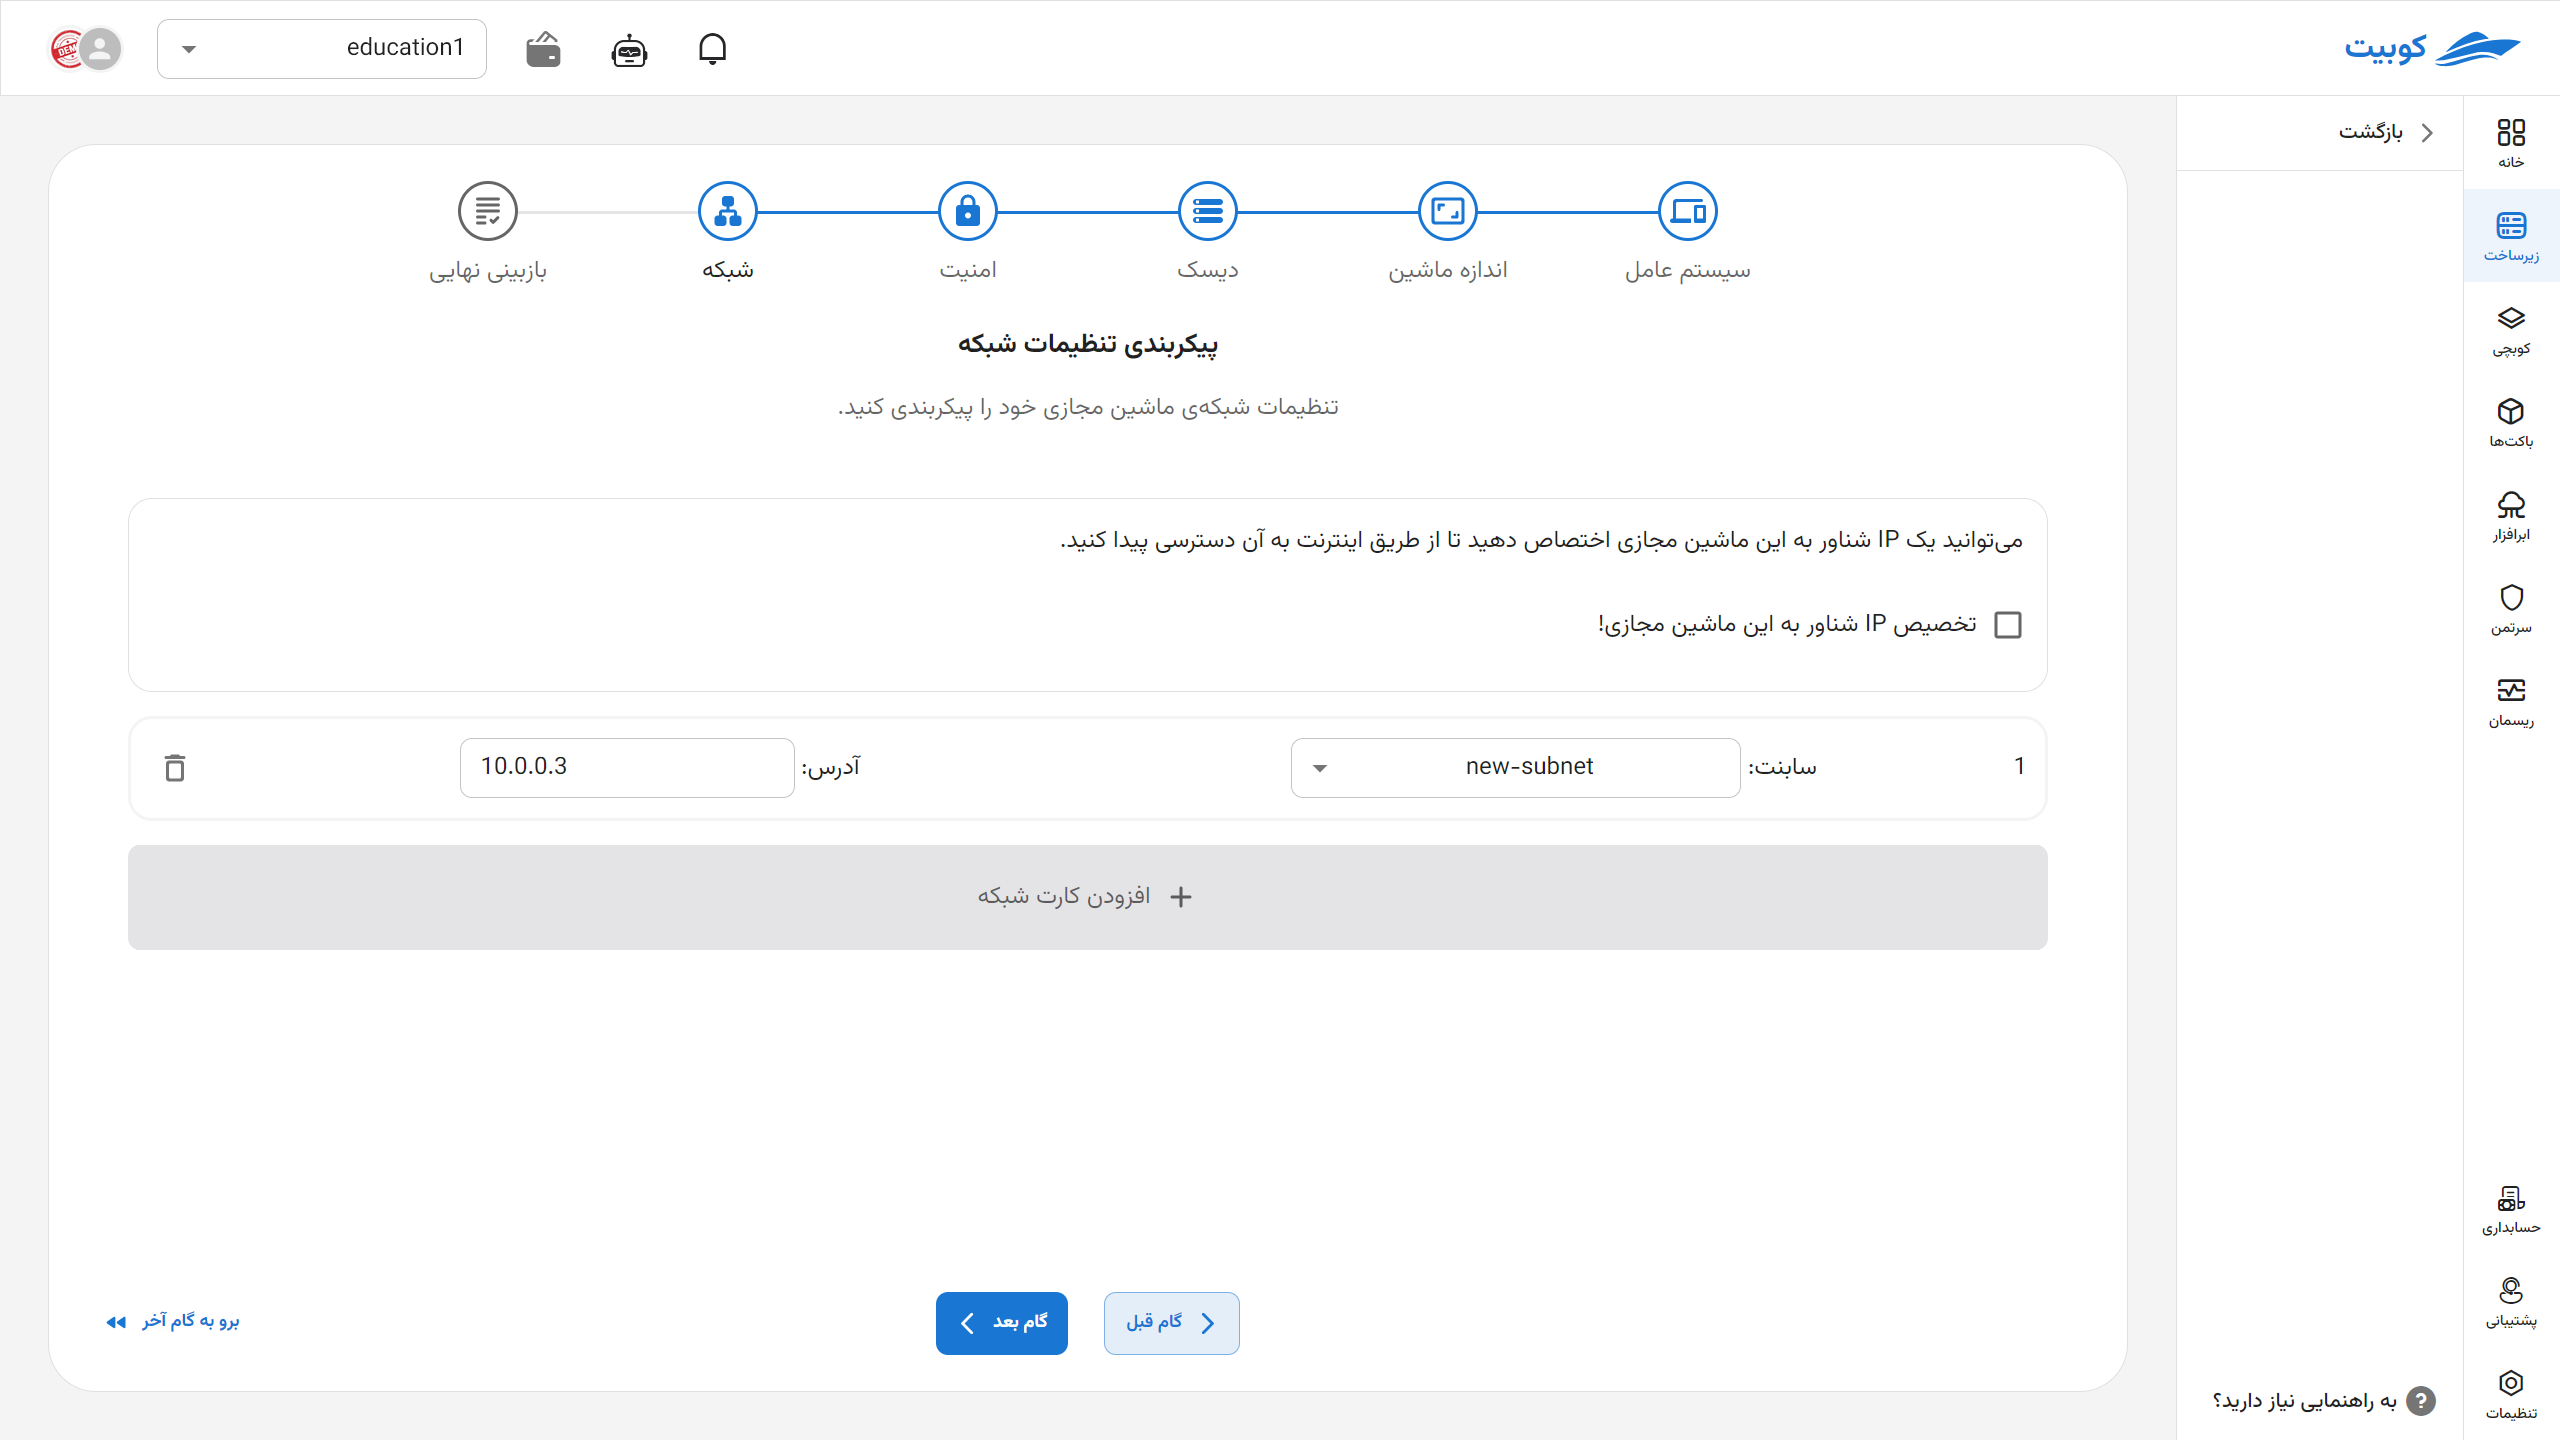
Step Five: Network
In this step, network configuration, including adding a network interface and assigning a floating IP, is performed. To assign a floating IP, you must first define at least one network interface for your machine.
First, click on Add Network Interface to open the information form:
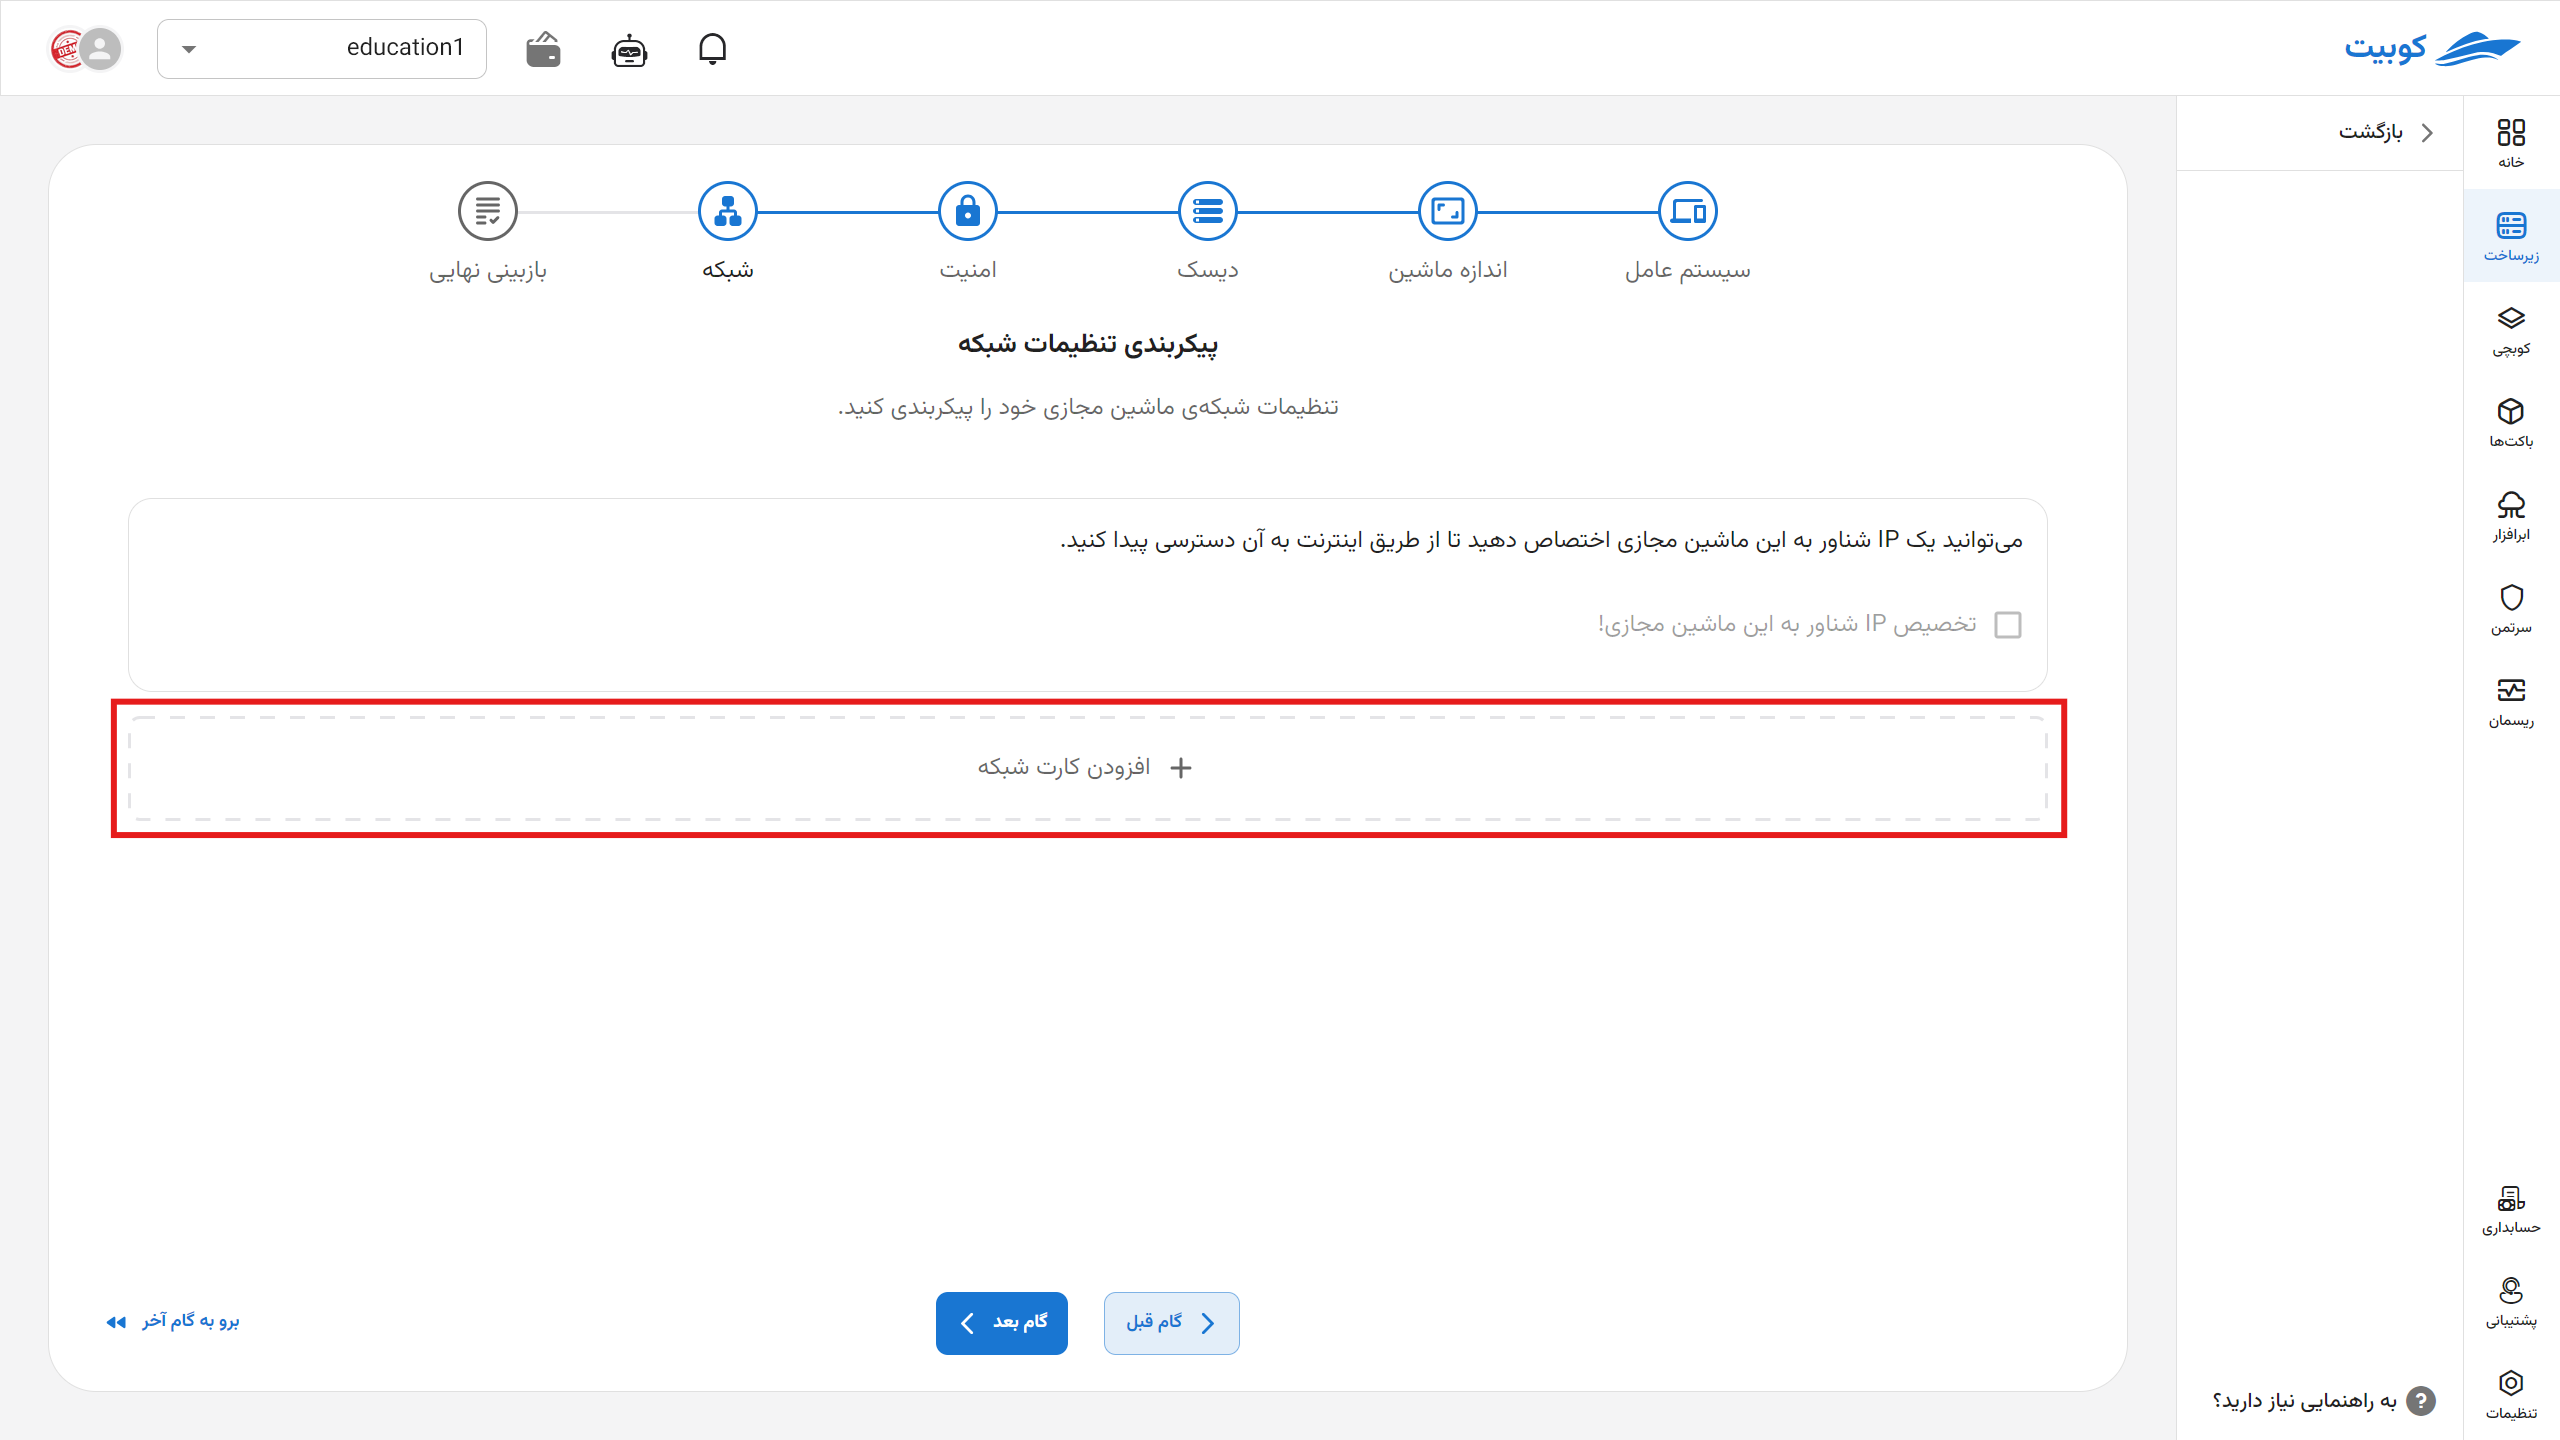
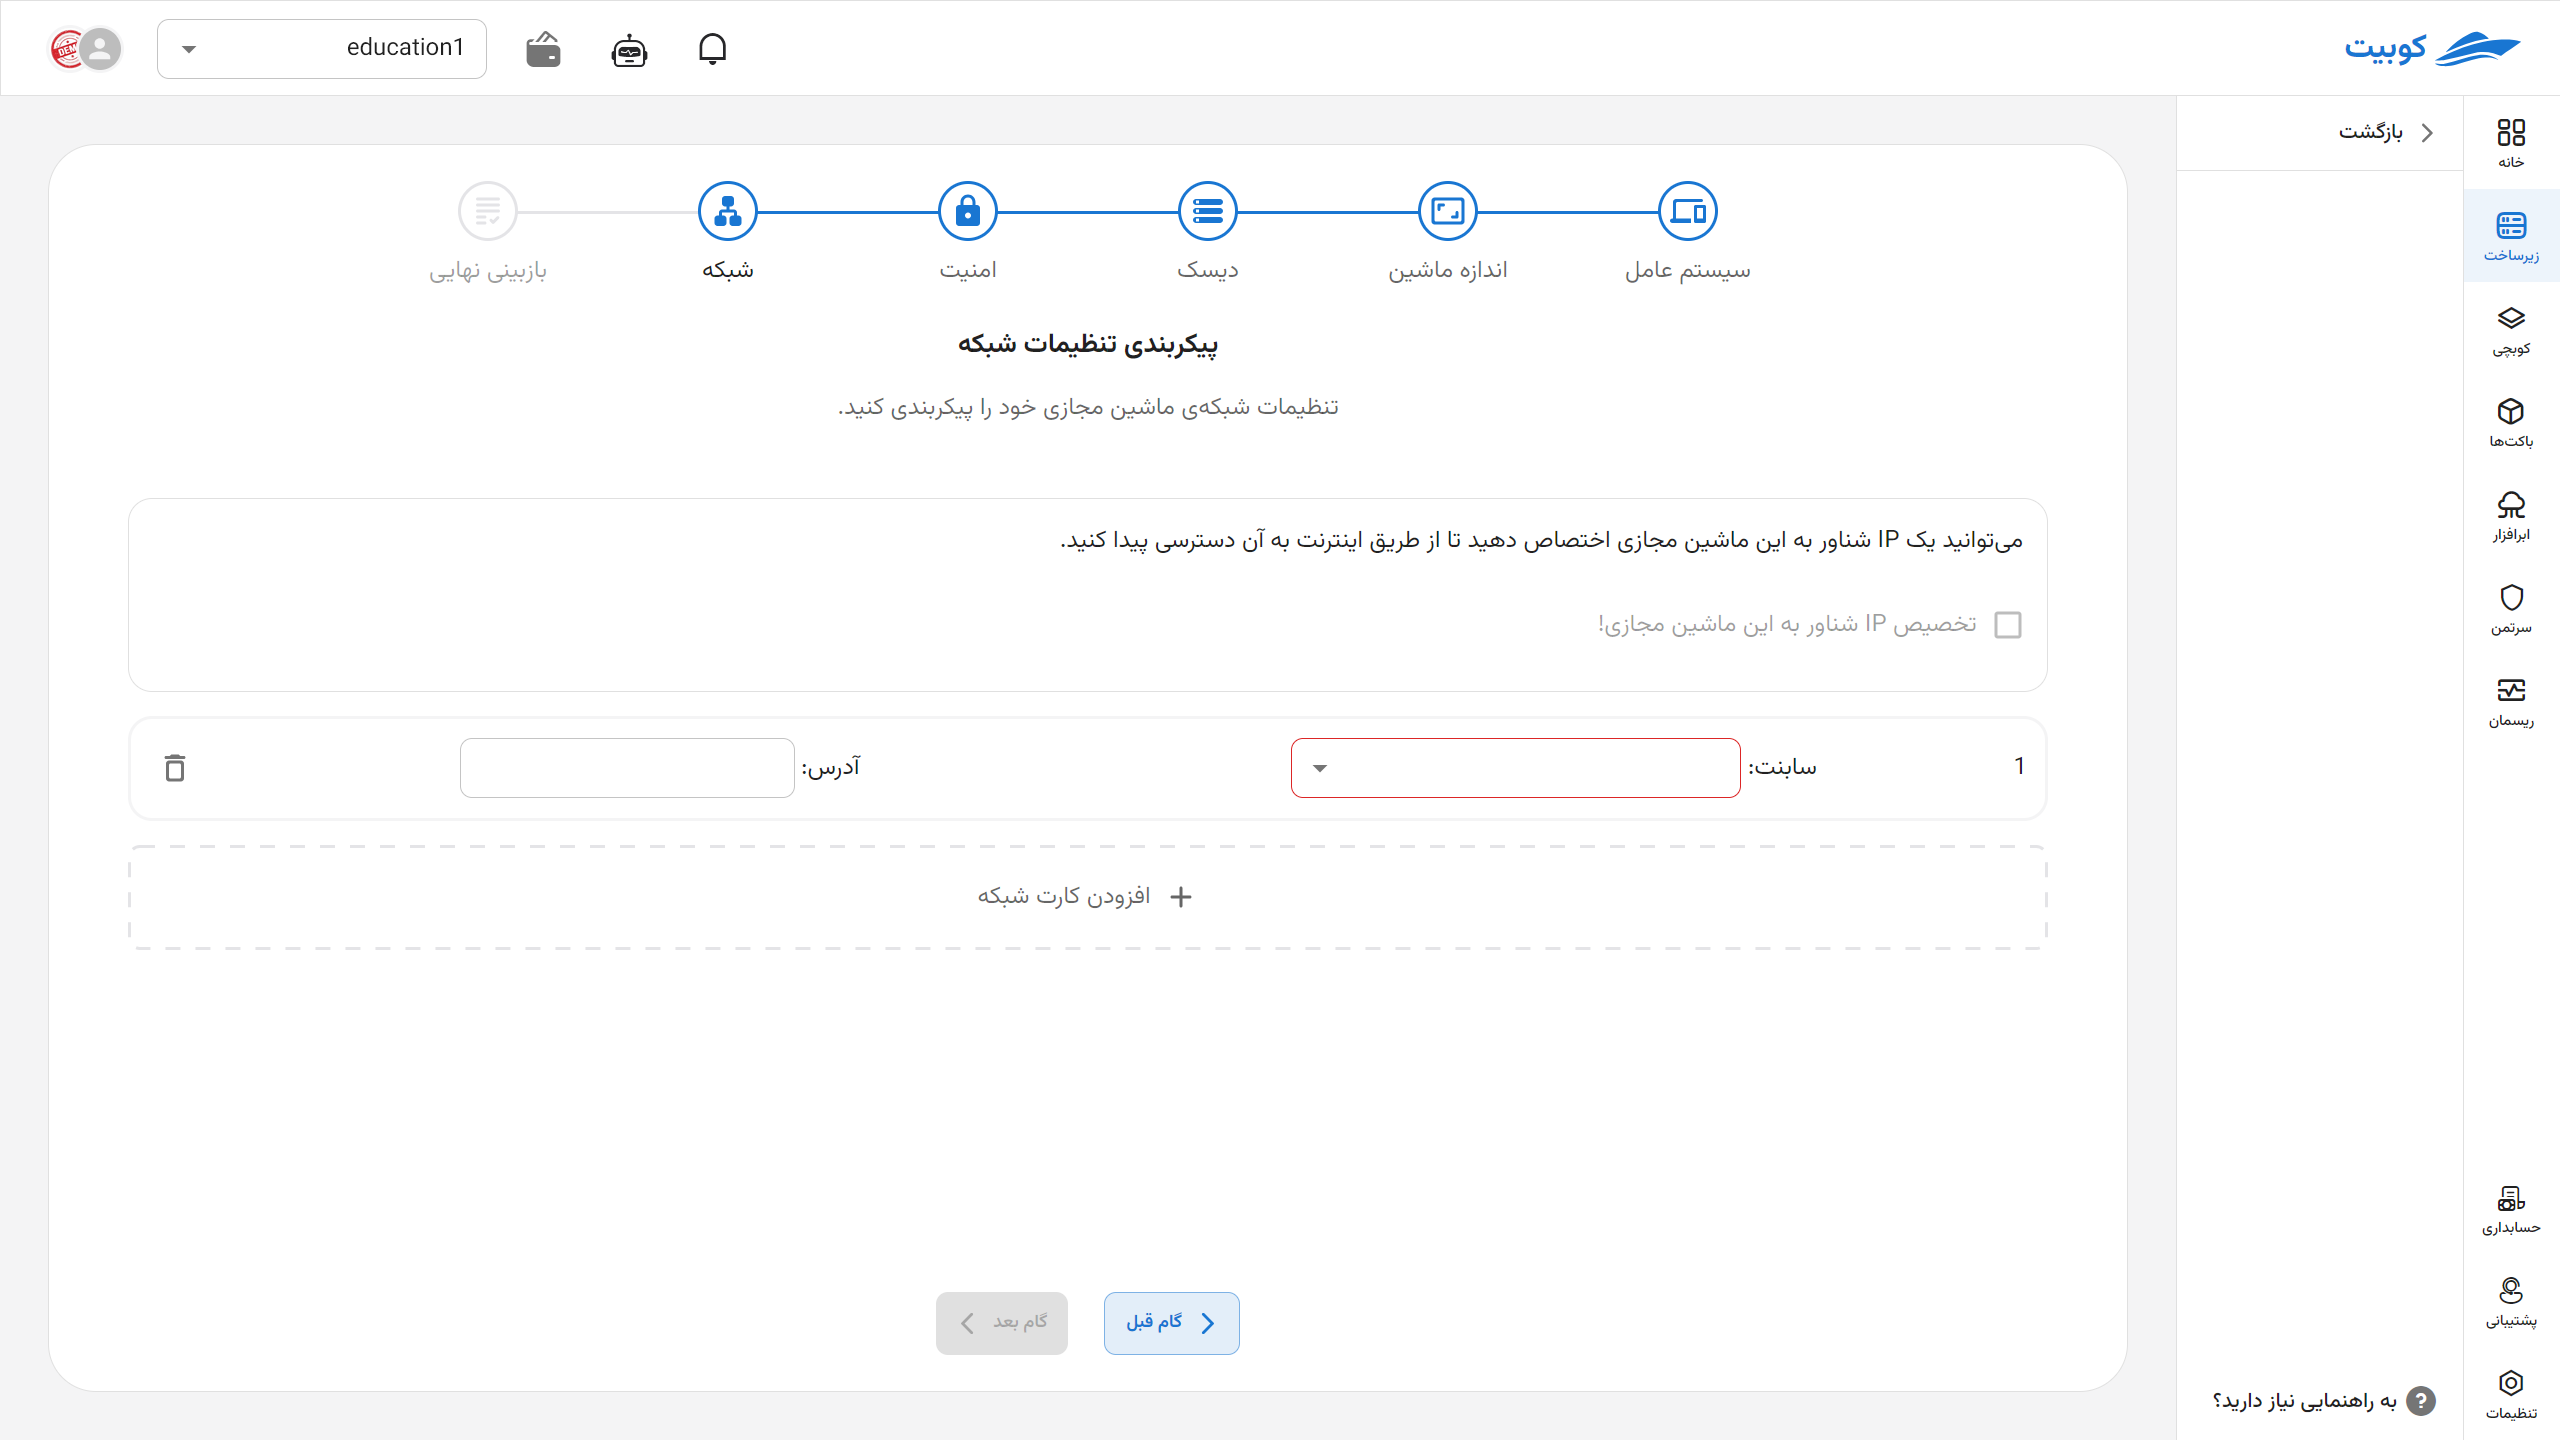
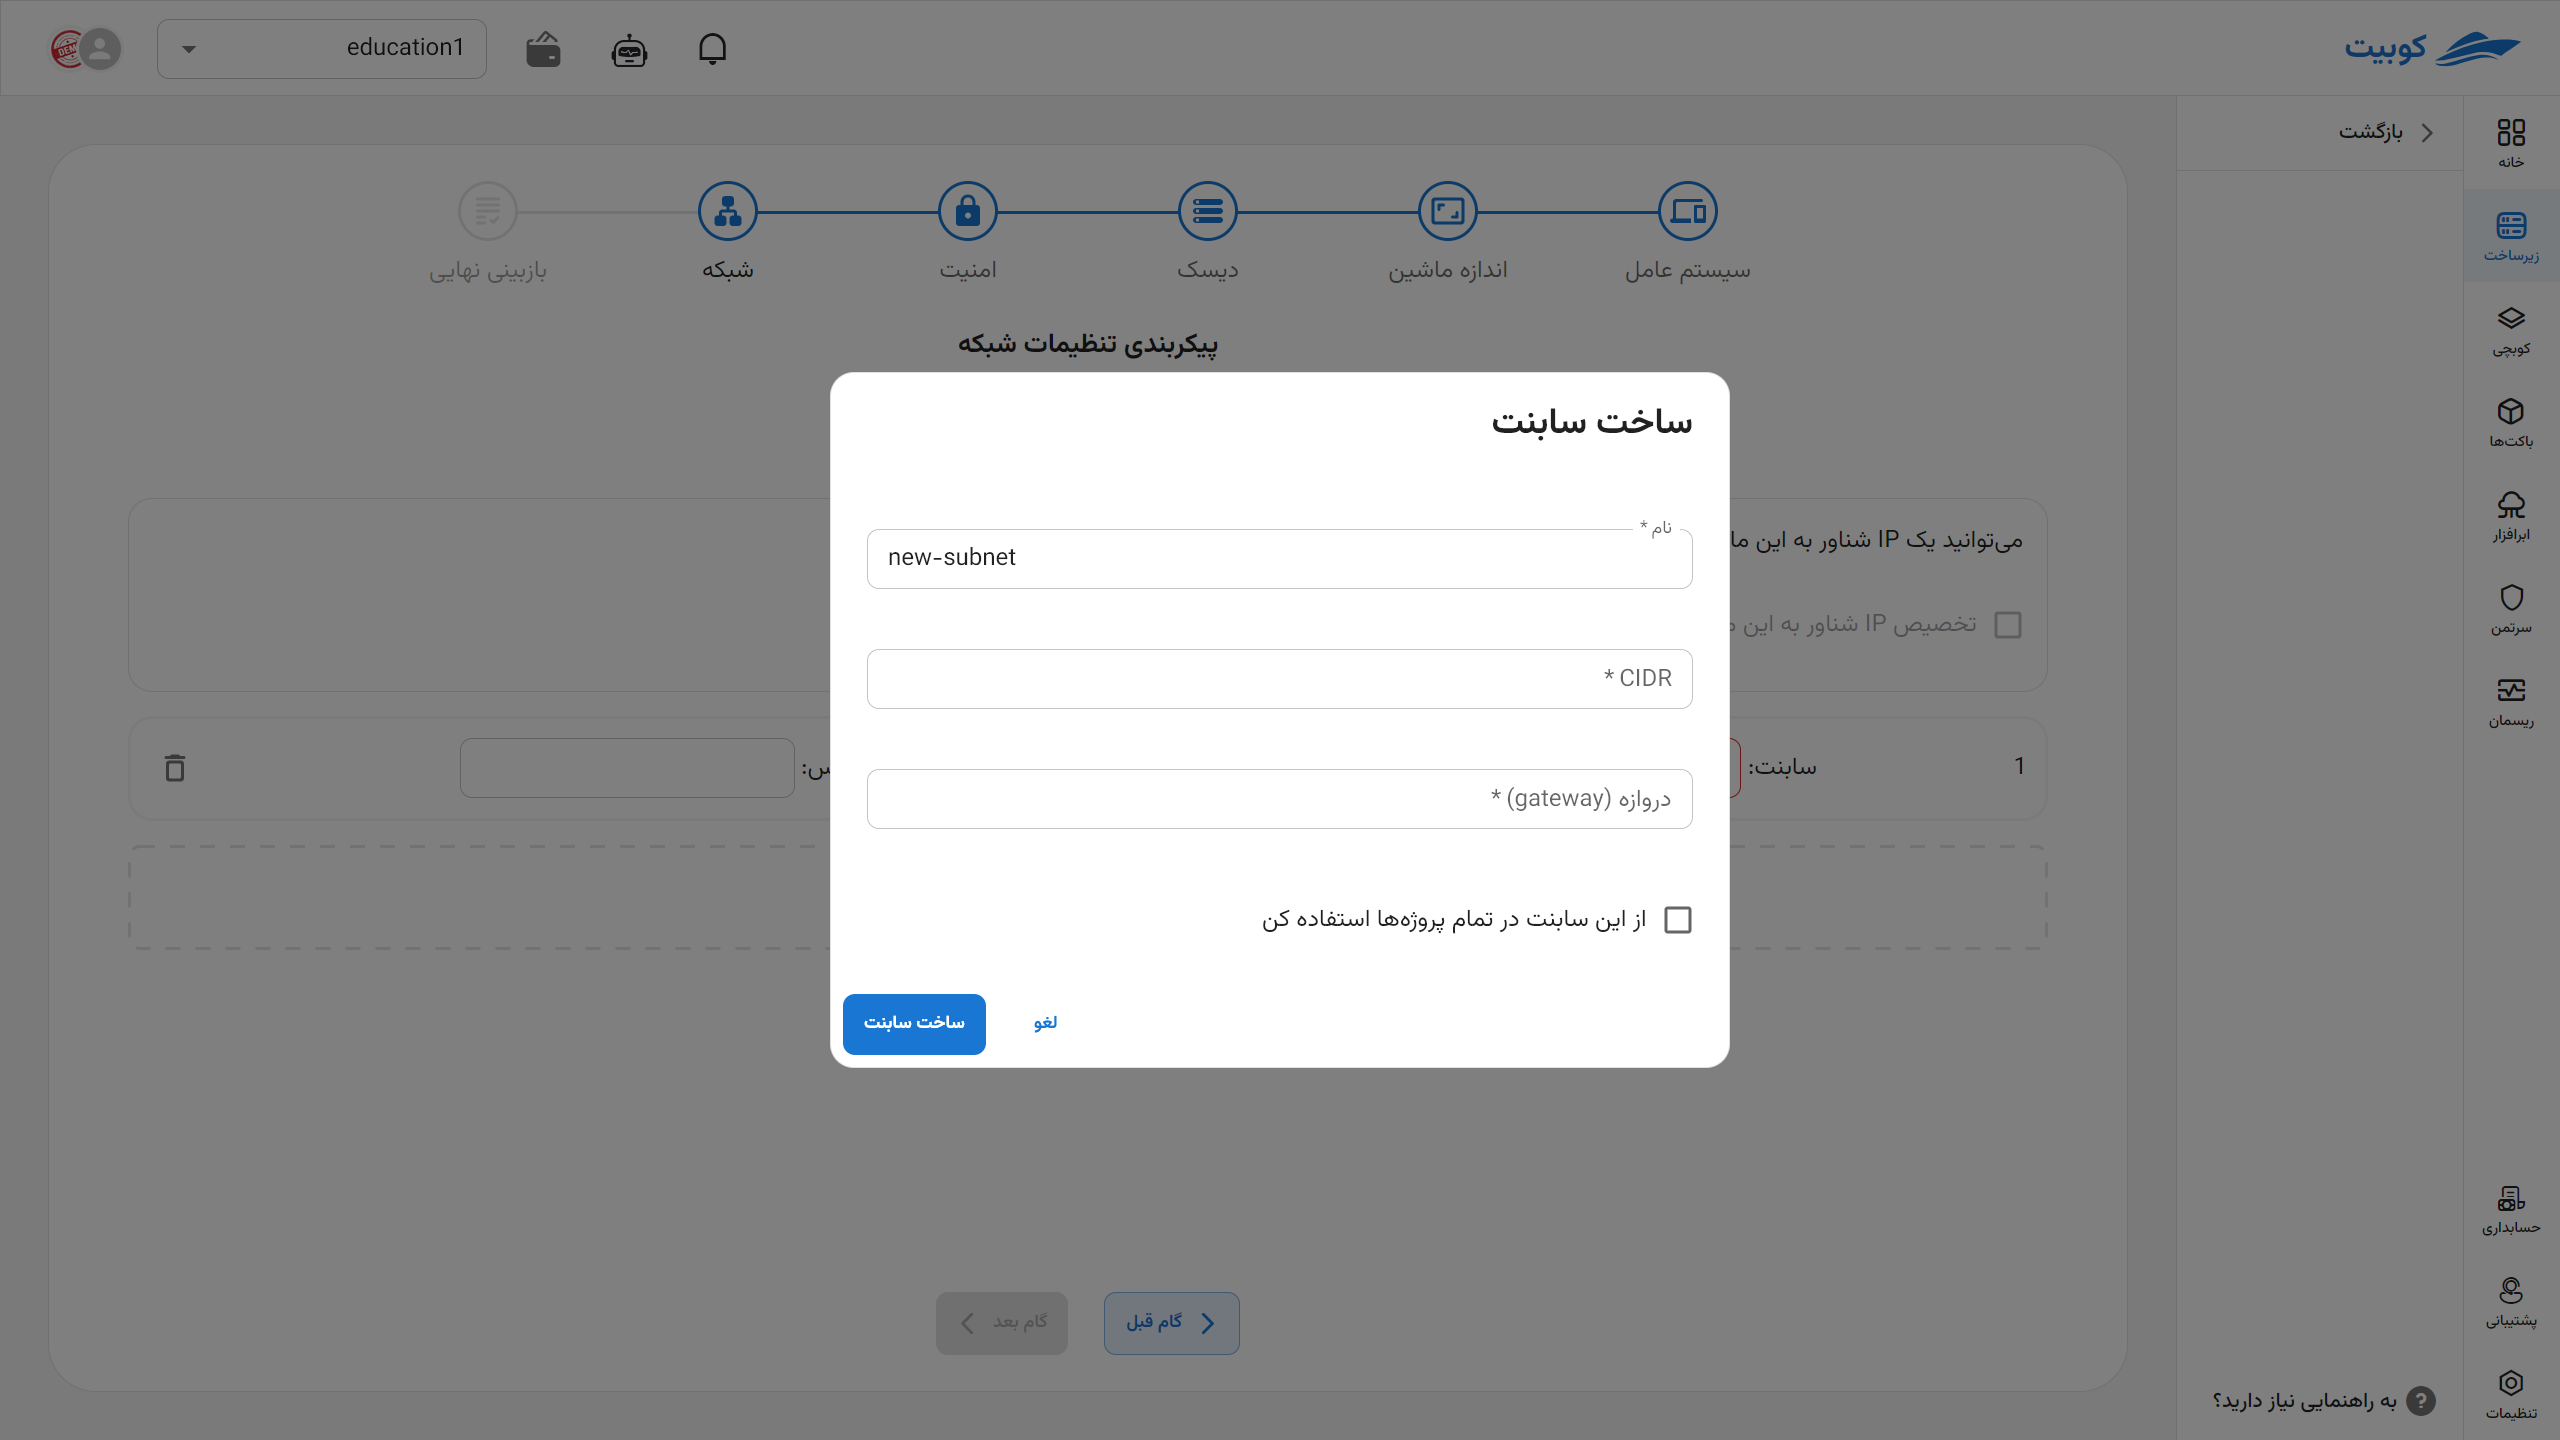
Then, you can choose from the project’s subnets or organization-shared subnets, or create a new subnet:
Selecting a Subnet
Choose one from the available subnets:
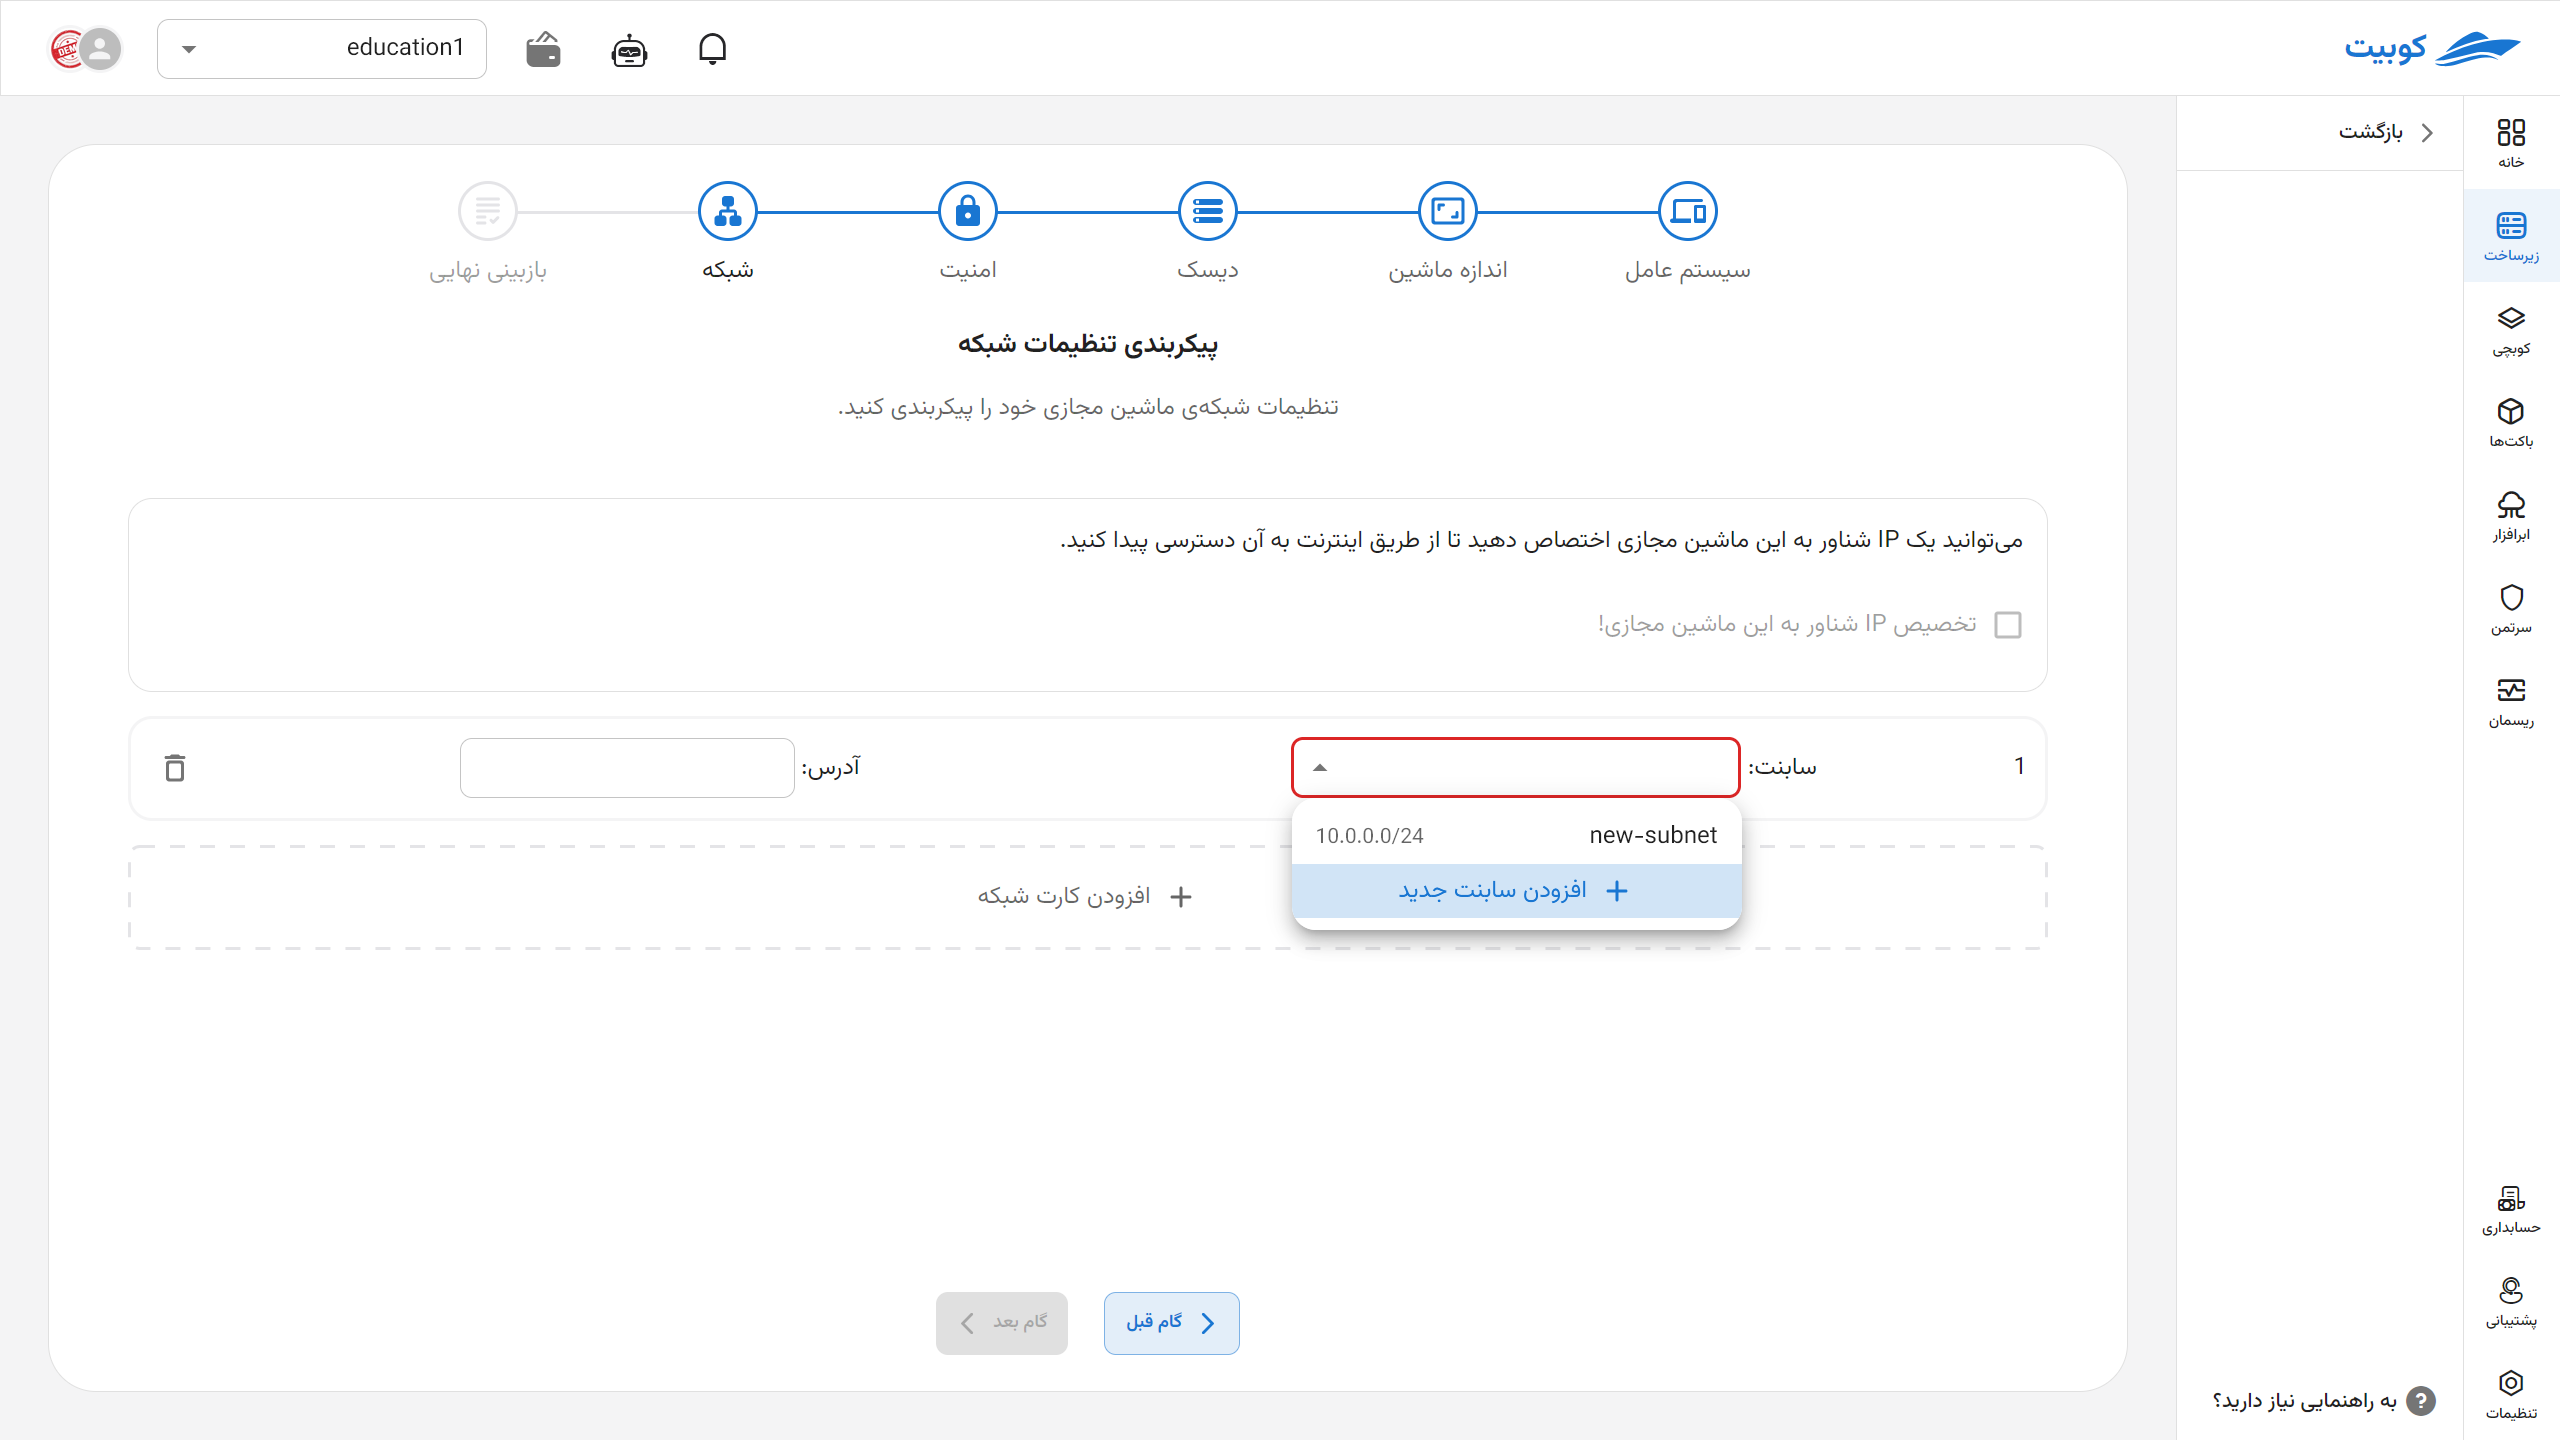
Adding a Subnet
- First, click on the Add New Subnet option.
- Then, enter the subnet details, including Name, CIDR, and Gateway.
- Finally, if you wish to share this subnet across the organization, select the Use this subnet in all projects option and click Create Subnet.
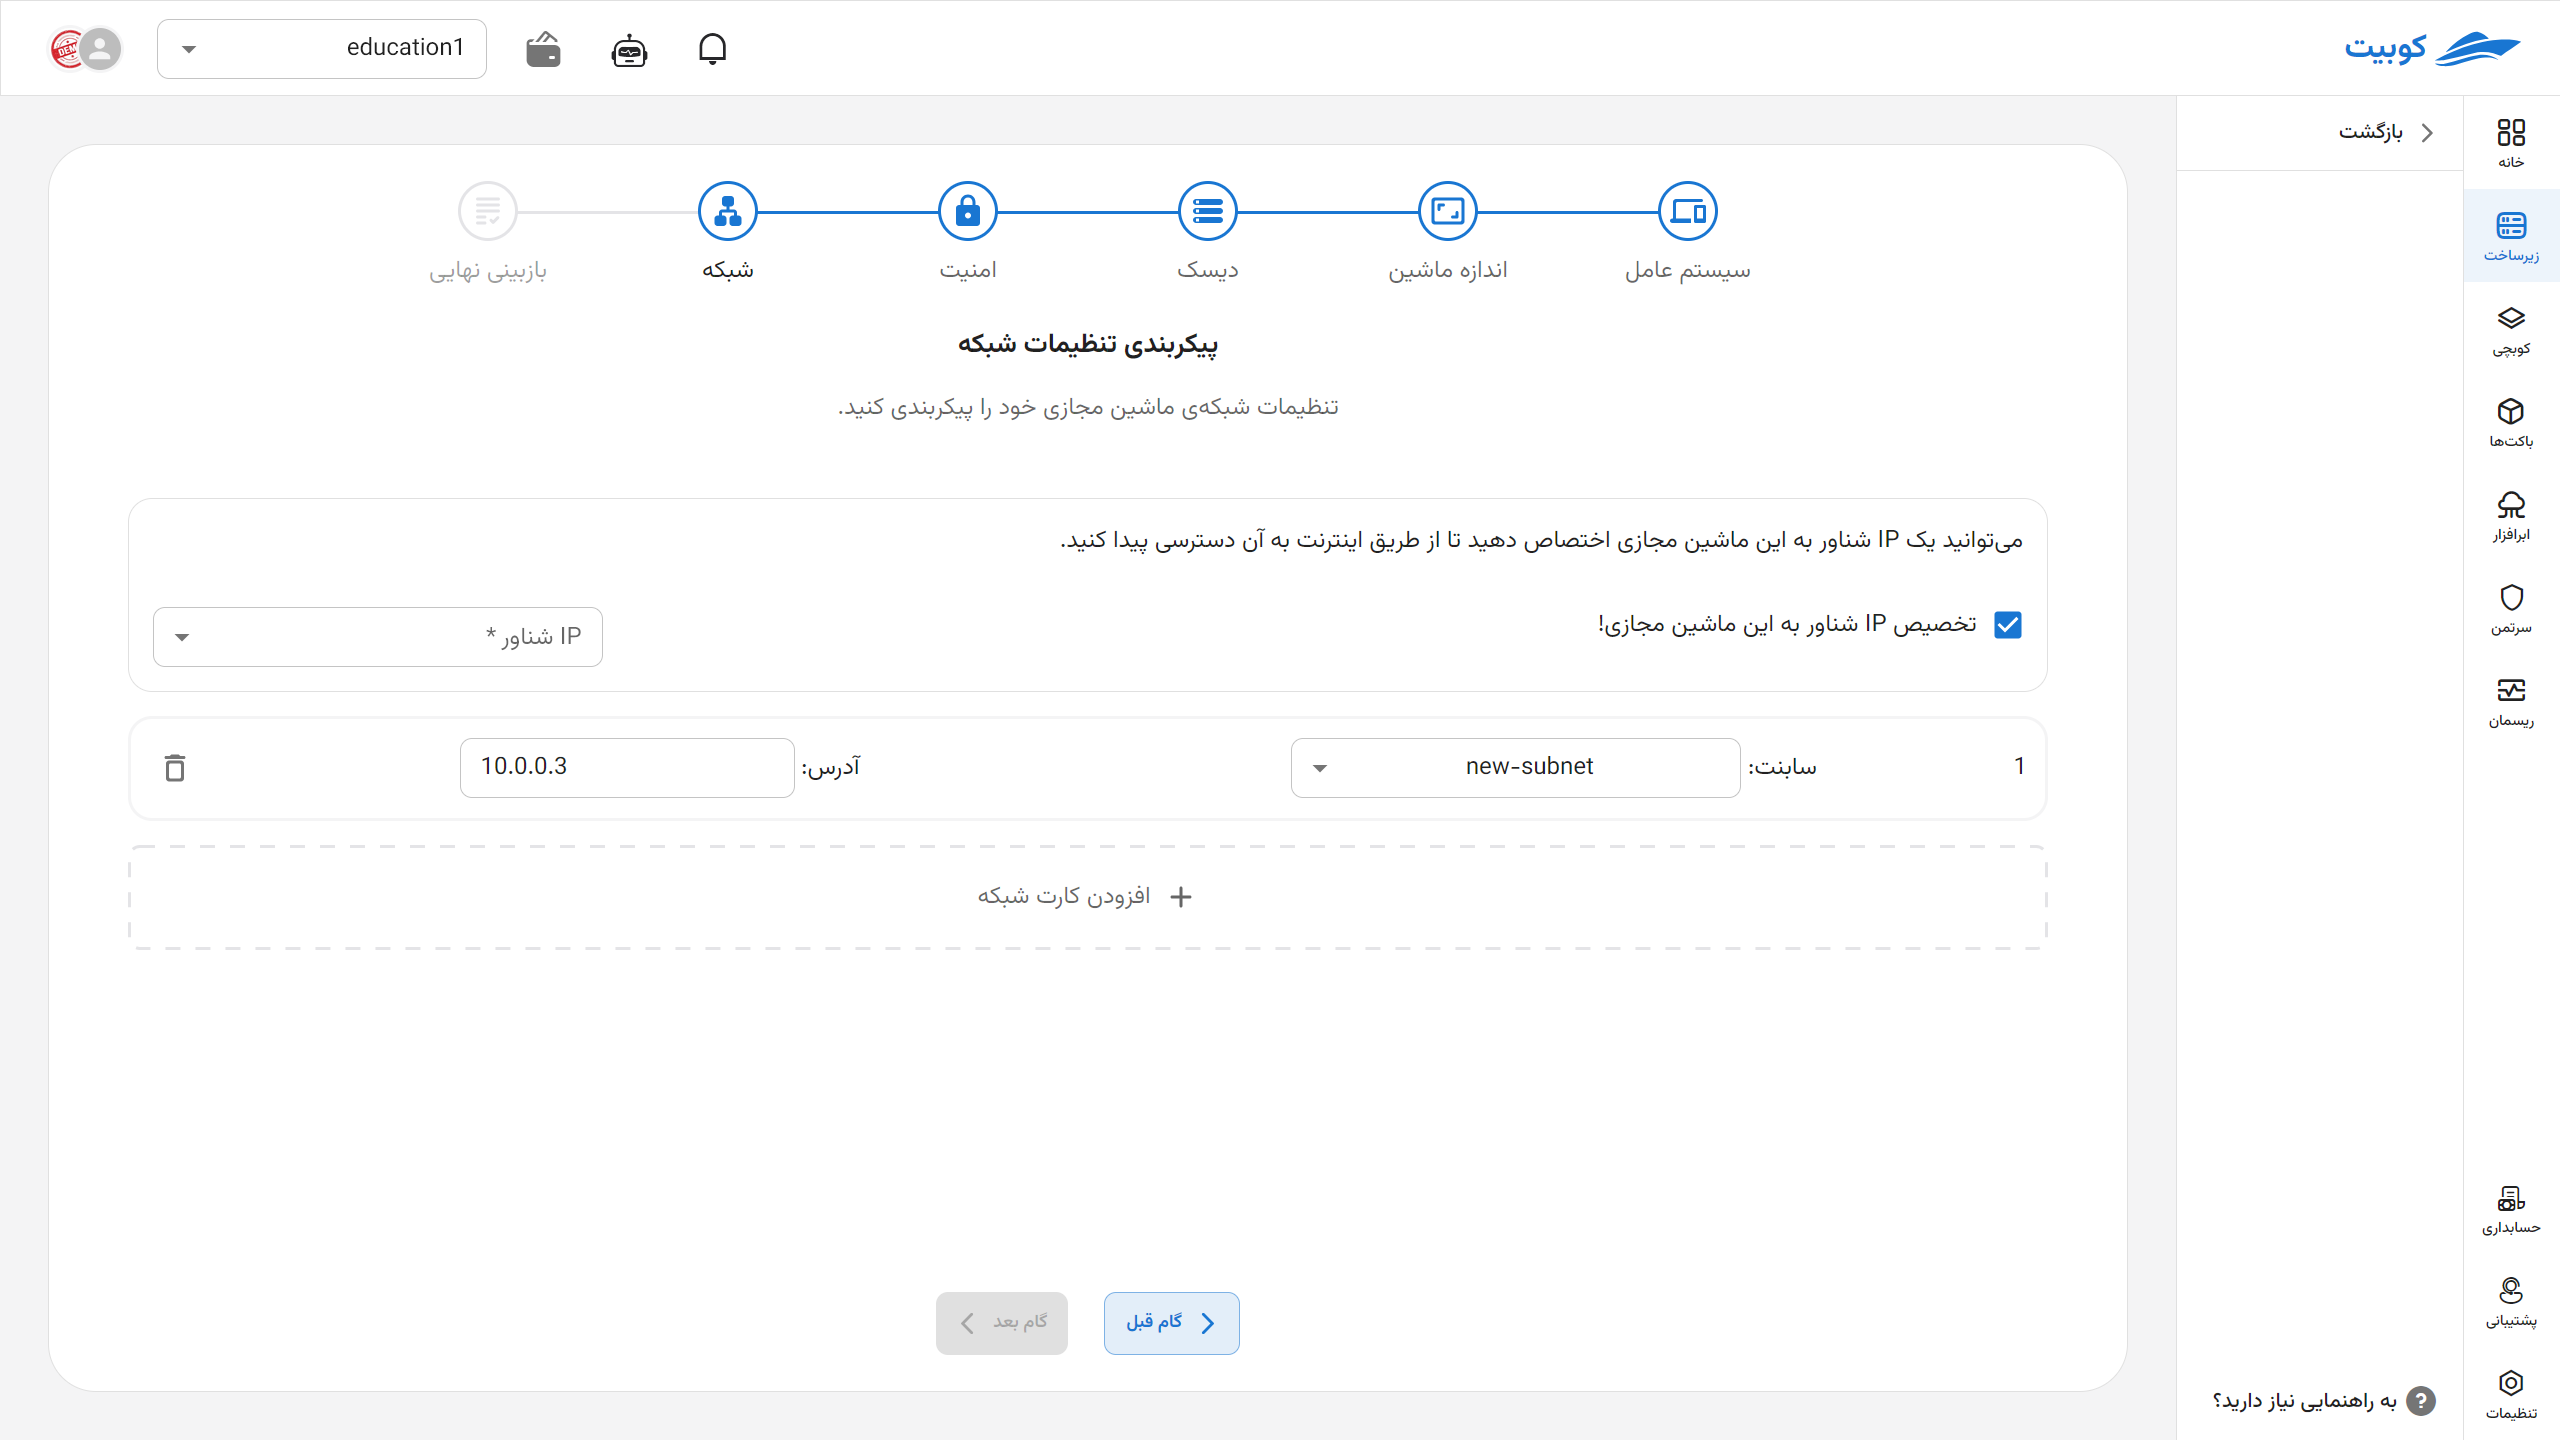
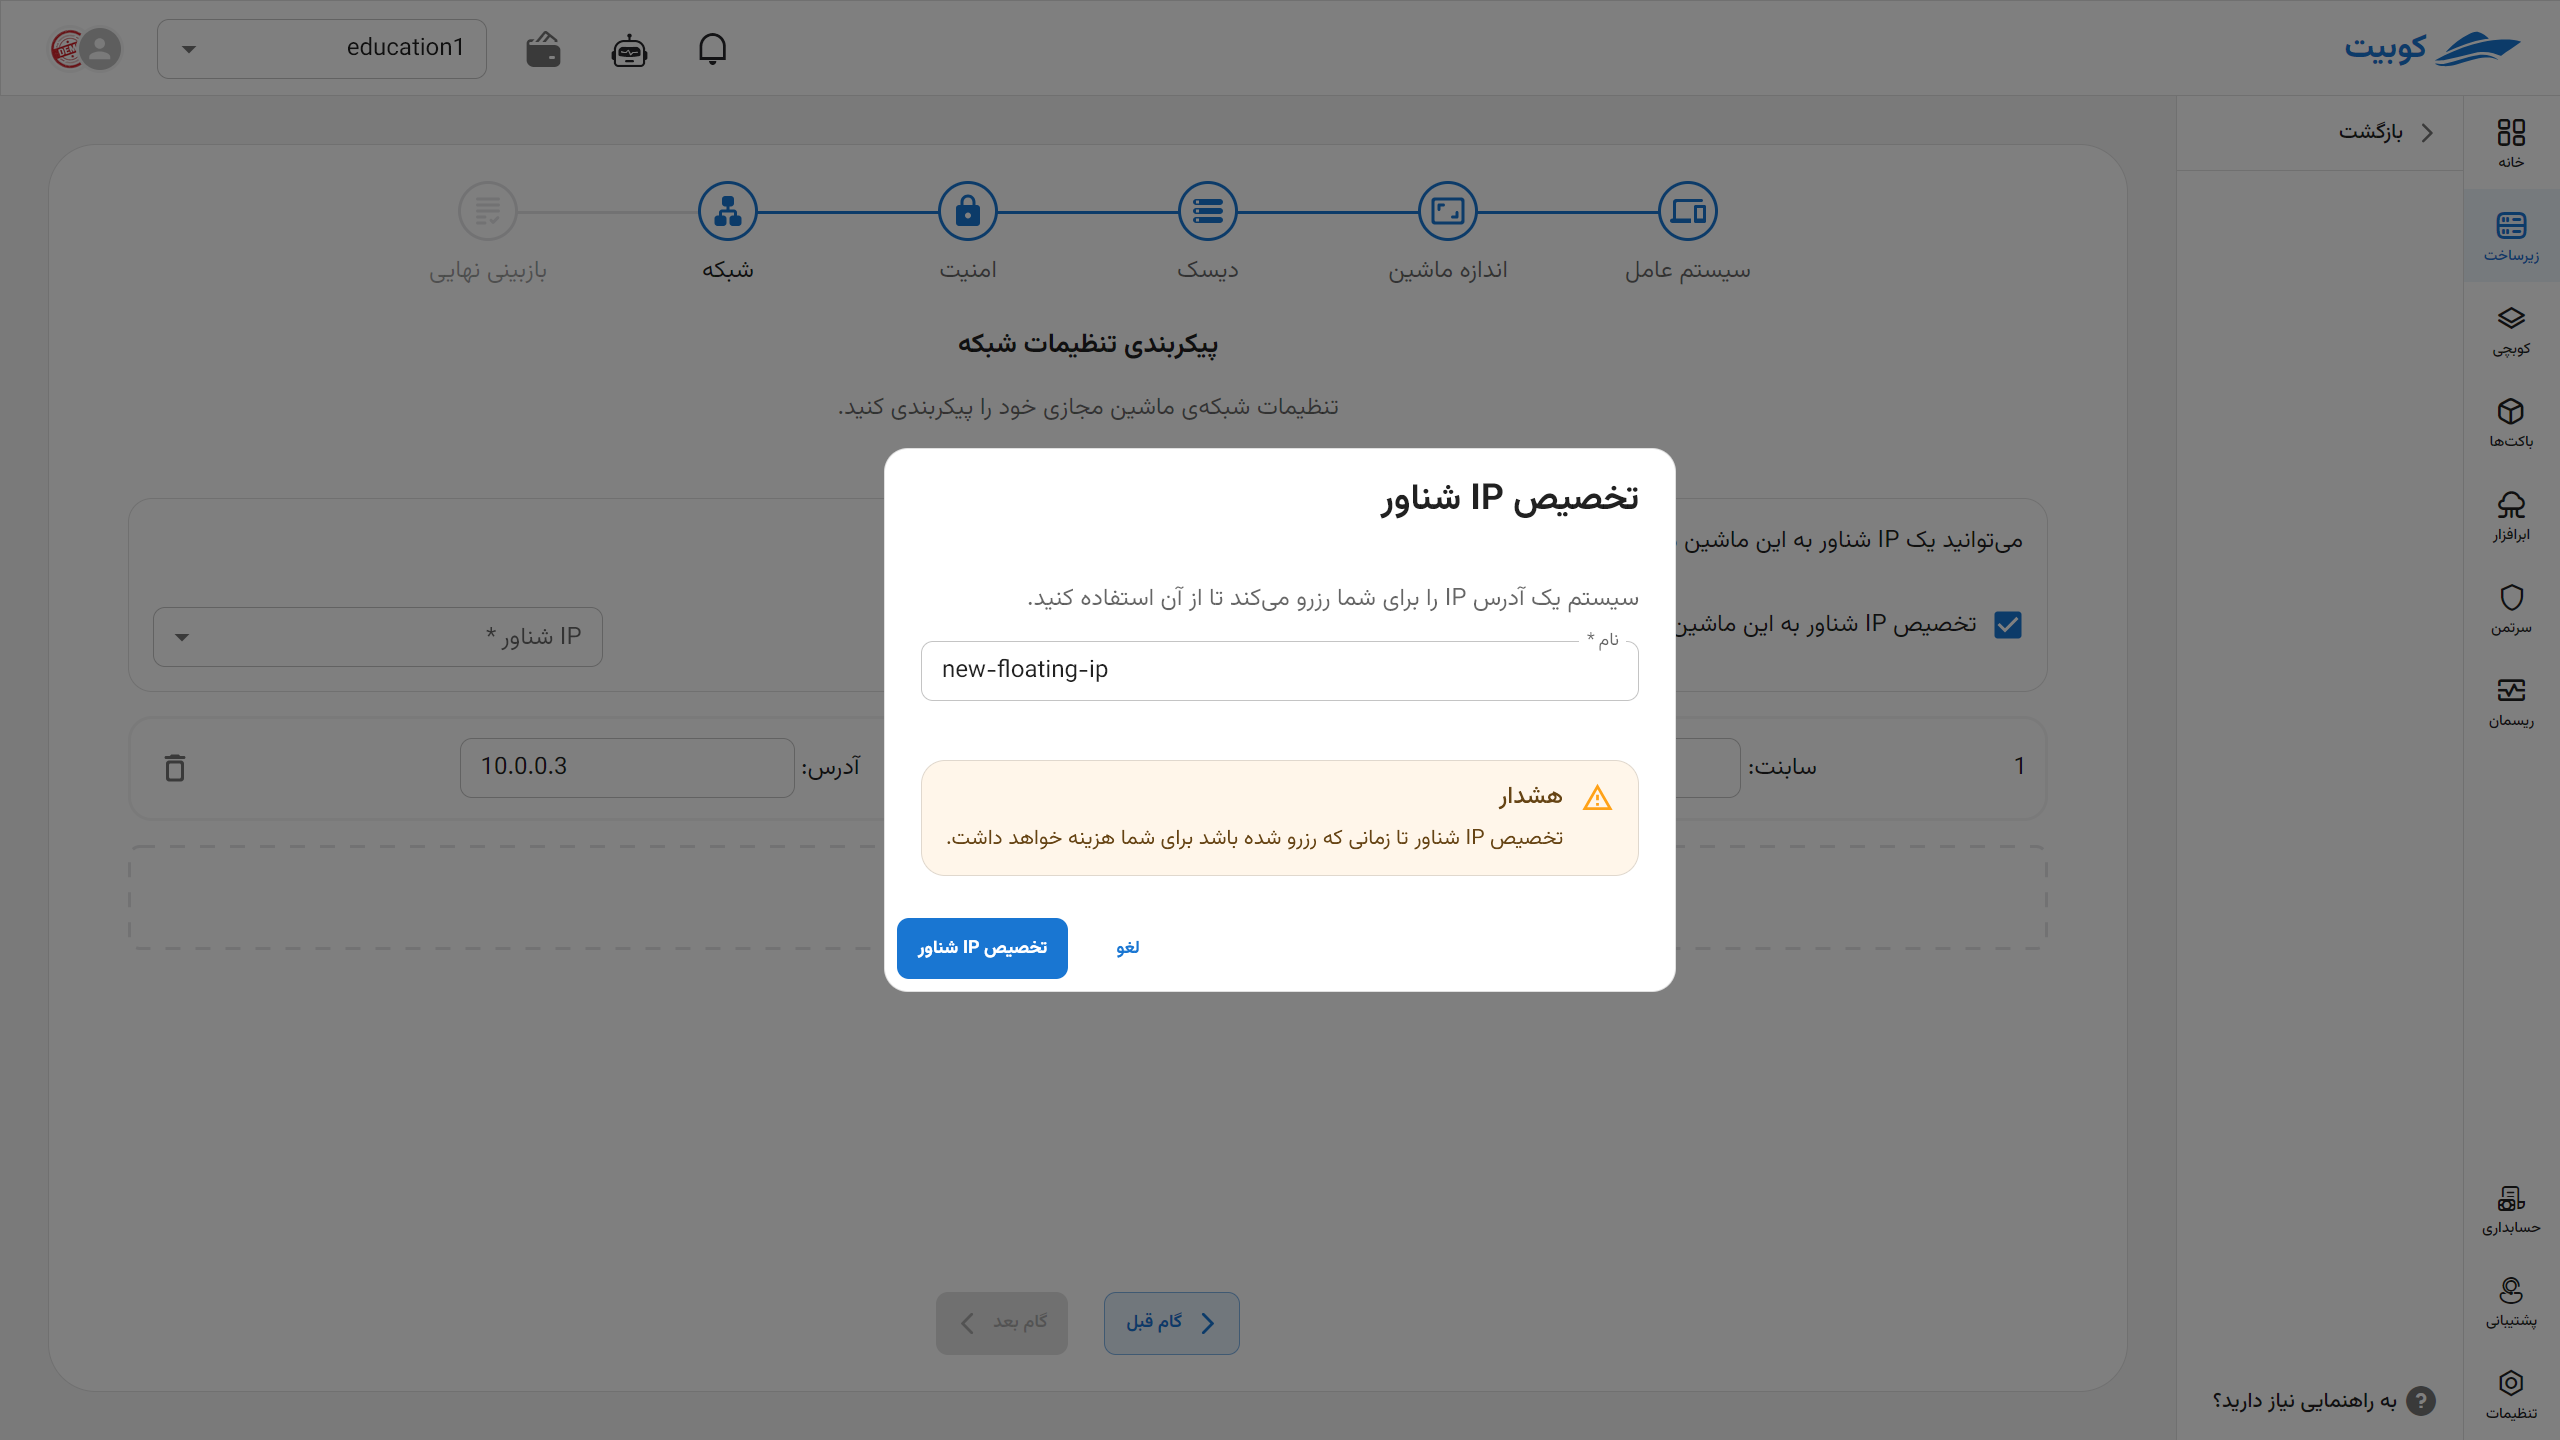
Assigning a Floating IP
- After selecting a subnet, you can also assign a floating IP to the machine. First, select the Assign a floating IP to this virtual machine! option.
- Then, you can choose from the project’s floating IPs or organization-shared floating IPs, or create a new floating IP.
Selecting a Floating IP
Choose one from the available floating IPs:
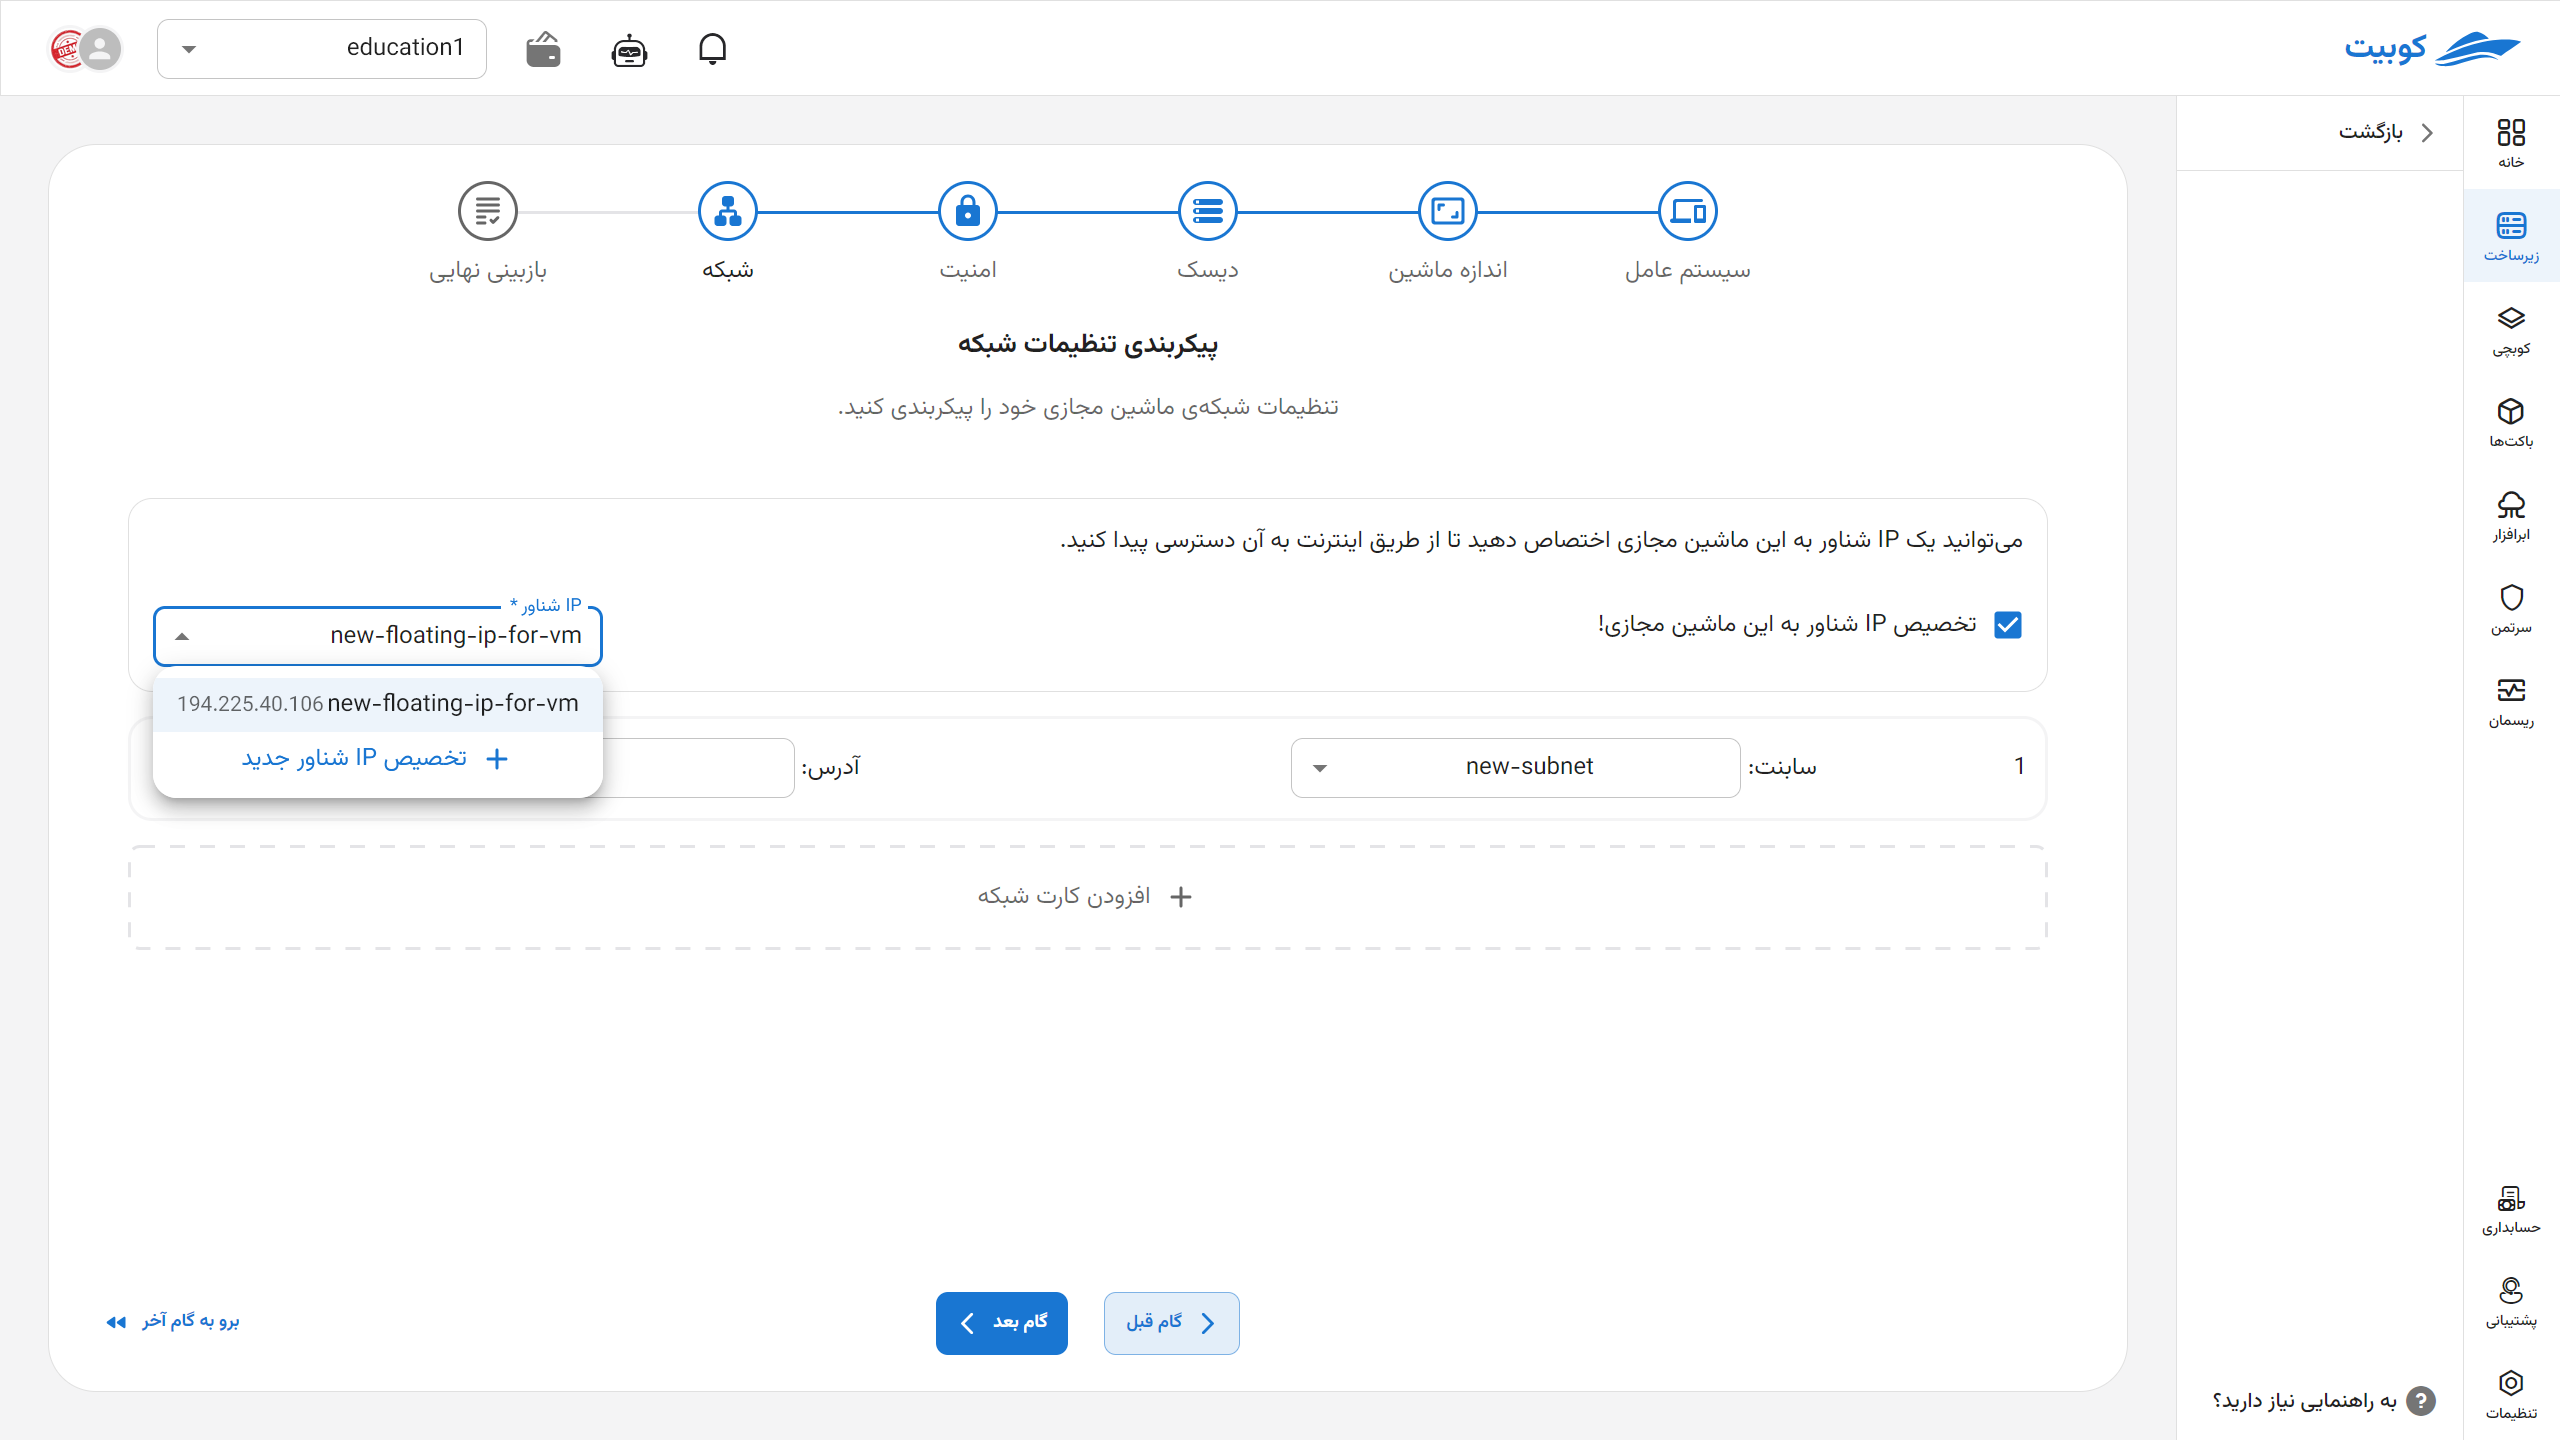
Adding a Floating IP
Click on the Assign New Floating IP button to open the assignment form. Then, choose a name for it and click the Assign Floating IP button:
Finally, after selecting the subnet and assigning a floating IP, proceed to the next step.
Step Six: Final Review
In the final review, information such as the virtual machine’s name, location, operating system, processor, memory, additional disks, SSH keys, floating IP, and configured network interface is displayed.
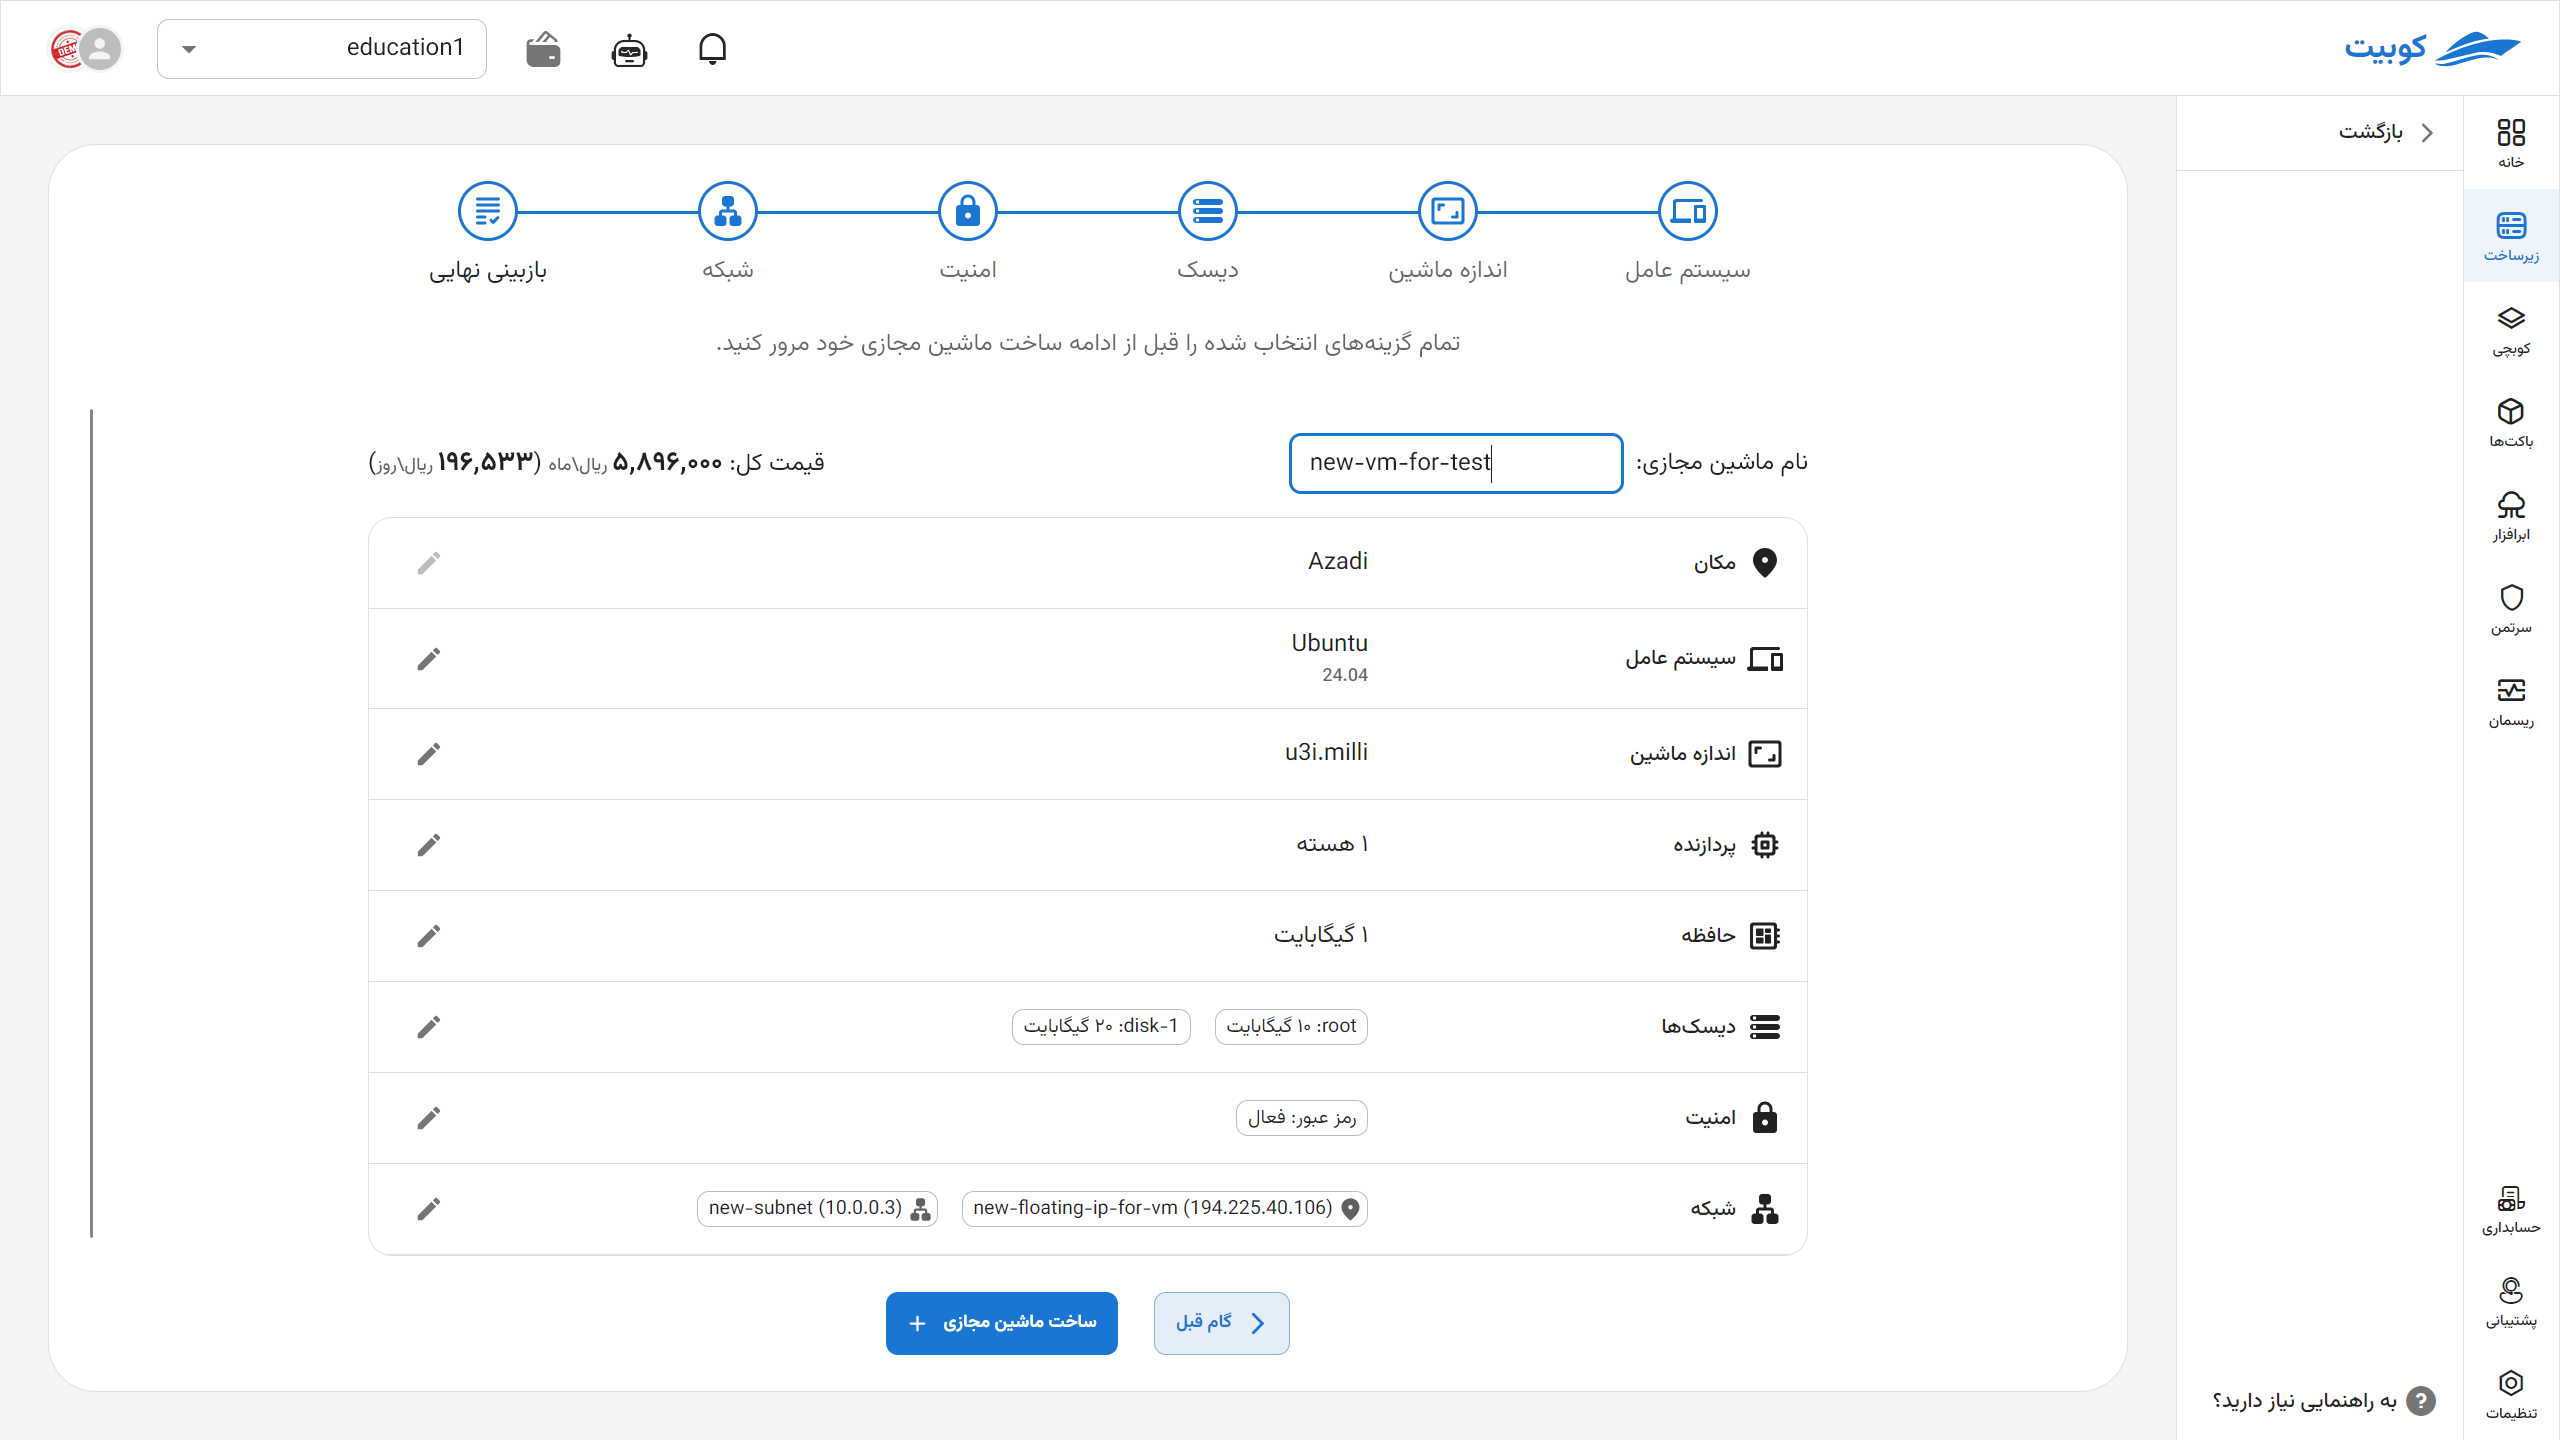
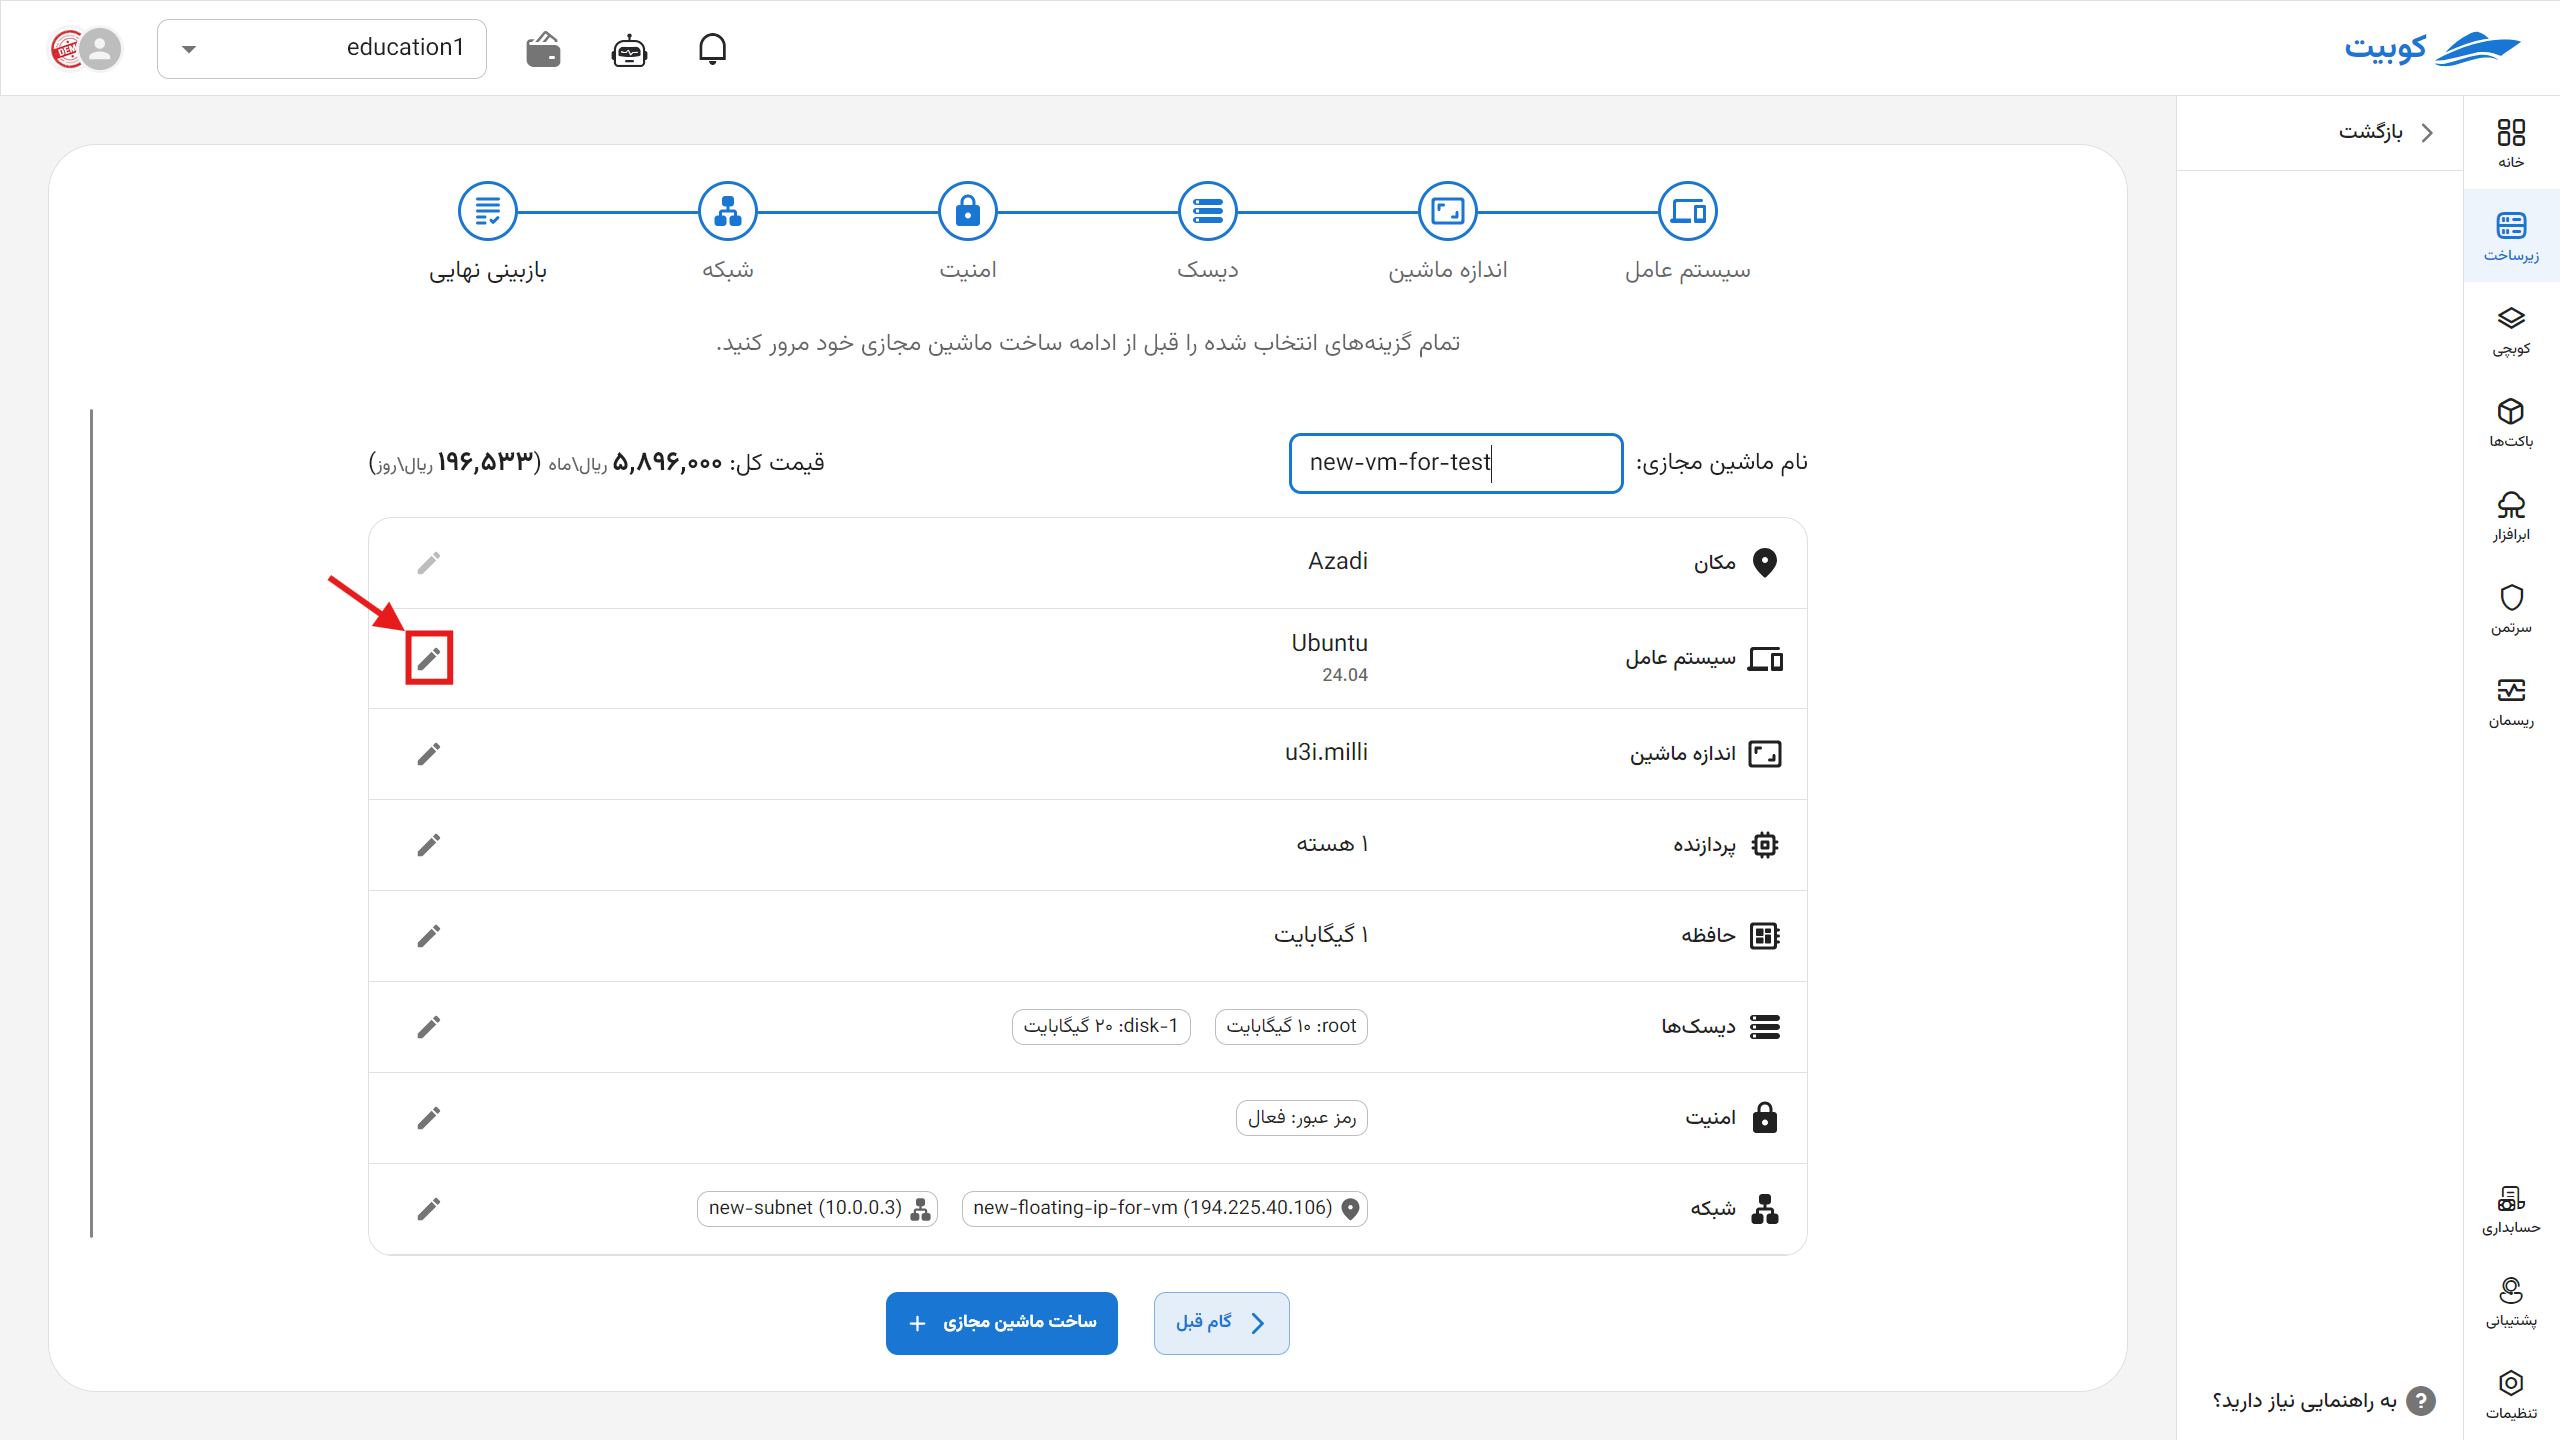
To edit any of the specifications except the location, simply click on the pencil icon for the relevant specification:
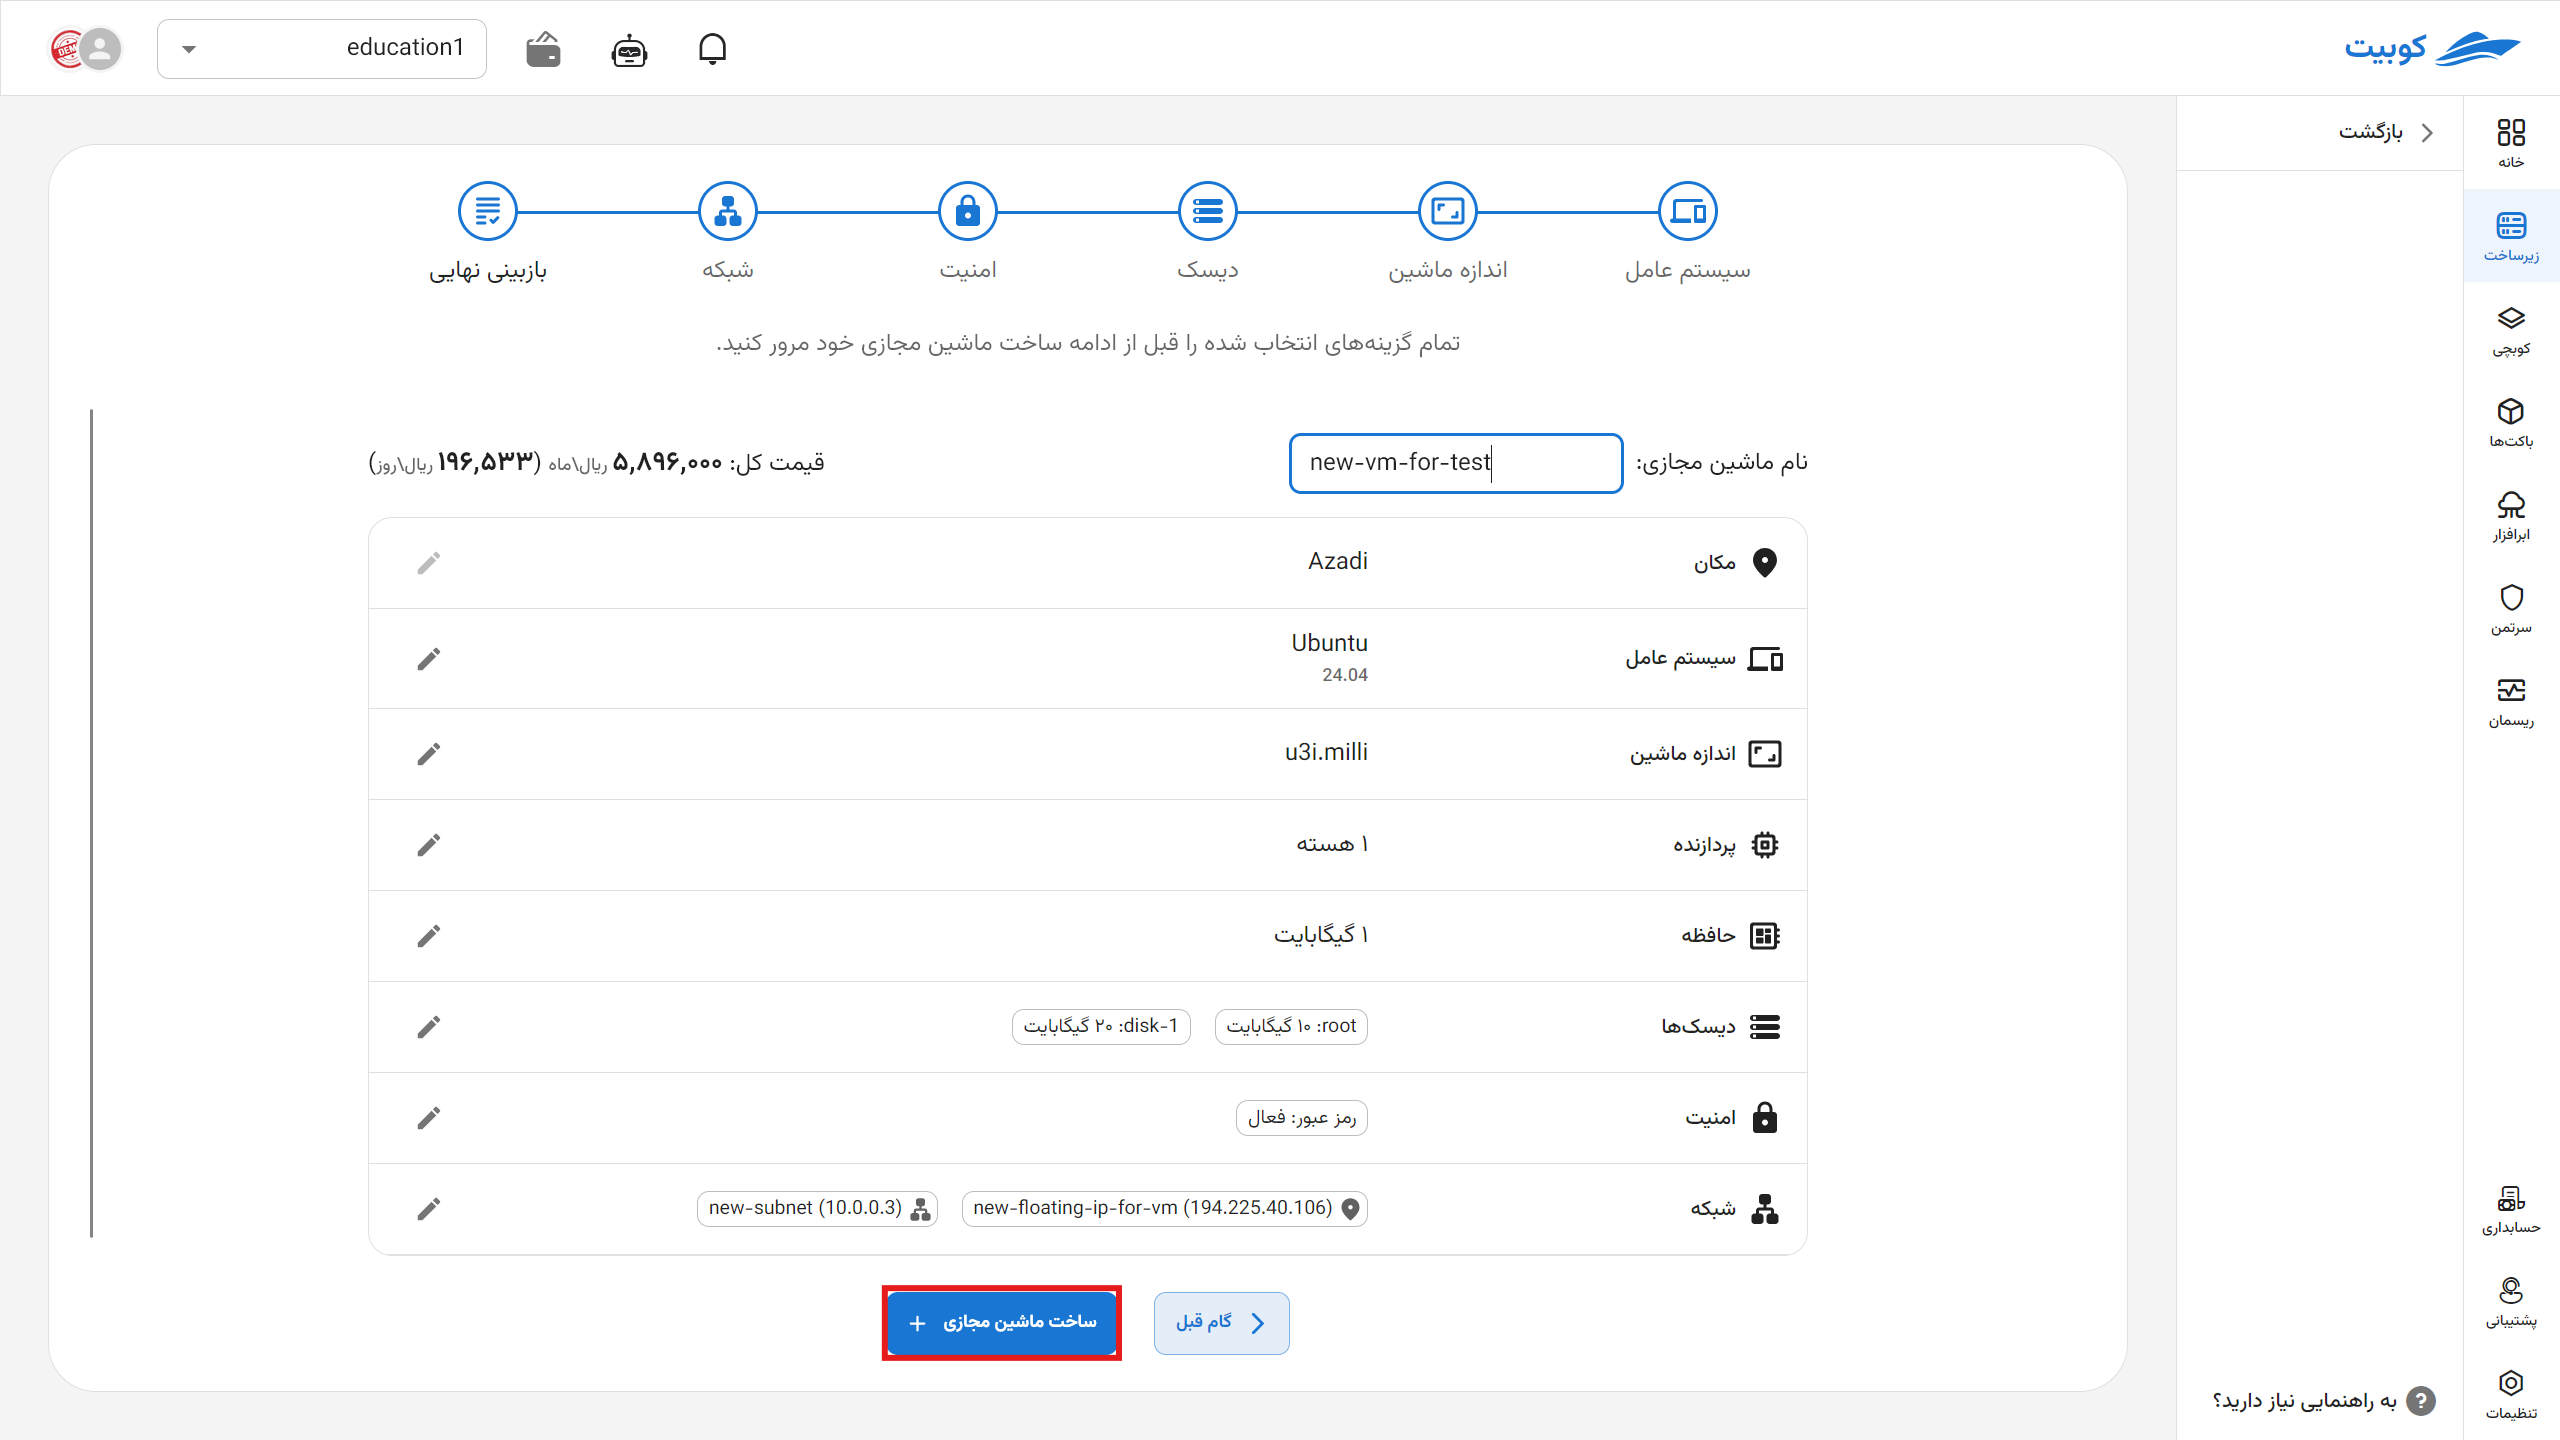
Finally, after reviewing the machine’s specifications and settings, click the Create Virtual Machine button:
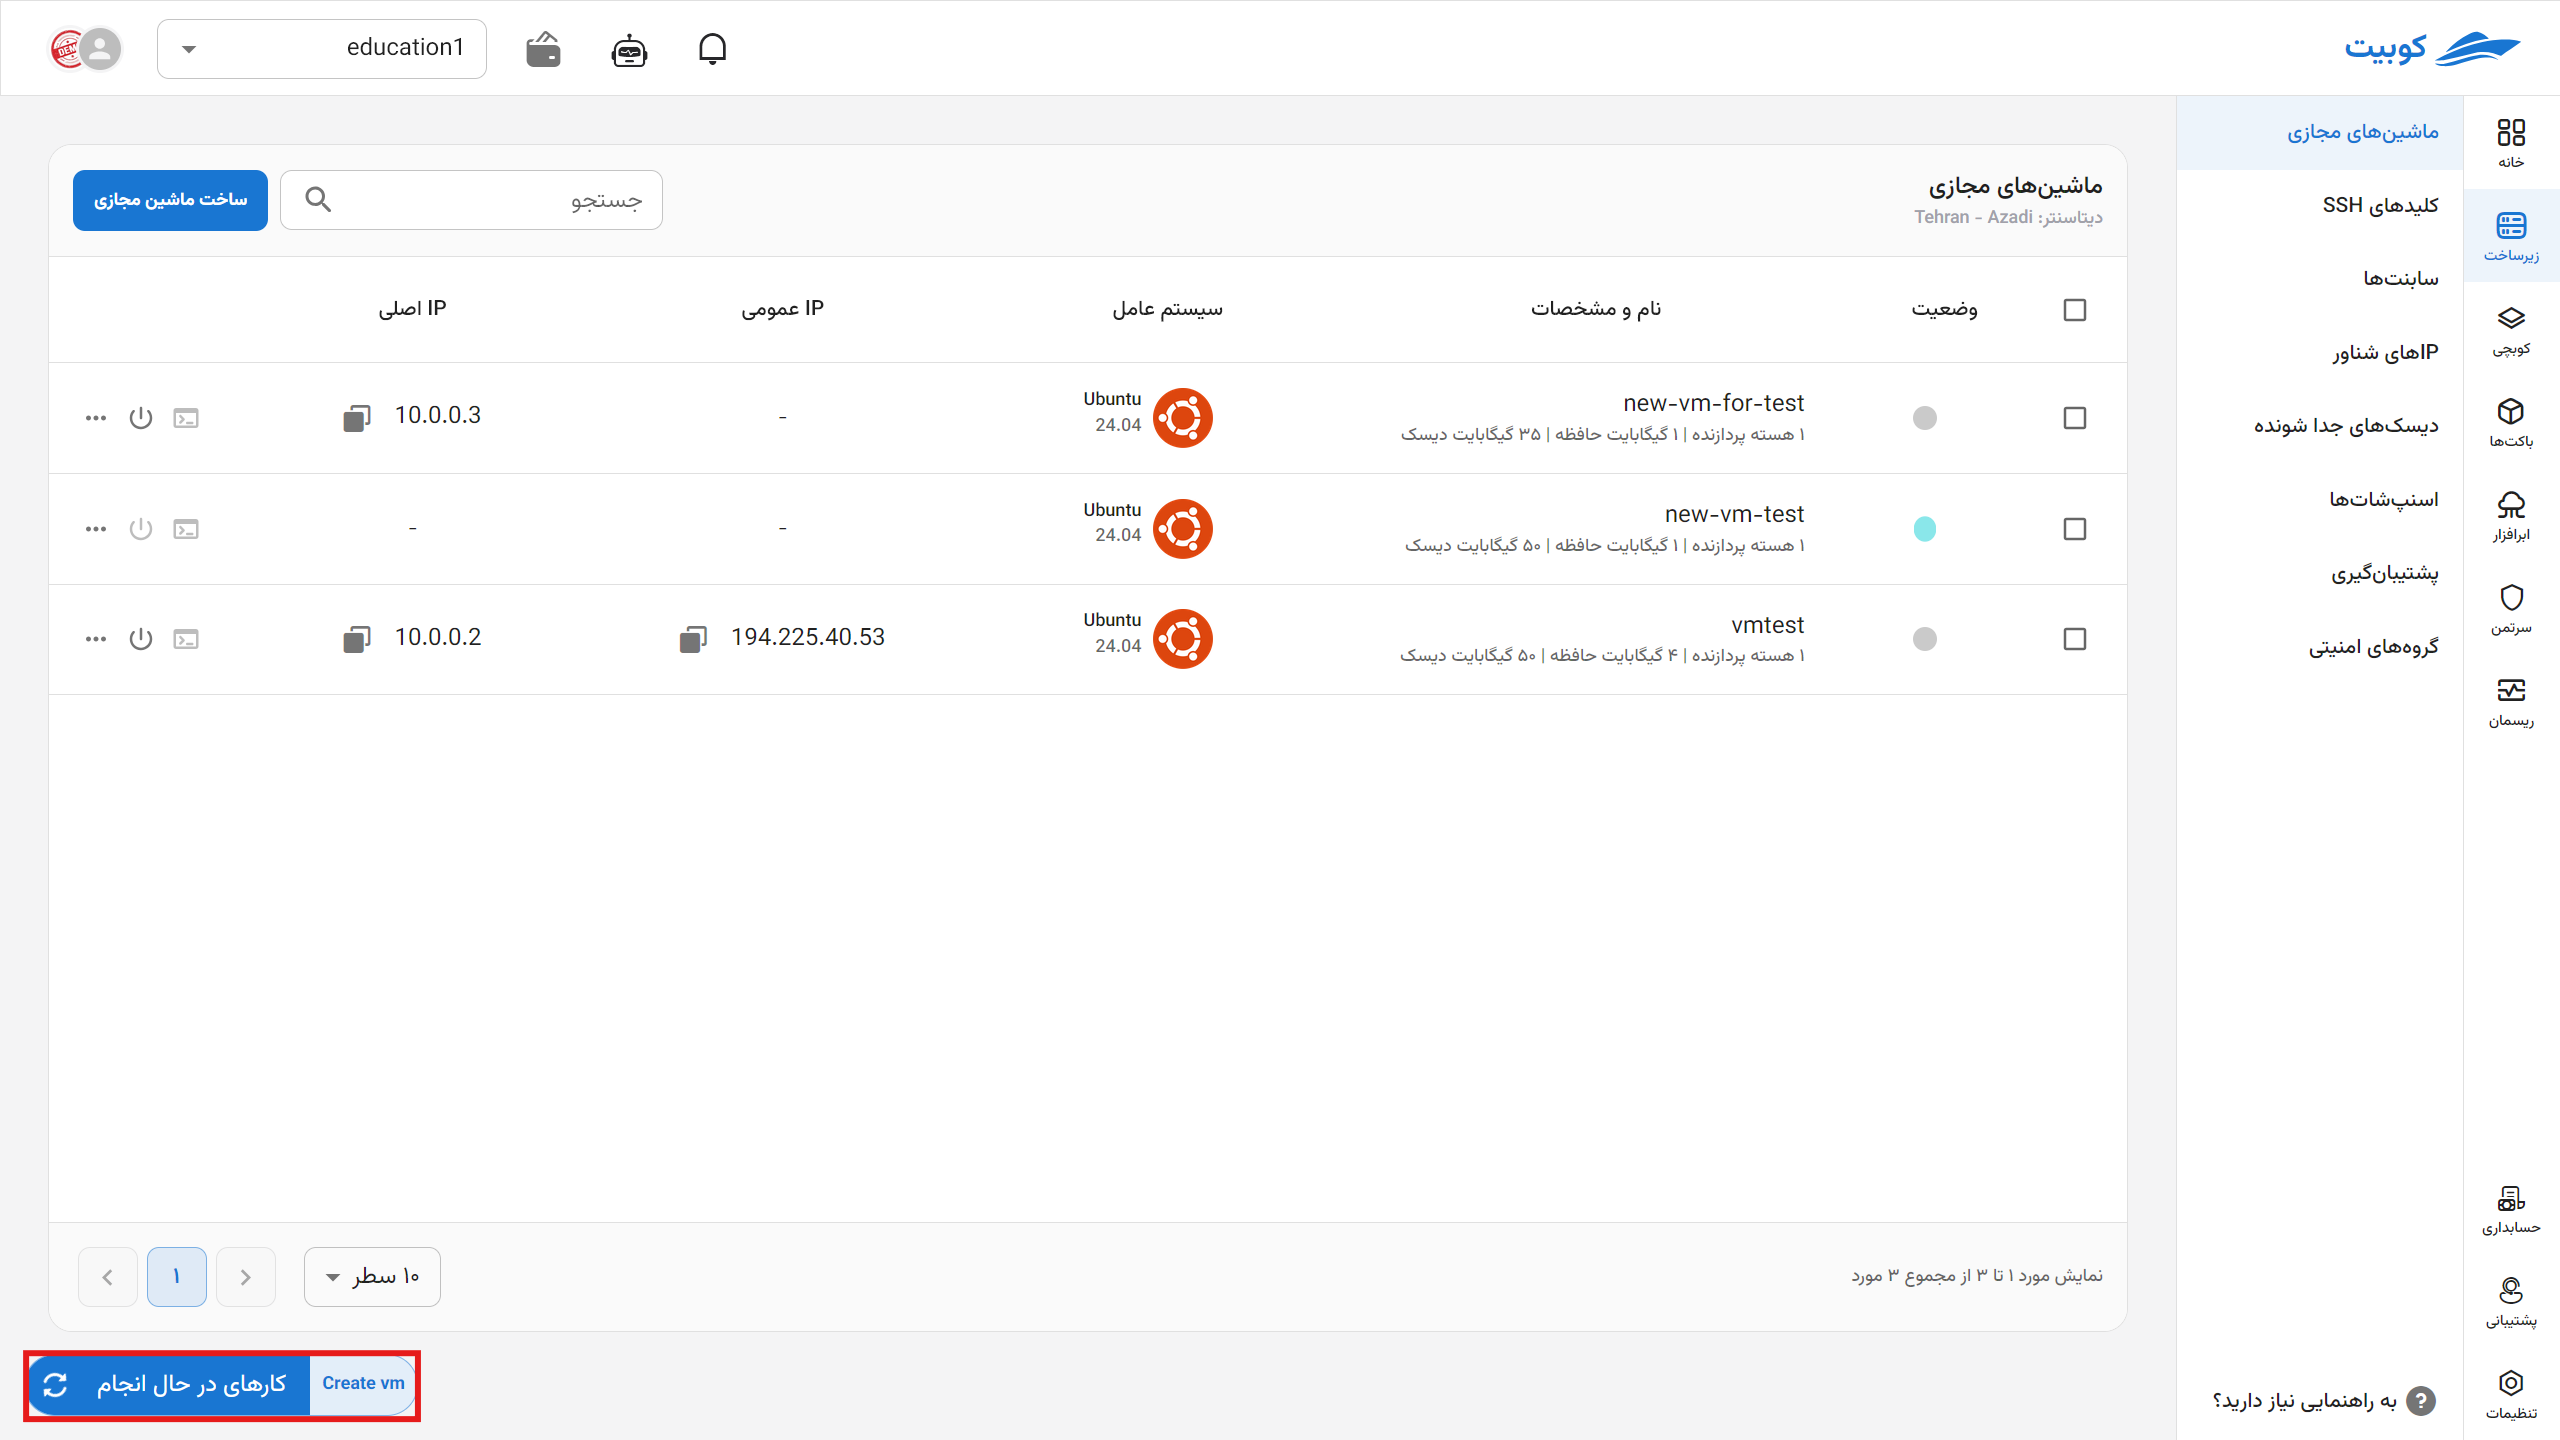
You will then be redirected to the Virtual Machine Overview page, and a job titled Create Virtual Machine will be created in parallel, displaying the status of the new machine creation:
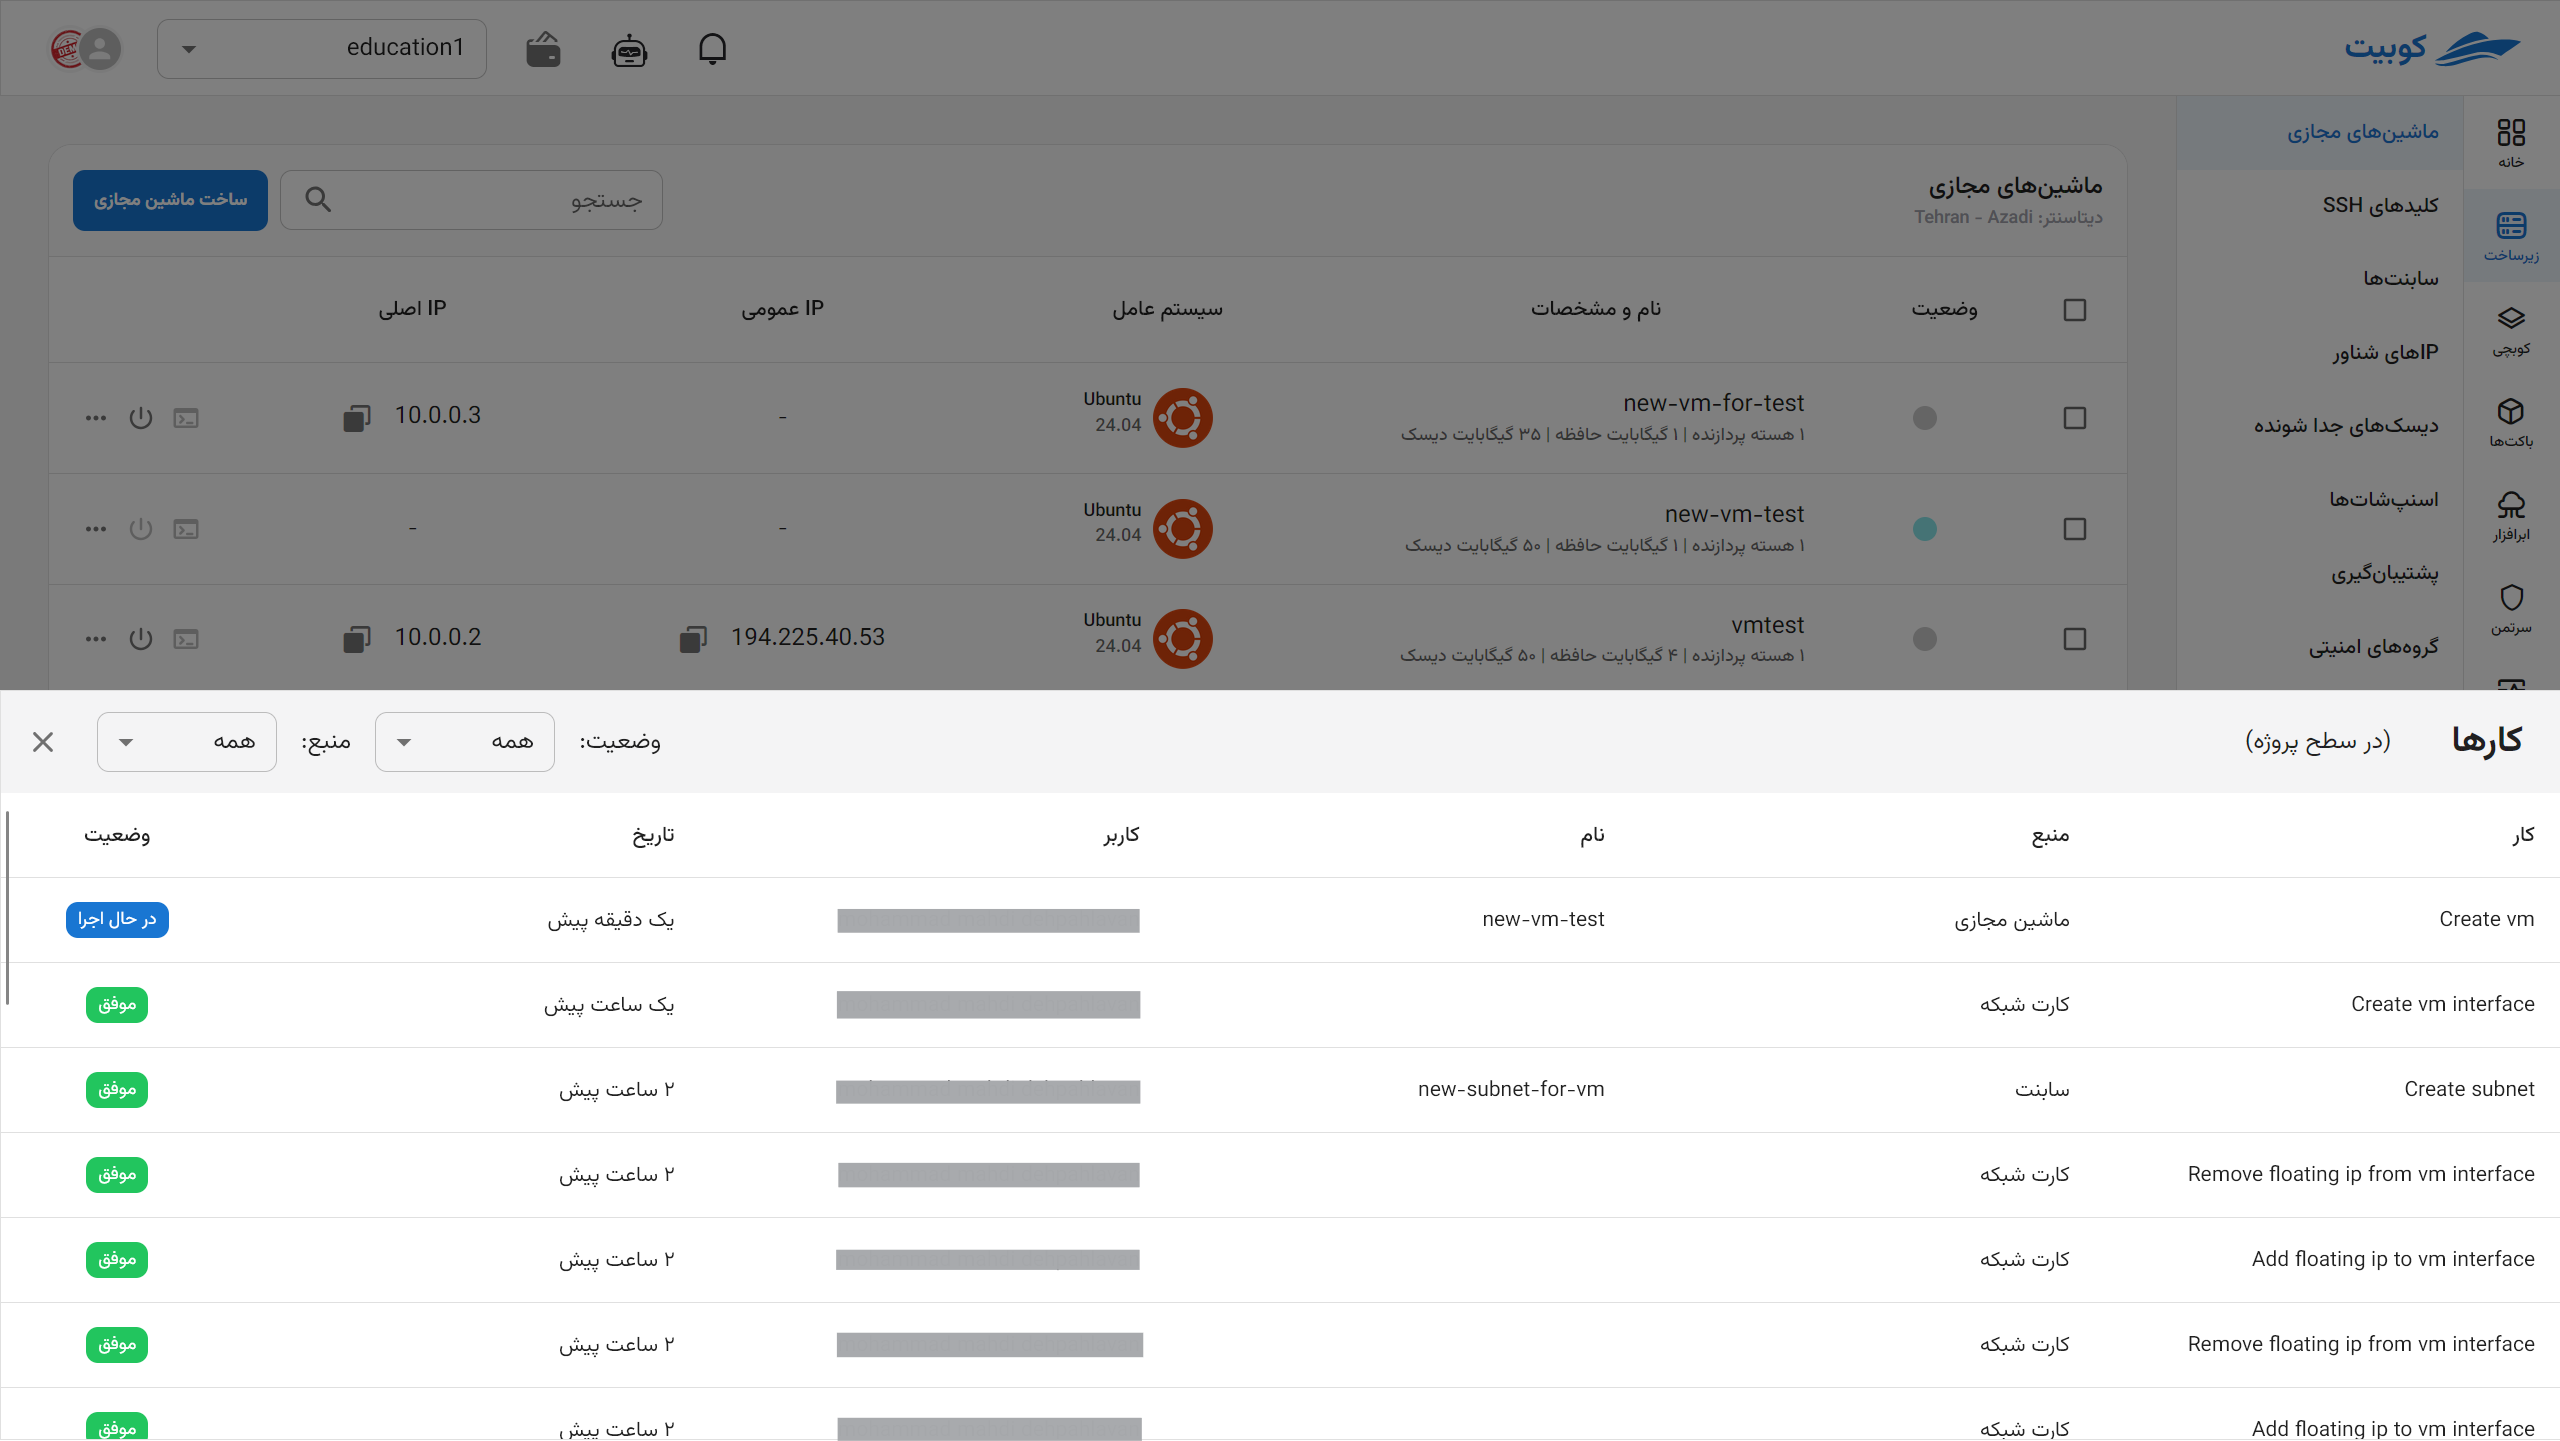
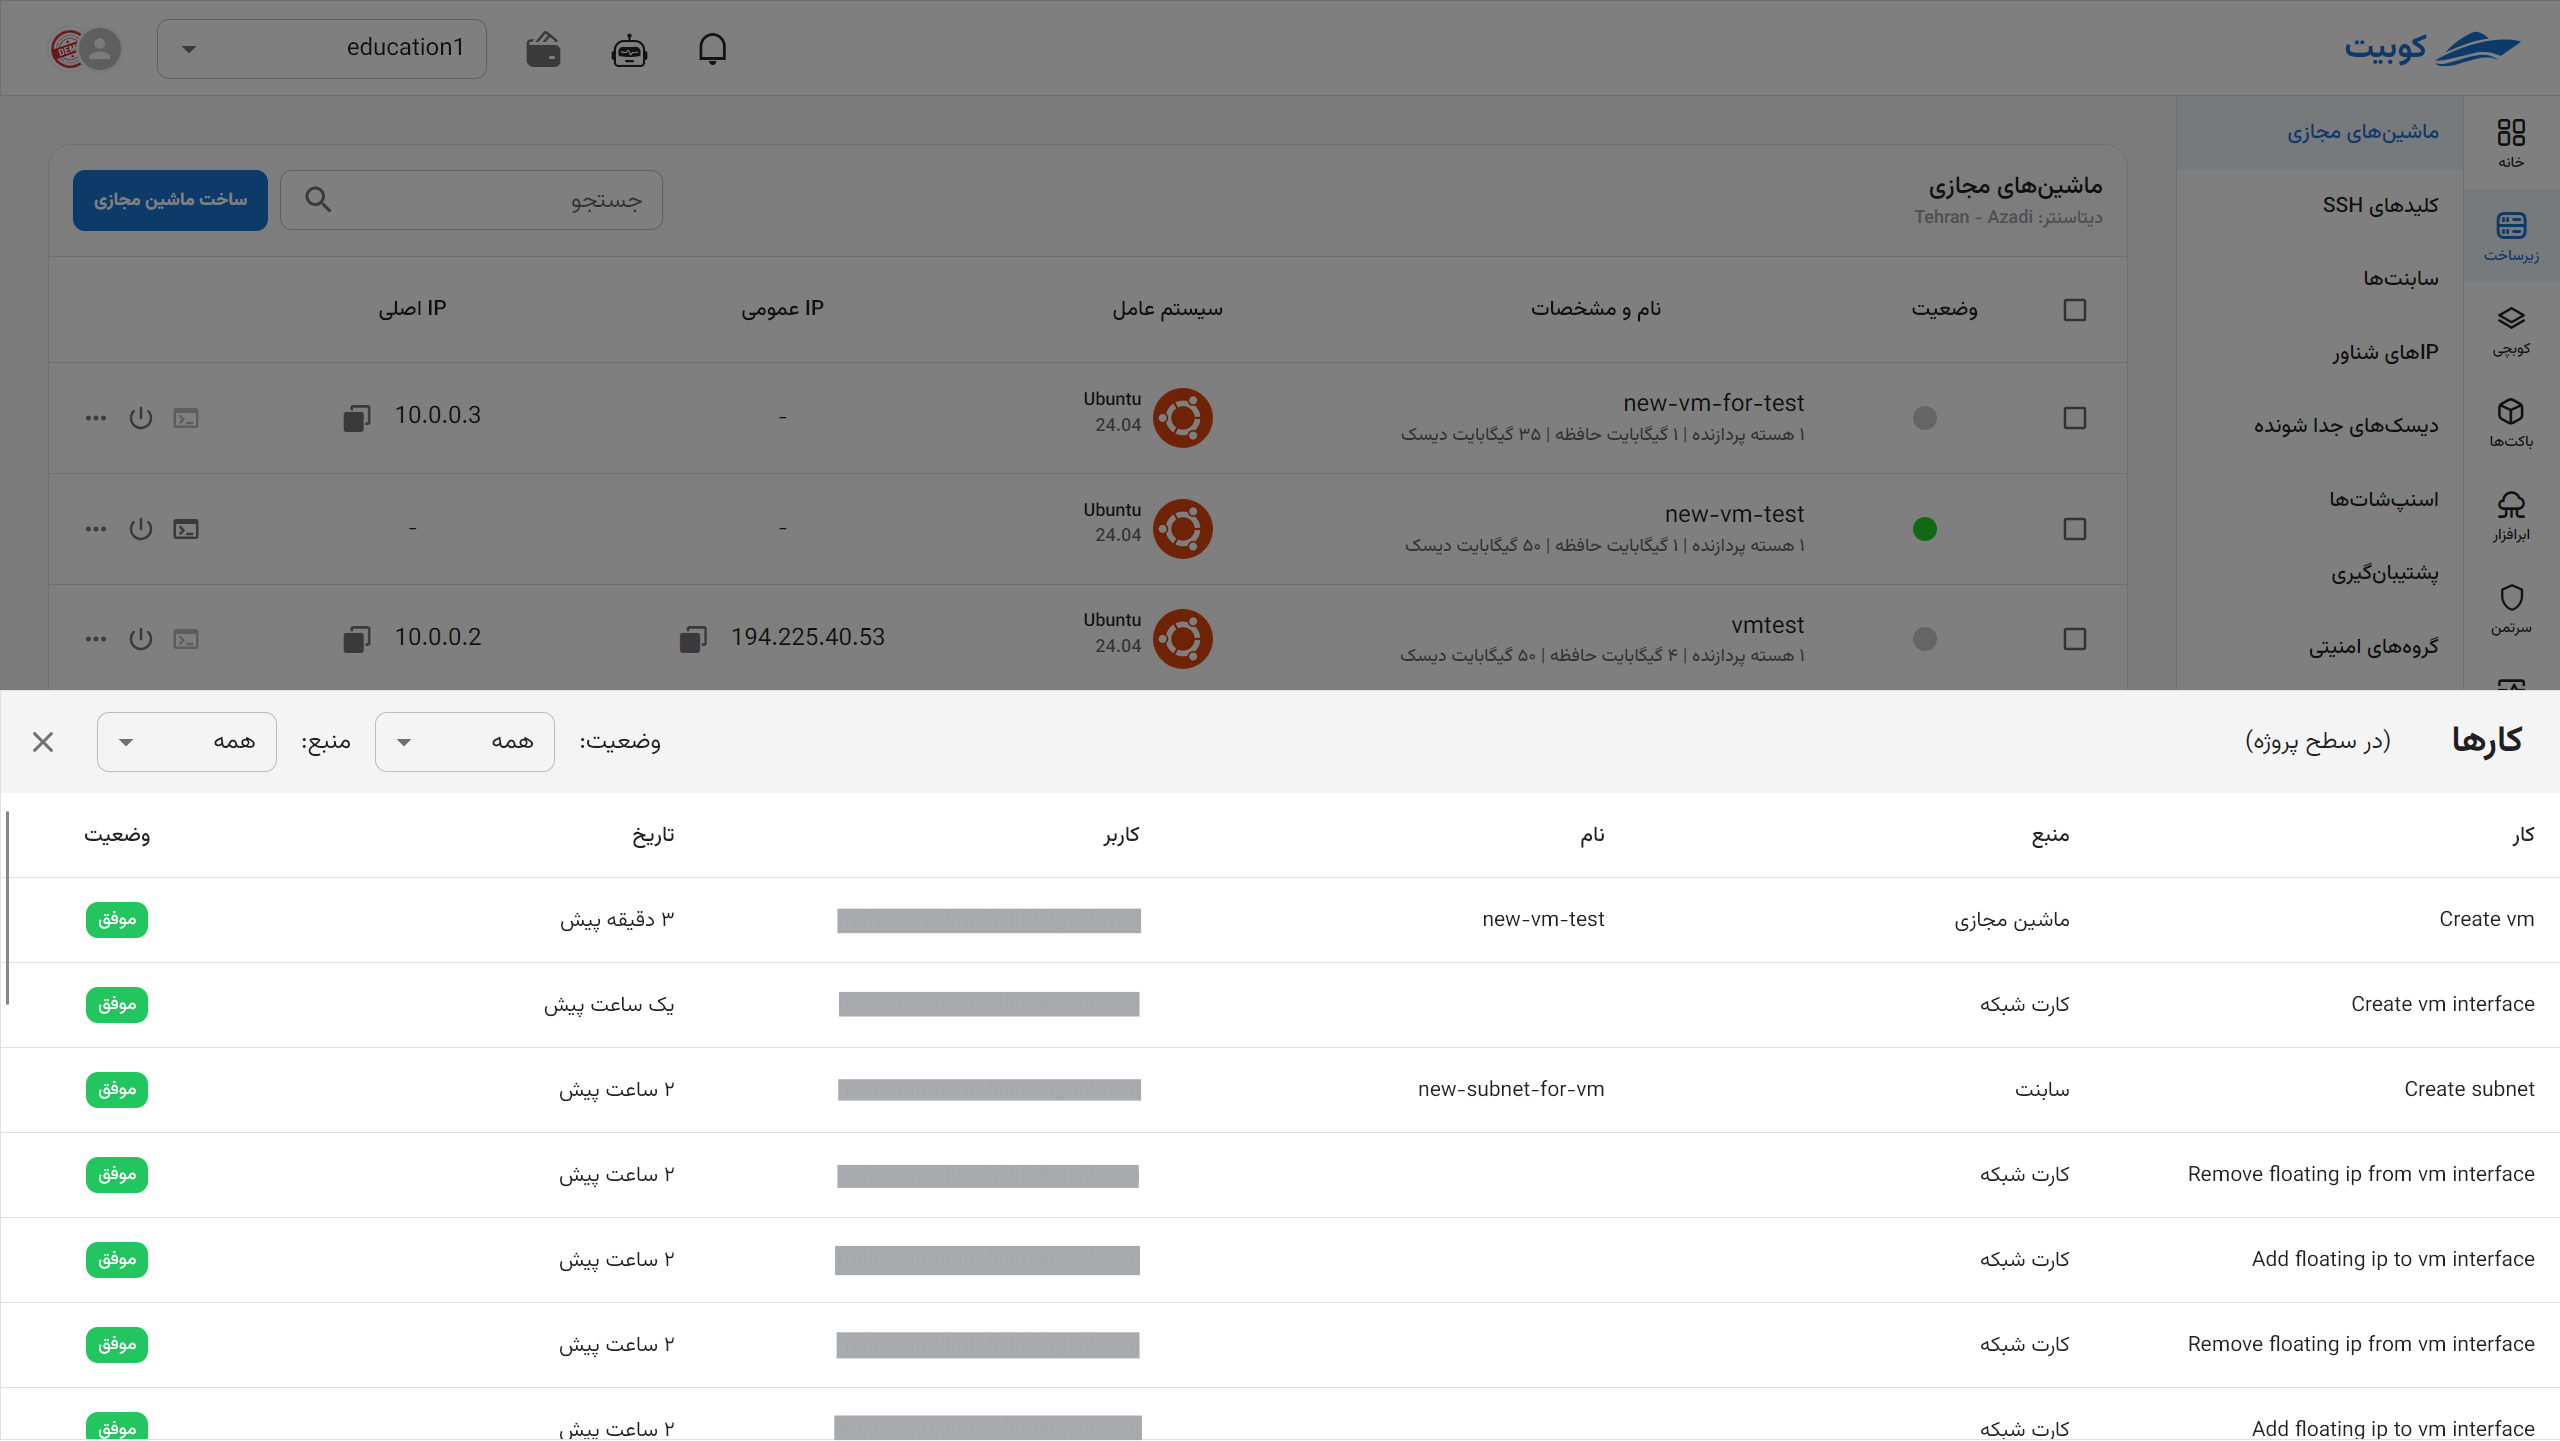 Upon successful completion of all jobs, access to the created virtual machine will be provided.

Refer to the Virtual Machine Settings section for documentation related to the virtual machine overview page.