Getting Started with GitLab Runner
To create and connect a new runner to your repository after creating a GitLab repository, proceed through the cloud software installation page. (You can also use this software to automate CI/CD processes in other repositories.)
Before starting, obtain the repository address, group, and token for the repository where you want the runner to be active.
Repository or Group Address
Log into the GitLab panel and find this address from your browser or enter it manually. The format is as follows:
gitlab.example.com/YourRepoName/YourProjectOrGroupName
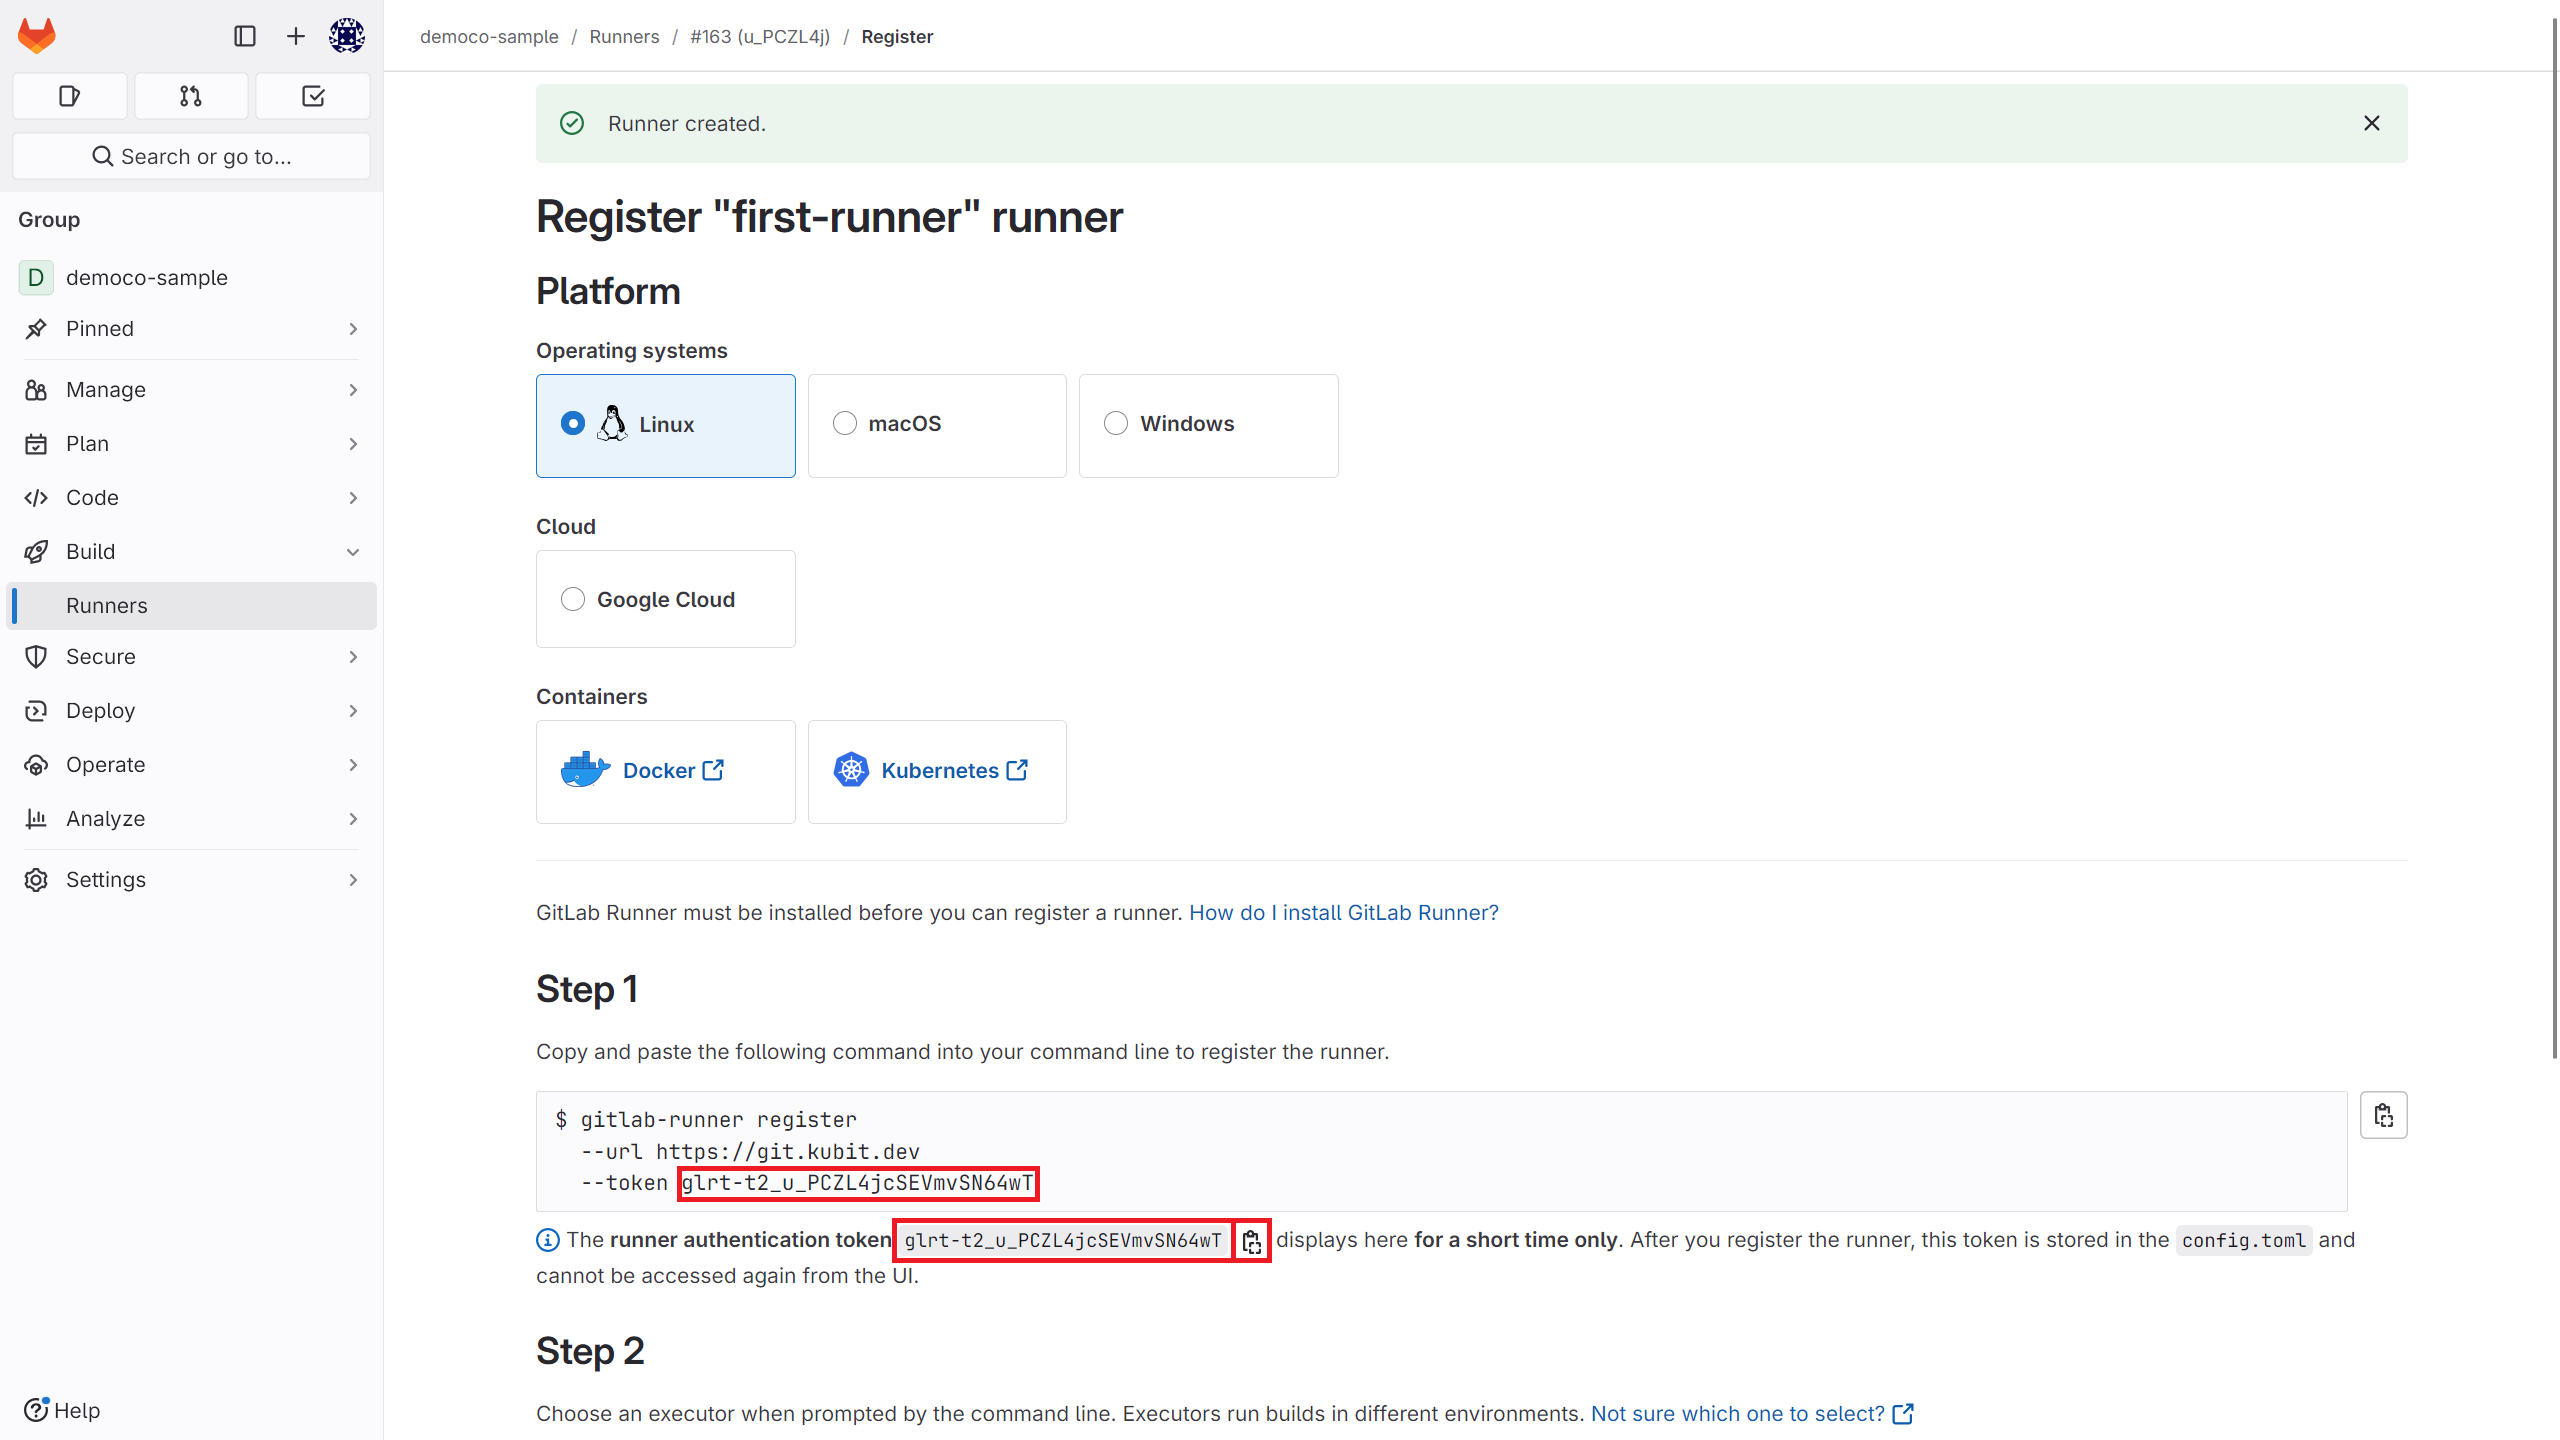
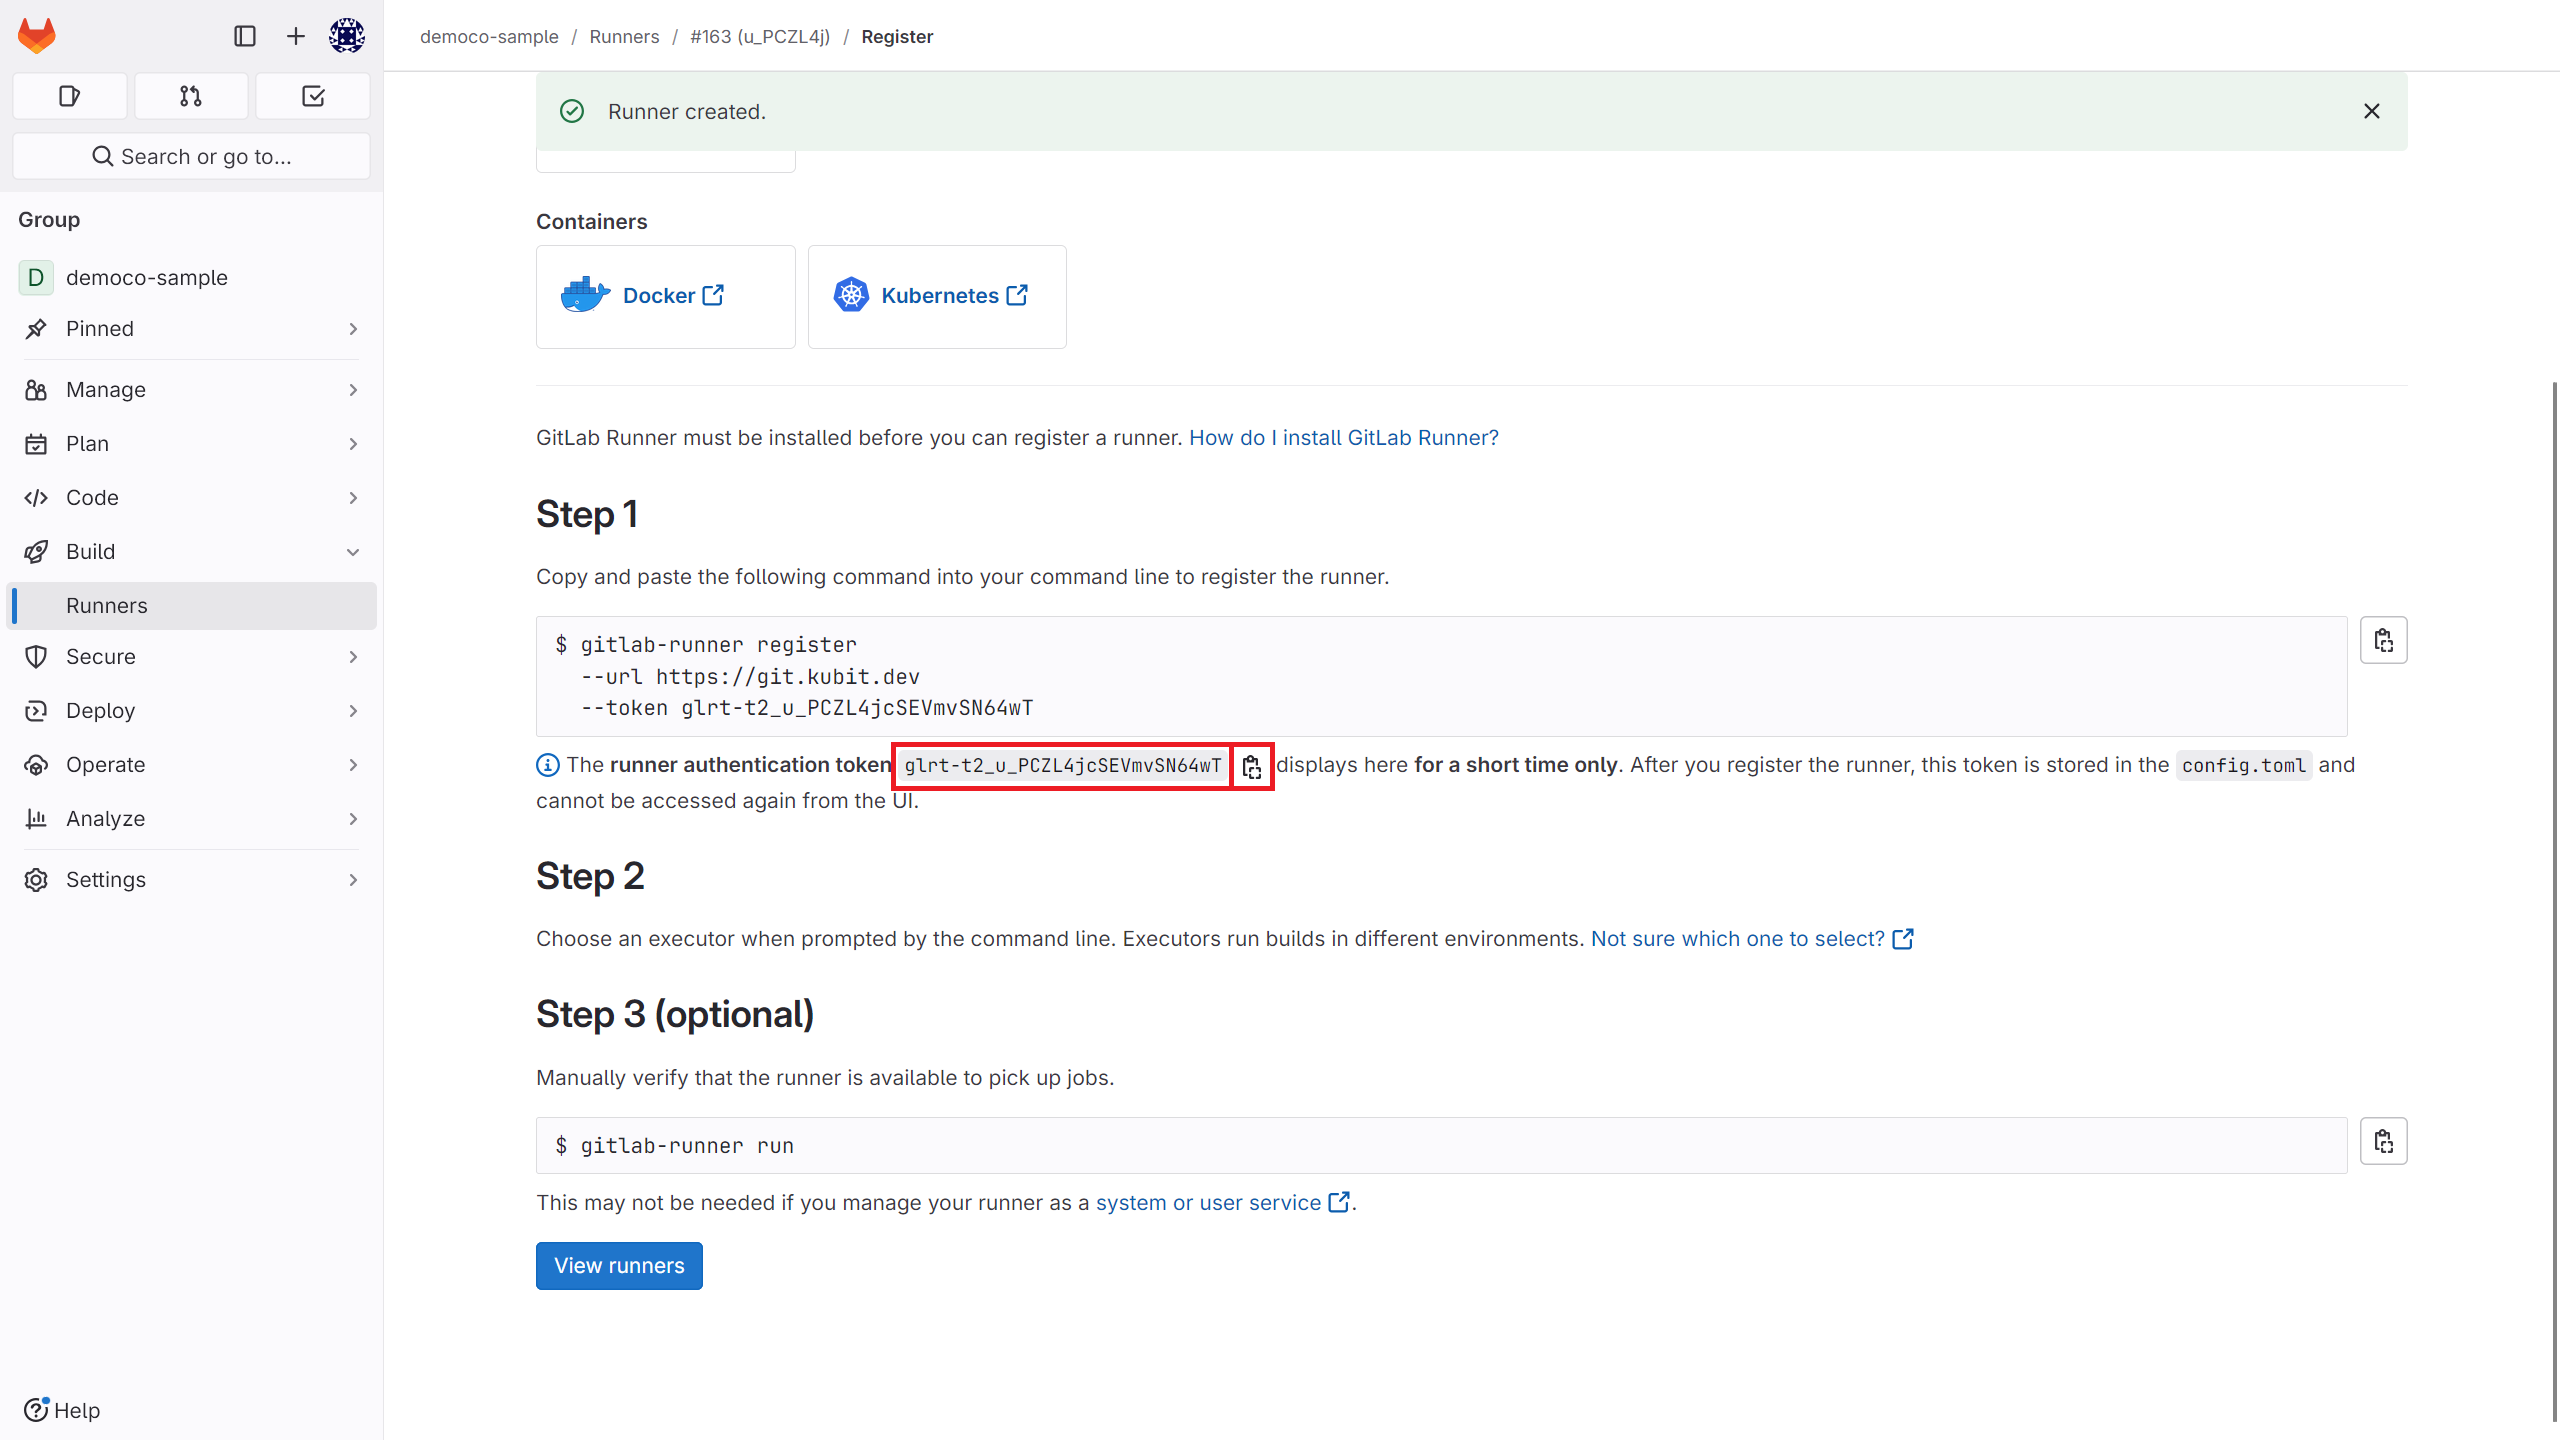
Token
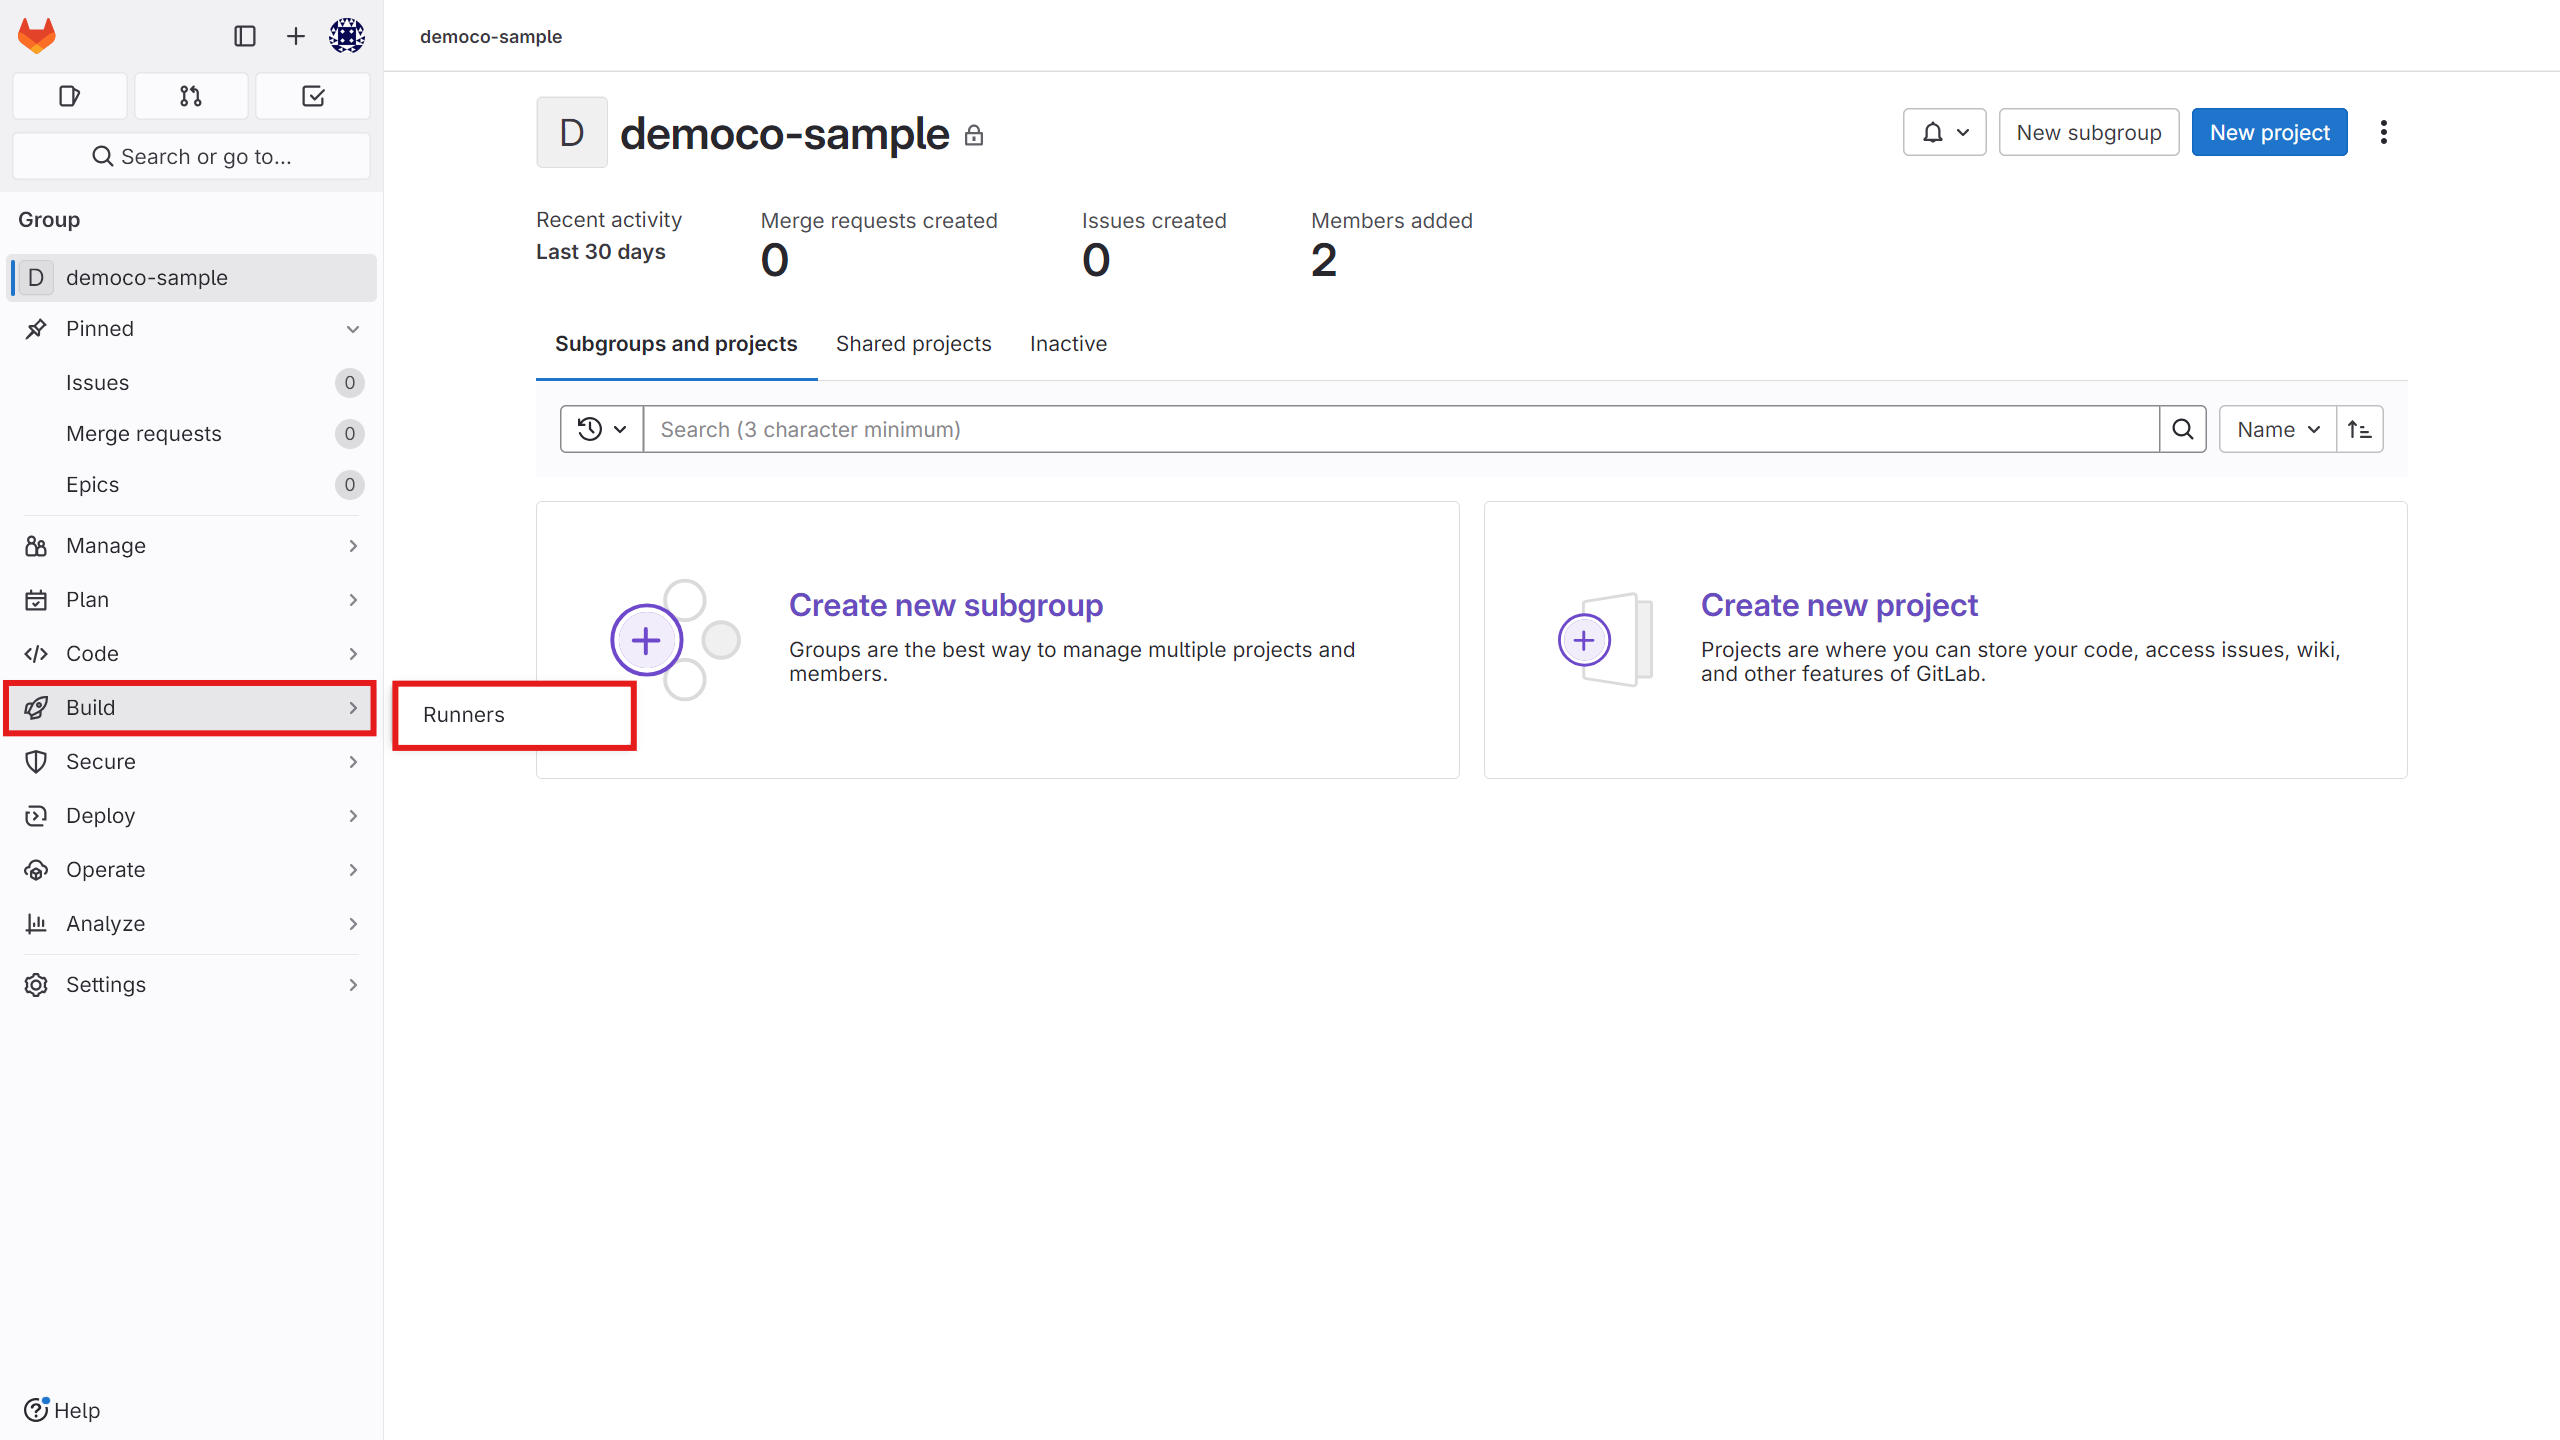
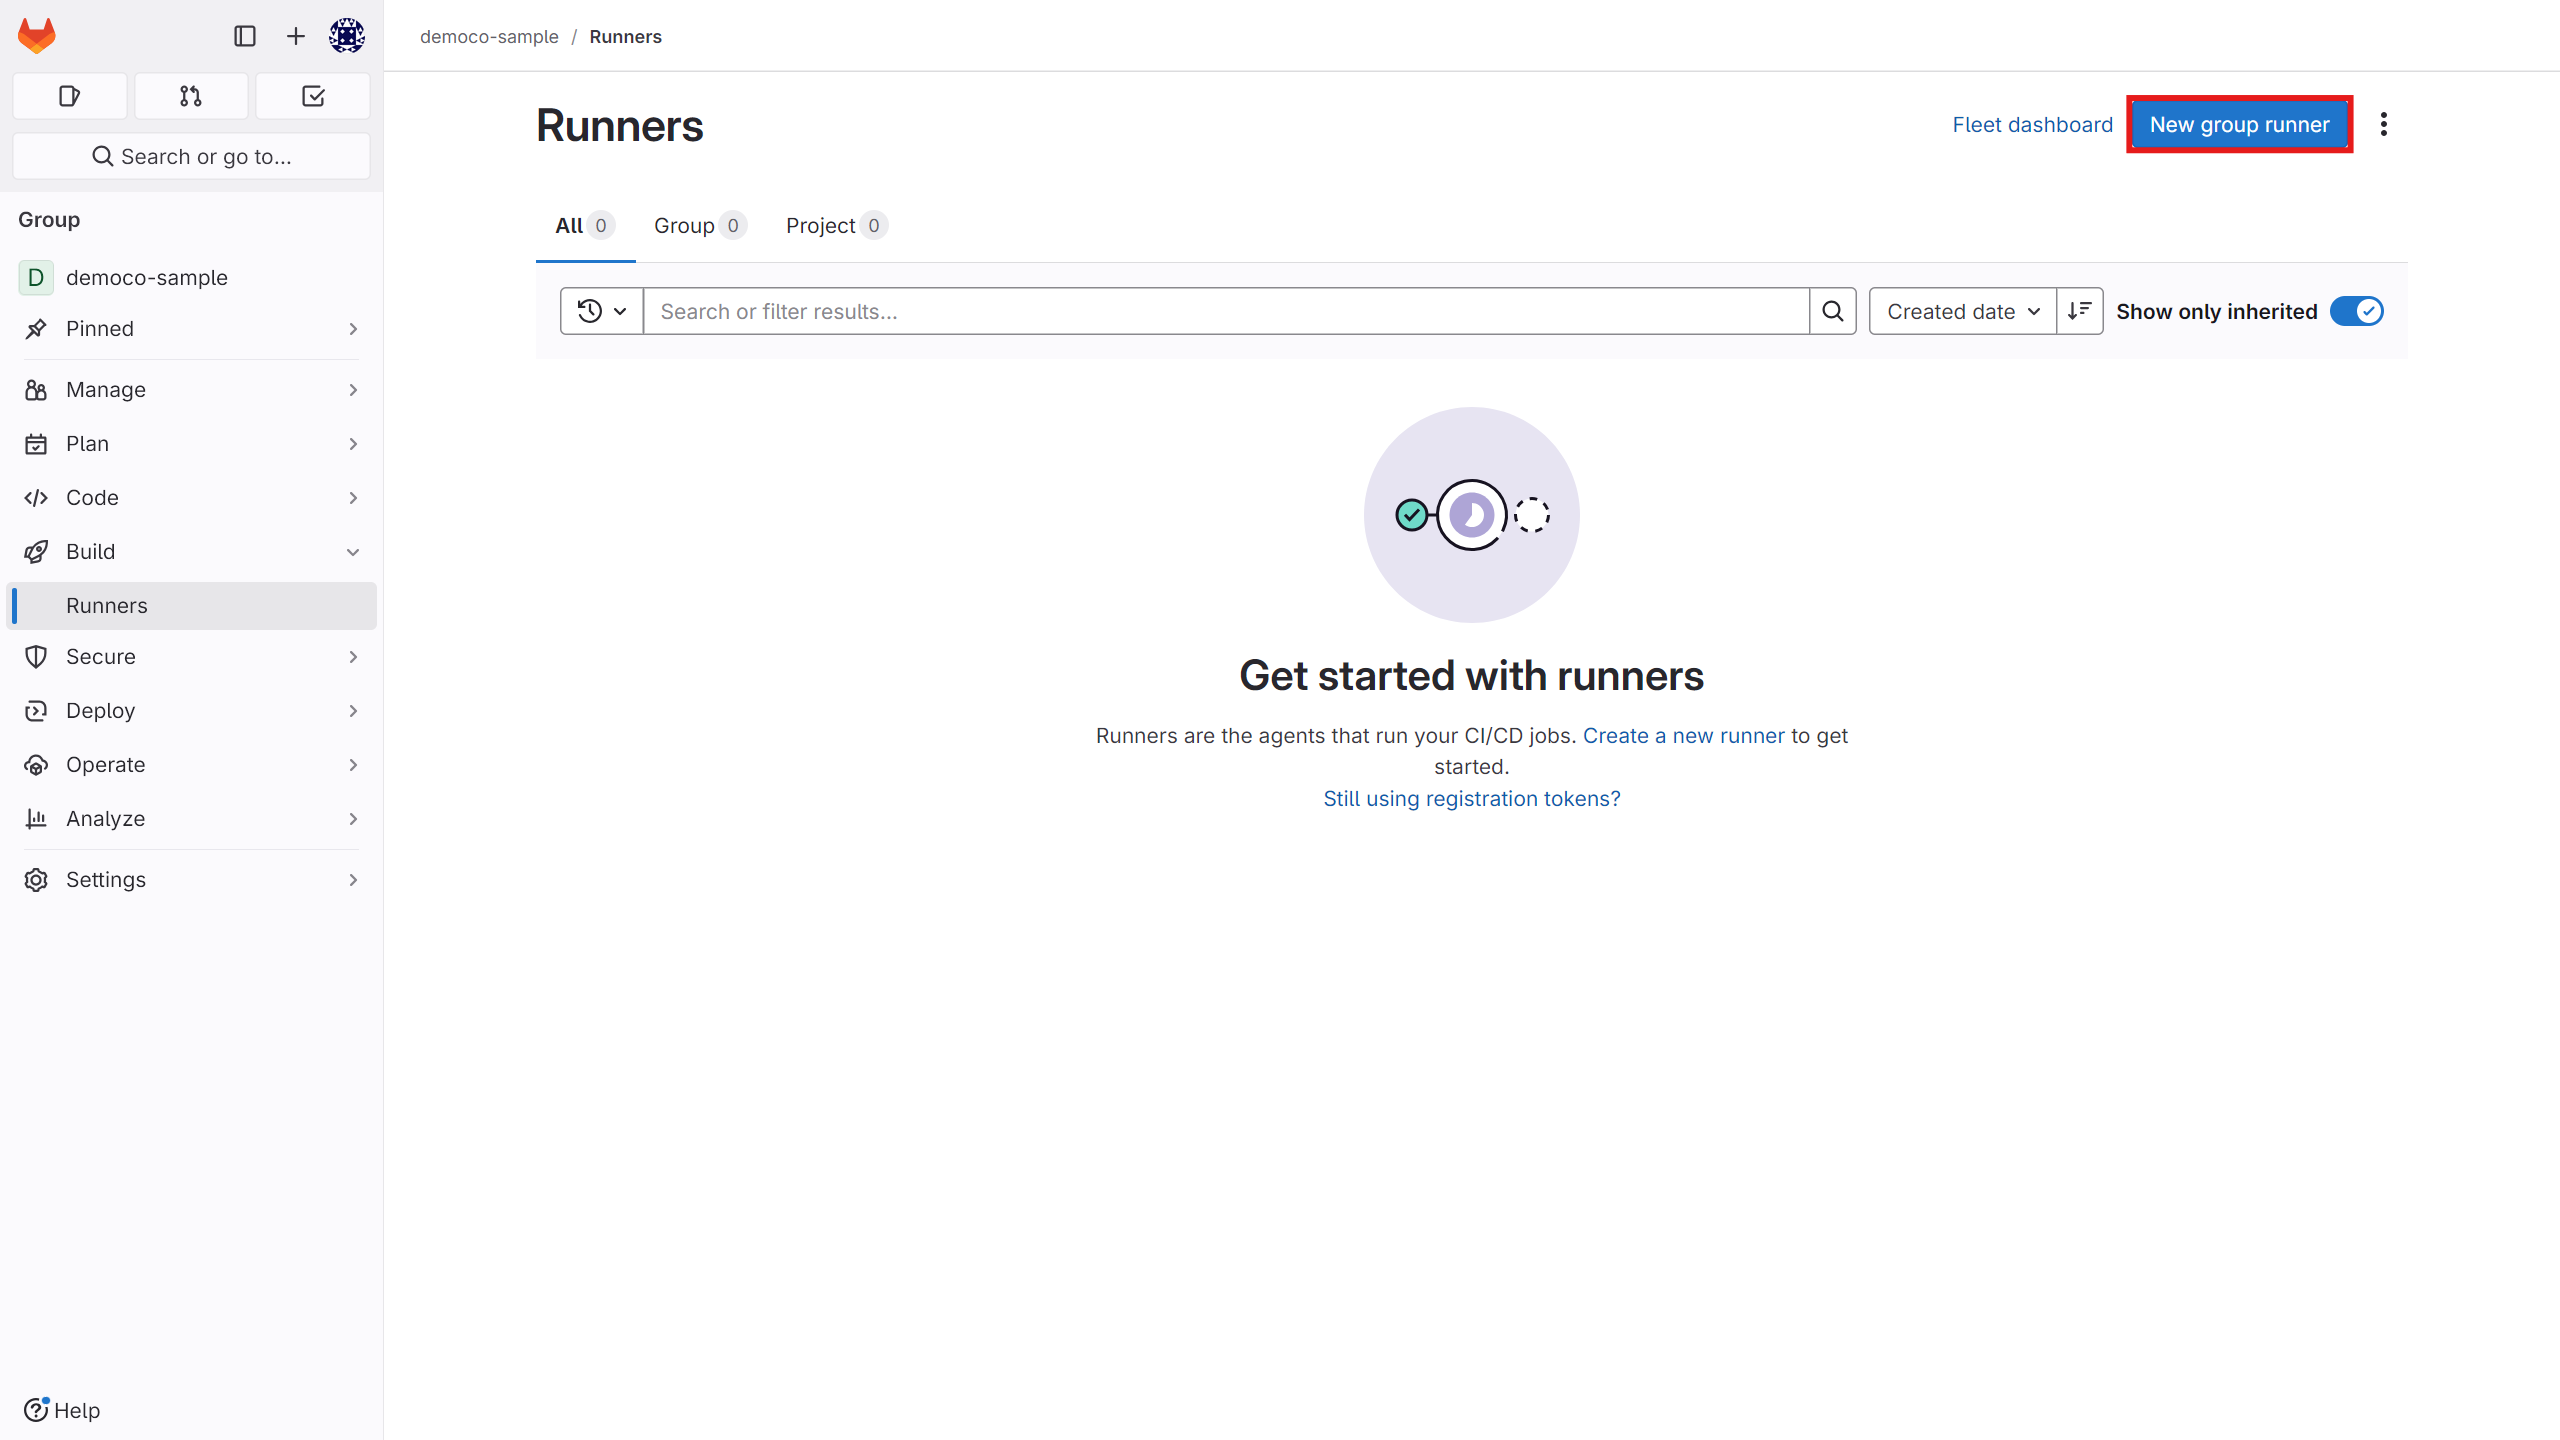
Go to the Build section and click on the Runners option to create a new runner.
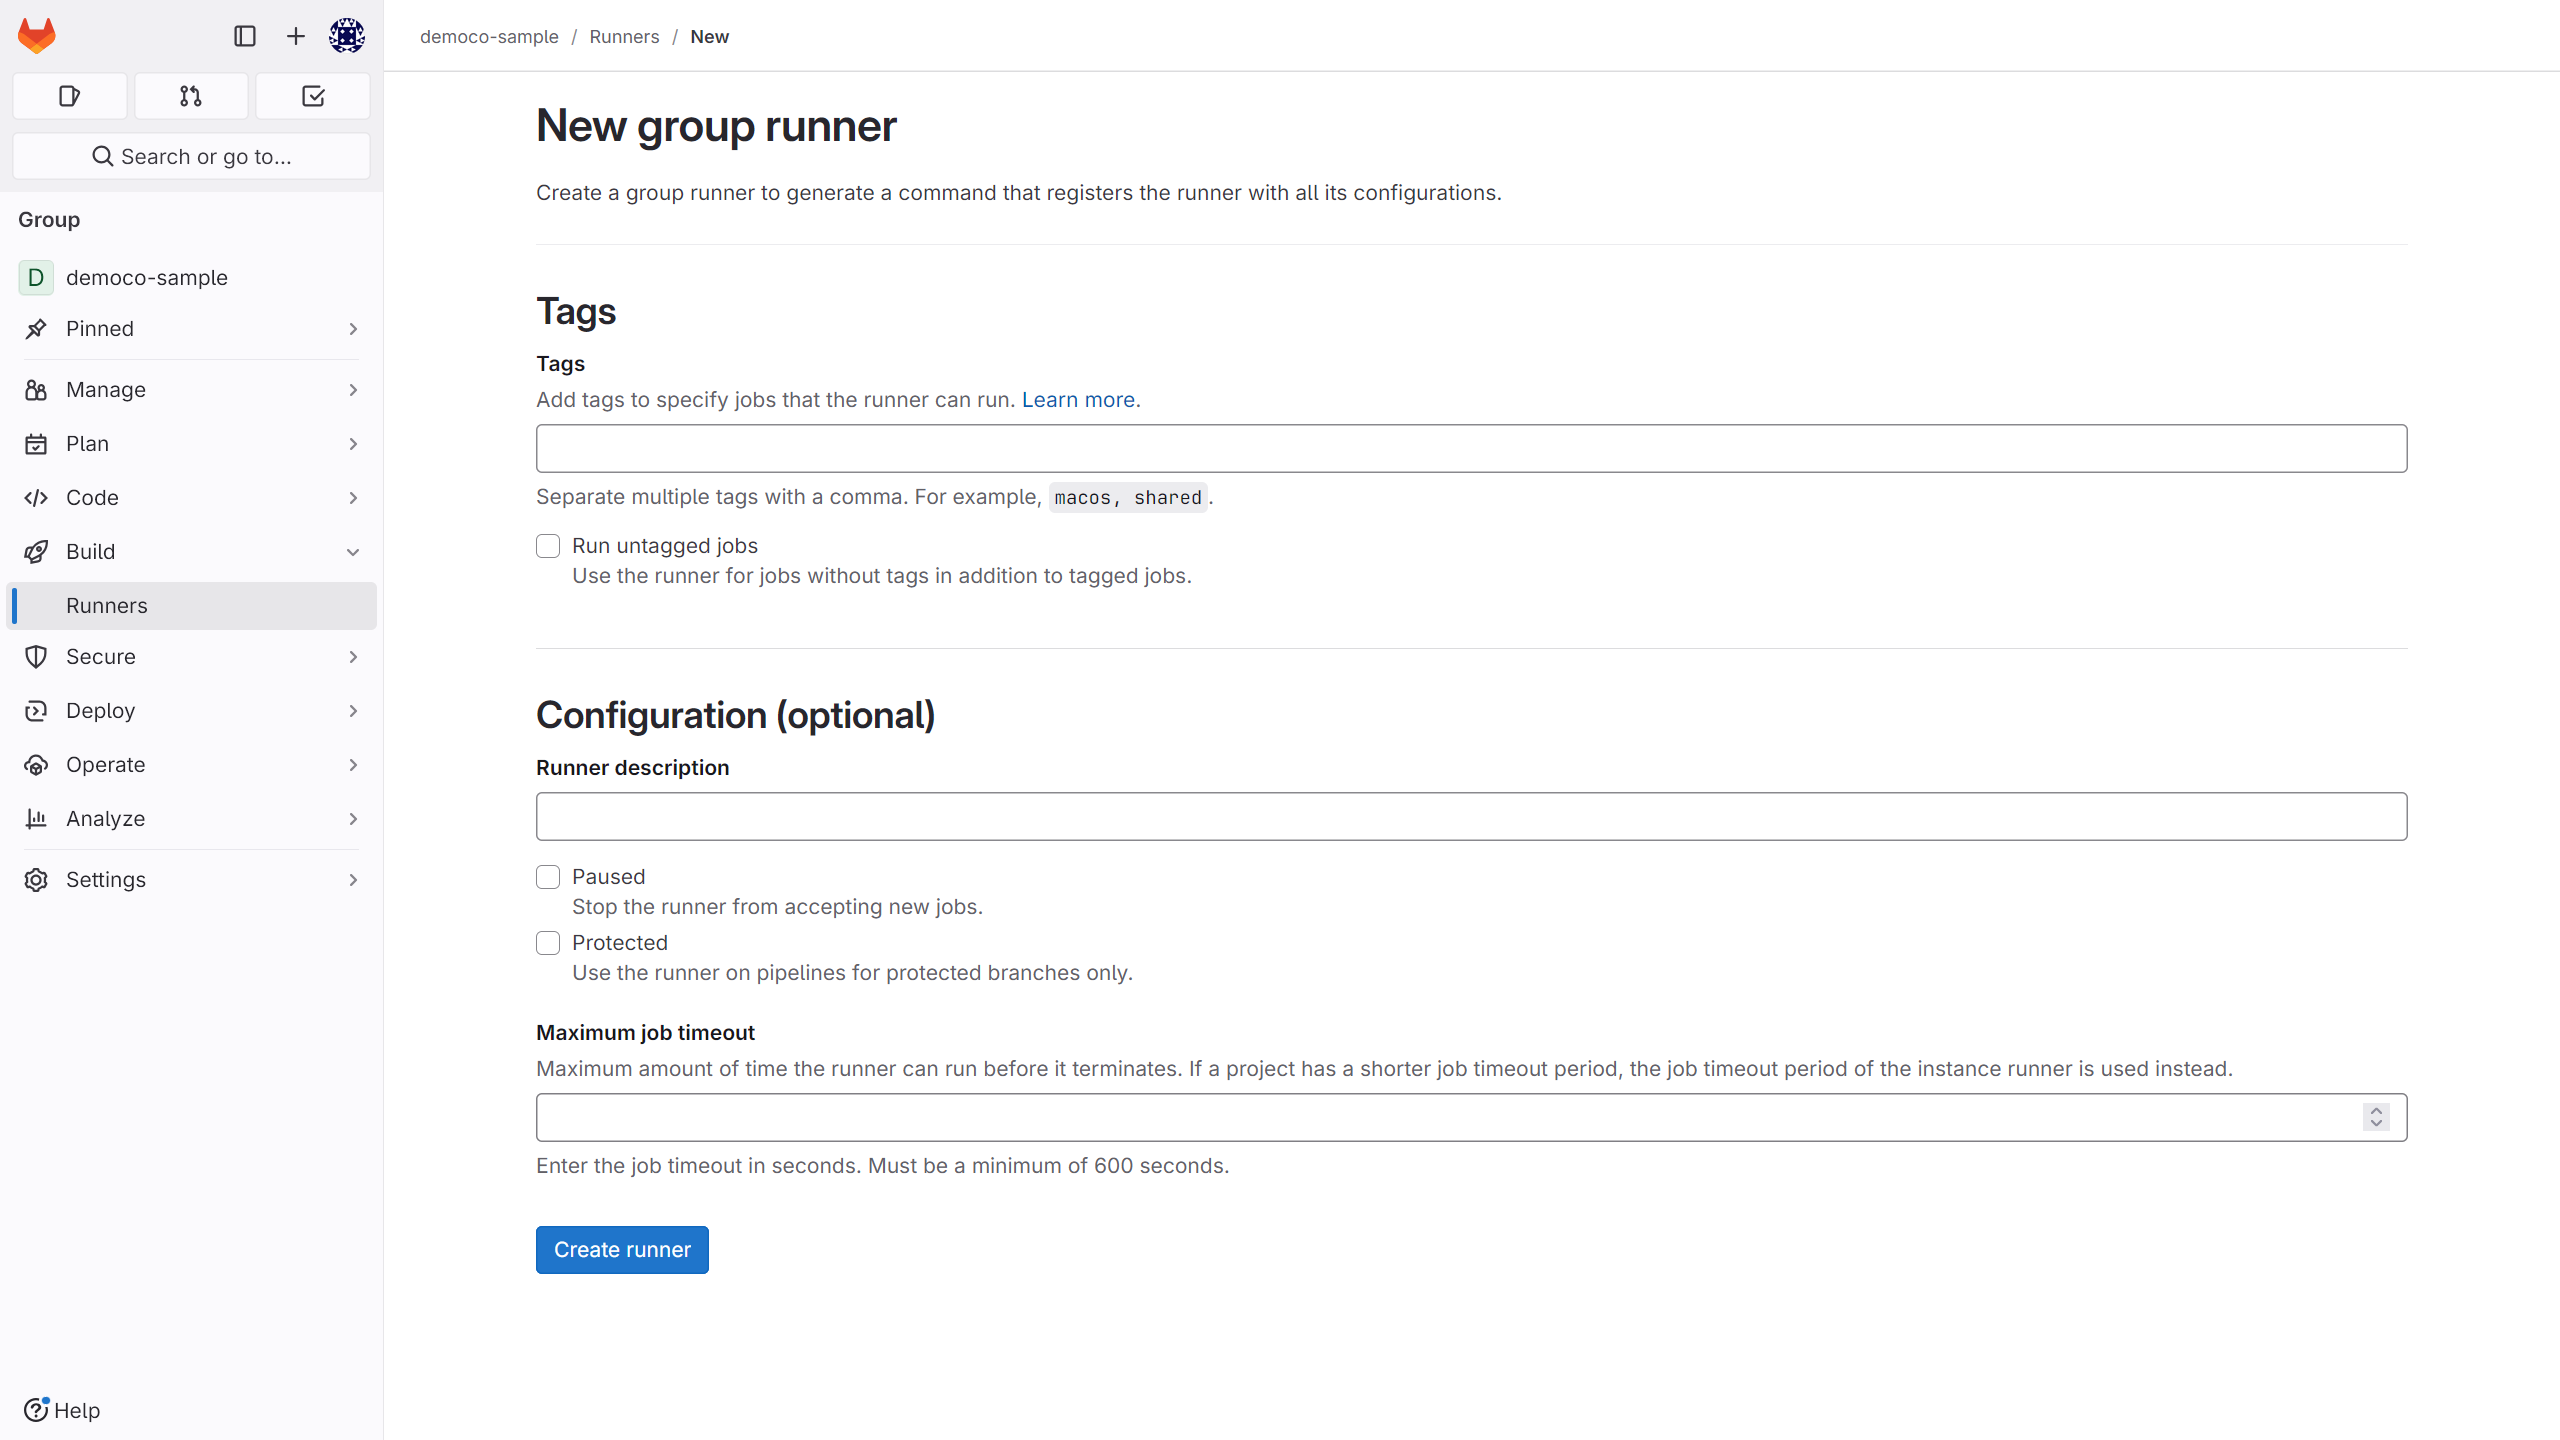
 Enter the runner specifications as needed.
 After creating the runner, obtain the token from this section.
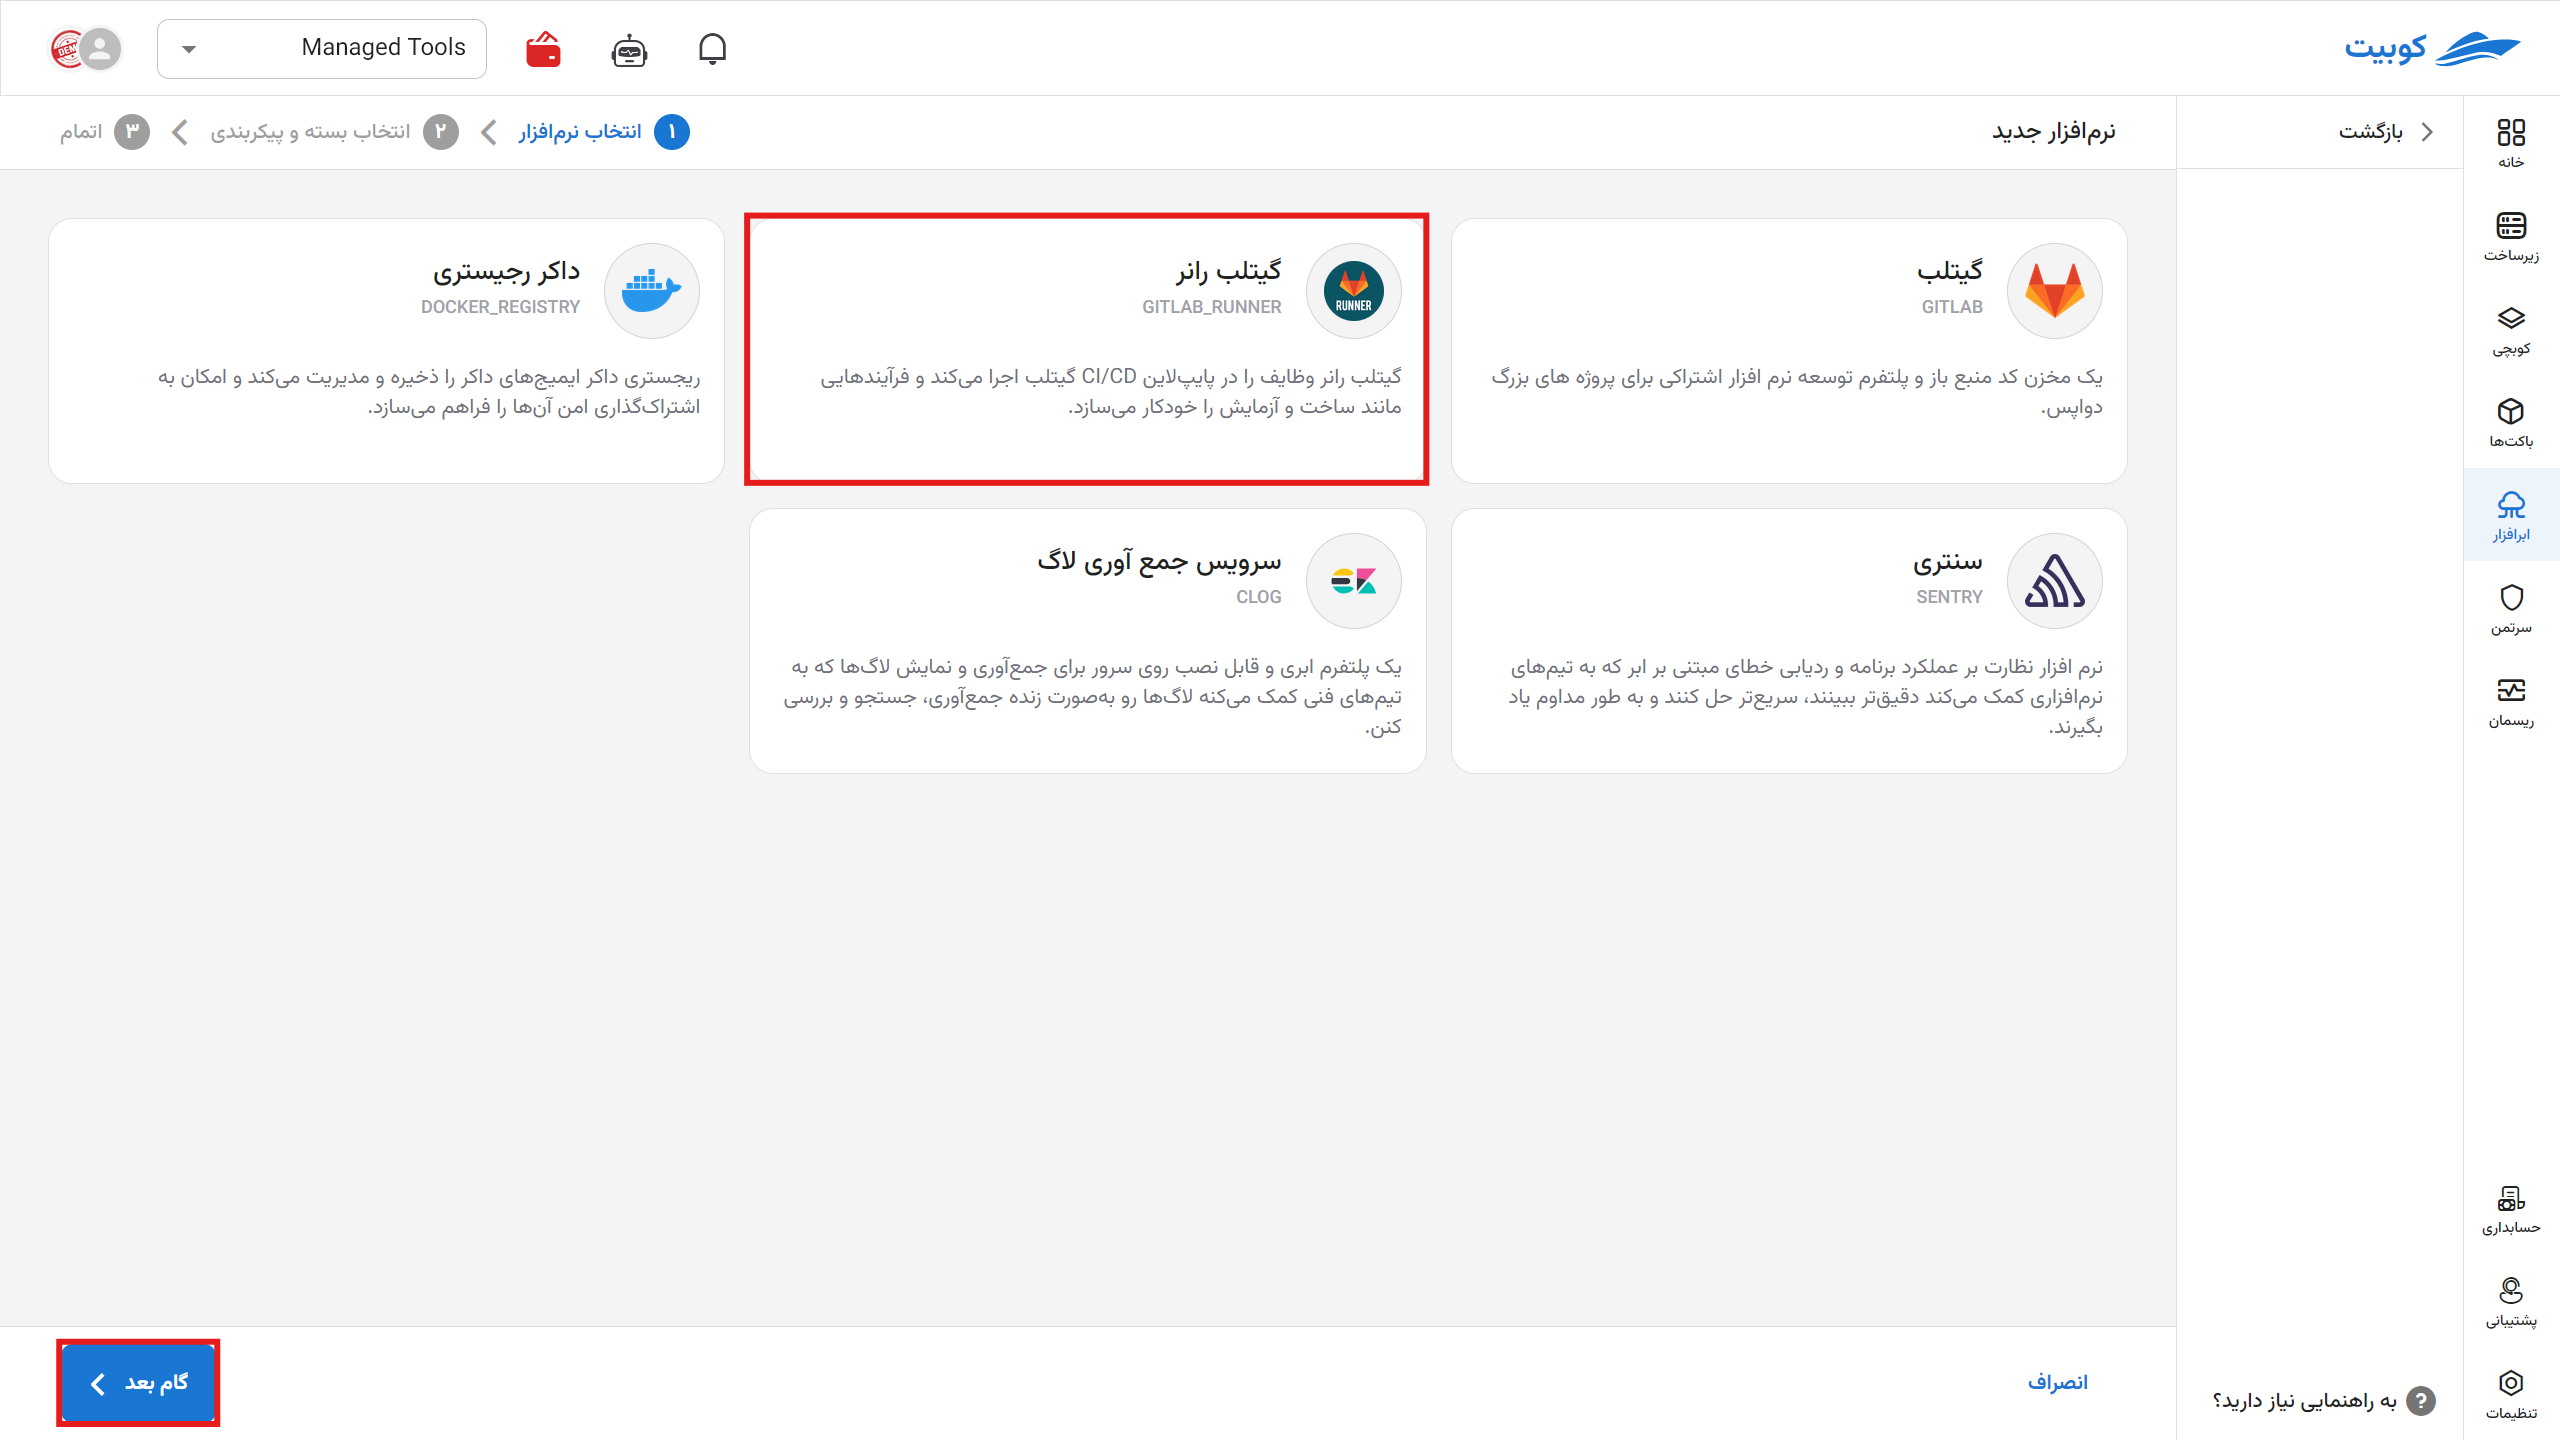
Software Installation
On the start page, select to install new software.
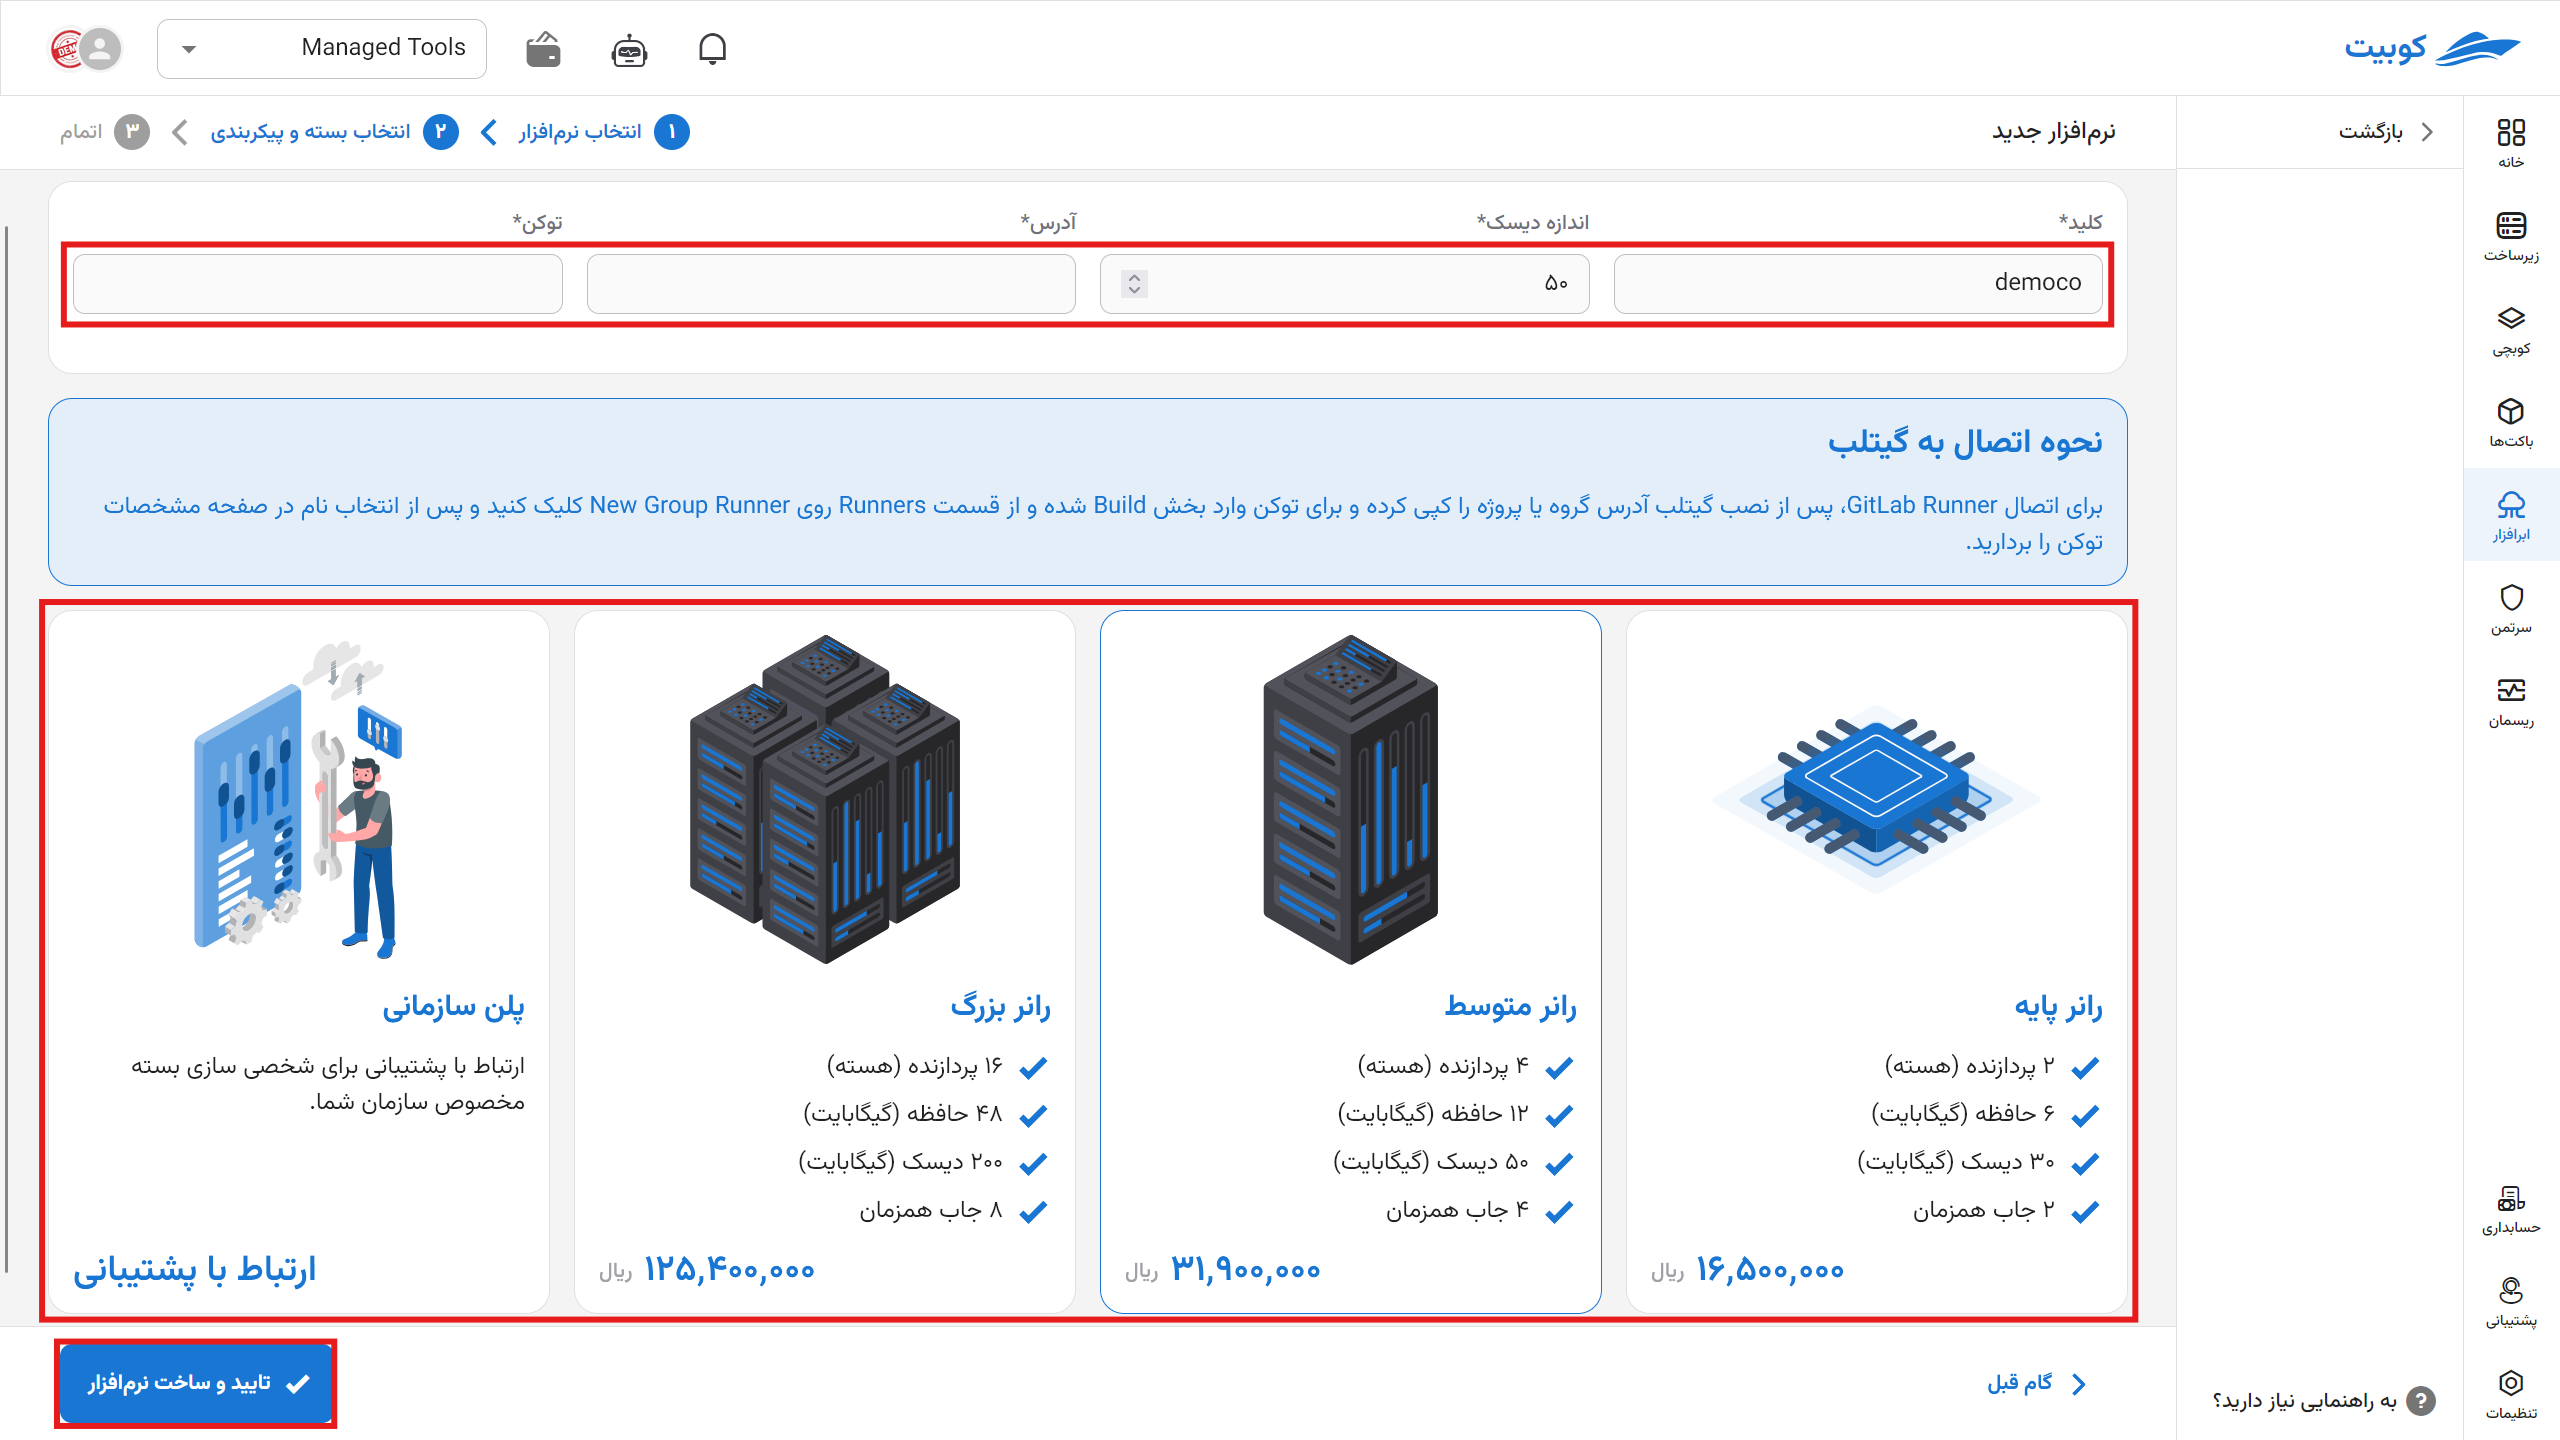
 Then enter the name (slug) of your runner.
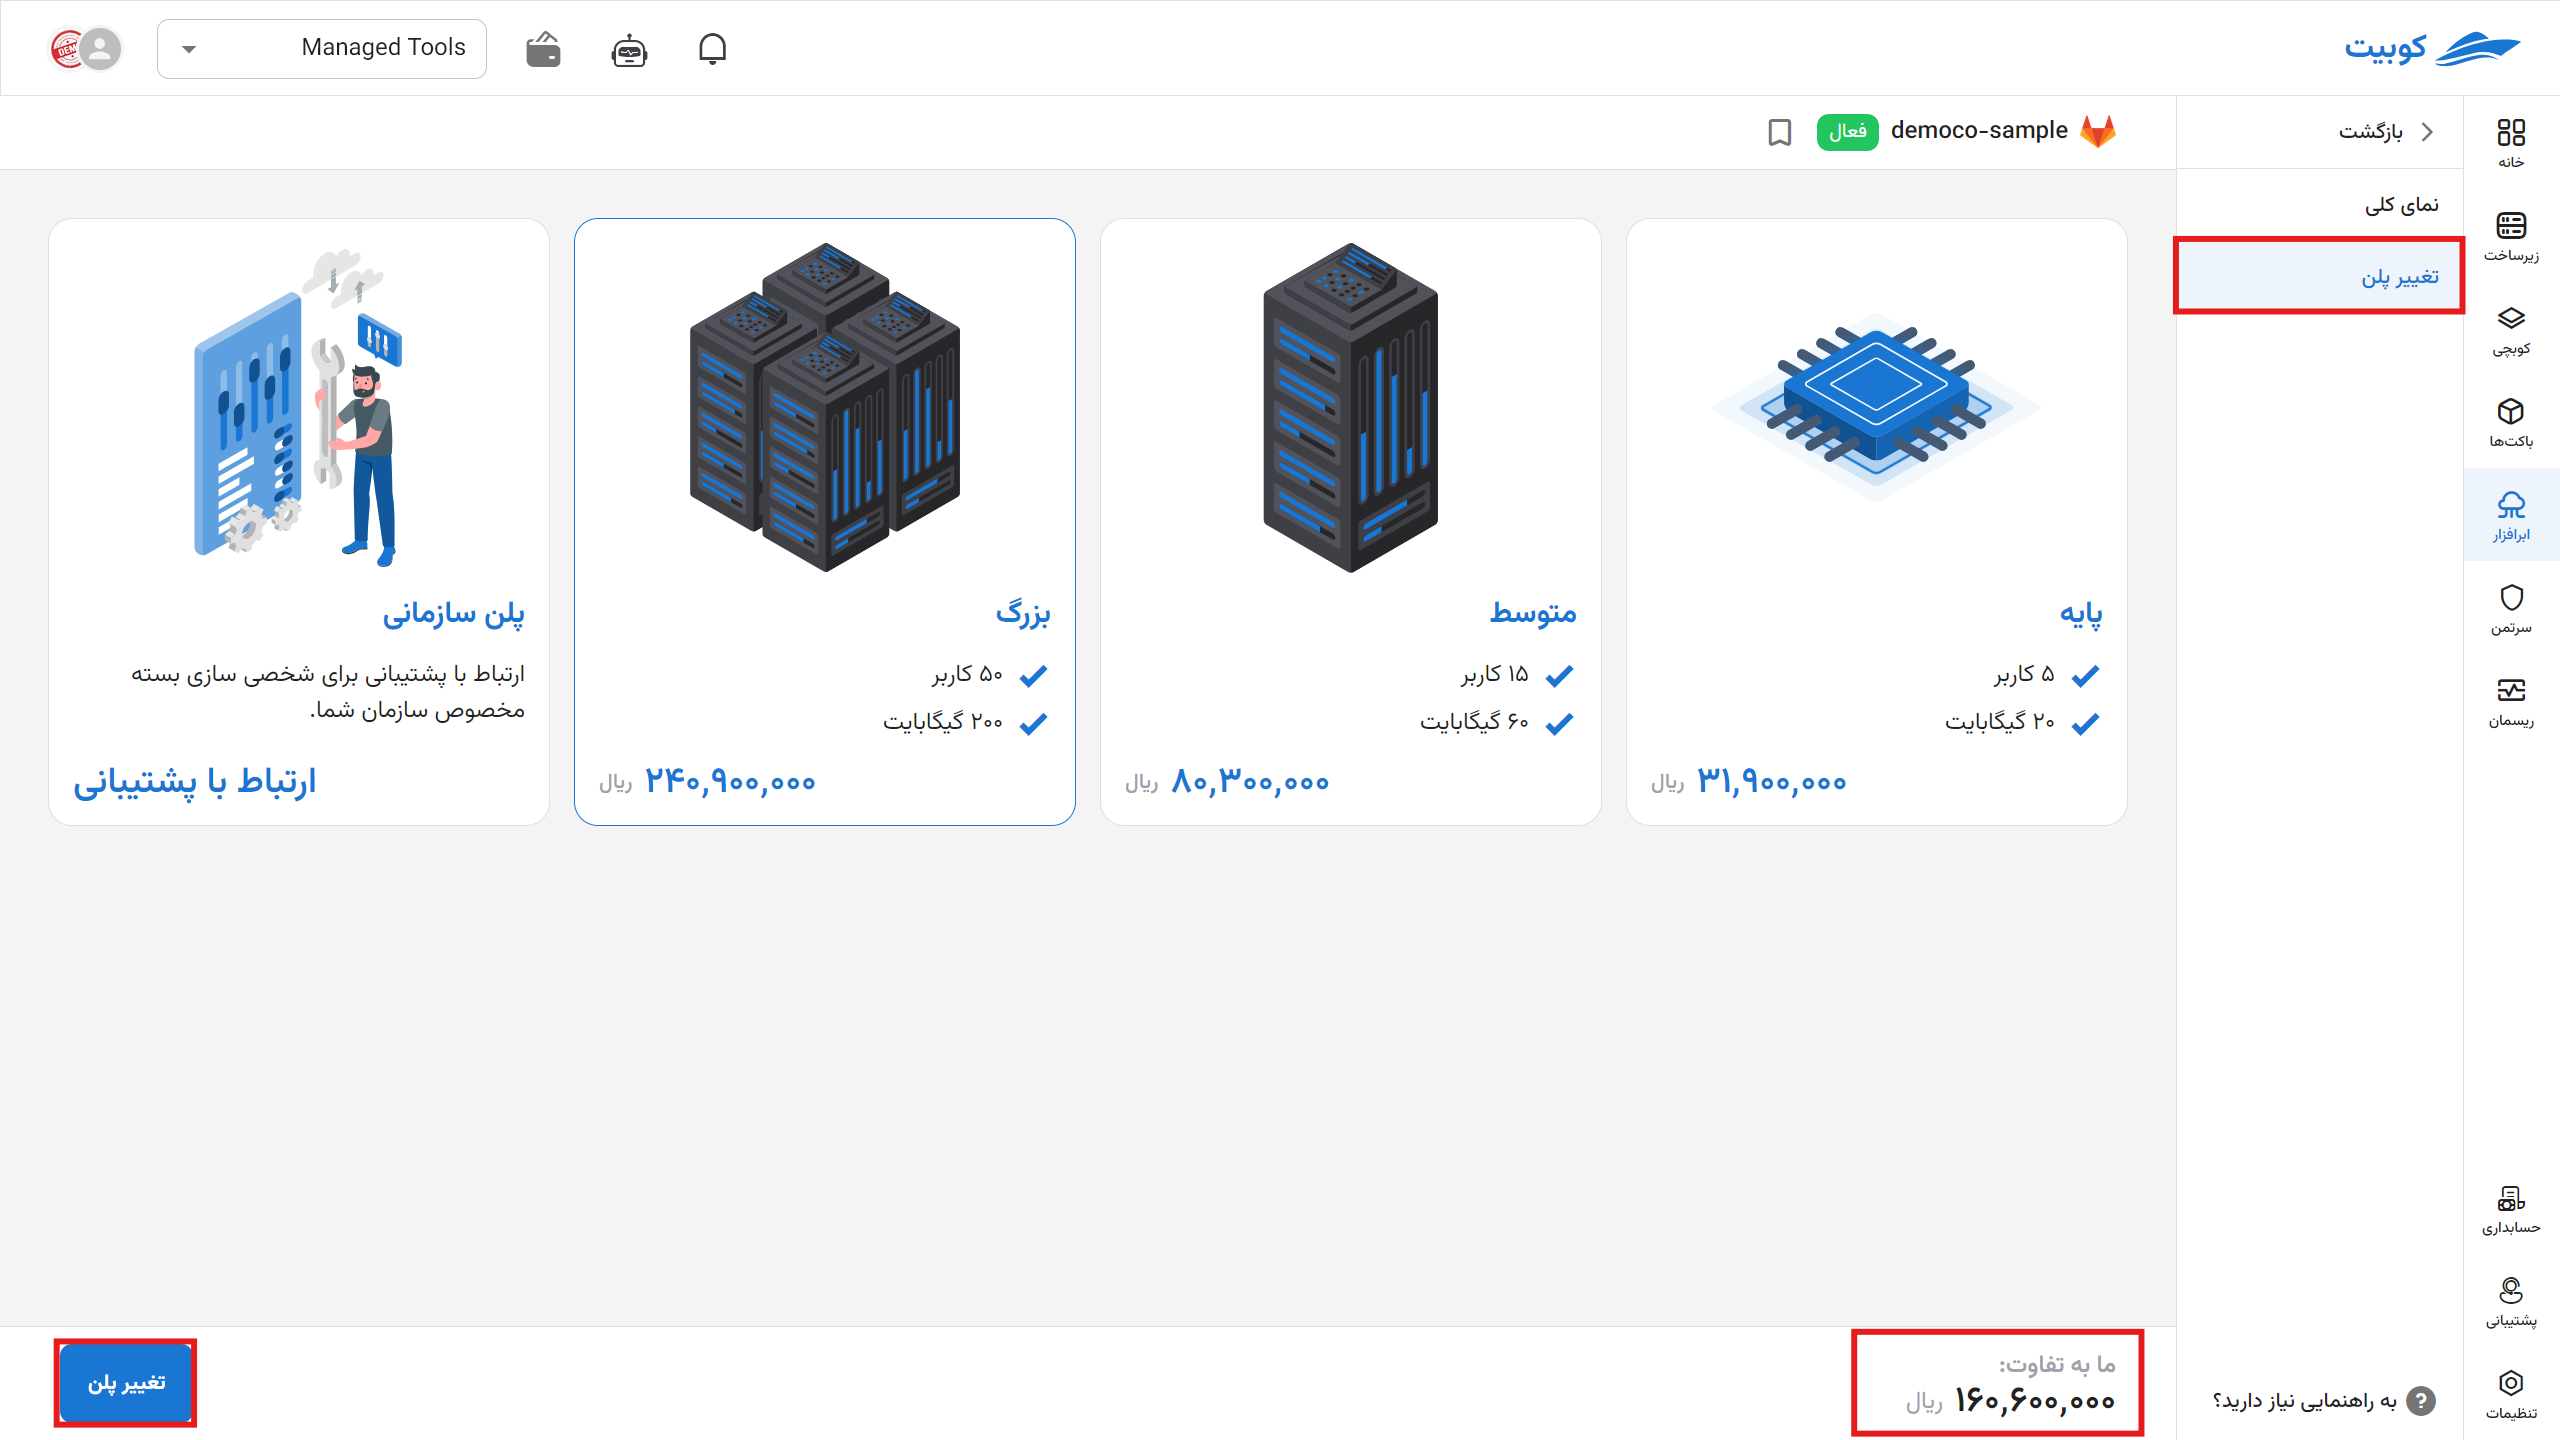
If you want to choose the capacity yourself, from the specified section, select a capacity in multiples of five and greater than your current plan.
Then enter the name (slug) of your runner.
If you want to choose the capacity yourself, from the specified section, select a capacity in multiples of five and greater than your current plan.
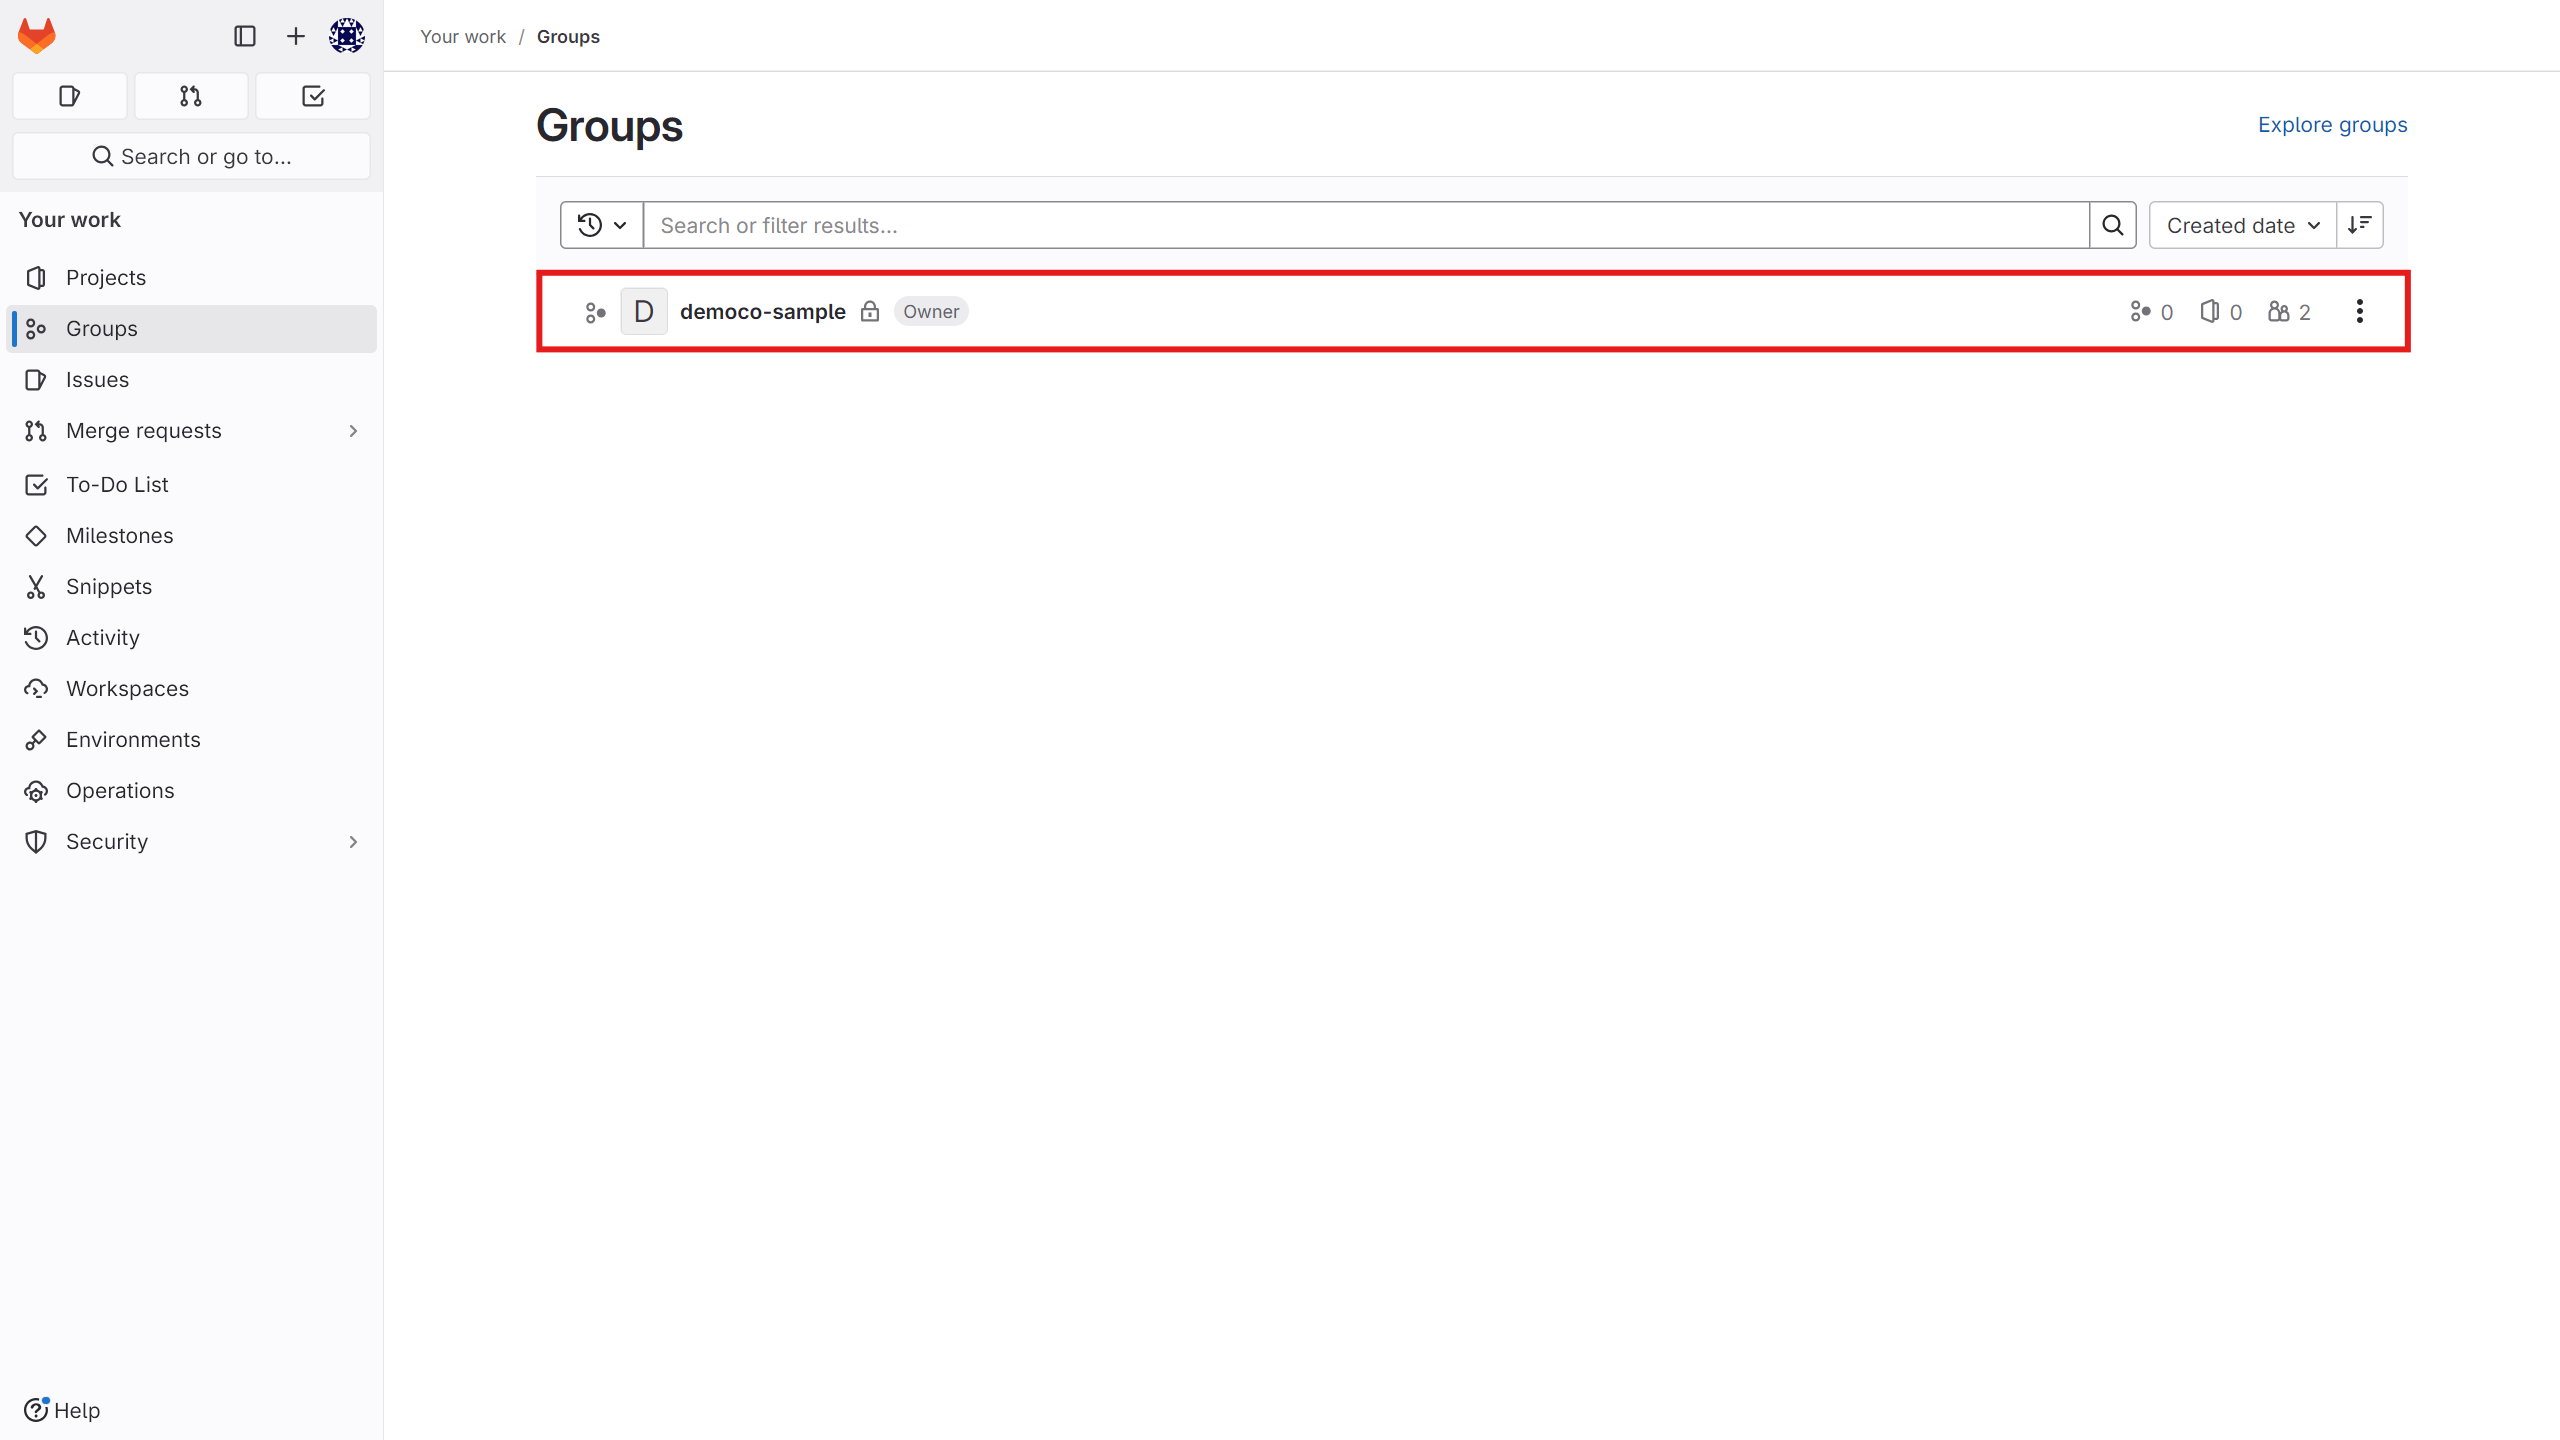
You can see the repository address connected to the runner on the overview page.
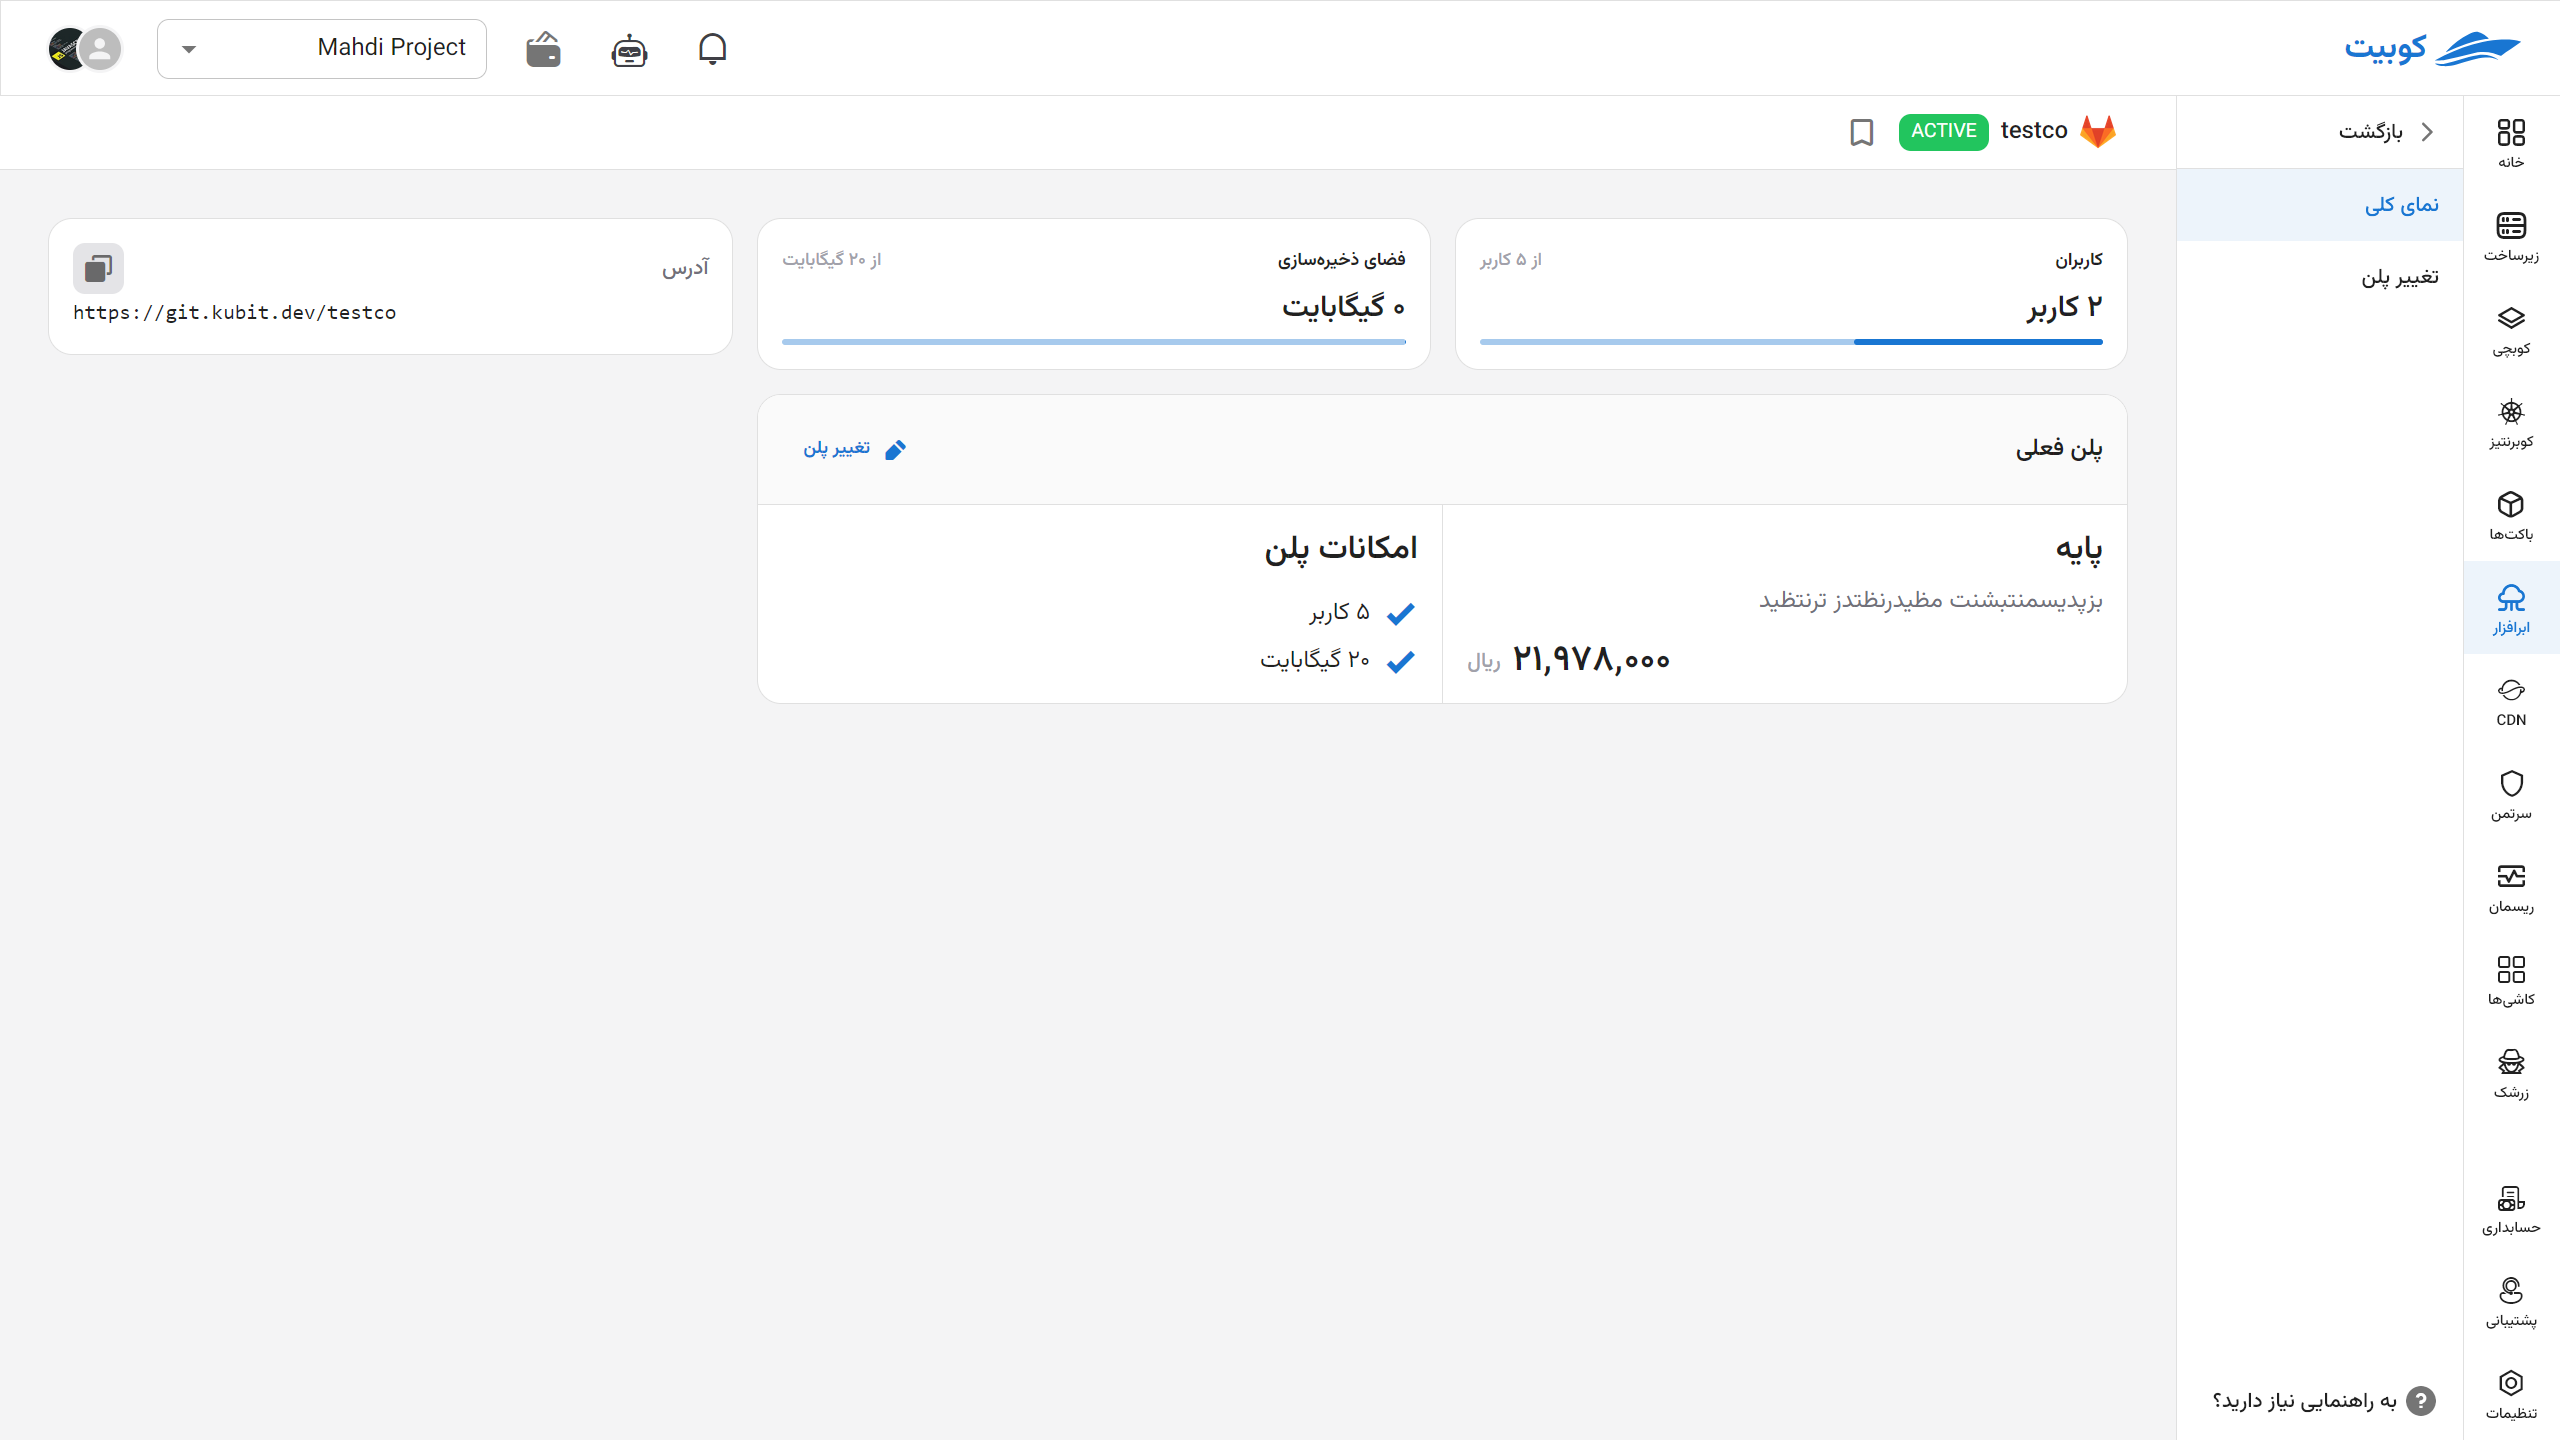
By selecting change plan, you will return to the plans page, and by choosing a new plan and paying the difference, your plan will be updated.
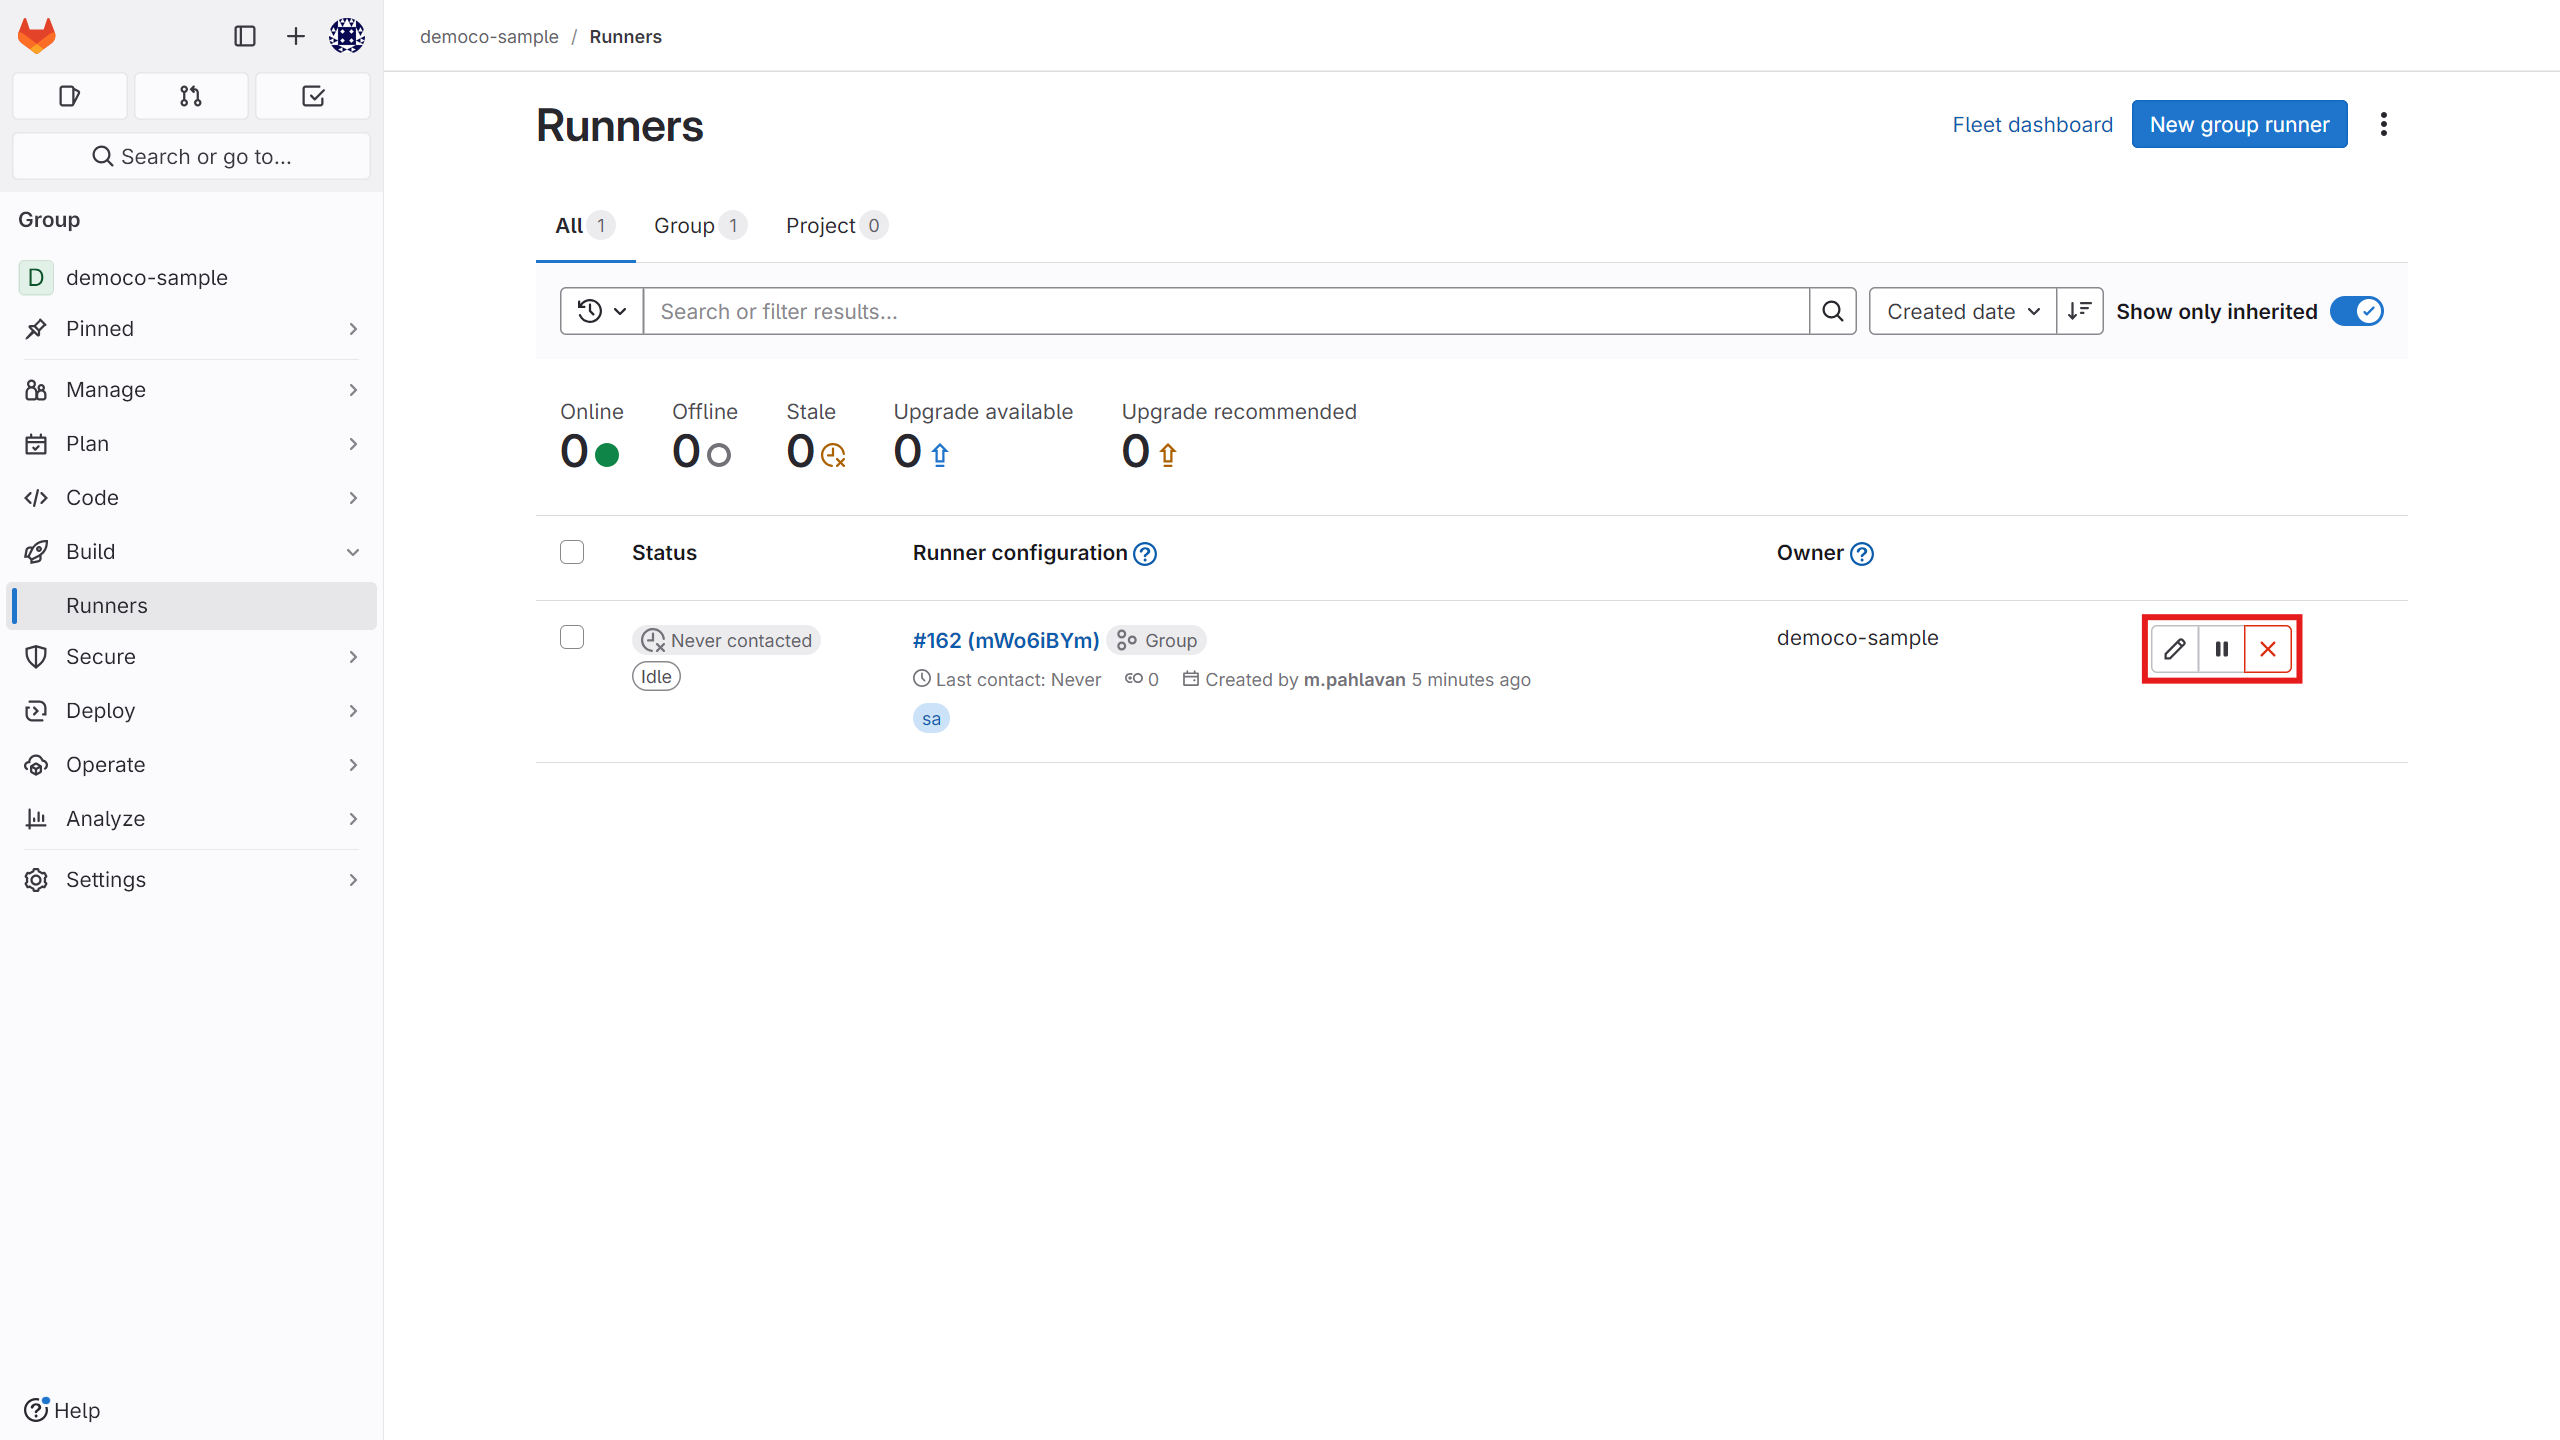
In your panel, you can view the list of available runners and pause, edit, or delete them.
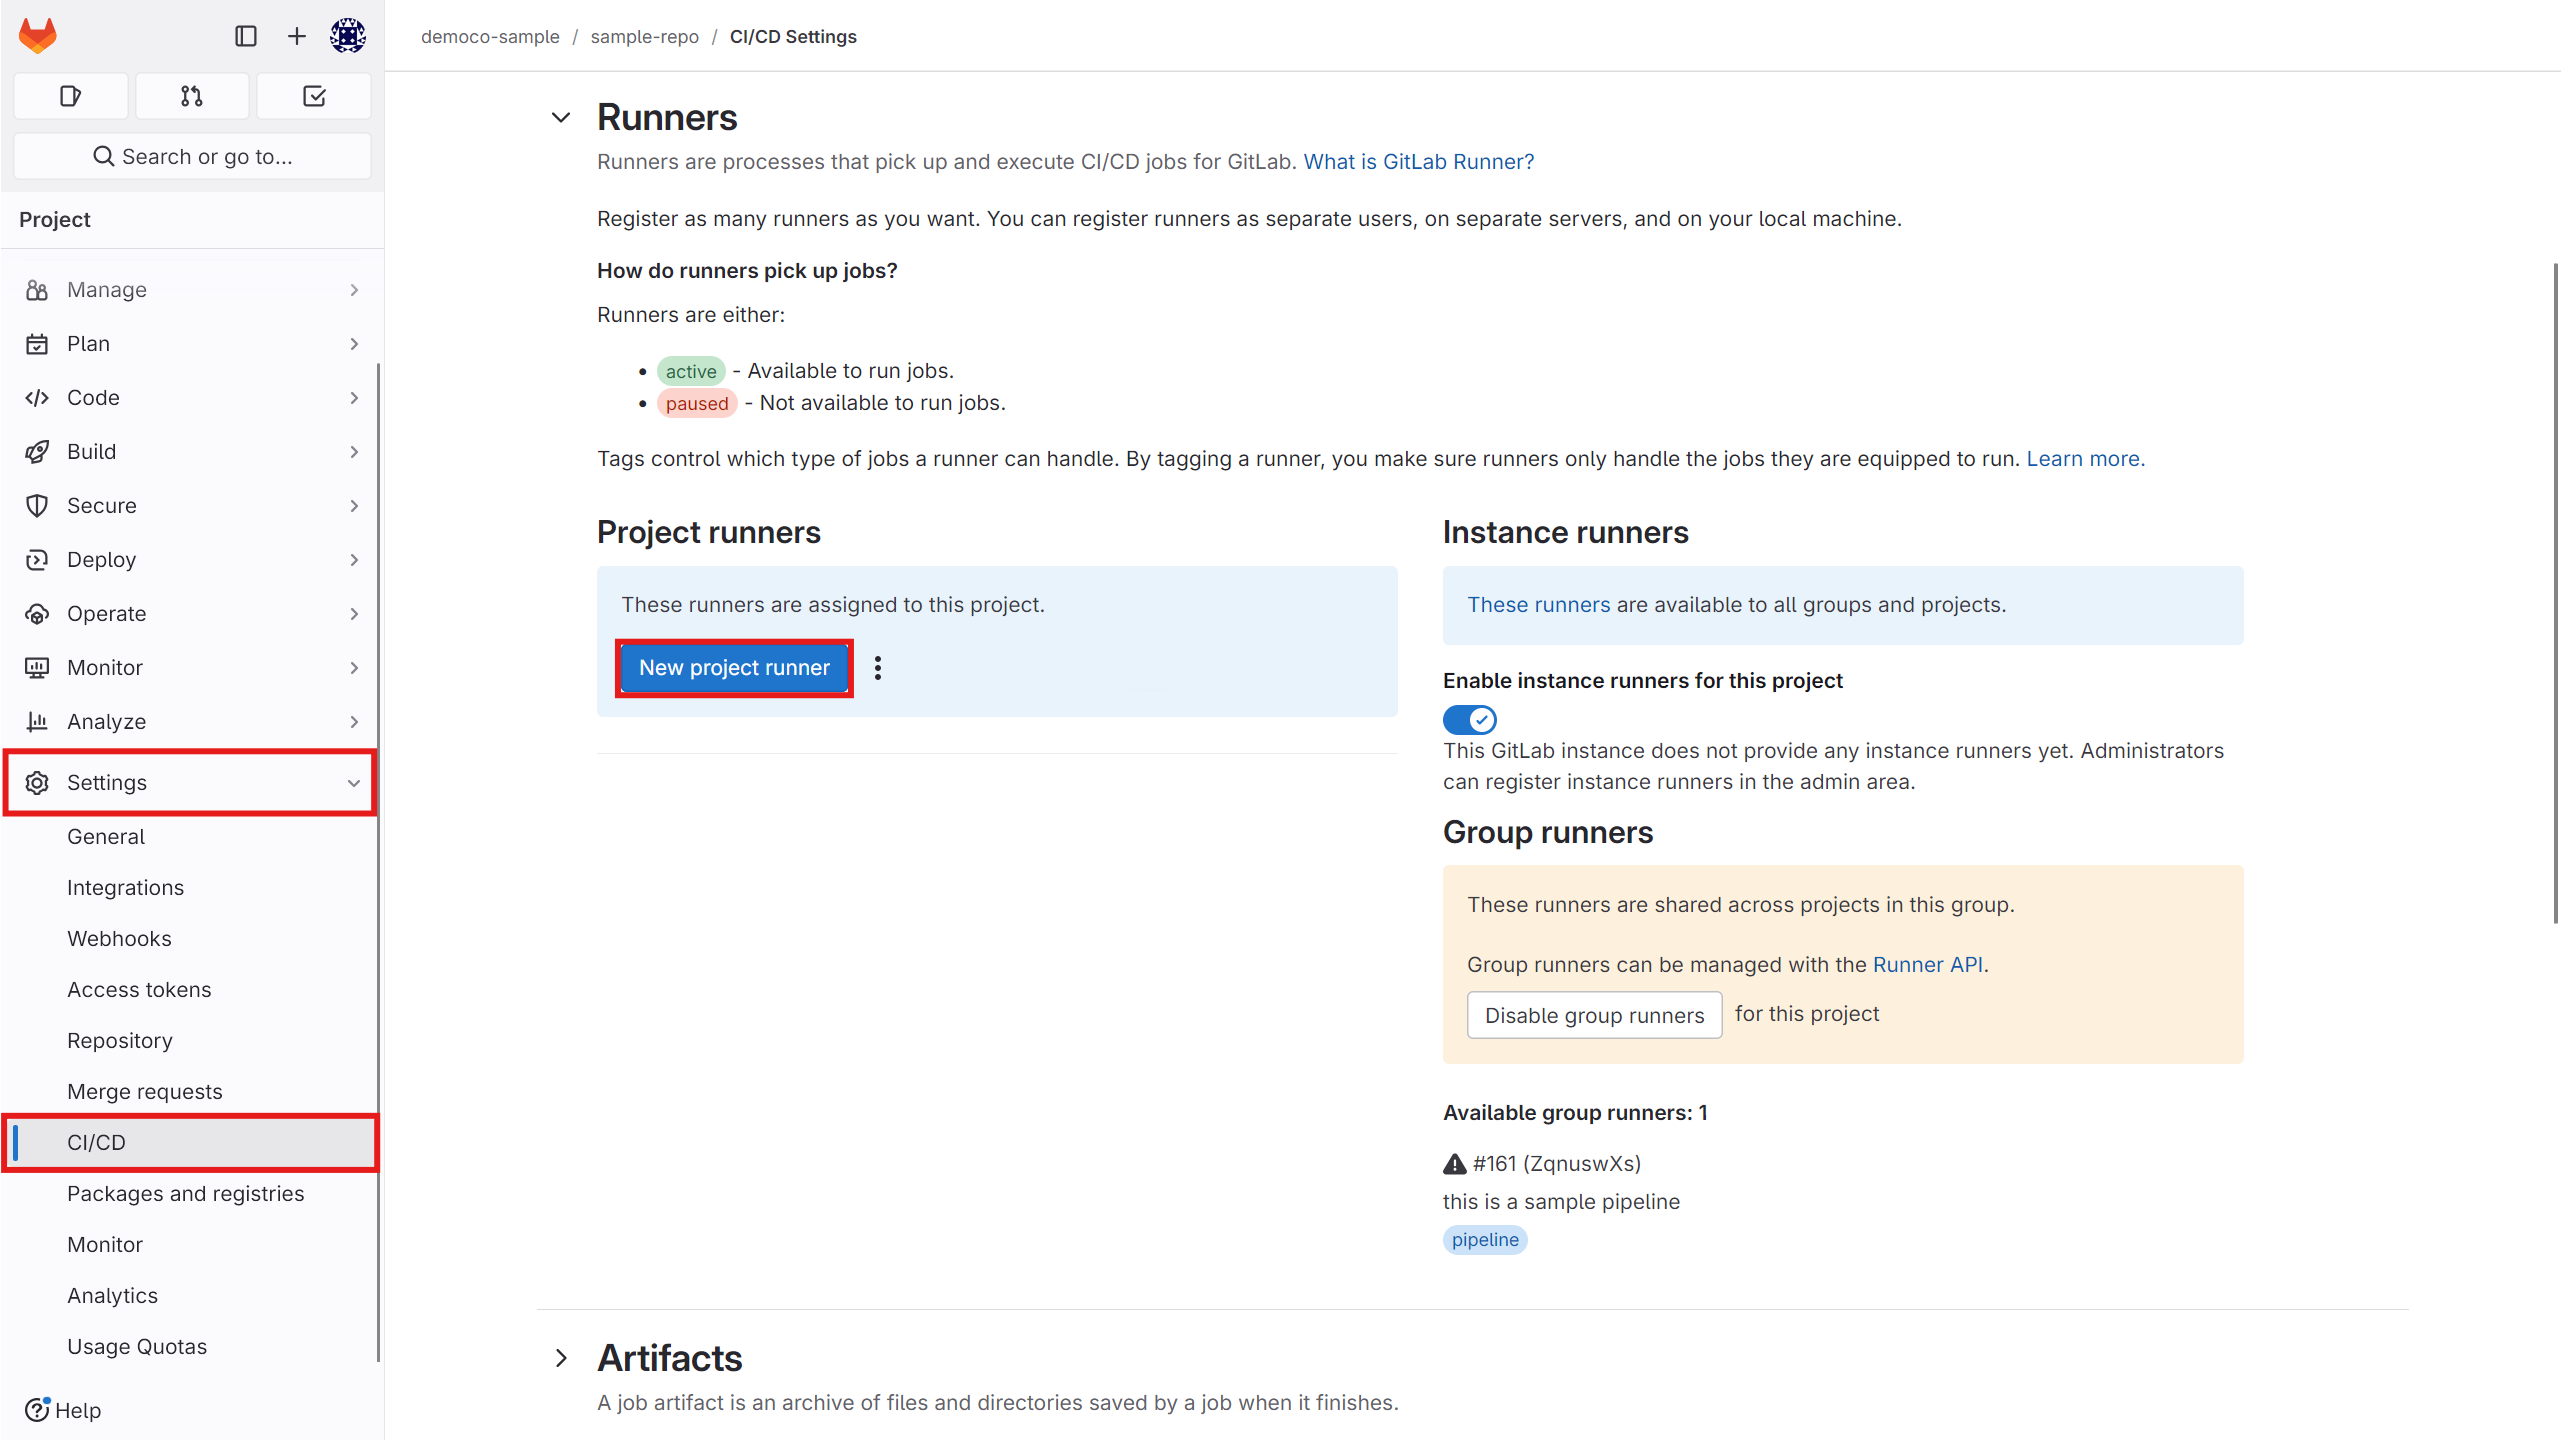
You can also create a new runner from the 不1Settings > CI/CD` section.
Running a Sample Job
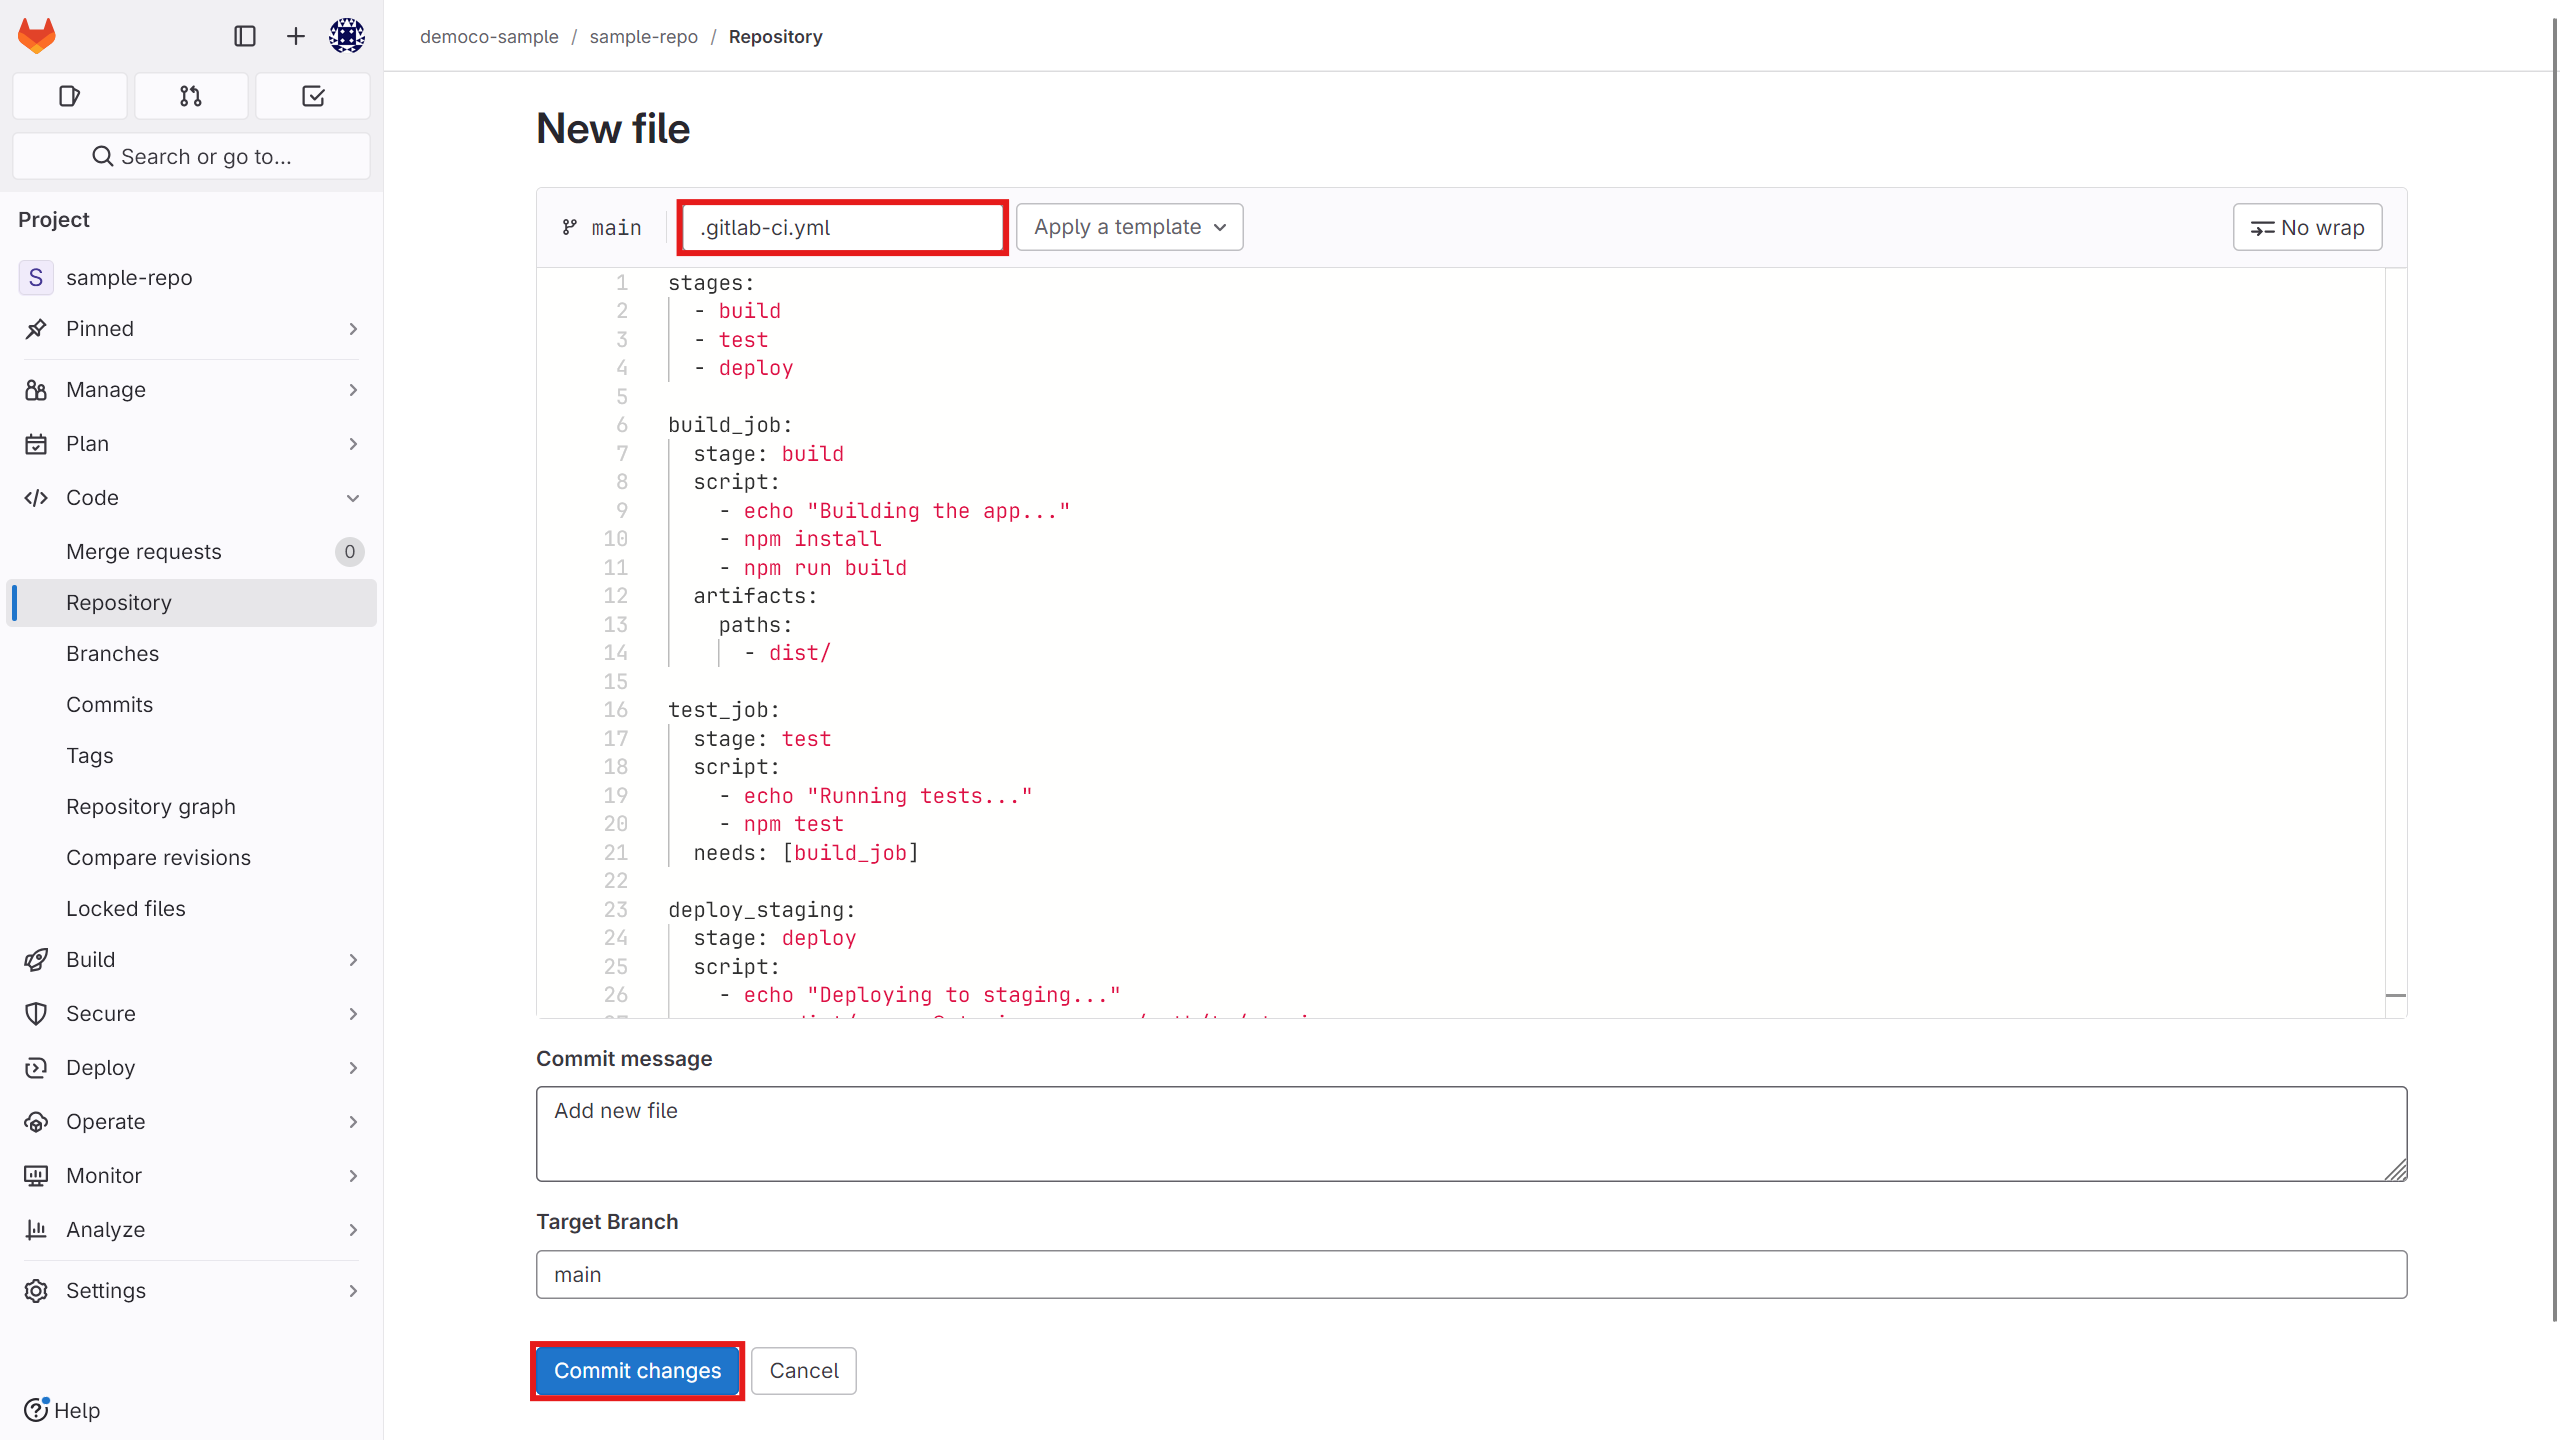
After creating the runner, to run a CI job in your repository, create a file named yml.
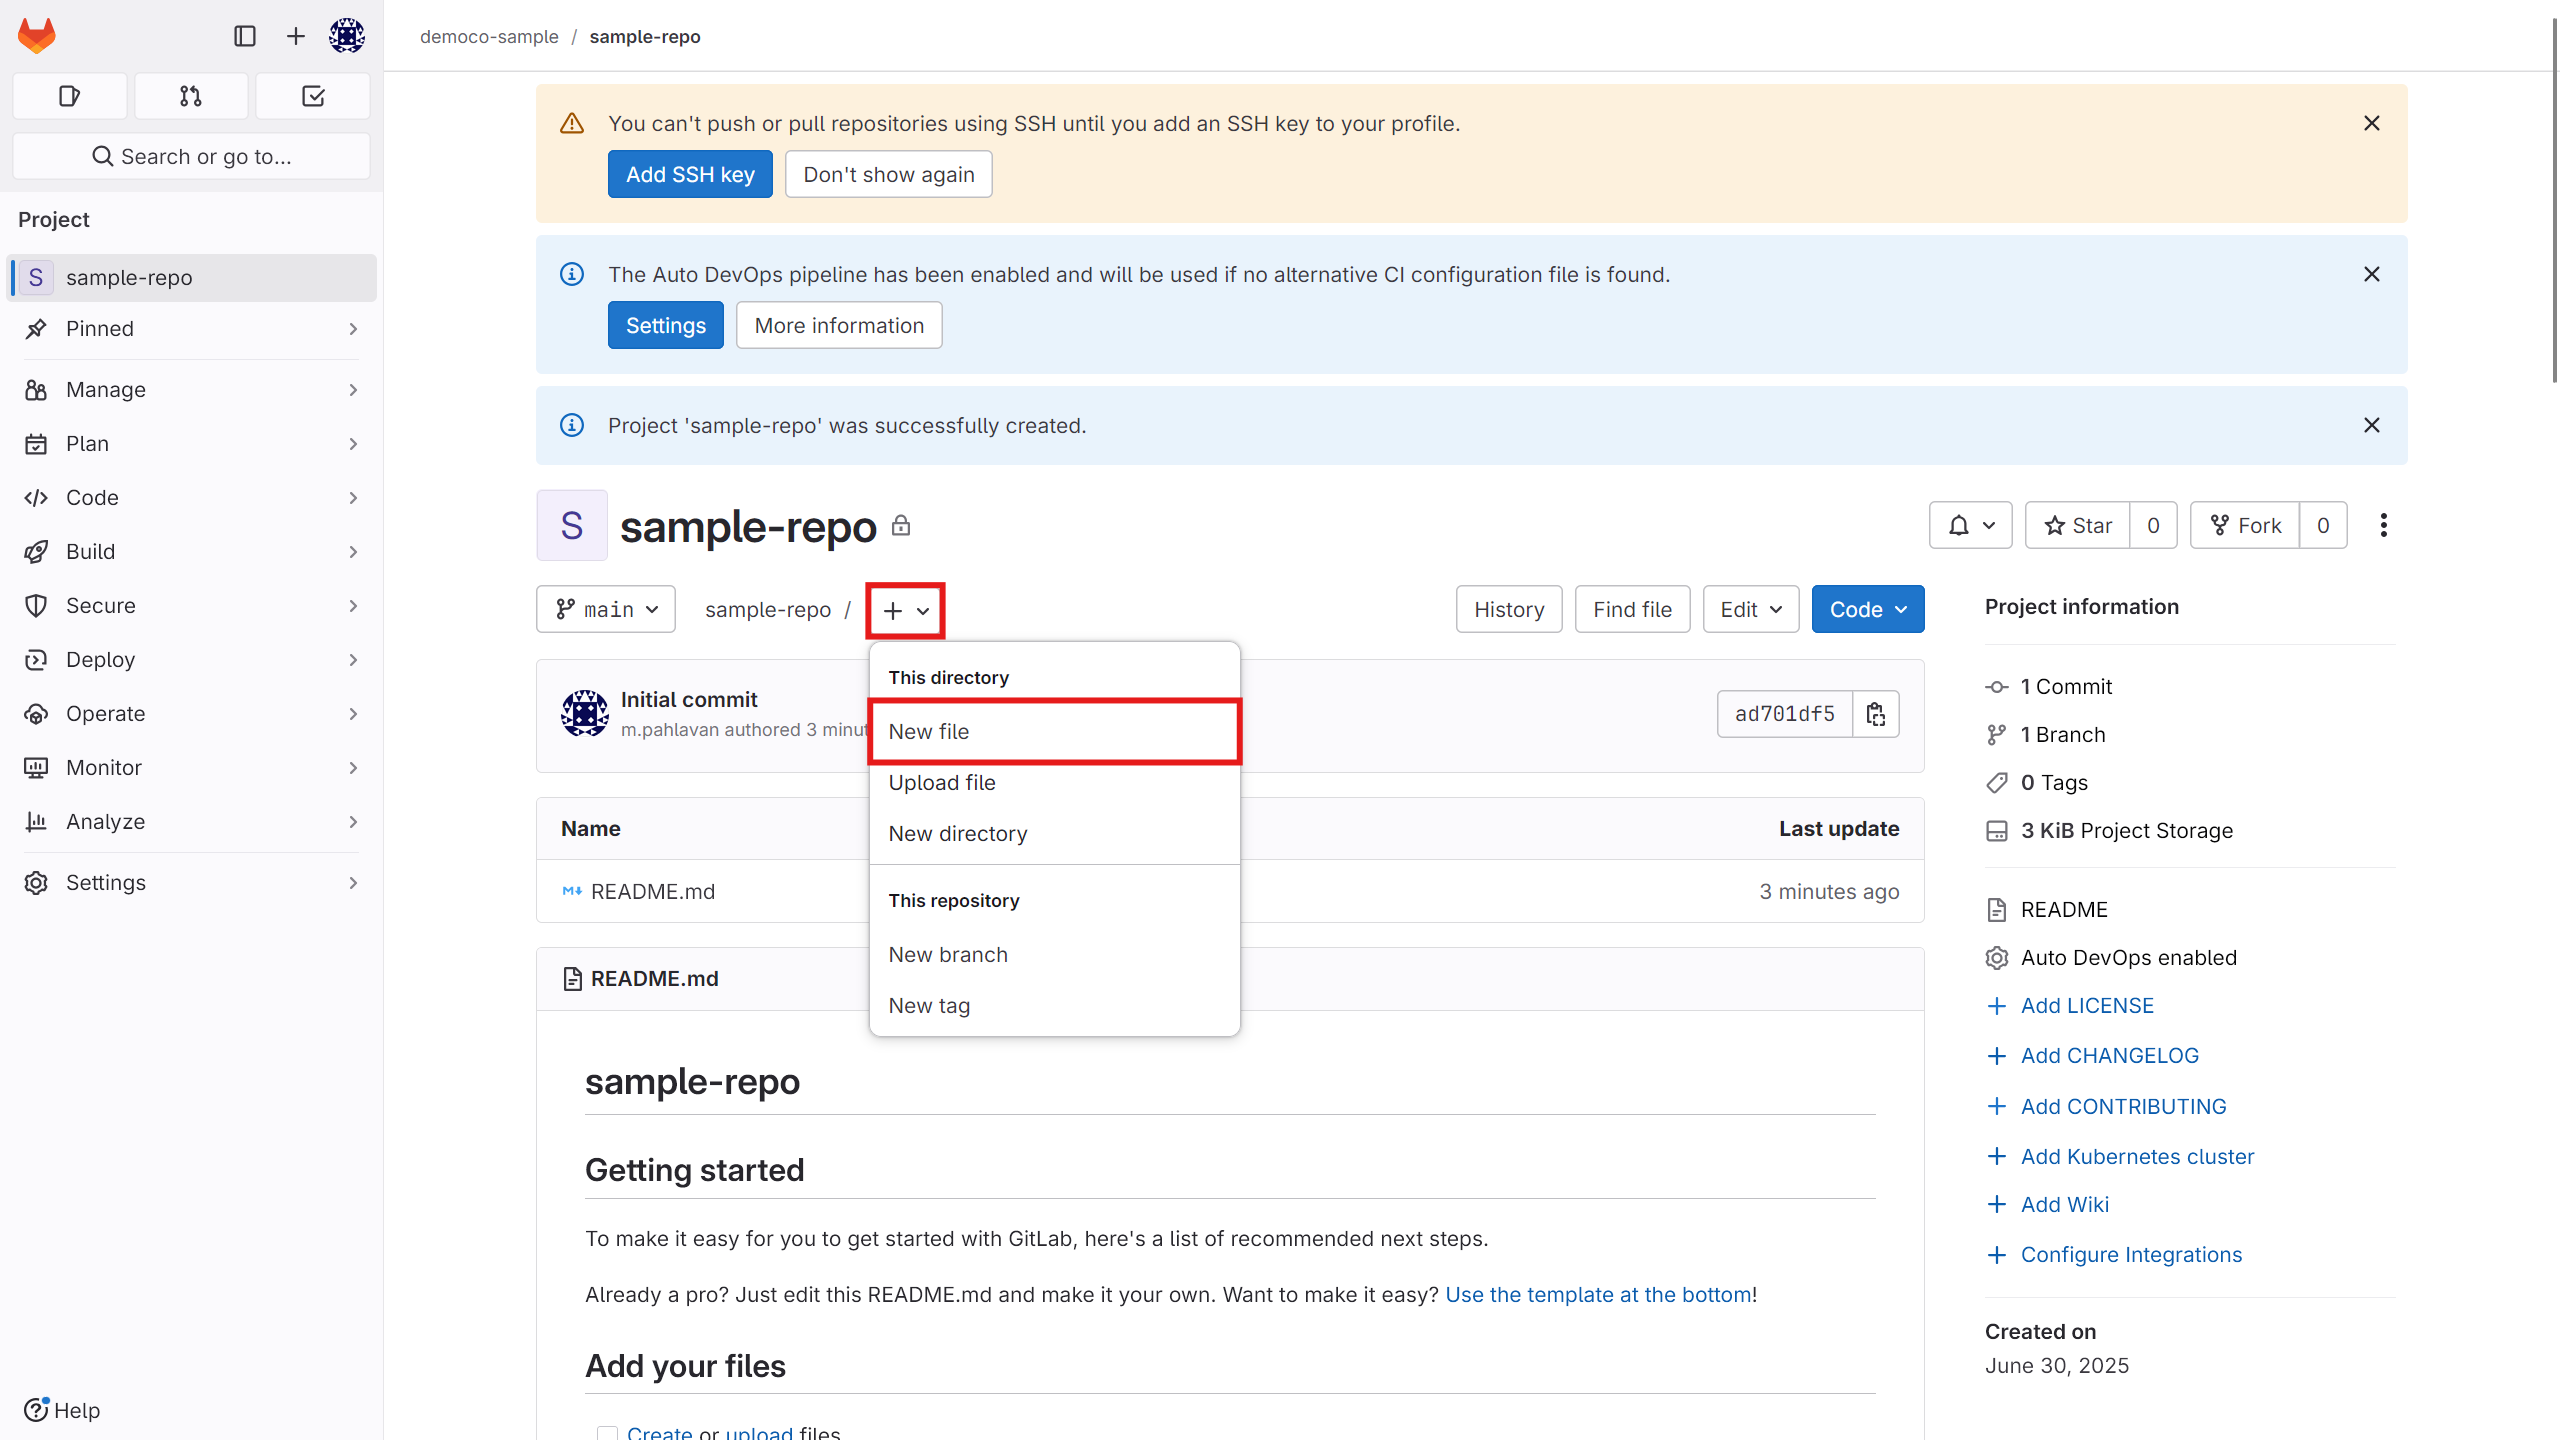
Copy your script into it.
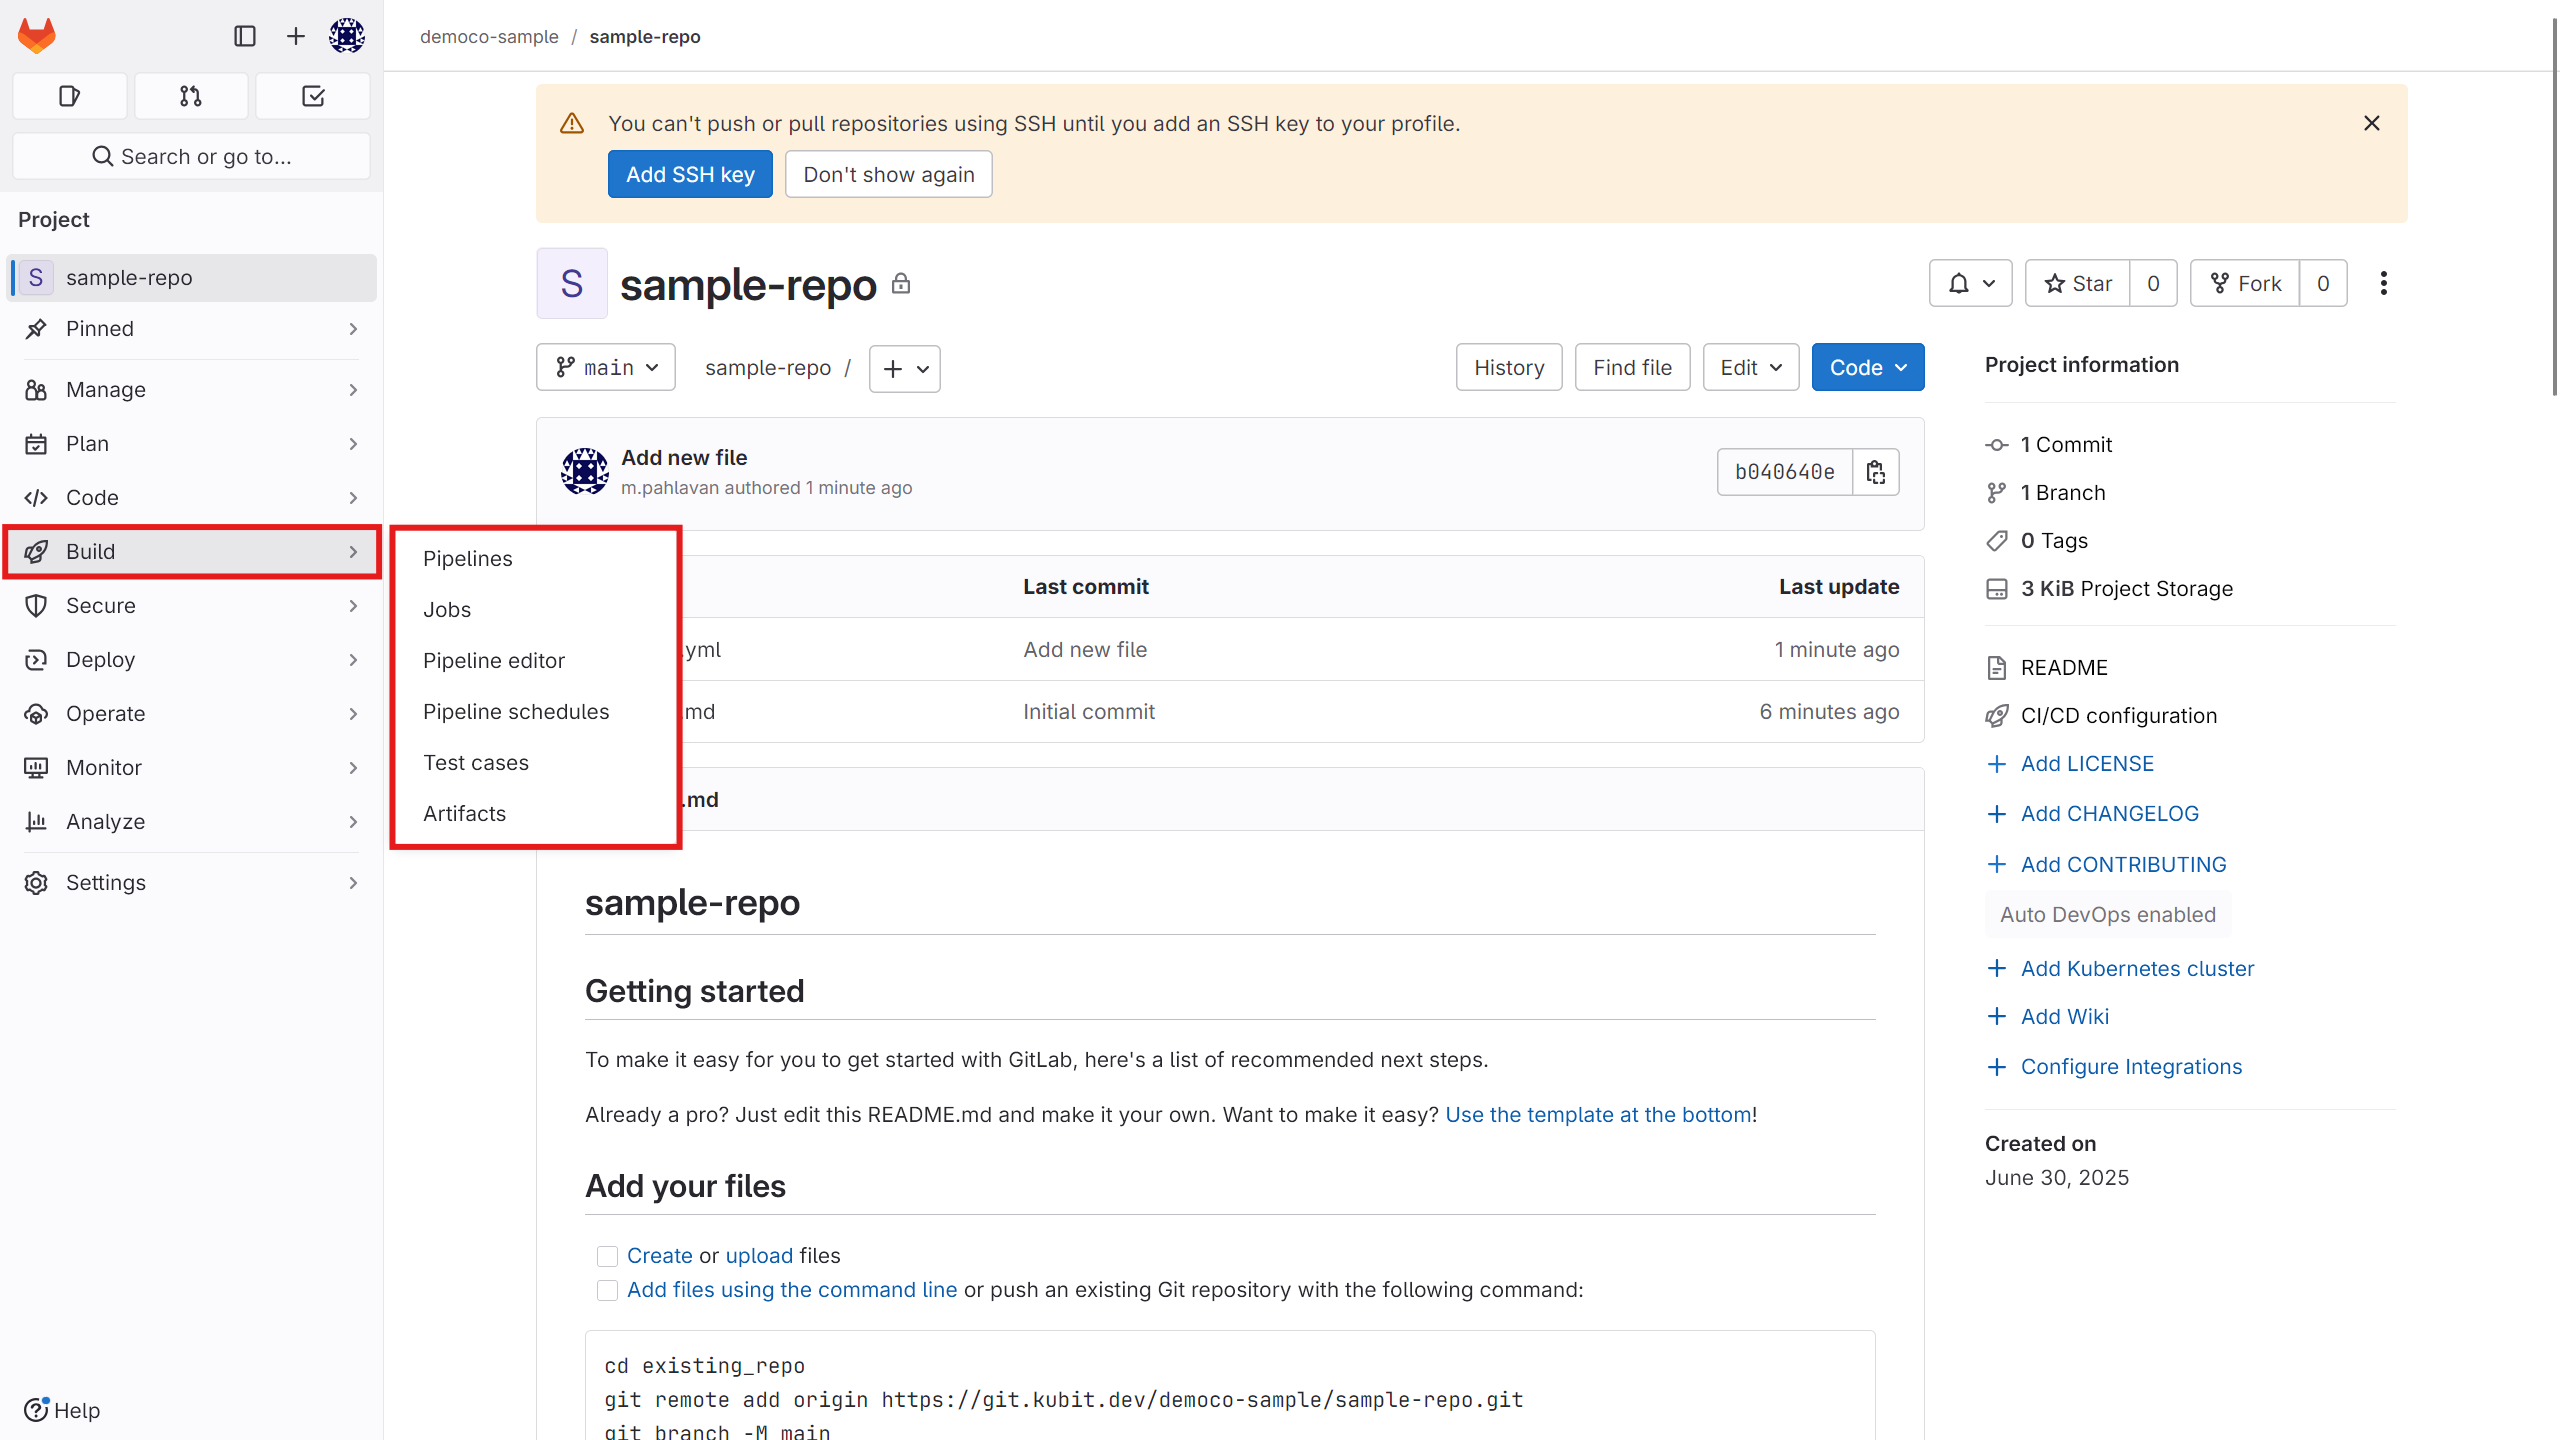
Now from the Build section, you can view your pipeline and the stage it is in, as well as how it is executed.
Pipeline graph:
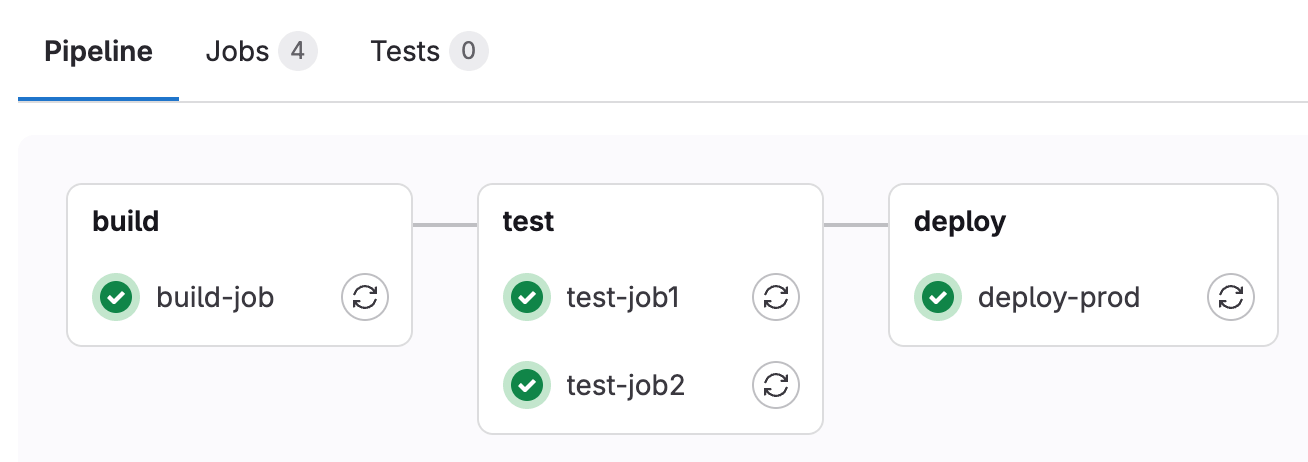
Status of each runner:

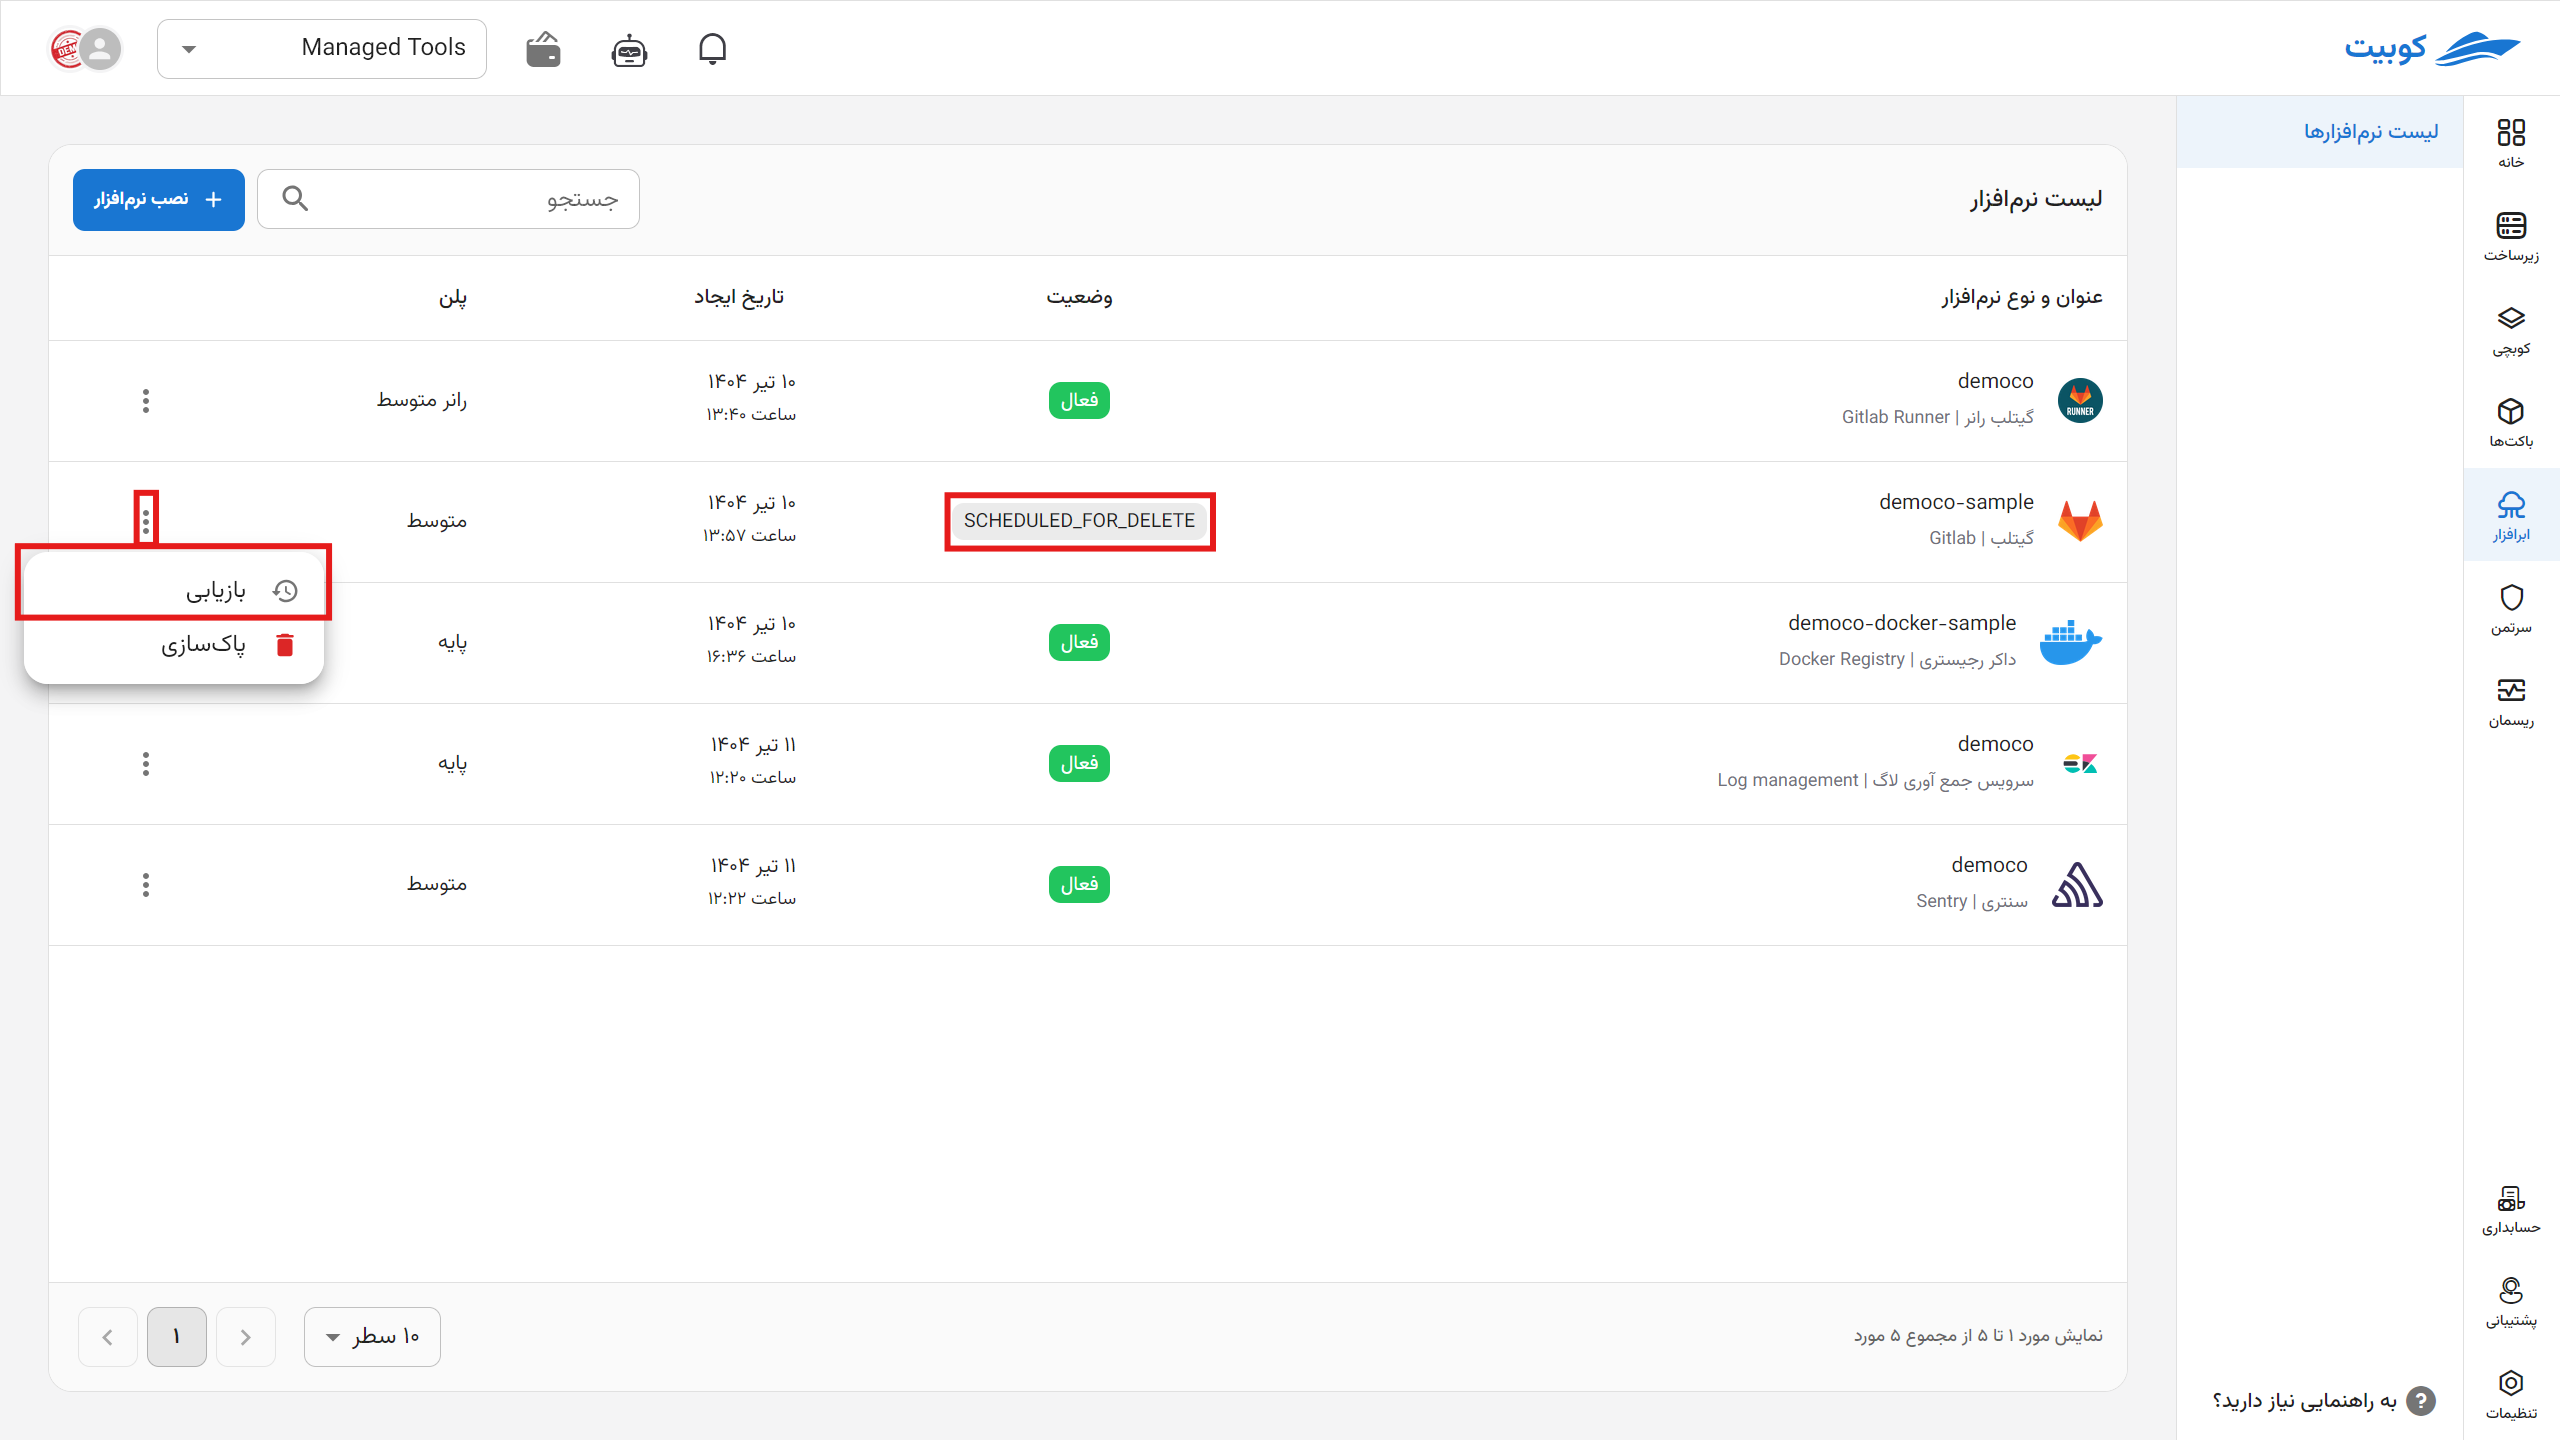
To delete the cloud software through the panel, click on the options icon and then hit delete.
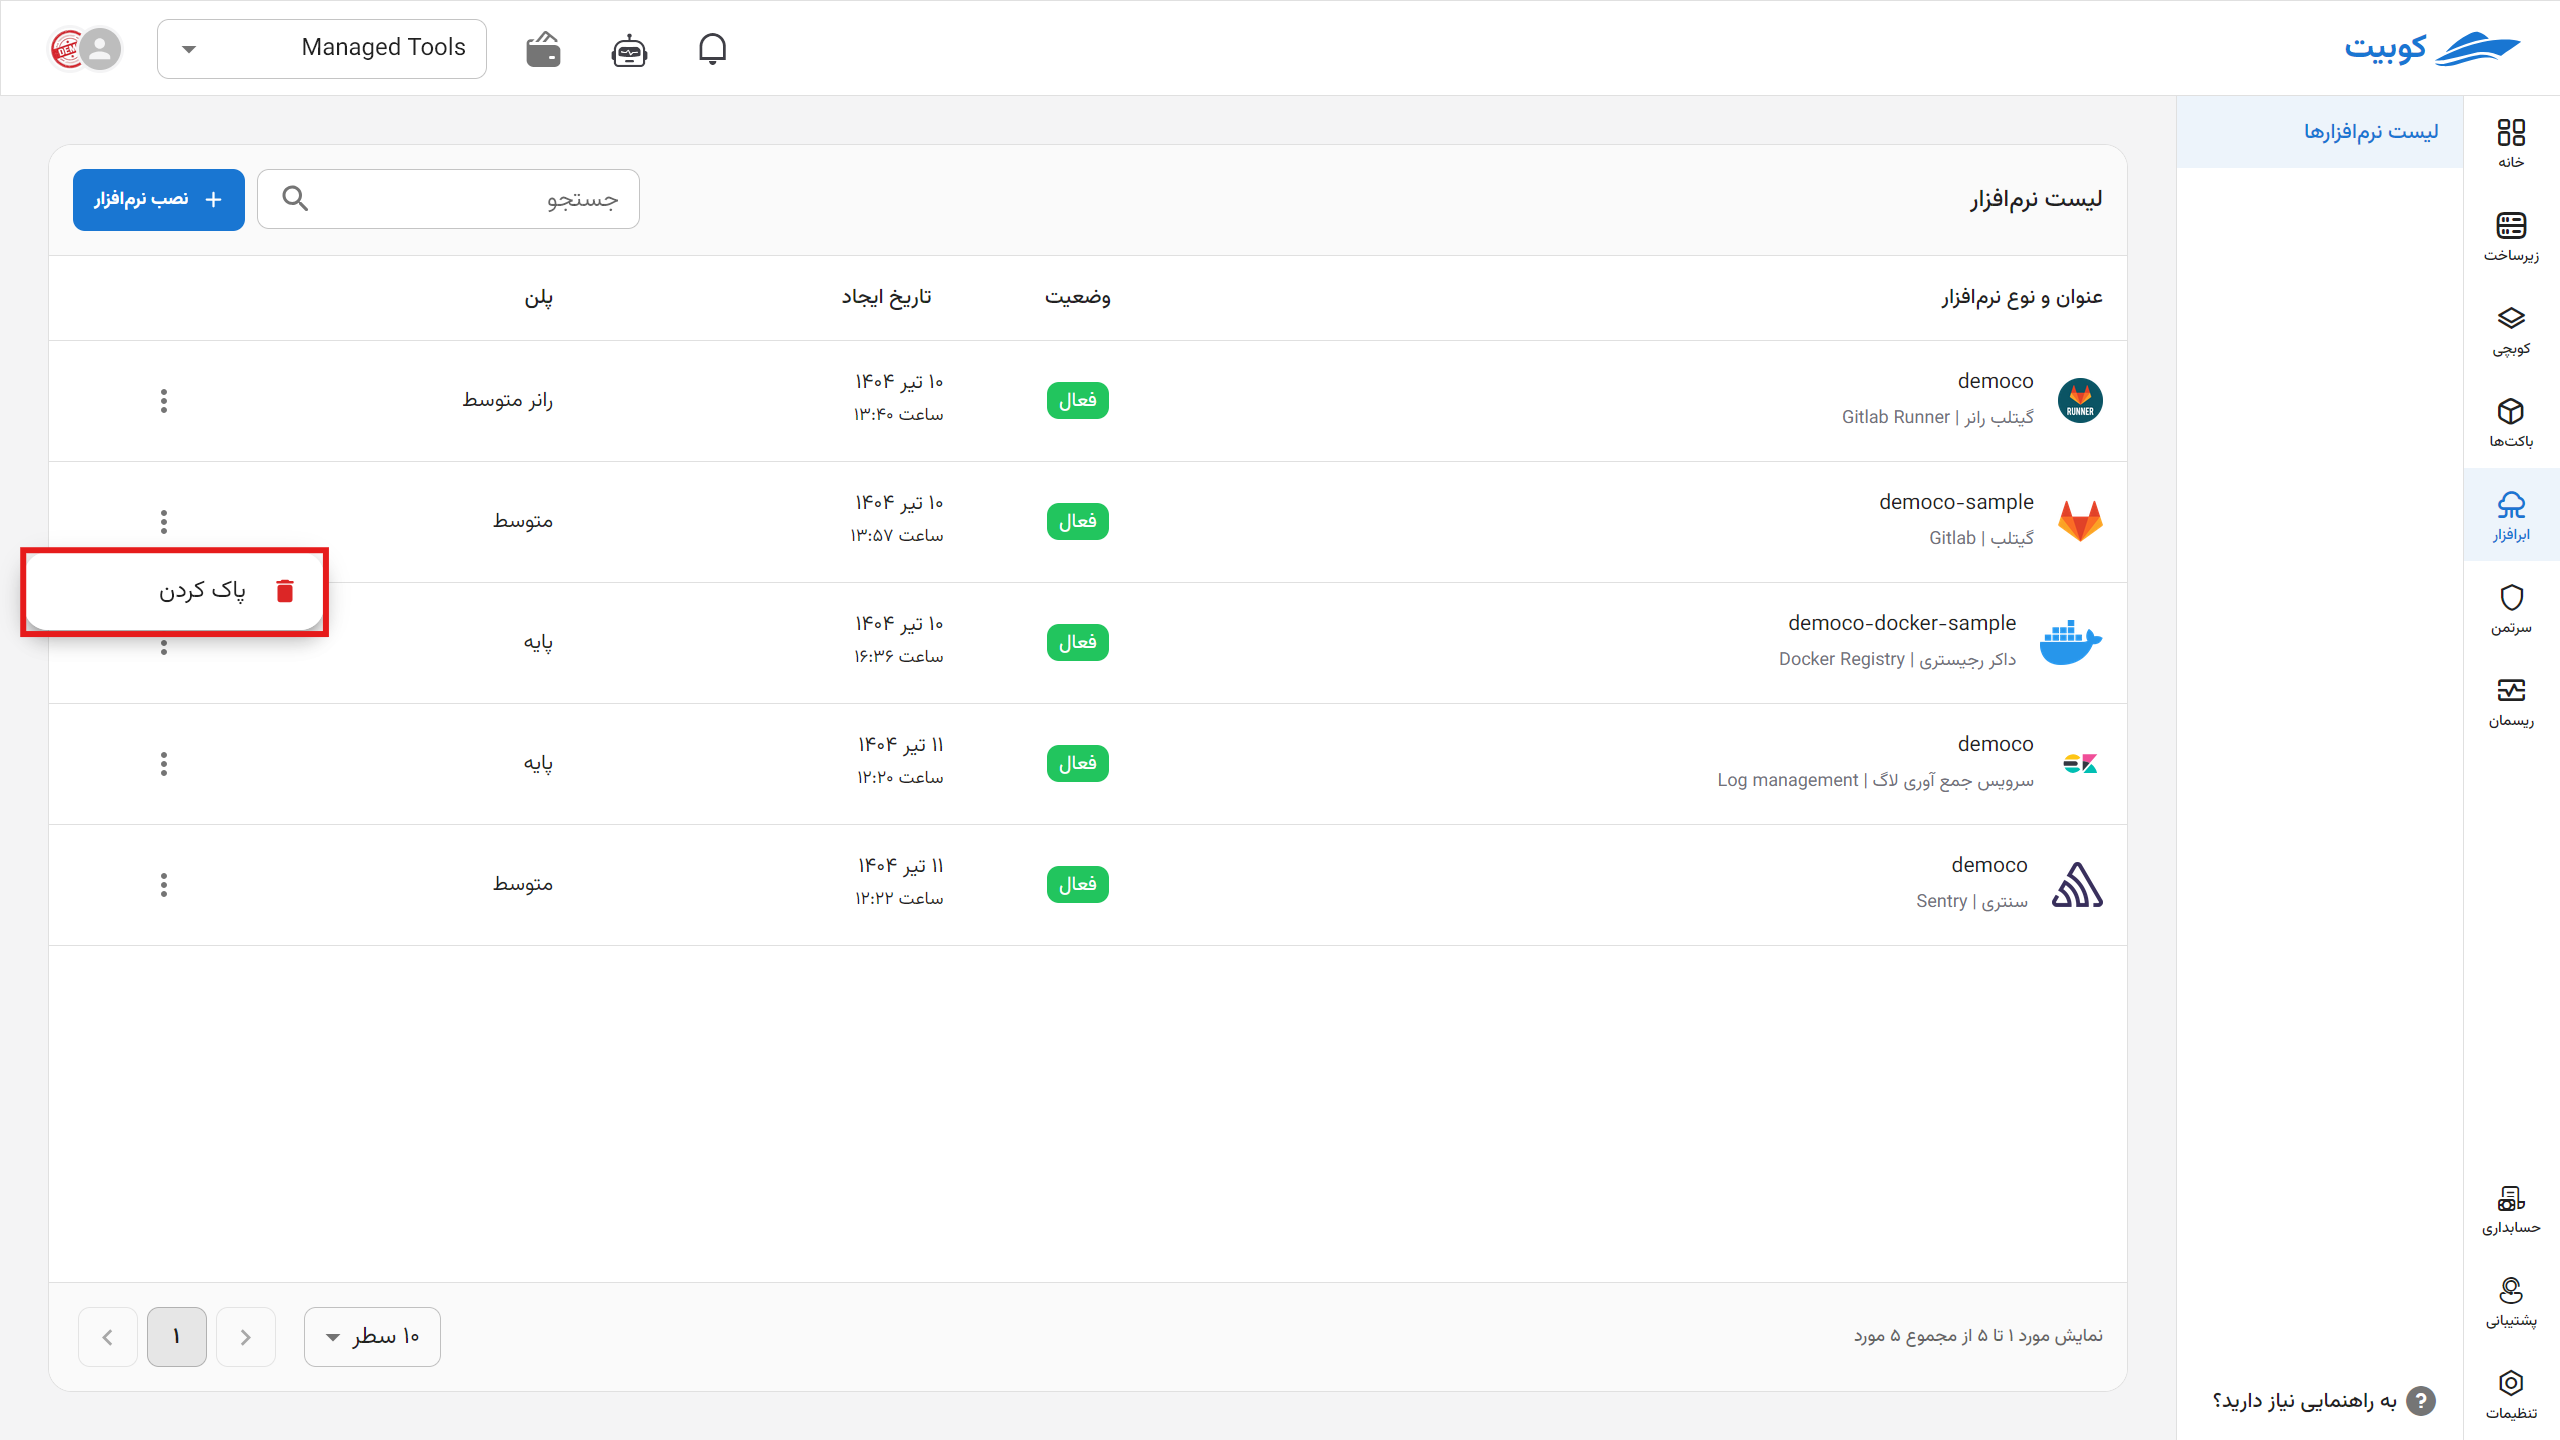
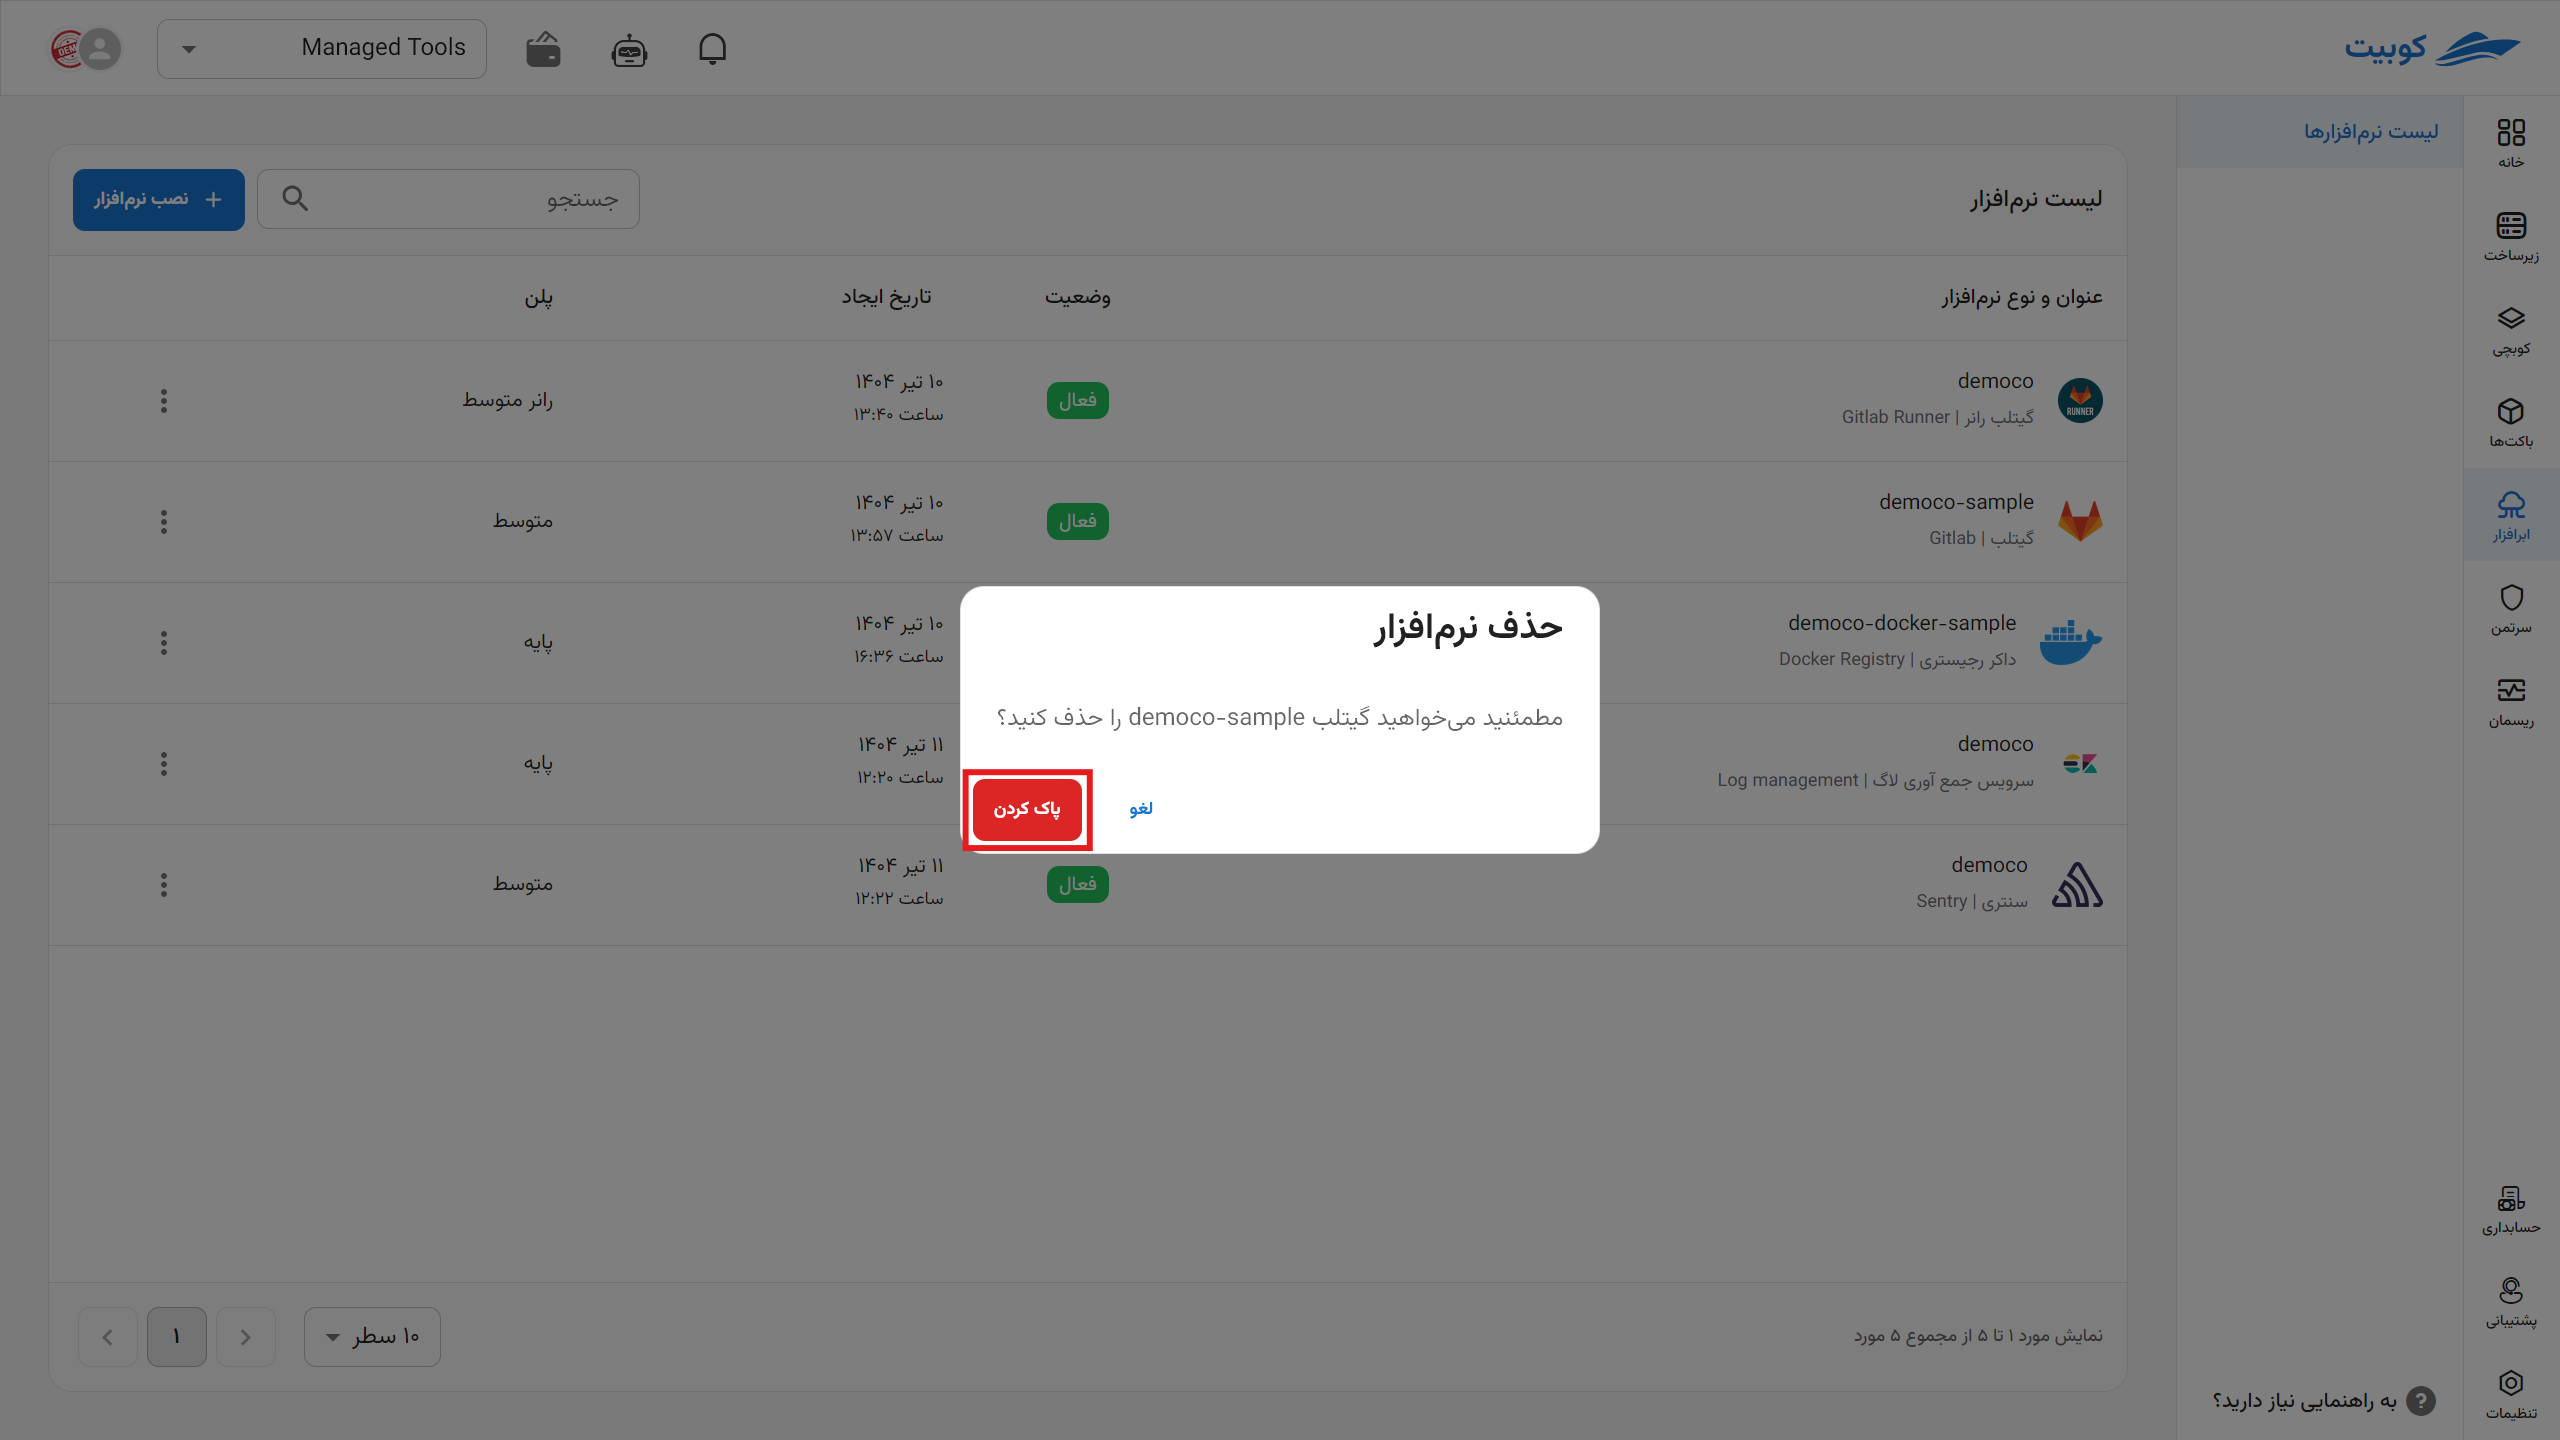
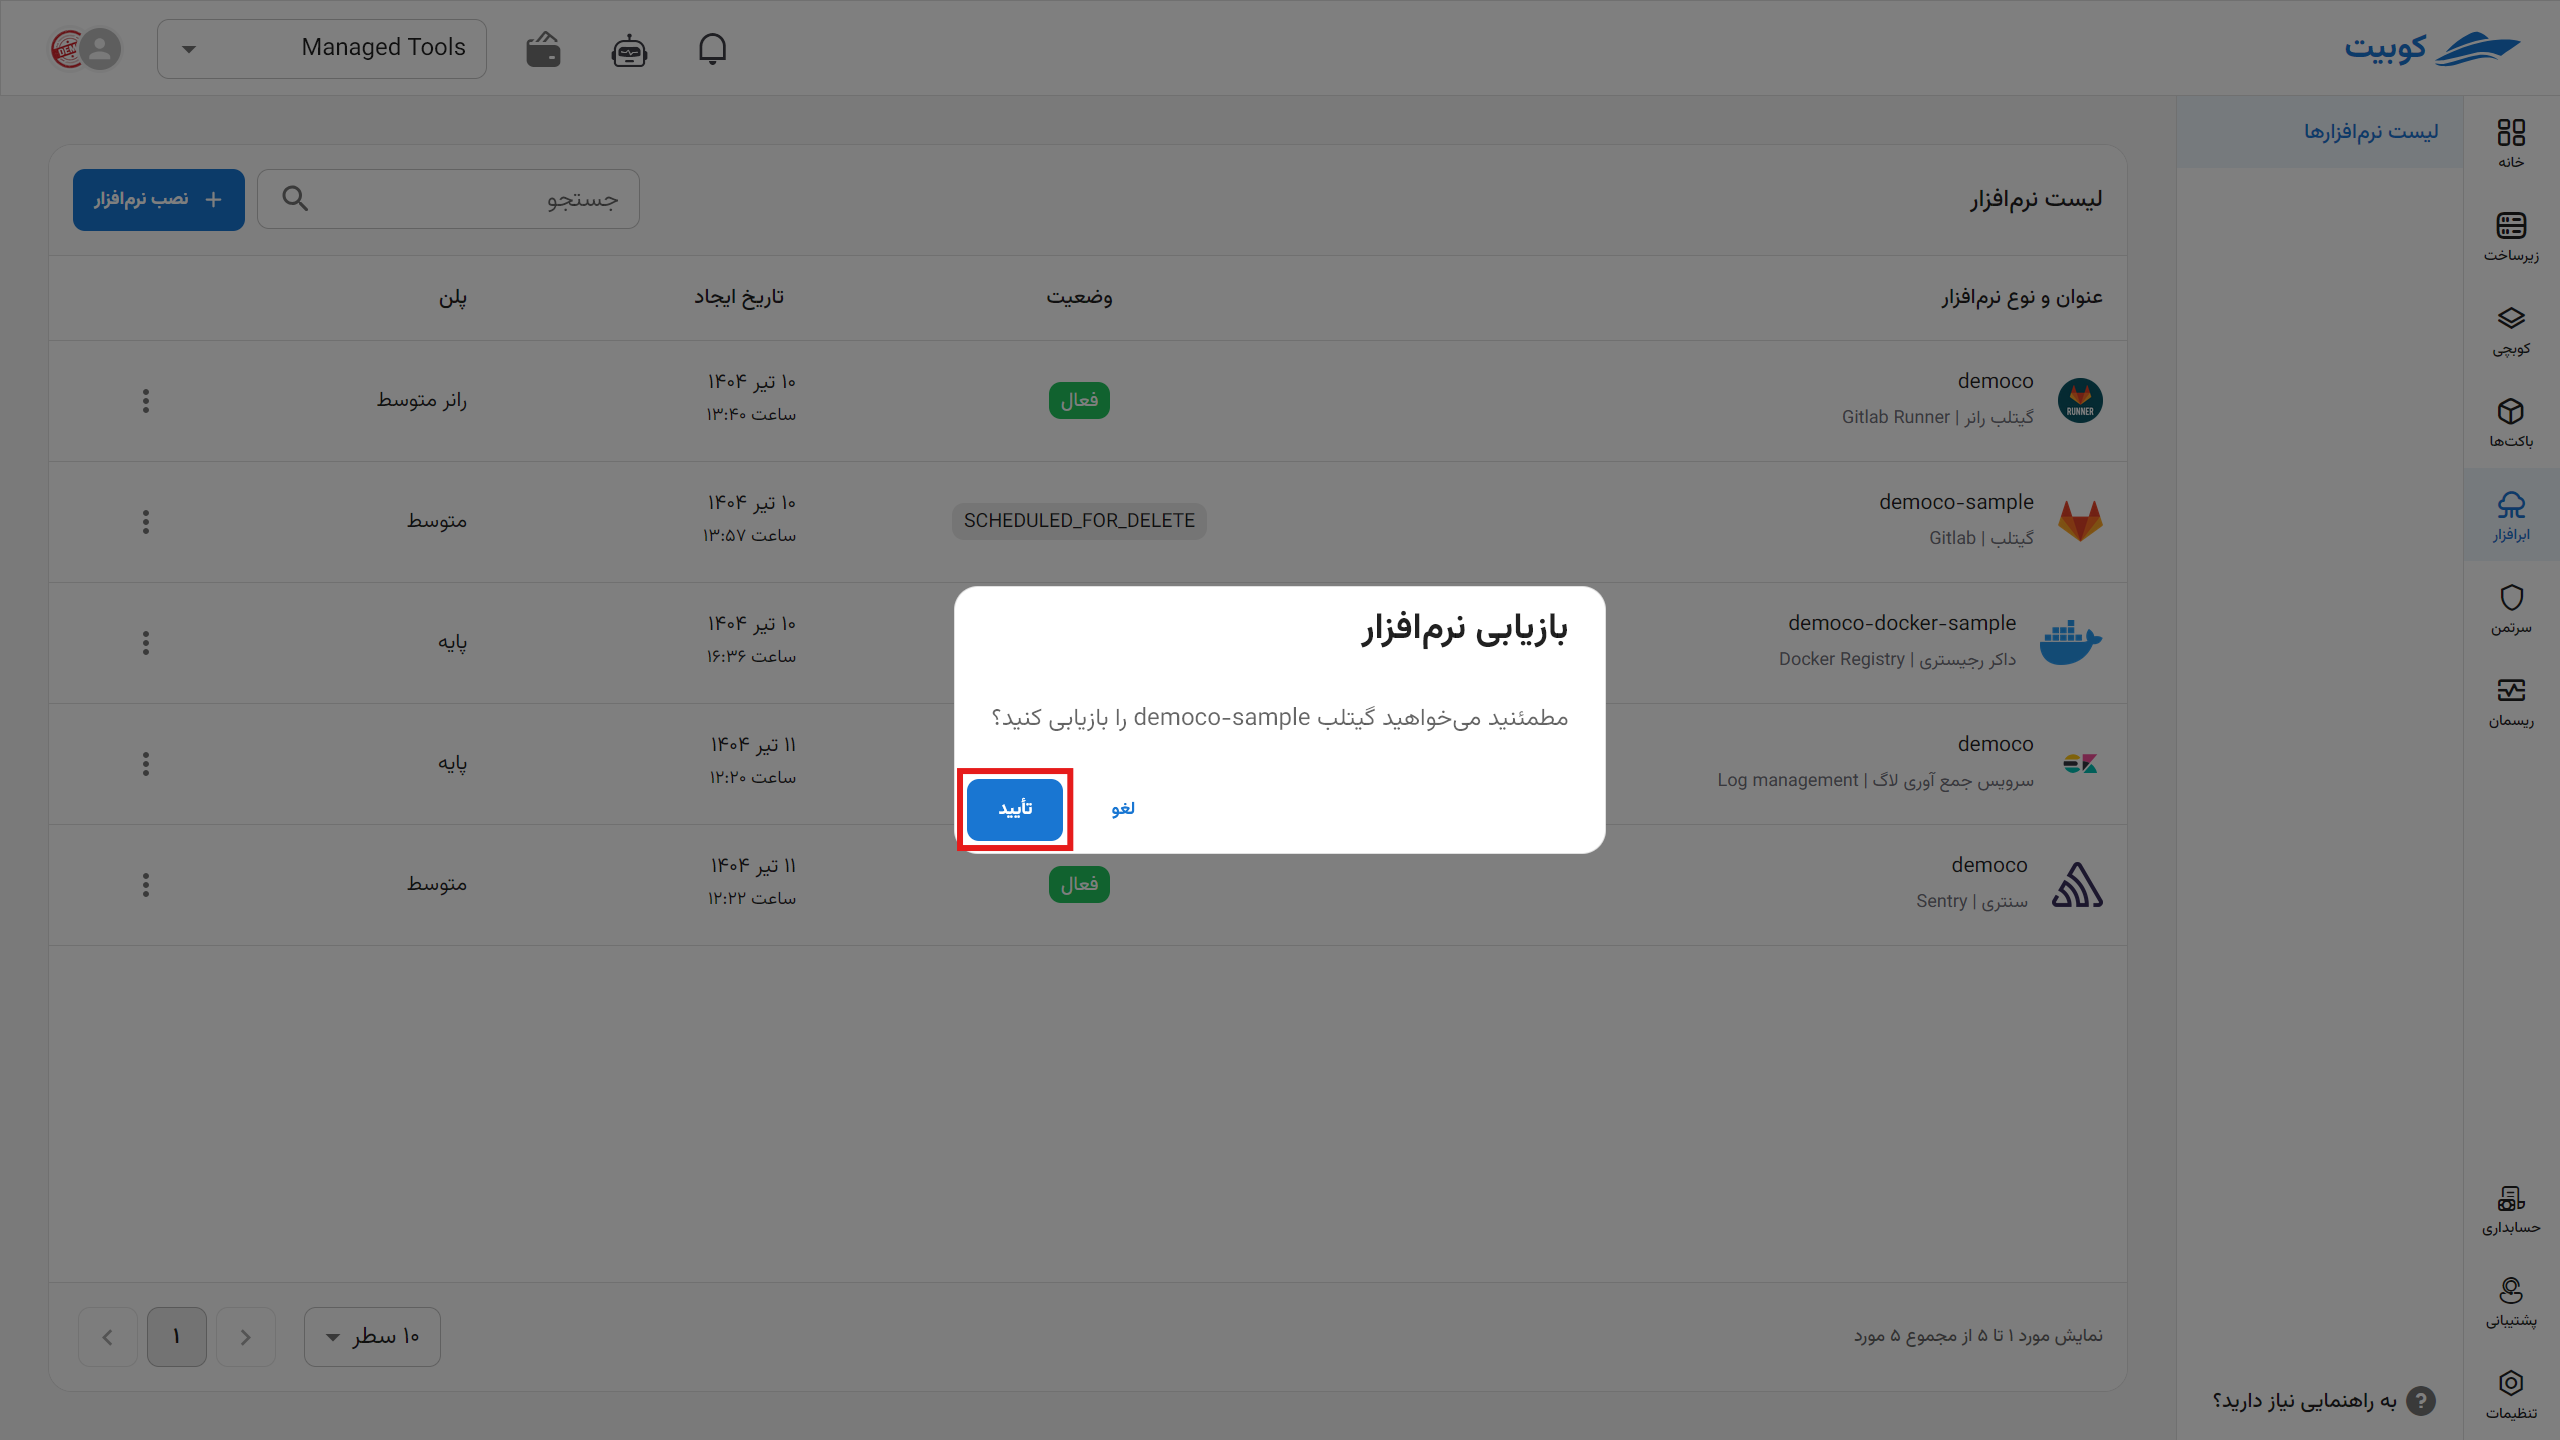
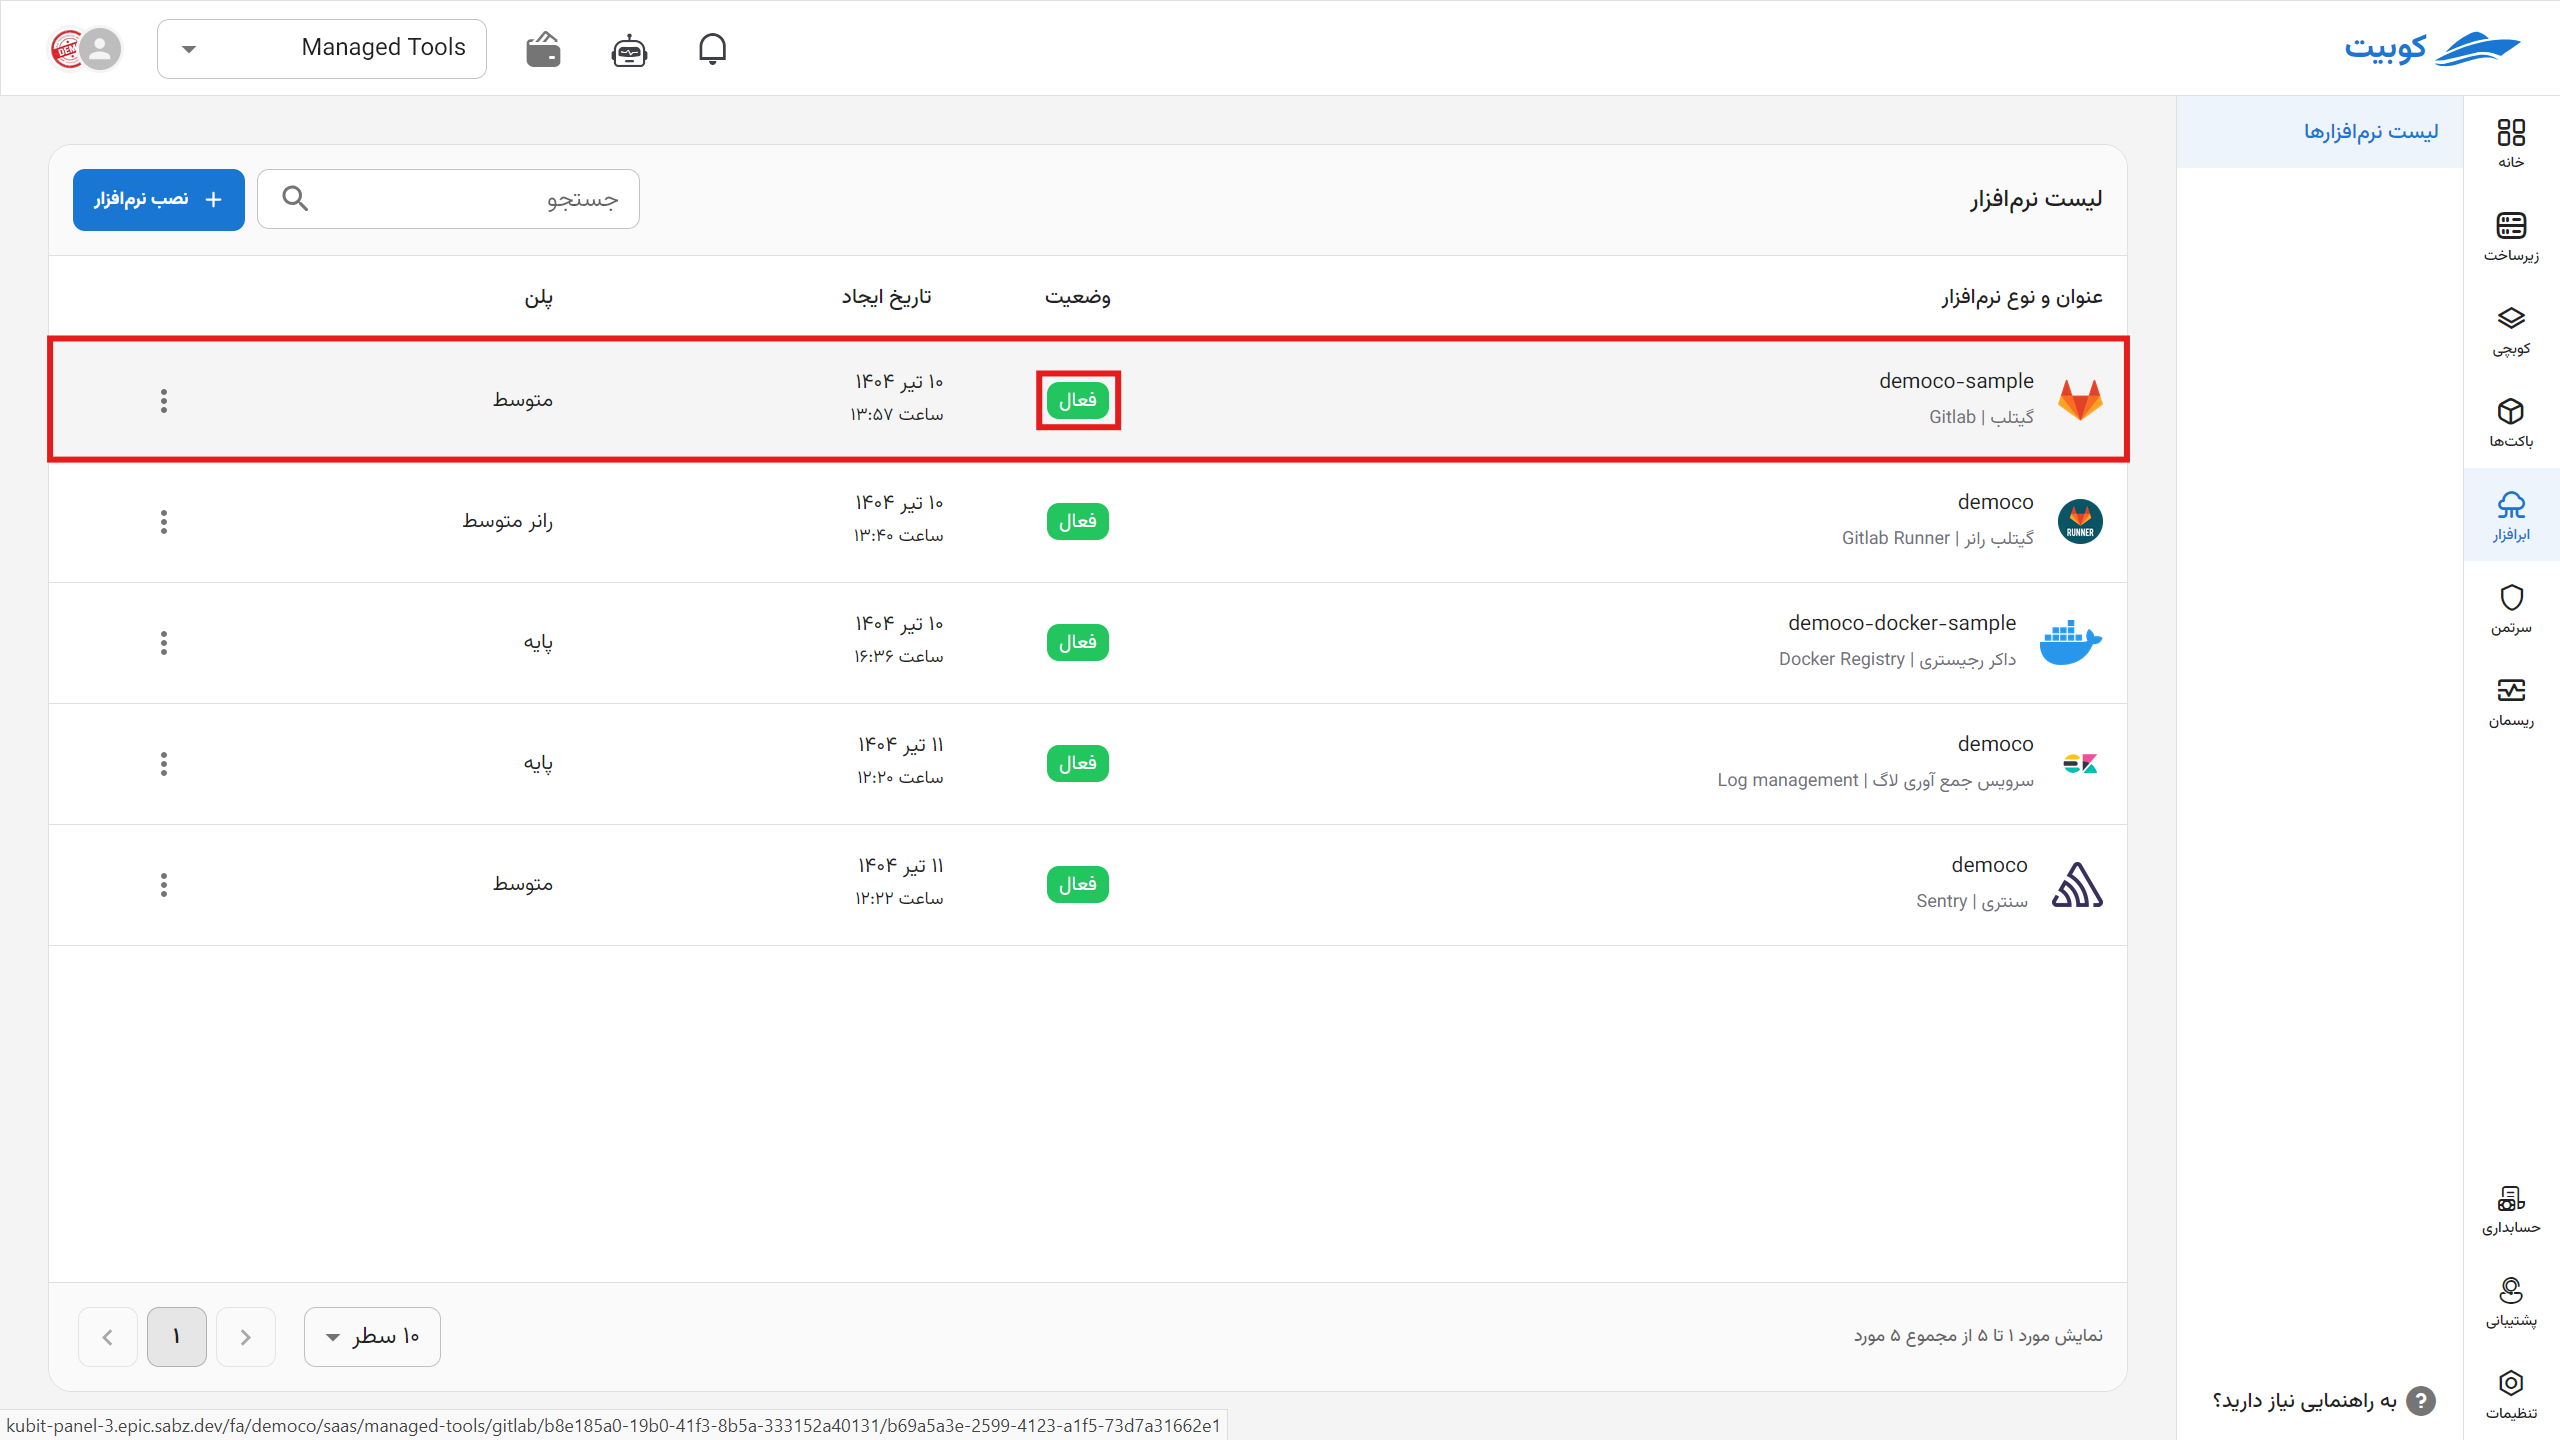
*After deletion, each application is queued for permanent deletion from the server within one to three days, during which you can take action to restore it.