

Connect a build and deployment pipeline to Kubchi
The CI/CD section of each Pack creates a dedicated URL and token for your pipeline. After building and publishing an image, the pipeline sends the new tag to this URL. Kubchi updates DOCKER_TAG in the Pack, validates the configuration, and makes the result available to the Pack operator.
Kubchi does not receive your application code or build its image. GitHub Actions or GitLab CI/CD builds and pushes the image; Kubchi only updates an allowed Pack tag or variable.
How it works
- A commit starts the application repository pipeline.
- The pipeline builds an image and pushes it to the registry with a unique tag.
- The deployment job sends that tag to Kubchi in a
POSTrequest authenticated with the Pack token. - Kubchi updates the Pack variable, validates the manifest, and, when GitOps is connected, also commits the change to Git.
- The Pack operator reconciles the Helm release with the new configuration. How pods are replaced depends on the chart and workload settings.
Prerequisites
- An installed Pack whose image tag reads from a variable such as
DOCKER_TAG. - An application repository on GitHub or GitLab, with an active Runner for the pipeline.
- A target registry and the credentials required to push an image.
- Permission to view the Pack's
CI/CDpage and create its credentials. If the options are unavailable, ask an organization administrator to check your project role.
The CI/CD token can change allowed variables for that Pack. Treat it as a password: do not place it in repository files, pipeline output, tickets, or screenshots.
Prepare the image tag variable
By default, the webhook only accepts variables whose names start with DOCKER_TAG. Defining the variable alone does not change an image; a chart value must also use it. The exact values structure depends on the chart, but the relationship looks like this:
spec:
  vars:
    DOCKER_TAG: main-initial
  values:
    image:
      tag: '{{ vars.DOCKER_TAG }}'
On the Pack Configuration page, check both the variable declaration and where it is used. If the chart provides a form, the same value may appear there under a label such as image tag. See the Pack variables reference for details about vars and templates.
Open the Pack CI/CD guide
Open the Pack and select CI/CD from its sidebar. You can also open the guide from the CI/CD card on the Pack overview page.
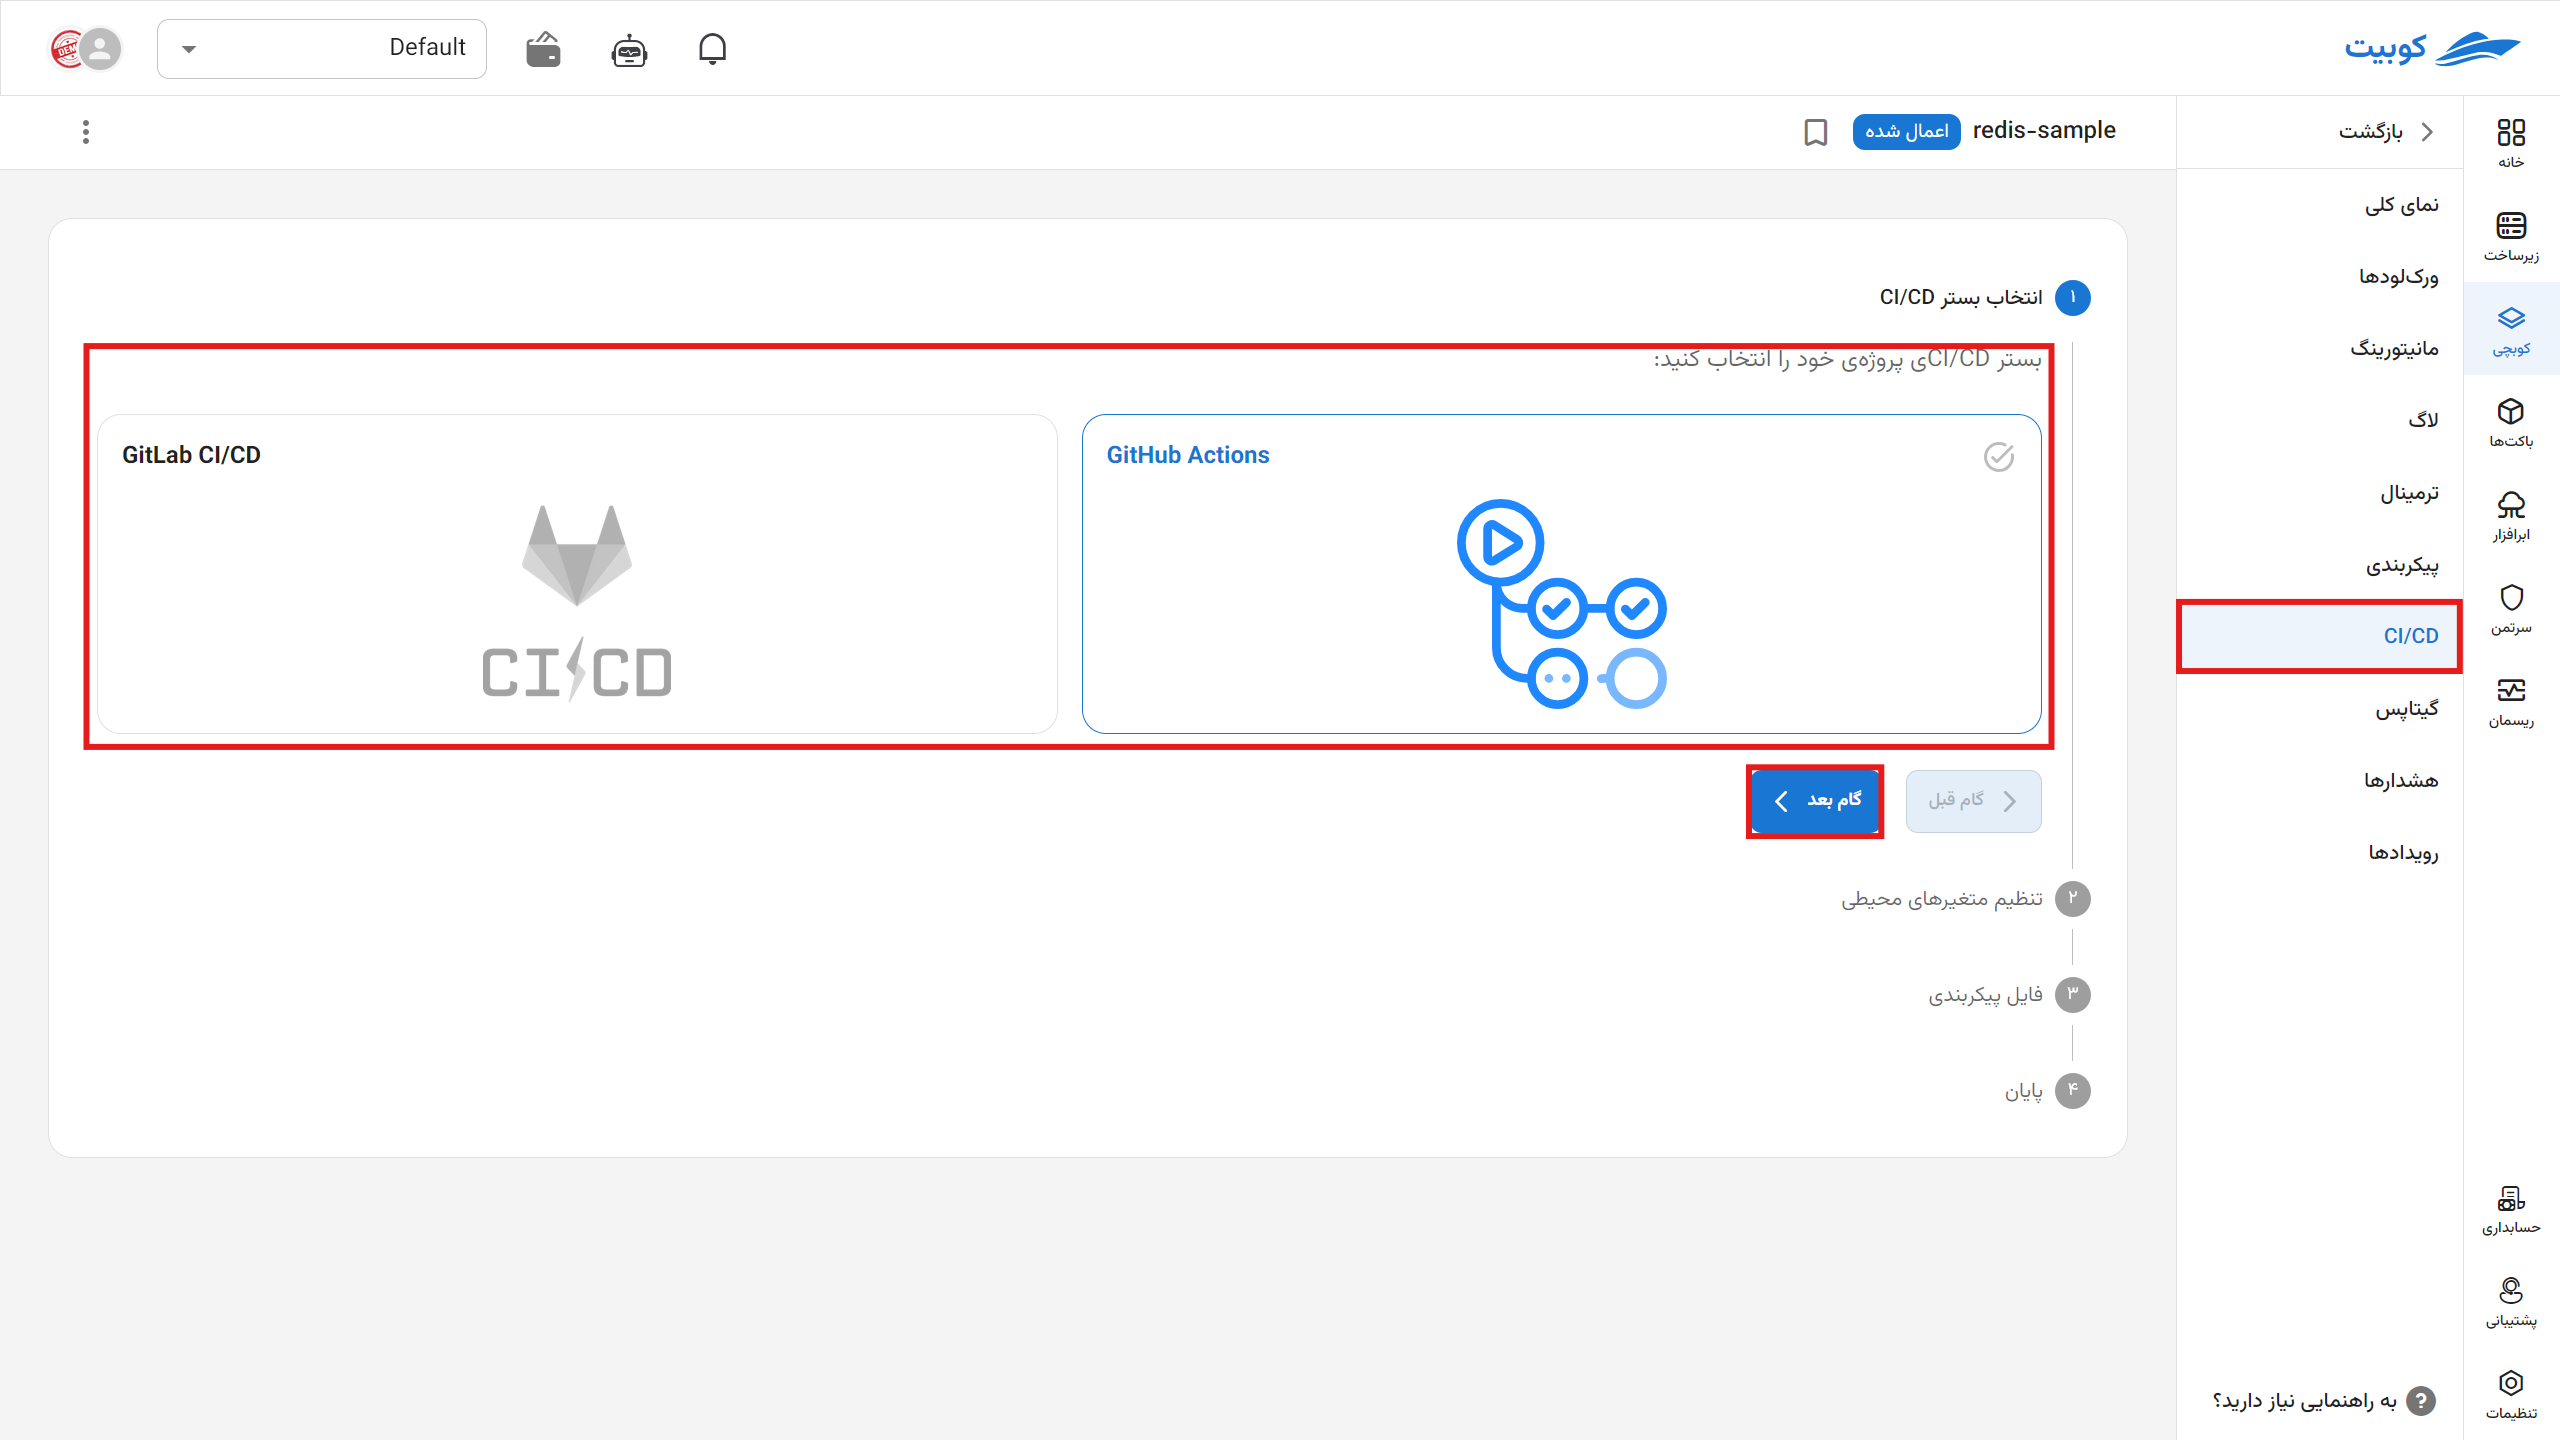
At Choosing CI/CD Platform, select GitHub Actions or GitLab CI/CD. When you select Next step, Kubchi creates dedicated credentials if the Pack does not already have them.
Configure pipeline variables
The Set Environment Variables step shows five names:
| Name | Purpose | Recommended storage |
|---|---|---|
KUBIT_WEBHOOK_TOKEN | Authenticates requests that change the Pack | Secret, or a masked and protected variable |
KUBIT_WEBHOOK_URL | Pack-specific API endpoint | Protected variable; the current GitHub template expects a Secret |
CI_REGISTRY_URL | Target registry address | Variable or Secret, according to your organization's policy |
CI_REGISTRY_USERNAME | Username used to push the image | Secret or masked variable |
CI_REGISTRY_PASSWORD | Password or token used to push the image | Secret or masked and protected variable |
Use the panel's copy buttons and paste the webhook values directly into the destination repository settings. Do not keep them in an intermediate file or message.
Add Secrets to GitHub Actions
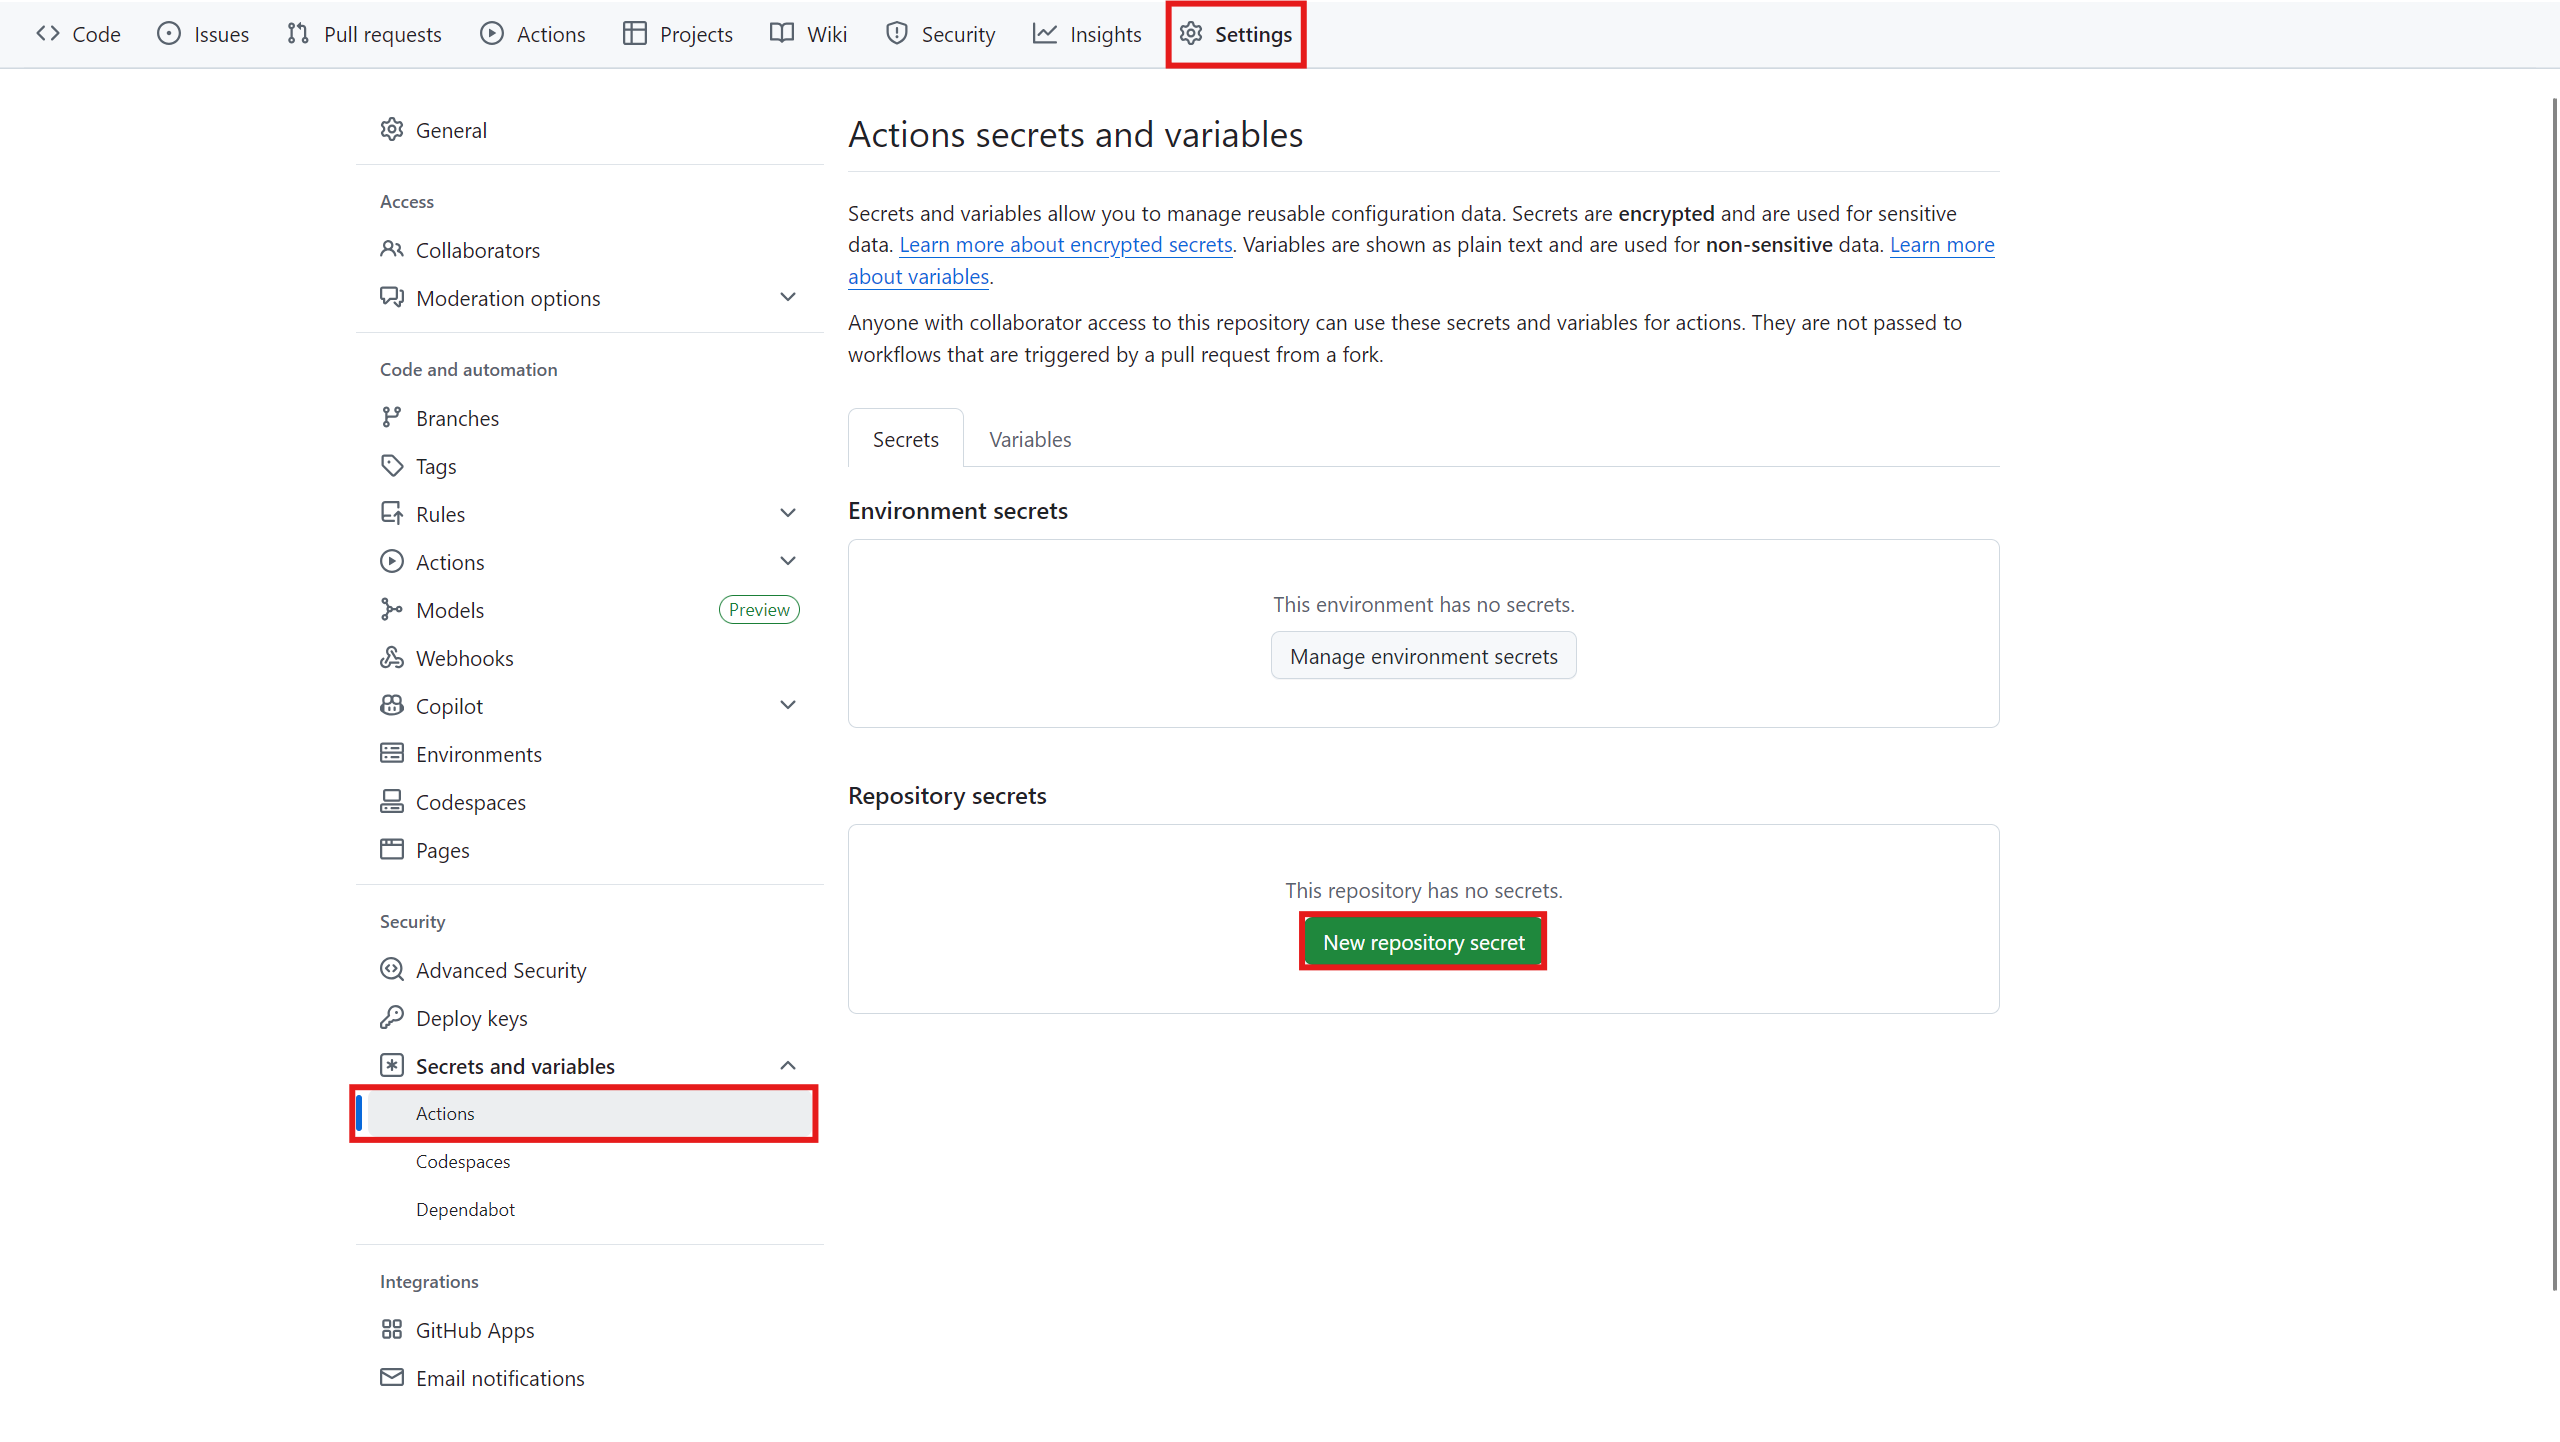
In the GitHub repository, open Settings > Secrets and variables > Actions, then select Secrets. Select New repository secret for each value and enter its name exactly as shown in the table. At minimum, store KUBIT_WEBHOOK_TOKEN and the registry credentials as Secrets.
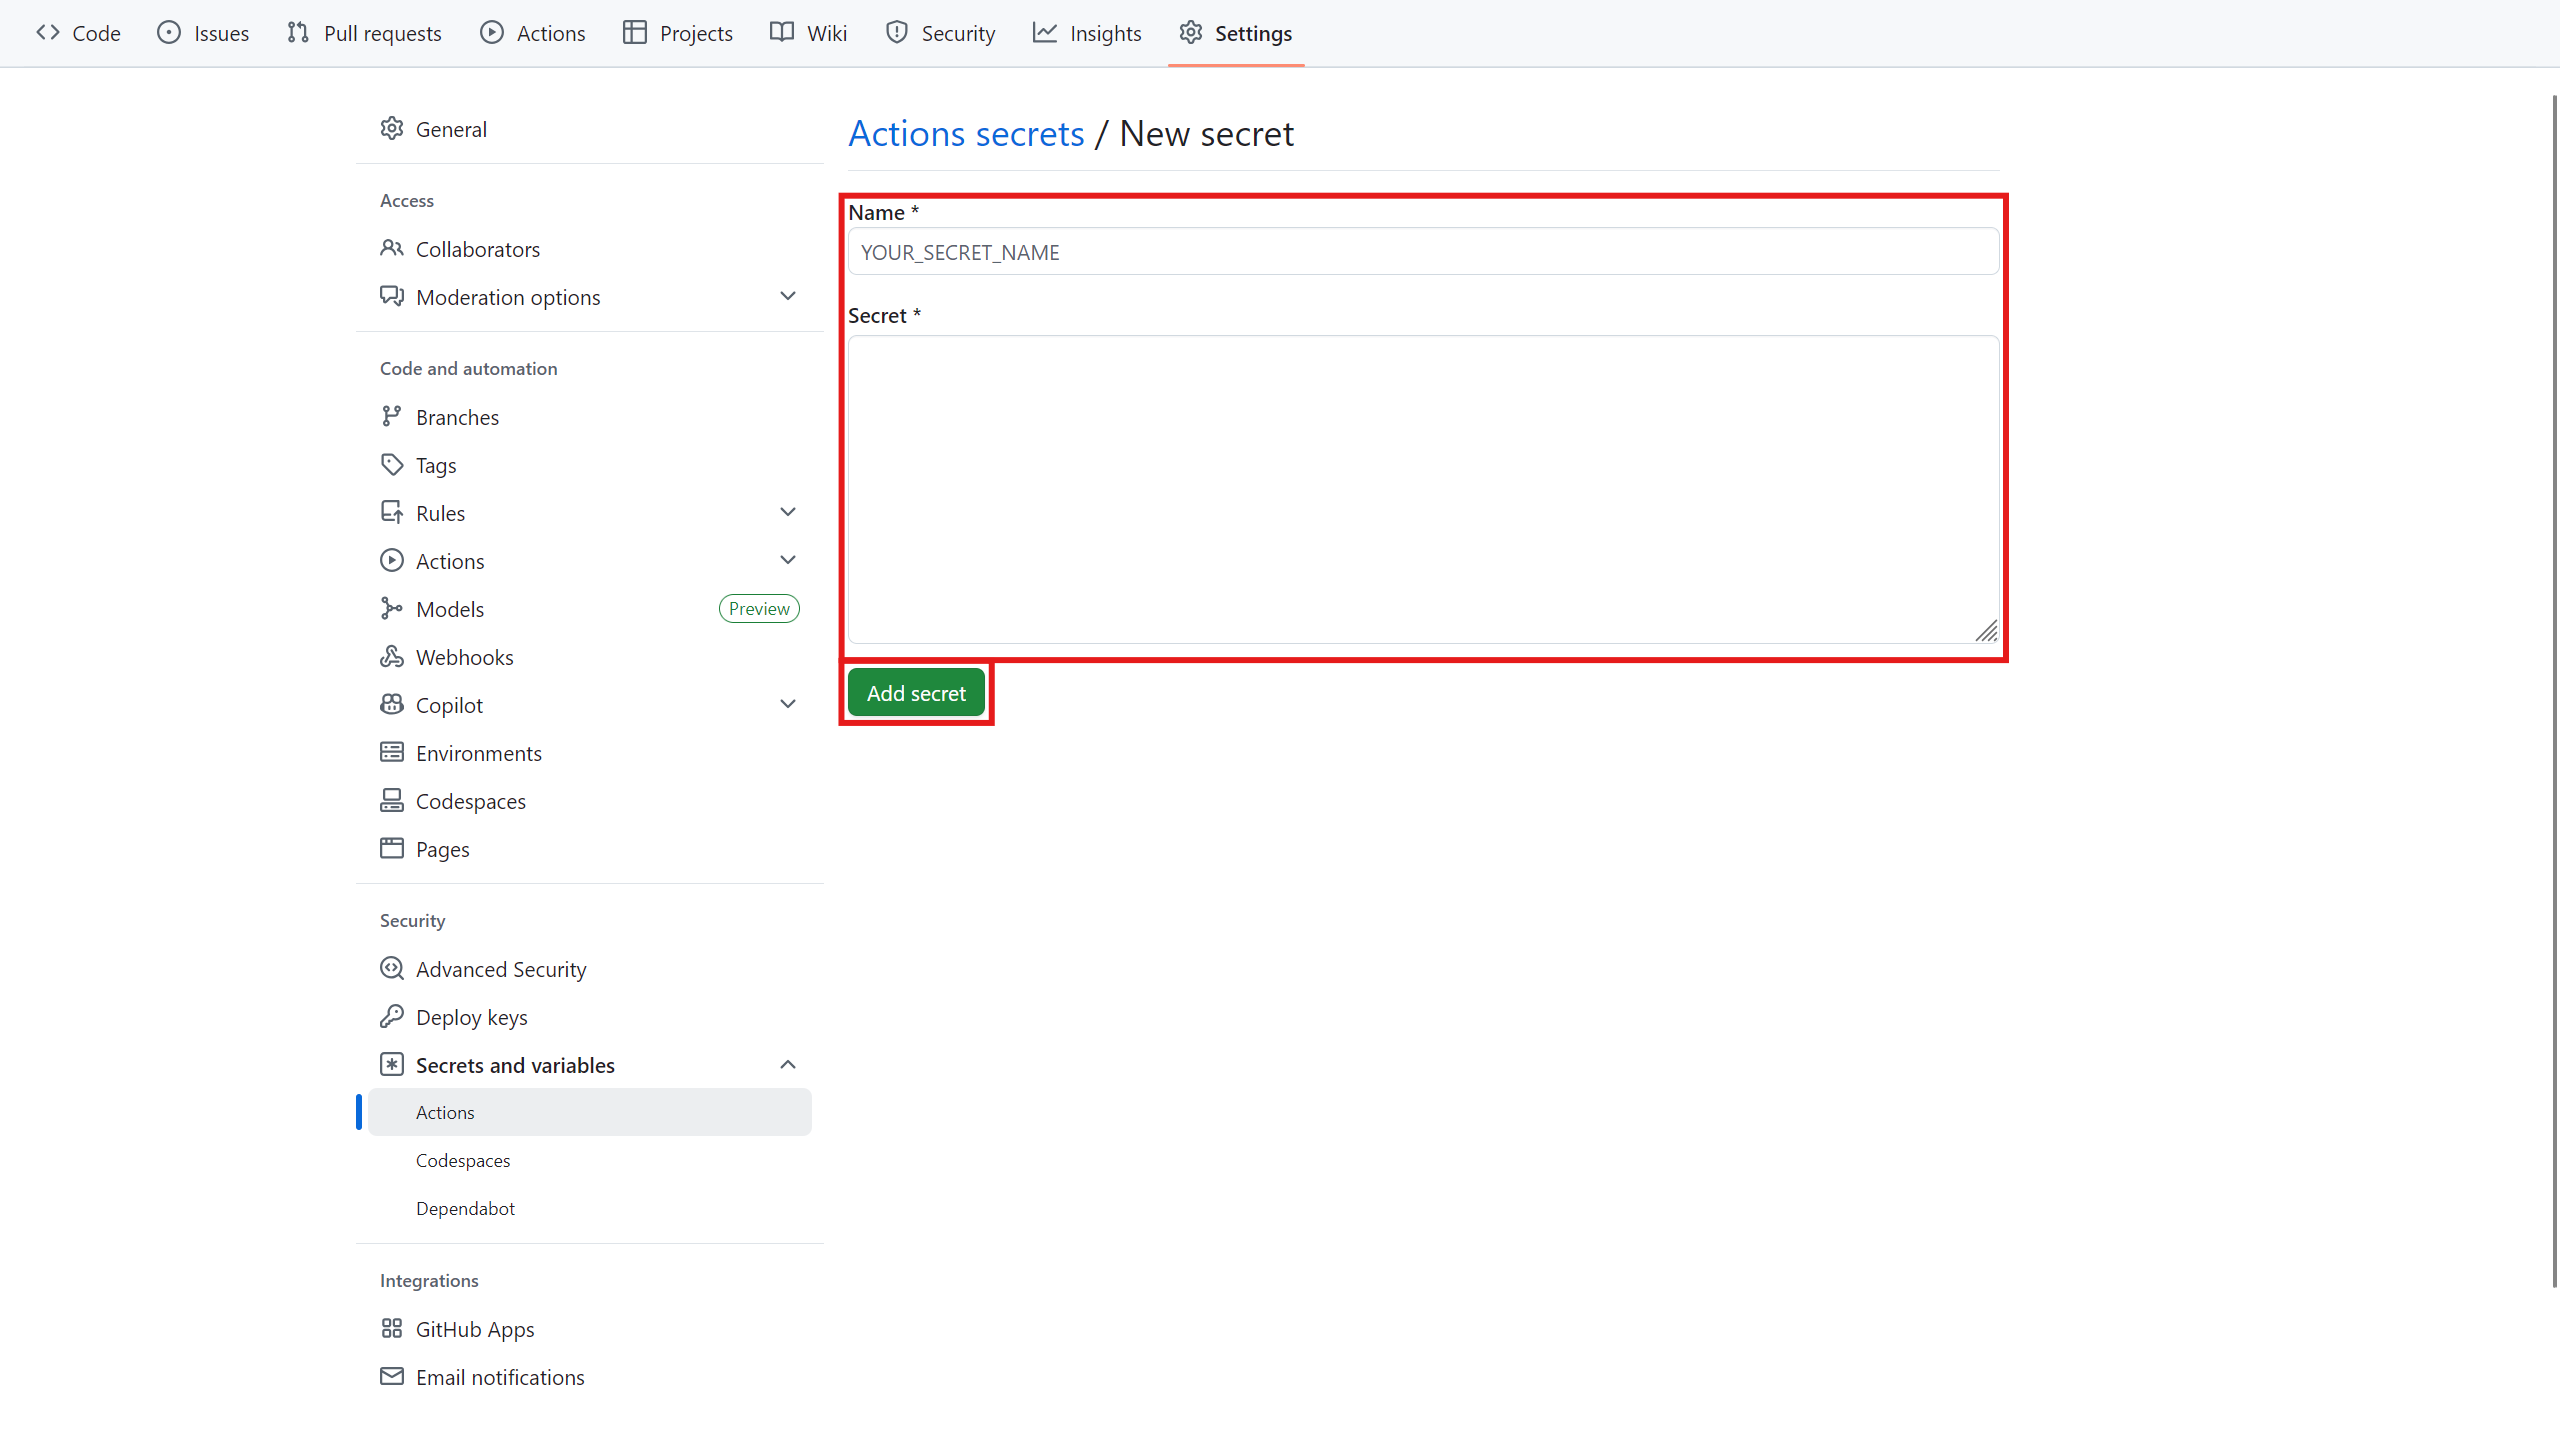
The current GitHub template reads all five values from secrets. If you store the URL or username under Variables, change the corresponding workflow reference from secrets to vars.
Add variables to GitLab CI/CD
In the GitLab project, open Settings > CI/CD, expand Variables, and add the values one at a time. For the webhook token and registry password, select Masked and hidden when your GitLab version supports it. If the pipeline only runs for a protected branch or tag, also enable Protect variable.
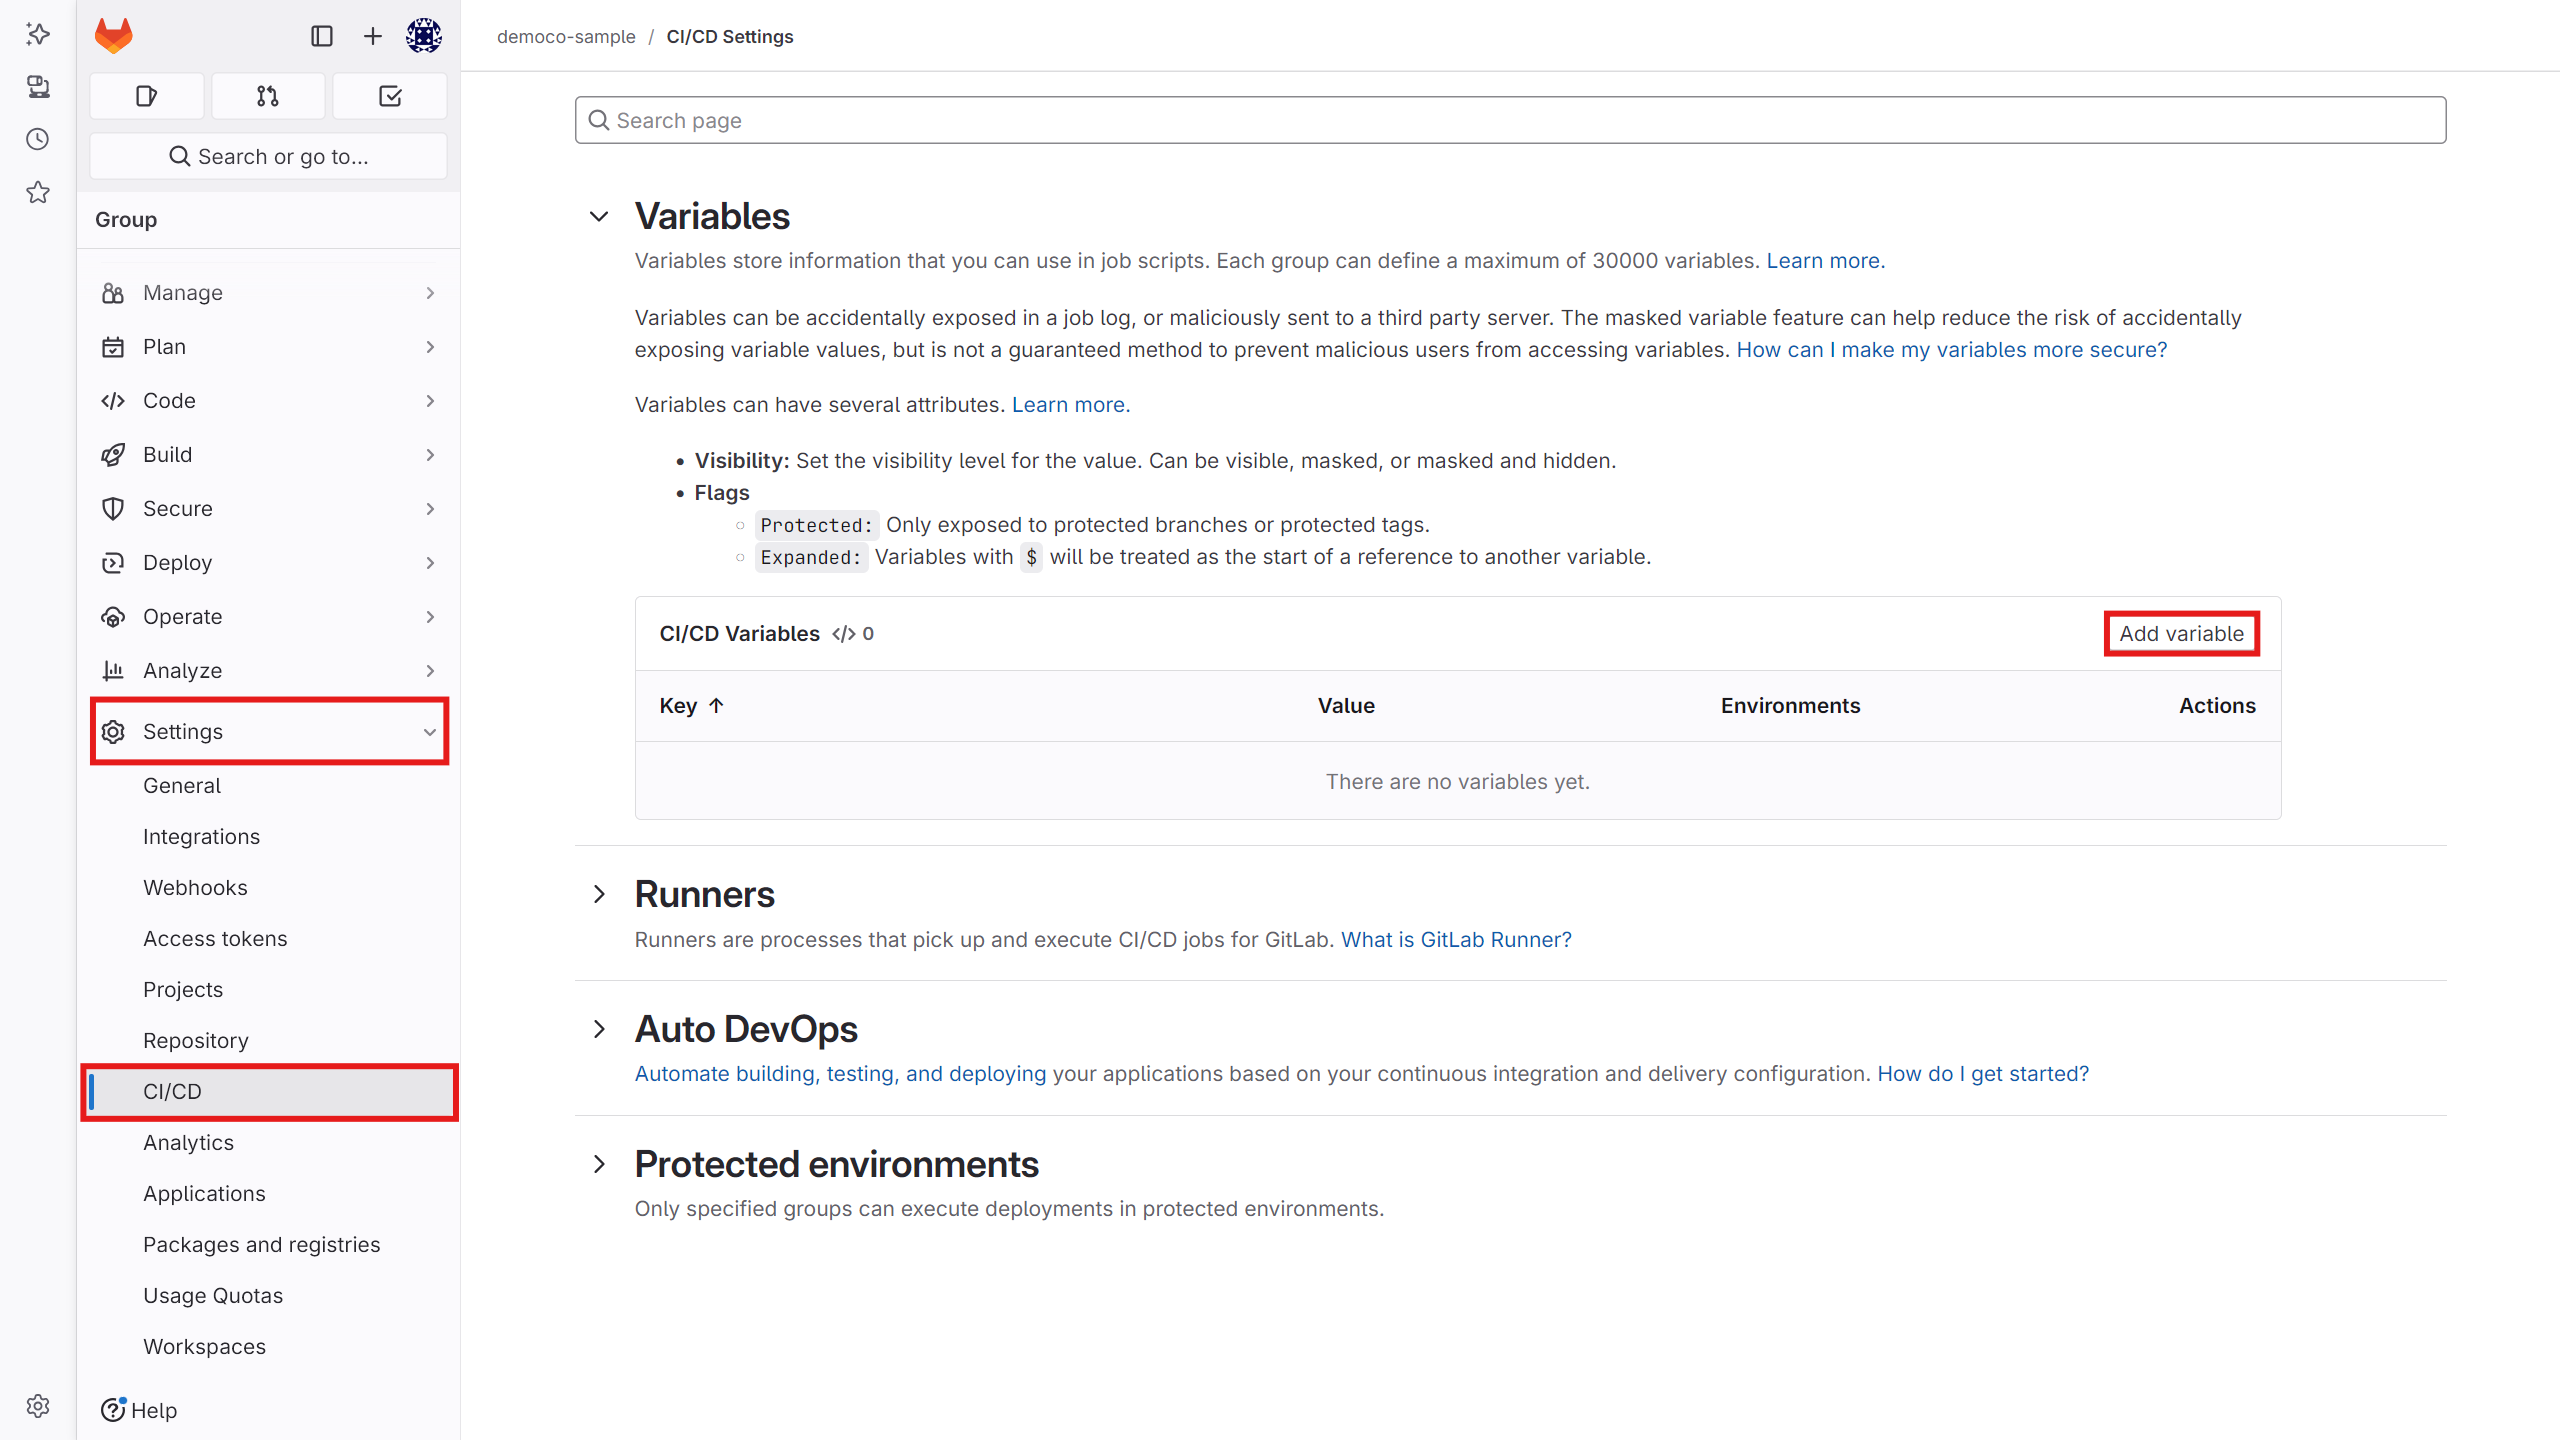
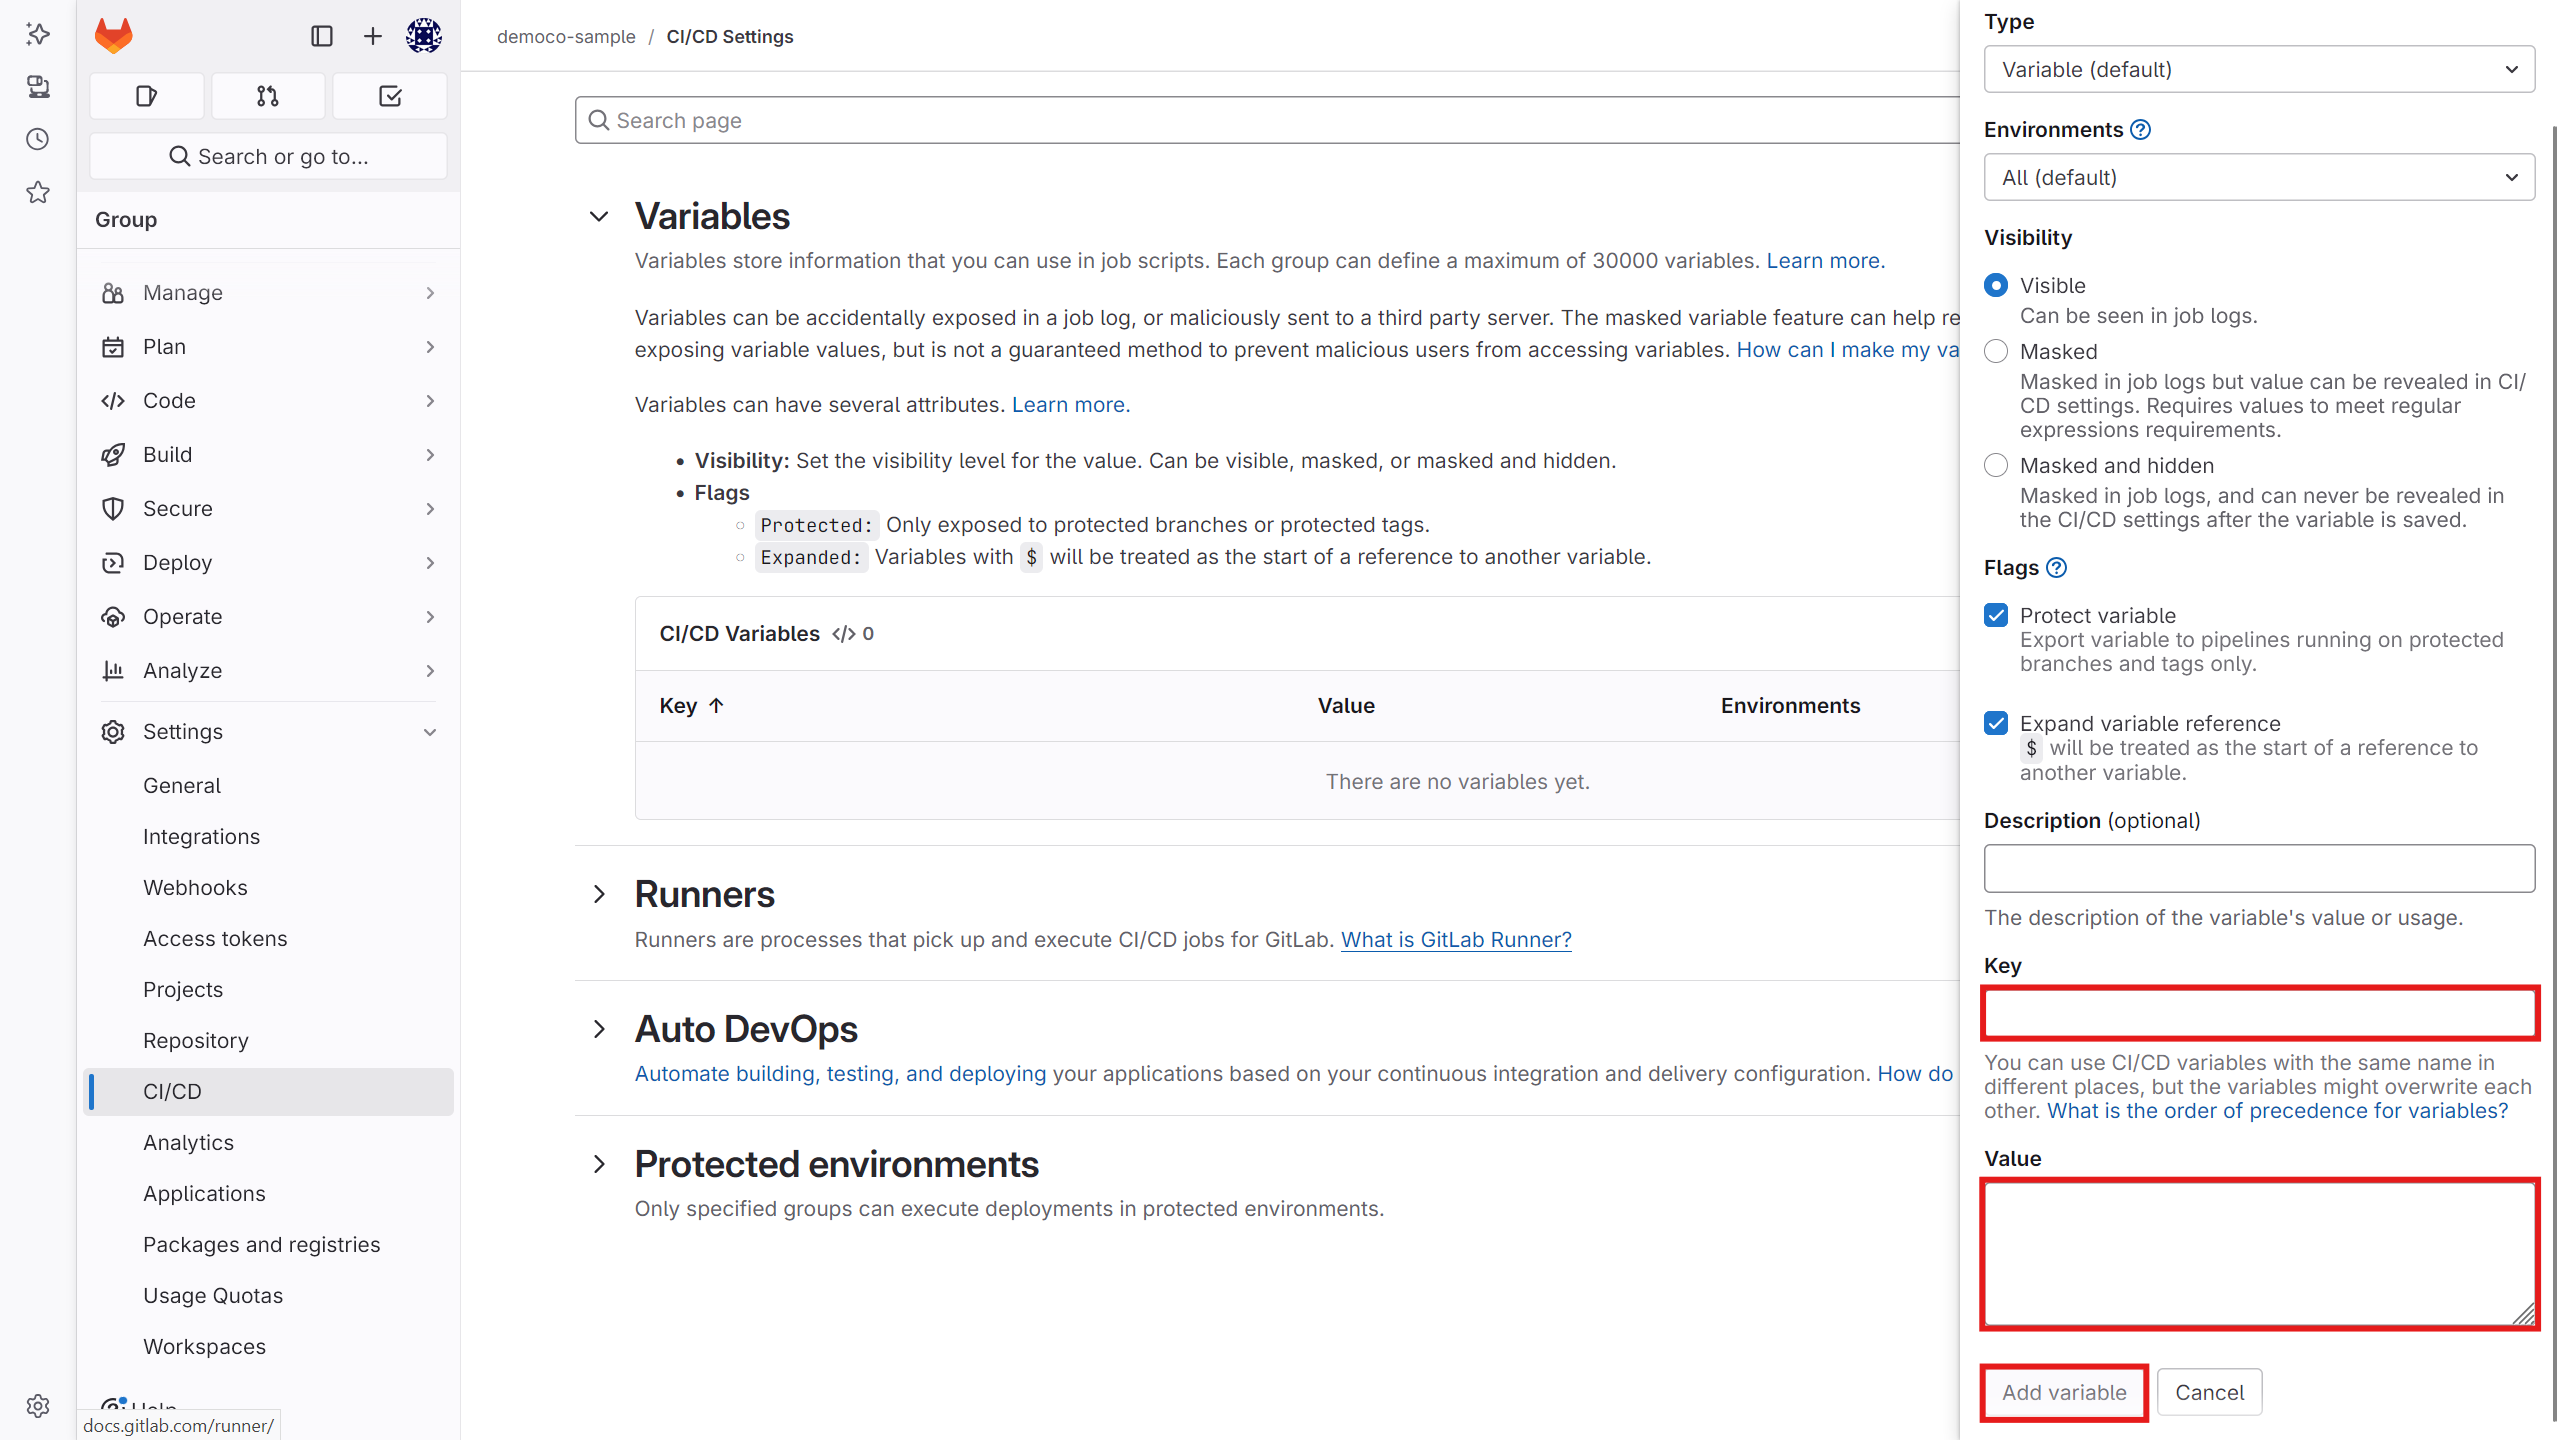
The GitLab template uses IMAGE_ADDRESS for the image path, but Kubchi does not show this value in the variables table. Add it separately according to your registry path, for example team/my-app.
Add the pipeline configuration
At Configuration File, Kubchi displays a general, read-only template. Copy it to the appropriate path in your repository:
- GitHub Actions:
.github/workflows/main.yaml - GitLab CI/CD:
.gitlab-ci.yml
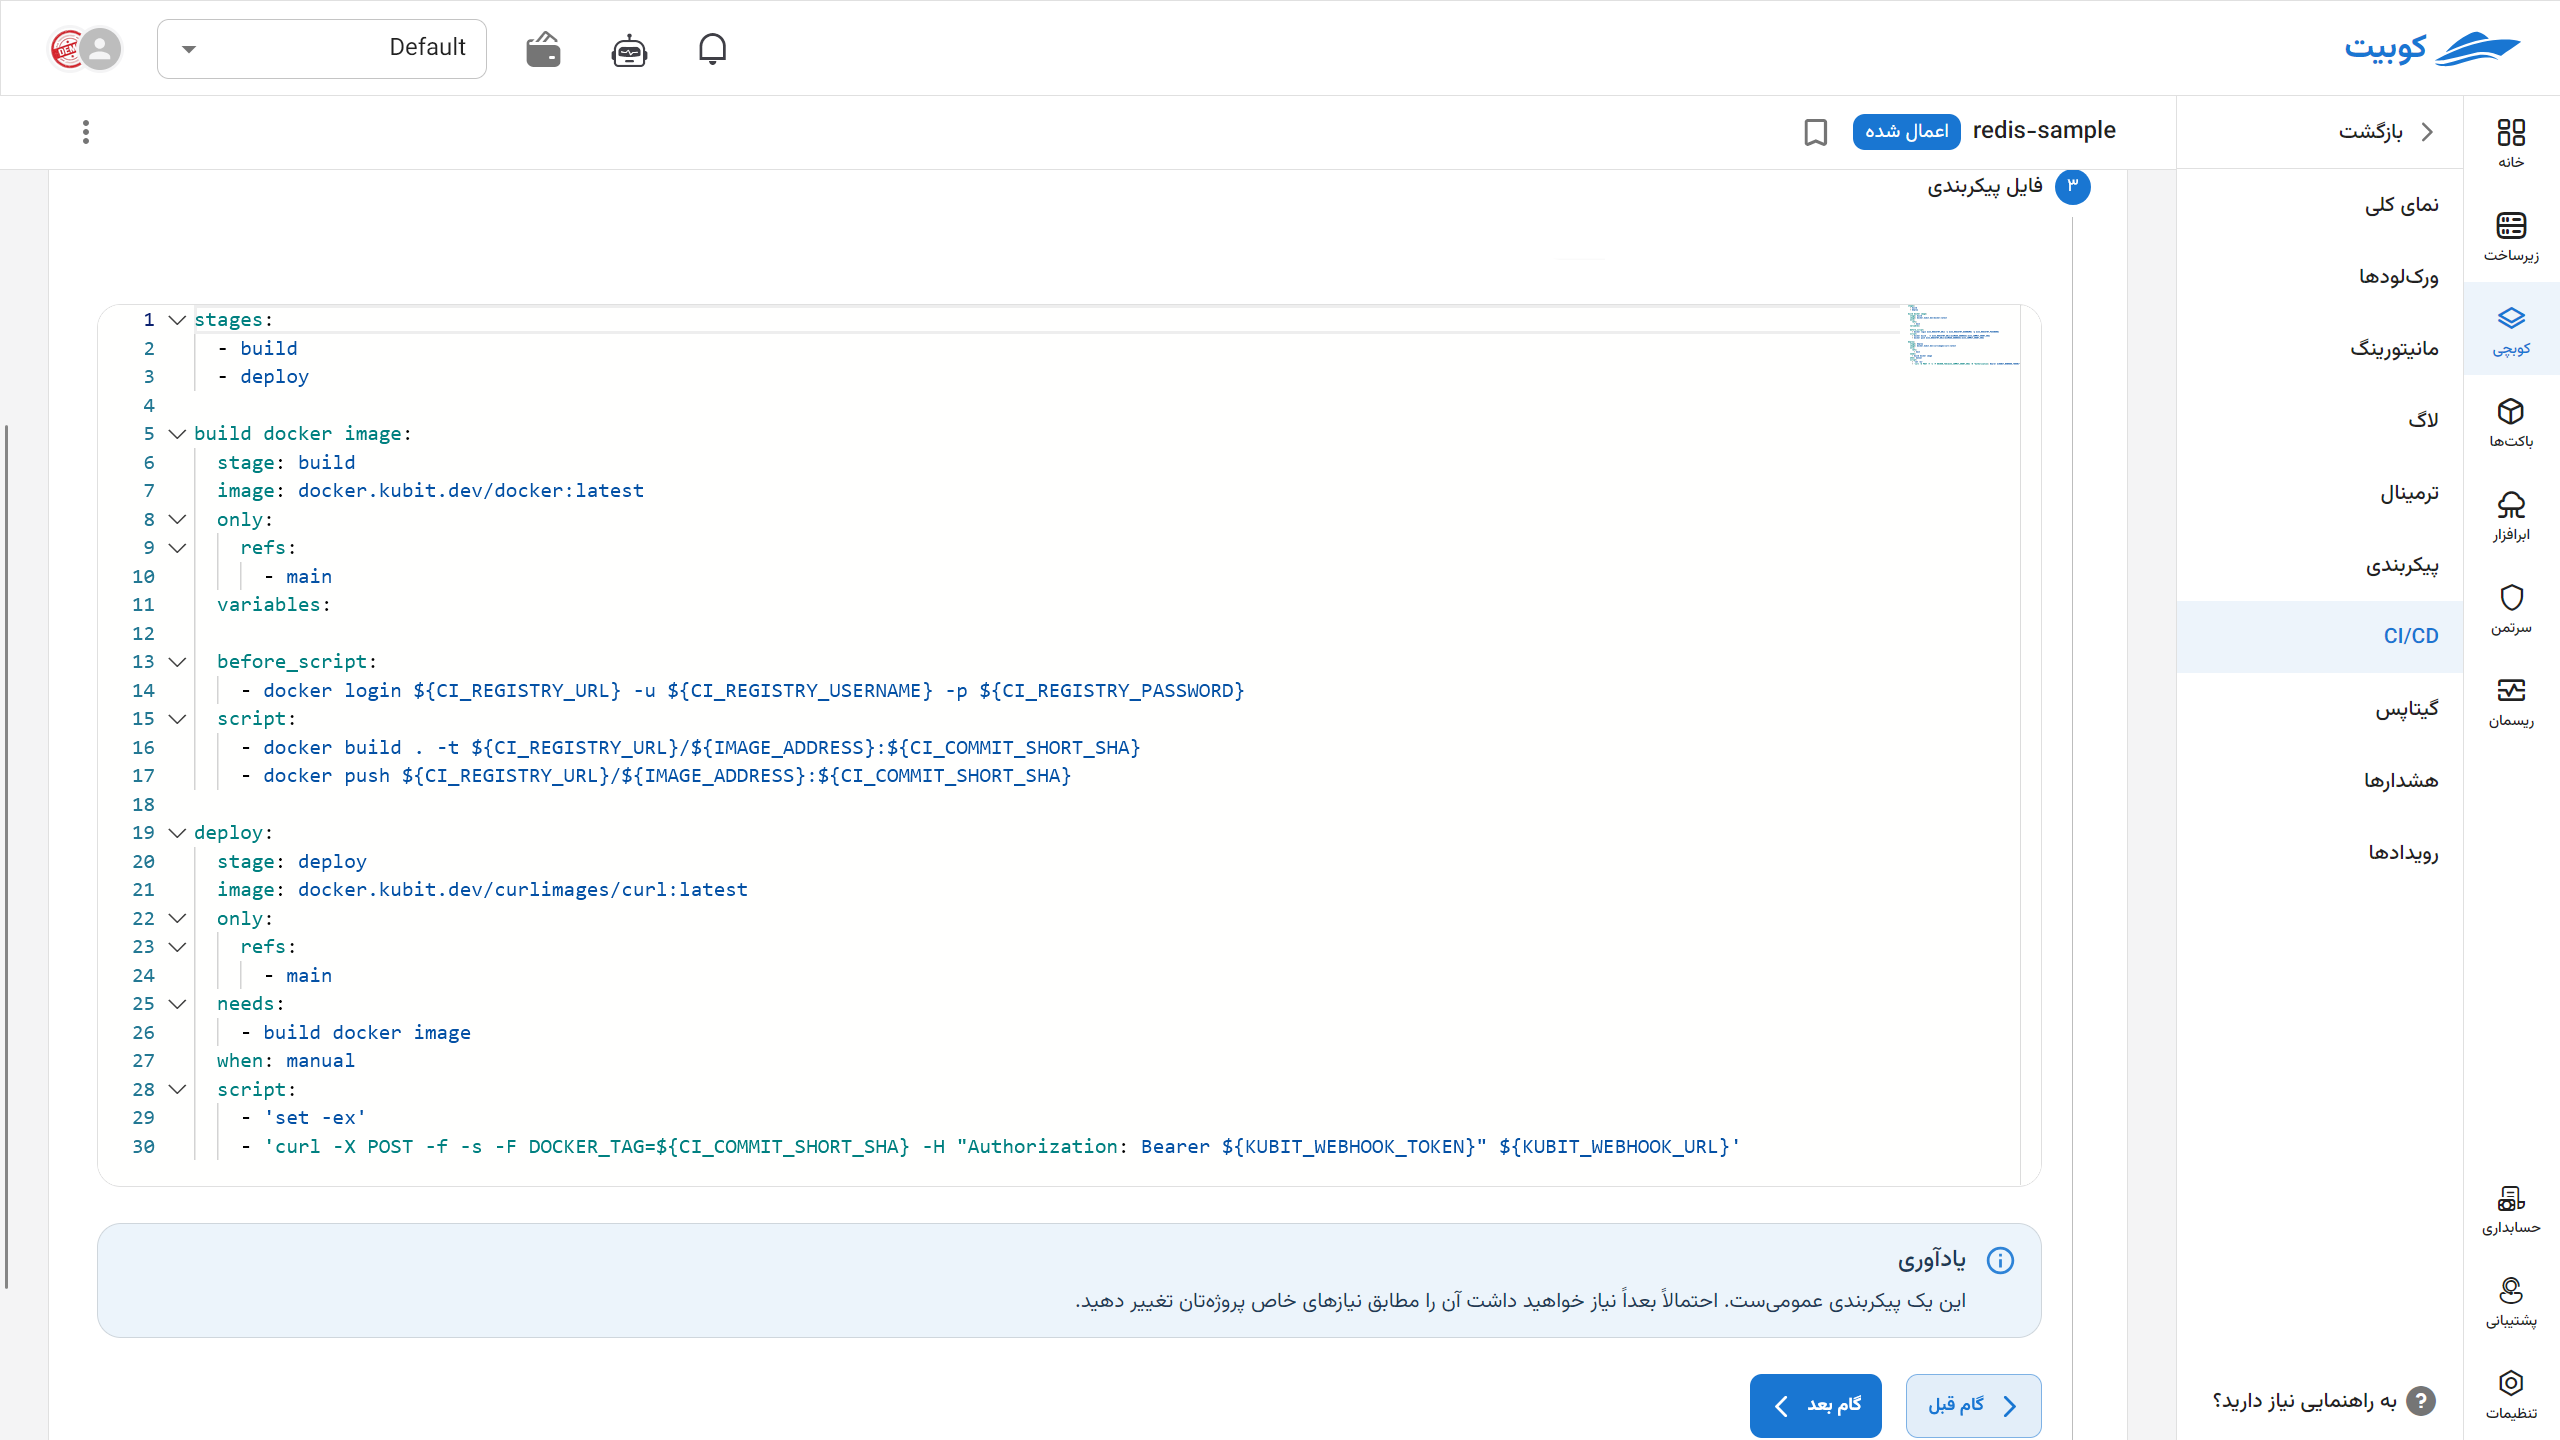
Adapt the template before committing it. Your branch name, Dockerfile, image path, Runner, registry, and deployment rules may differ. The GitHub template runs on pushes to main and starts deployment automatically after the build. In the current GitLab template, the deployment job is manual; approve it after the build succeeds.
In the GitLab example, change set -ex to set -e before using the template. The -x option prints executed commands in the job log and may expose the webhook token header. Also confirm that sensitive values are masked in GitLab settings.
The main request in the deployment job is equivalent to:
curl --fail --silent --show-error \
  --request POST \
  --form "DOCKER_TAG=${IMAGE_TAG}" \
  --header "Authorization: Bearer ${KUBIT_WEBHOOK_TOKEN}" \
  "${KUBIT_WEBHOOK_URL}"
IMAGE_TAG must be the tag pushed by the build job. Avoid the fixed latest tag. A commit identifier or version number lets you trace each deployment to a specific image.
Update multiple image tags
The default webhook accepts additional names when they start with DOCKER_TAG, such as DOCKER_TAG_API and DOCKER_TAG_WORKER. Each name must exist in spec.vars and be used in the correct part of values.
To send several values, add them to the request using variables[NAME]:
curl --fail --silent --show-error \
  --request POST \
  --form "variables[DOCKER_TAG_API]=${API_TAG}" \
  --form "variables[DOCKER_TAG_WORKER]=${WORKER_TAG}" \
  --header "Authorization: Bearer ${KUBIT_WEBHOOK_TOKEN}" \
  "${KUBIT_WEBHOOK_URL}"
This integration rejects names that do not start with DOCKER_TAG. Use Kubit variables for general project values; the CI/CD webhook is intended for controlled changes to deployment tags.
CI/CD and GitOps
When the Pack is connected to GitOps, Kubchi commits the updated manifest to the Pack's configured path. Kubchi normally adds [skip ci] to this commit so that changing the Pack file does not start the same pipeline again.
If your pipeline uses different trigger rules, still exclude the GitOps Pack path from build and deployment triggers. After the first run, check the GitOps commit log and confirm that the tag change caused only the expected run.
Run the first deployment
- Commit the workflow or pipeline file and any required project changes.
- Open the build run and confirm that it pushed the expected tag to the registry.
- In GitLab, start the manual deployment job after reviewing the build. In GitHub, follow the deploy job as it runs.
- The request to Kubchi must succeed. With
--fail, an error response stops the job. - Check the new
DOCKER_TAGvalue in Pack Configuration. Then review workloads and pods and Pack events.
A successful response only means that Kubchi accepted the Pack change. Check the Pack, workload, pod, and event status separately to confirm that the application is ready.
Recreate CI/CD credentials
If the token is exposed or you need to revoke previous access, select Recreate variables under Set Environment Variables and review the confirmation. When you confirm, Kubchi creates a new token and immediately invalidates the previous credentials.
Replace the displayed token and URL in the GitHub or GitLab settings before running the pipeline again. If you recreate the credentials without updating the repository Secrets, the next run will fail authentication.
Common problems
The request fails with a token error
Replace KUBIT_WEBHOOK_TOKEN with the current token from the panel. Extra whitespace, an old token left behind after recreation, or storing it as an ordinary visible variable are common causes. Do not print the token in logs; replace the Secret directly.
The response says no allowed variables is given
The field must be named DOCKER_TAG or start with that string. For a multi-variable request, use the exact variables[DOCKER_TAG_NAME] form. Names are case-sensitive.
The pipeline succeeds, but the image does not change
Confirm that the pipeline first pushed the same tag to the registry and then sent it to Kubchi. In the Pack, check that the variable exists in spec.vars and that the chart's actual tag field references {{ vars.DOCKER_TAG }} or the corresponding name.
The new pod cannot pull the image
Check the registry address, image path, and tag. Pipeline push credentials are separate from the cluster's pull credentials. For a private repository, also add the Docker registry credential in Kubchi and enable it for the project.
CI/CD changes start the pipeline repeatedly
If the Pack uses GitOps, configure the pipeline so that a commit containing [skip ci], or a change limited to the Pack manifest path, does not start another build. Check the pipeline history and GitOps commits to find the repeated trigger.